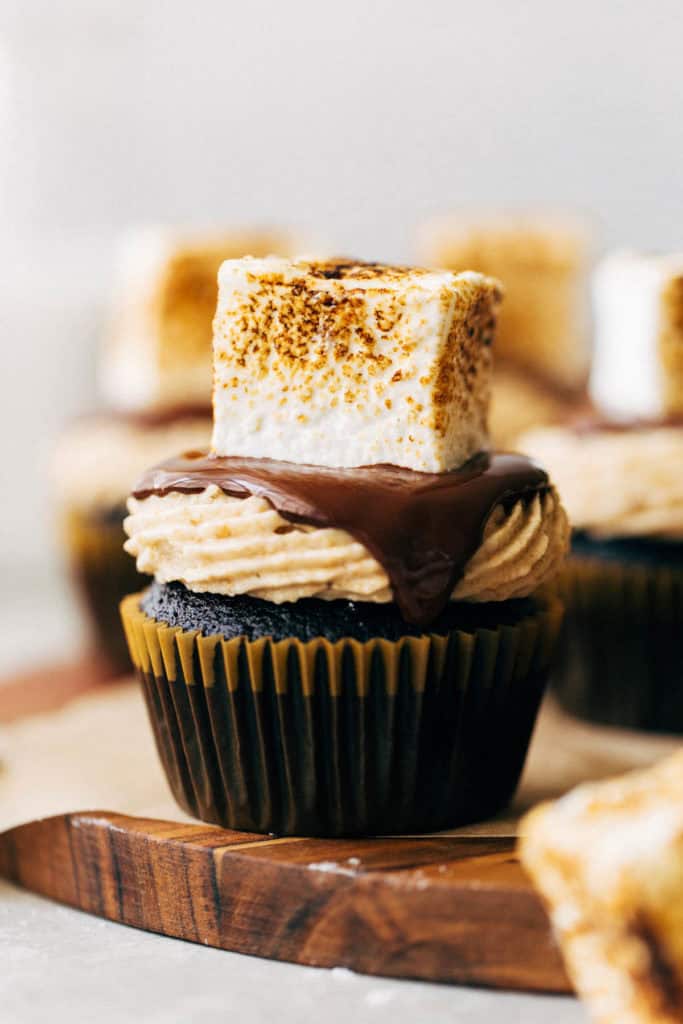
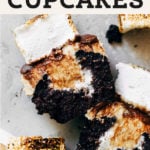
Toasted S’mores Cupcakes
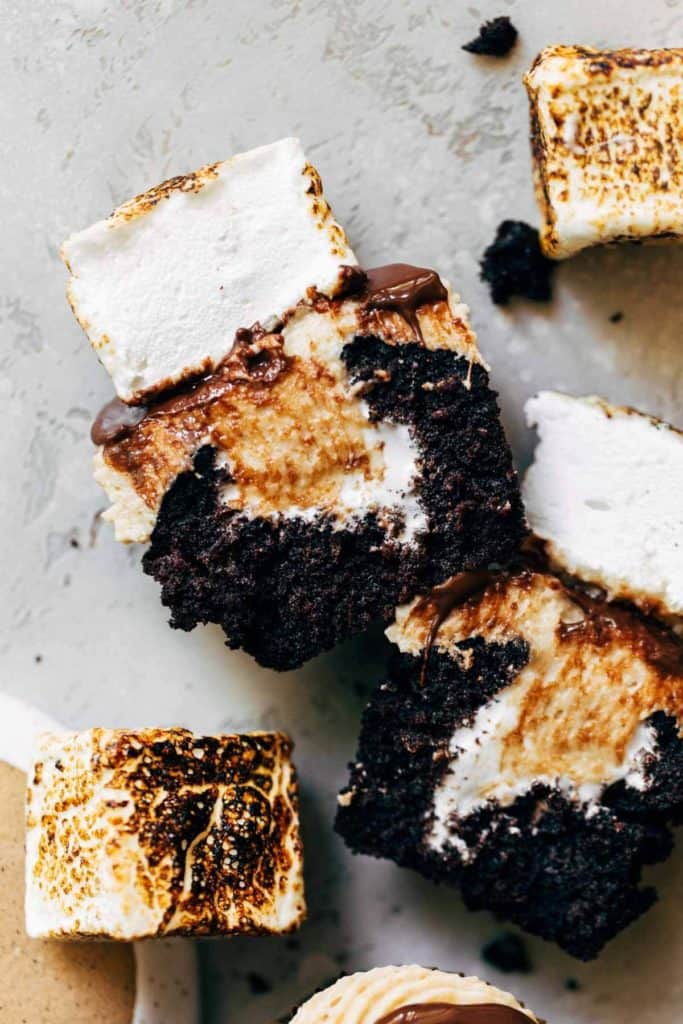
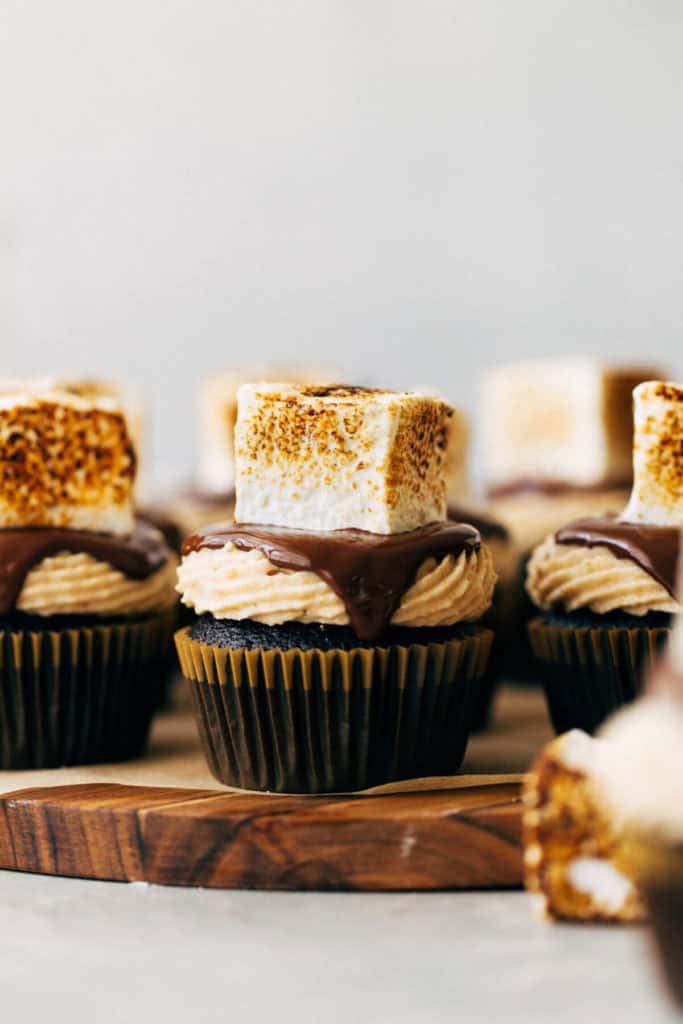
These Toasted S’mores Cupcakes are exactly what your summer needs! A moist chocolate cake is filled with marshmallow cream and topped with graham cracker cream cheese frosting. If you want to make these extra special, add toasted homemade marshmallows on top. They’re just as messy and gooey as regular s’mores, but now in a cupcake!
What makes these s’mores cupcakes so good?
These cupcakes are a classic combination of chocolate, marshmallow, and graham cracker. But it’s unusual to see s’mores cupcakes filled with marshmallow, then finished with a graham cracker frosting (and then being topped with an optional homemade marshmallow!)
Here’s why I love this cupcake recipe:
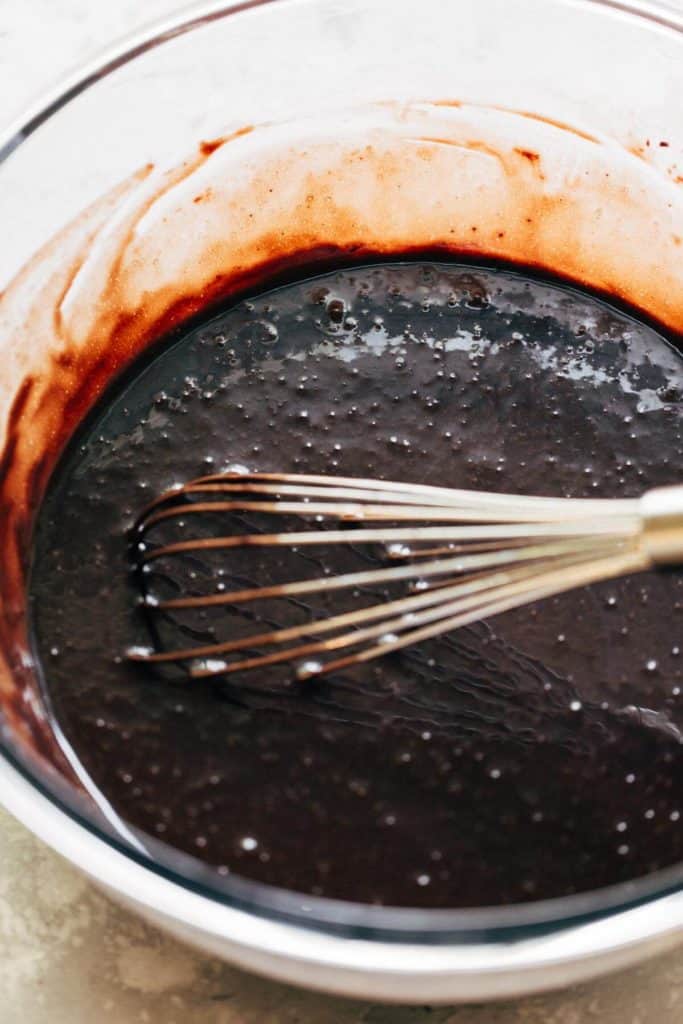
- Chocolate Cake – This chocolate cake recipe is SO easy you could make them with your eyes closed. They’re made in one bowl and with really simple ingredients. They bake perfectly with a domed top and moist texture. (If you’re looking for a classic chocolate cake, look here!)
- Marshmallow Filling – Once the cupcakes have cooled, the centers are hollowed out and filled with marshmallow fluff. This adds that messiness factor which you would get from a bonfire s’more.
- Graham Cracker Frosting – The buttercream might just be my favorite part because it includes both crushed graham crackers AND cream cheese. It’s a unique way to include that graham cracker flavor.
- Homemade Toasted Marshmallows – This is completely optional, but you can top each cupcake with a homemade marshmallow and they are really simple to make. Just remember to make them a day ahead! They add a gourmet touch to these cupcakes and everyone will think they’re from a fancy bakery.
Tips for making chocolate cupcakes
This s’mores cupcake recipe is VERY simple, but here are a few tips to ensure they turn out perfect:
- Espresso powder – Mix the espresso powder into the hot water in order to activate it. Espresso powder enhances the chocolate flavor of these cupcakes. It’s optional, but HIGHLY recommended. Also make sure to use hot water, which also activates the cocoa powder in the batter.
- The flour – Make sure to measure the flour properly, otherwise the cakes will be too dense and dry. Spoon it into a measuring cup and level it off with a flat edge. Don’t shake it or pack it down and don’t scoop straight into the flour bag or container. If you can, use a food scale to ensure accuracy.
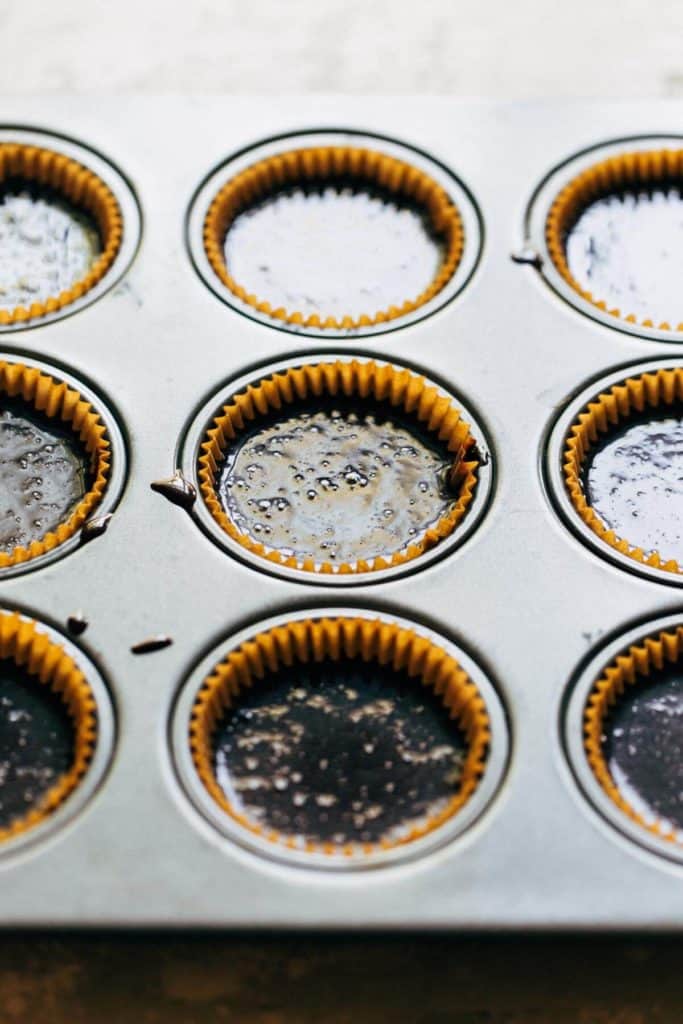
- Only make 11 cupcakes – Rather than making 12, I find that distributing the batter between 11 cupcakes leaves you with a perfect dome top.
- Pour the batter – This batter is pretty thin, so the easiest way to pour it into the cupcake liners is to transfer it out of the bowl and into a pourable container. Large measuring glasses are a great option.
- Don’t over bake – Start the timer at 12 minutes then work your way up from there. These cupcakes bake pretty fast since it’s at a higher temperature, so keep an eye on them as they can over bake fairly quickly. After 12 minutes, check every minute until a toothpick in the center comes out clean with a few moist crumbs.
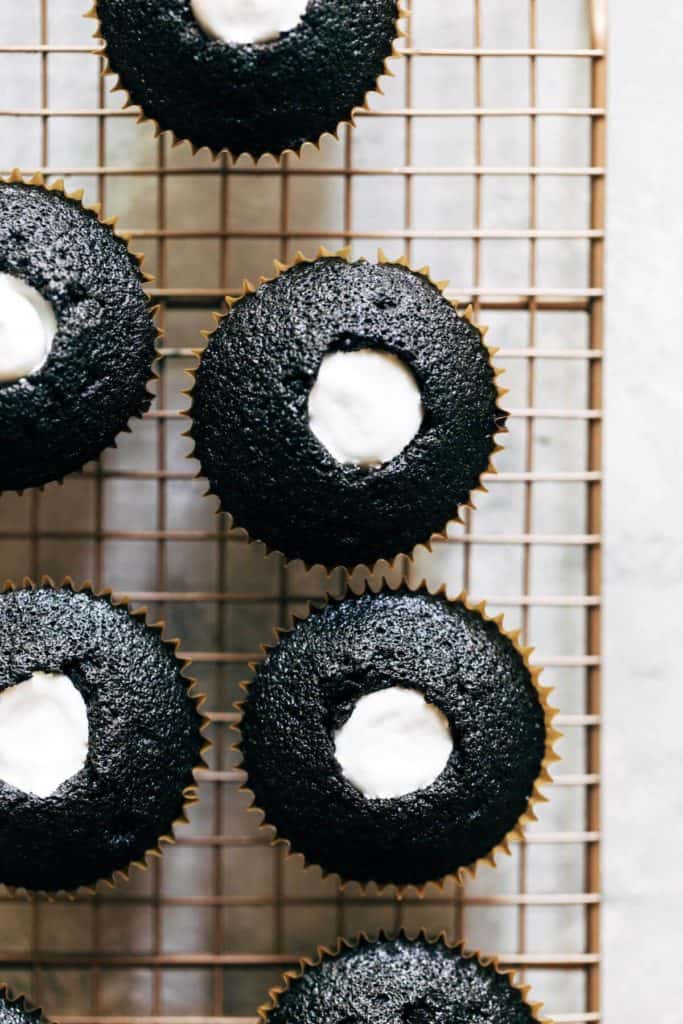
How to fill s’mores cupcakes
To fill these cupcakes, make sure they’re completely cooled. Then, use a small knife or a cupcake corer to hollow out the center. Don’t dig all the way down into the cupcake as this with disrupt the structure, and no one wants a flimsy cupcake. Dig about 1/3 of the way down and cut out a hole that’s about 1/2 inch in diameter (see picture below).
Once they’re hollowed out, you can reserve the crumbs to either snack on our crumble on top of the cupcakes once they’re finished. Then, fill a small ziplock bag with about 1/2 cup of marshmallow fluff and snip off a corner.
Stick the bag opening into the hollowed out core of each cupcake and squeeze to fill. Just make sure to not overfill them otherwise the buttercream will slide around on top.
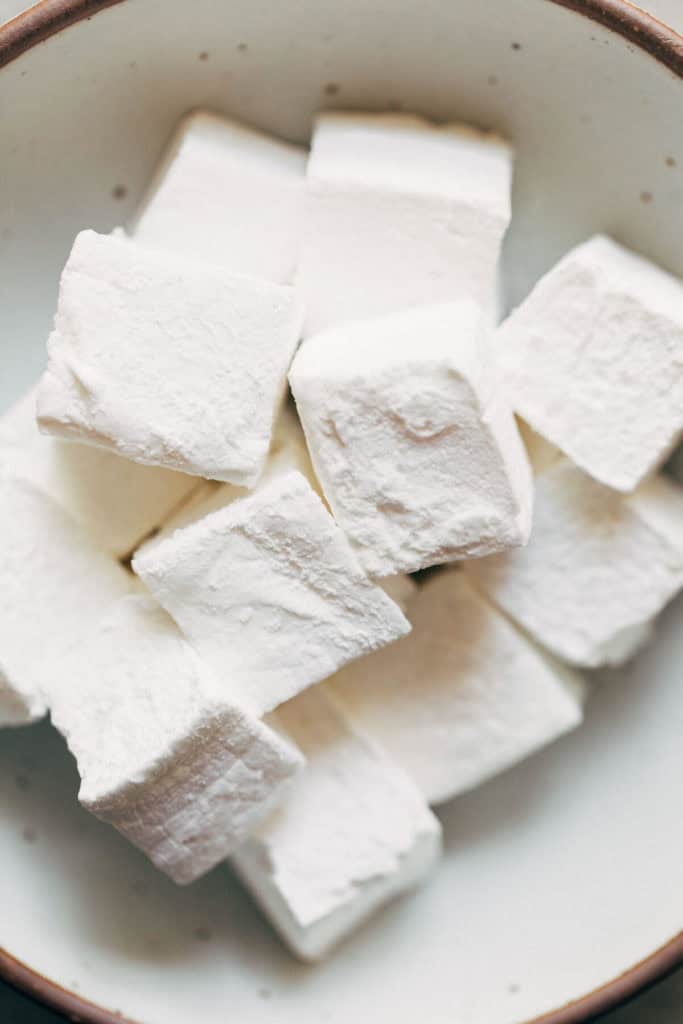
How to make homemade marshmallows
Making marshmallows is much easier than it sounds, but it does require a stand mixer. If you don’t have one, you can either leave off the marshmallow or top with large store bought marshmallows.
But to make them homemade, it must be done the day before as the marshmallows need to firm up and dry out overnight. I know, so annoying but so worth it!
You start by combining water and gelatin in the bottom of the bowl of your stand mixer (fitted with the whisk attachment). This allows the gelatin to bloom or activate, so it can evenly dissolve into the marshmallows.
Next, sugar, corn syrup, water, and salt are heated on the stovetop until the mixture reaches 240F. At this point the sugar is completely dissolved. Pour the hot mixture into the bowl on the stand mixer and whisk on high speed.
It will slowly change from clear, to opaque, to fluffy, to glossy with stiff peaks. During this process, vanilla is mixed in for flavor.
The entire mixing process should take about 10 minutes. In the end you’re left with a marshmallow fluff-like texture. Quickly dump the mixture into a baking pan that has been greased and heavily dusted with powdered sugar and cornstarch. It’s important to move fast as the marshmallow mixture will begin to thicken and set pretty quickly.
Spread it even and dust the top with more powdered sugar and cornstarch. Leave the pan out at room temperature uncovered overnight. The next day they’re ready to slice!
What to do if your marshmallows stick to the pan
The next day, remove the marshmallows from the pan before cutting. If it’s stuck, run a knife all around the edges and try to lift up a corner. If you can get your hand underneath a portion of the marshmallow, you should be able to pull it out. It’s pretty sturdy, so it won’t tear easily.
Frequently Asked Questions
Yes! Just use my gluten free chocolate cupcake recipe and swap the graham crackers from gluten free graham crackers.
Yes, assemble the cupcakes but leave off the marshmallow on top. They tend to get a bit stale once they’re in the refrigerator. Store the cupcakes in the refrigerator (preferably in a container) and leave the marshmallows uncut inside the pan (but cover it after they’ve set overnight). The cupcakes should keep for up to 4 day in the fridge. When you’re ready, cut the marshmallows, toast, and top the cupcakes.
I don’t mind using store bought, especially when making the marshmallow from scratch too, but if you want to go ahead! Here is a good recipe with a vegan option.
This may seem like an odd topic to cover, but these cupcakes are best eaten without the marshmallow on top. Pluck it off, eat it, then eat the rest of the cupcake. Otherwise, if you try to take one big bite, the marshmallow on top will squish the entire cupcake.
For more cupcake recipes, check out my:
- Guinness Chocolate Cupcakes (with Salted Caramel Buttercream)
- Brown Butter Cupcakes (with Chocolate Frosting)
- Best Gluten Free Chocolate Cupcakes Recipe
- Pink Strawberry Cupcakes (with Roasted Strawberries)
- Vanilla Cupcakes with Homemade Sprinkles
Make sure to tag me @butternutbakery on Instagram and leave a review below if you make these Toasted S’mores Cupcakes. To pin this recipe and save it for later, you can use the button on the recipe card, the buttons above or below this post, or on any of the photos above. Happy baking!
Print
Toasted S’mores Cupcakes
- Total Time: 1 hour 20 minutes + Rest overnight
- Yield: 11 cupcakes
Description
These delicious s’mores cupcakes contain chocolate cupcakes stuffed with marshmallow cream and are topped with graham cracker cream cheese buttercream! Take it to the next level and adorn these cupcakes with a homemade toasted marshmallow.
Ingredients
Homemade Marshmallows *SEE NOTES
- 1/4 cup (25g) powdered sugar
- 1/4 cup (30g) corn starch
- 2 tbsp gelatin (about 2 packets)
- 2/3 cup water, divided
- 1 cup (200g) granulated sugar
- 1/4 tsp salt
- 2/3 cup (215g) light corn syrup
- 1 tsp vanilla extract
Chocolate Cake *SEE NOTES FOR GF OPTION
- 1/2 cup (105g) vegetable oil
- 1 cup (200g) granulated sugar
- 1 large egg
- 1 tsp vanilla extract
- 1 cup (130g) all-purpose flour
- 1/2 cup (35g) unsweetened cocoa powder
- 1/2 tsp baking soda
- 1/4 tsp salt
- 3/4 cup (175ml) hot water
- 1/2 tsp espresso powder
- Marshmallow fluff
Graham Cracker Buttercream
- 8oz cream cheese, room temp
- 1/2 cup (110g) unsalted butter, room temp
- 4 cups (480g) powdered sugar
- 1 1/2 cups (140g) finely ground graham crackers
- 1 tsp vanilla extract
Chocolate Topping
- 1/2 cup (90g) chocolate chips
- 2 tsp oil
Instructions
Homemade Marshmallows
- If you plan on making the marshmallows, make them a day ahead. Lightly spray an 8×8 pan and coat it with the powdered sugar and corn starch mixture. Save the excess.
- Next, place the gelatin and 1/3 cup water in the bottom of the bowl of a stand mixer fitted with the whisk attachment.
- In a medium sized sauce pan, mix together the other 1/3 cup of water, sugar, salt, and corn syrup. Using a candy thermometer, heat the mixture over medium heat until it reaches 240F. Mix it every now and then until it reaches that point.
- Add the hot sugar syrup to the gelatin and crank your mixer up to high speed. It will start to get white and glossy after about 5 minutes (mix in the vanilla at this point) but keep mixing it until it forms stiff peaks and strings start to pull away from the sides of the bowl. This will take about another 5 minutes.
- Quickly pour the marshmallow mixture into the prepared pan. Lightly coat a spatula with some non-stick spray and spread it out as even as you can. Dust the top of the marshmallows with some of the excess powdered sugar and corn starch. Let it sit out uncovered overnight.
- When they’re ready, turn them out onto a cutting board and cut into equal cubes. I recommend using a large knife and dusting it with some powdered sugar and corn starch between each cut.
- With your bowl of powdered sugar and corn starch handy, coat the sides of the marshmallows and place them in a sifter to shake out the excess powder. You should be left with about 18 marshmallows so you’ll have extras to snack on!
Cupcakes
- Preheat your oven to 375F and line a cupcake tin with 11 liners.
- Mix together the hot water and espresso in a measuring glass and set aside.
- Whisk together the oil, sugar, egg, and vanilla in a large bowl. Dump in the flour, cocoa powder, baking soda, salt, and espresso mixture and whisk to combine. The batter will be pretty thin.
- Evenly distribute the batter between the 11 liners, each about 3/4 full.
- Bake for 12-14 minutes or until a toothpick comes out clean.
- While those are cooling, make the buttercream.
Graham Cracker Buttercream
- Using your mixer with the paddle attachment, mix together the butter and cream cheese until smooth. Make sure they’re both at room temperature, otherwise you’ll end up with a lumpy buttercream.
- Mix in the powdered sugar, 1 cup at a time, then the vanilla, then the graham cracker crumbs.
Assemble
- To assemble, hollow out the center of the cupcakes (make sure they’re completely cooled before doing so). You can use a small knife or a cupcake corer. Using a small sandwich bag, spoon in some of the marshmallow fluff, snip off a corner, and inject it into the hollow cupcakes.
- Pipe on the buttercream to cover the hole. I used a french star tip, but you can use any large piping tip or just snip off the corner of a ziplock bag.
- Place the cupcakes in the refrigerator while you make the chocolate topping. Combine the chocolate chips and oil in a small dish and microwave in 30 second intervals until smooth.
- Spoon the chocolate on top of each cupcake, allowing some to drip down. If you aren’t going to toast the marshmallows, you can top each cupcake with a homemade or store bought marshmallow and you’re done!
- But to add toasted marshmallows, return the cupcakes to the fridge while you prep the marshmallows. Using a toothpick, poke a marshmallow and gently torch the sides using a kitchen torch. Do so very lightly, otherwise it will be too hot and melty for the cupcake. Carefully remove it from the toothpick and place on top of the cupcakes.
- If you aren’t serving these right away, leave the marshmallows off until you’re ready. Otherwise, they can get a bit stale in the fridge.
Notes
TO MAKE GLUTEN FREE – Use my recipe for gluten free chocolate cupcakes and use gluten free graham crackers in the frosting.
MARSHMALLOWS – You can also use store bought large marshmallows to save time.
- Prep Time: 1 hour
- Cook Time: 20 minutes
- Category: Baking
- Cuisine: American
Join Our Community


Meet Jenna
I’m the creator, baker, and photographer behind Butternut Bakery. Here I share desserts for every diet because I believe everyone should have a chance to indulge!

These are amazing! I have also just made the cupcake recipe my go to for chocolate cupcakes. I have never made such light/ fluffy/ moist cupcakes before so this is a must try recipe.