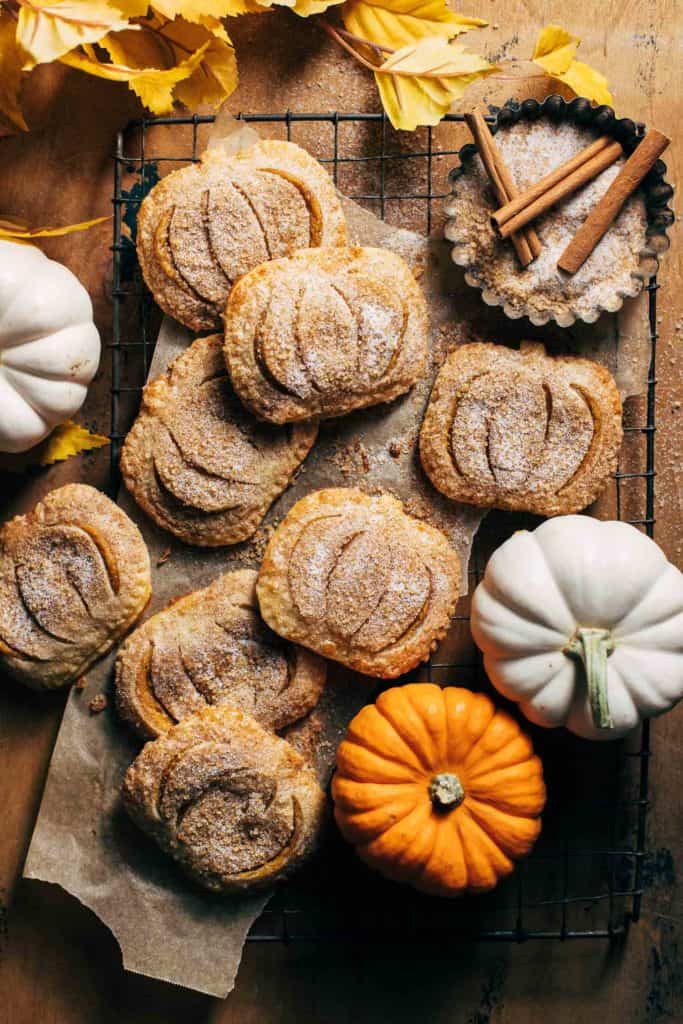
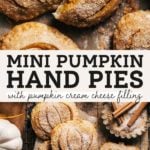
Mini Pumpkin Hand Pies
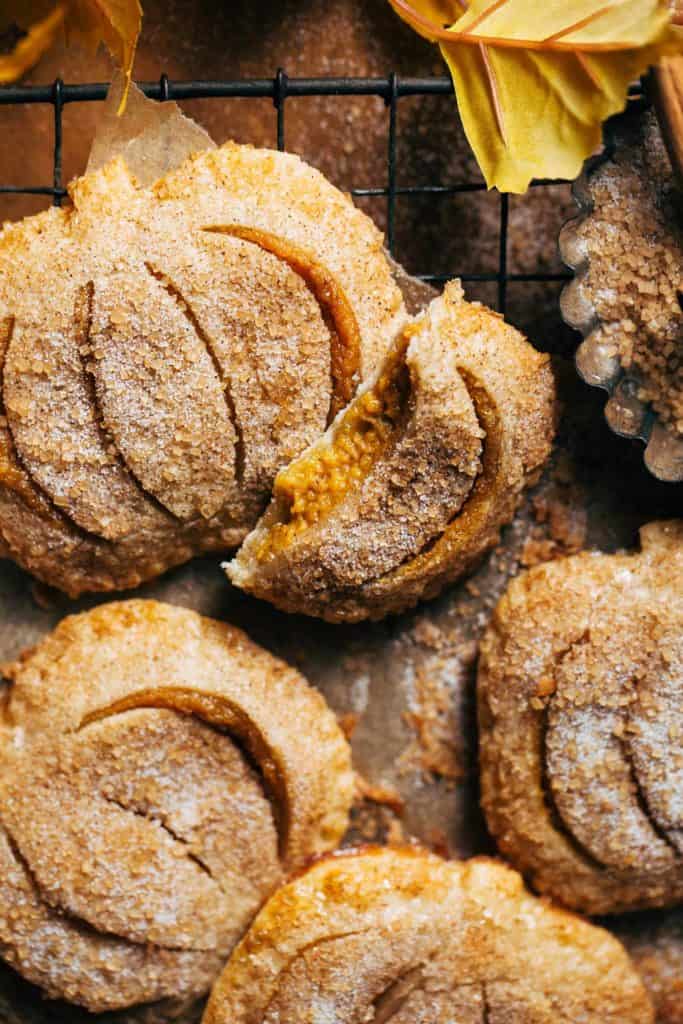
These mini pumpkin pies are an easy out to baking an entire pumpkin pie from scratch. They’re baked with store bought pie crust, pumpkin cream cheese filling, and a coating of cinnamon sugar. In other words, they taste JUST as good (if not better) than pumpkin pie, minus all the work!
What makes this mini pumpkin pie recipe so good?
Homemade pie is one of the more time consuming desserts, which is why I made it my mission to create a pumpkin pie recipe without all the fuss. These mini pumpkin hand pies taste just like a slice of pumpkin pie, but with added cream cheese AND cinnamon sugar. So in other words, they taste even better!
The filling is mixed by hand and made up of just 5 simple ingredients. The crust is store bought pie dough, which makes this entire recipe a breeze. The coating is a sprinkle of cinnamon sugar that adds a delicious layer of crunch and sweetness.
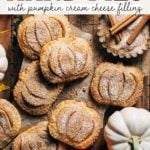
Not to mention the fact that they’re shaped like little pumpkins! They’re cut out using either a pumpkin cookie cutter or a homemade pumpkin outline. Then the tops are sliced to look just like the ridges of a pumpkin. You just can’t not smile while eating these!
How to make easy cream cheese pumpkin pie filling
The filling for this recipe takes a total of 5 minutes to make, and consists of just 5 ingredients:
- Cream Cheese
- Brown Sugar
- Pumpkin Puree
- Pumpkin Pie Spice
- Salt
It’s very important that the cream cheese is room temperature before starting. Since it’s mixed by hand, softened cream cheese will be much easier to mix into a smooth consistency.
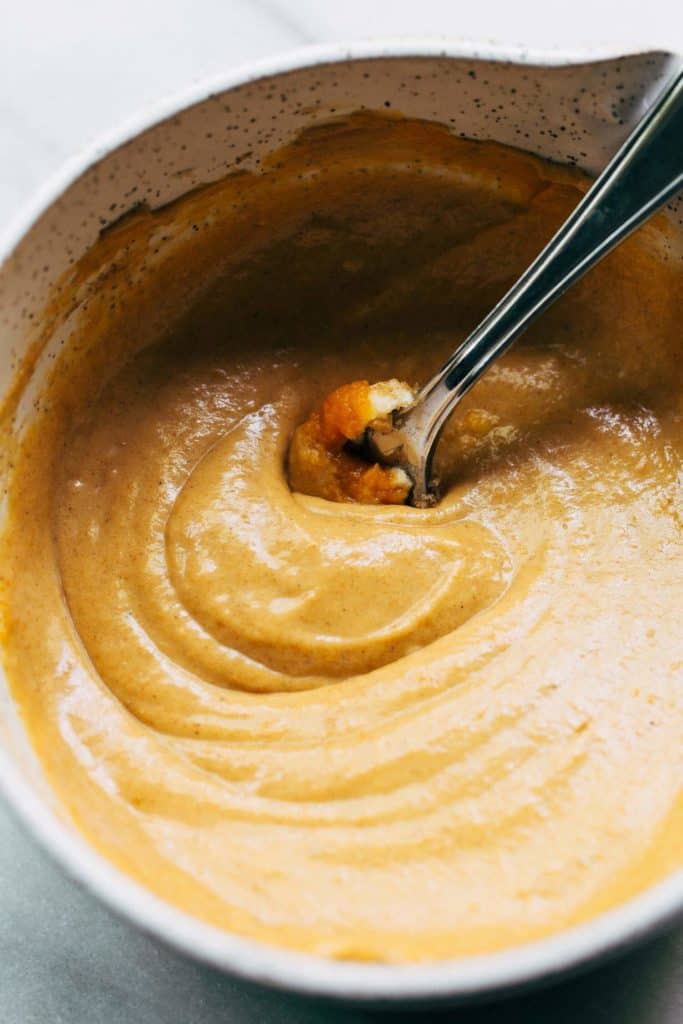
To start, the cream cheese and brown sugar are mashed and mixed together with a fork. Once smooth, mix in the pumpkin puree in two halves. This is because the puree is thin but the cream cheese mixture is thick. Mixing too much of the thin puree into the thick cream cheese could cause it to clump up, if done all at once.
But once they’re smooth and combined, pumpkin pie spice is added to give this filling a warm flavor and a pinch of salt helps even out the sweetness. In the end, it should be the consistency of pudding which is perfect for filling these mini pumpkin pies.
How to shape mini pumpkin pies
After the filling is mixed, it’s time to cut out the tiny pumpkins. For this recipe, we’re using store bought pie crust. One, because it’s just as good as homemade and two, because I wanted this recipe to be quick and easy. This time of year can get so busy, and sometimes you just don’t have time to bake everything from scratch!
To cut out our tiny pumpkins, start by thawing the crust just a bit. It should be refrigerated, so allow it to rest at room temperature for about 15-20 minutes. This will make it easier to roll out and smooth for cutting.
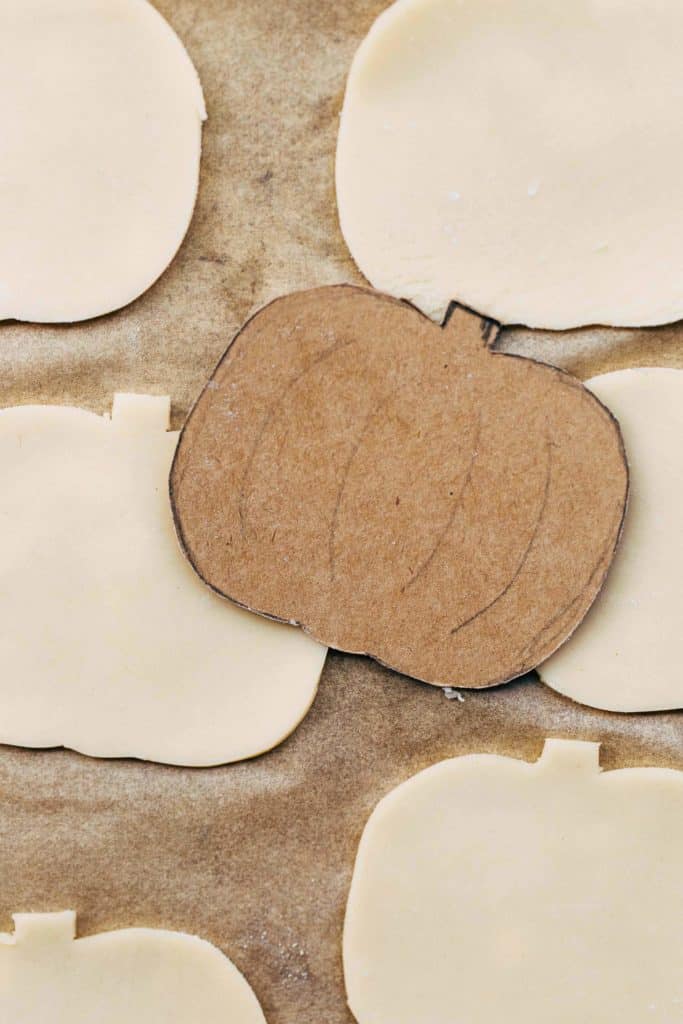
For the pumpkin shapes, you can either use a large pumpkin cookie cutter or make your own out of cardboard. For mine, I used the box that the pie crust came in. I made a rough outline of a pumpkin that’s about 3.5″ wide by 3″ tall. Then I went back in and drew a harsher line as the true outline of the pumpkin.
After cutting it out, just lay it on top of the rolled out crust and use a small paring knife to cut around it. Between the two crusts, you should get about 20 pumpkins total.
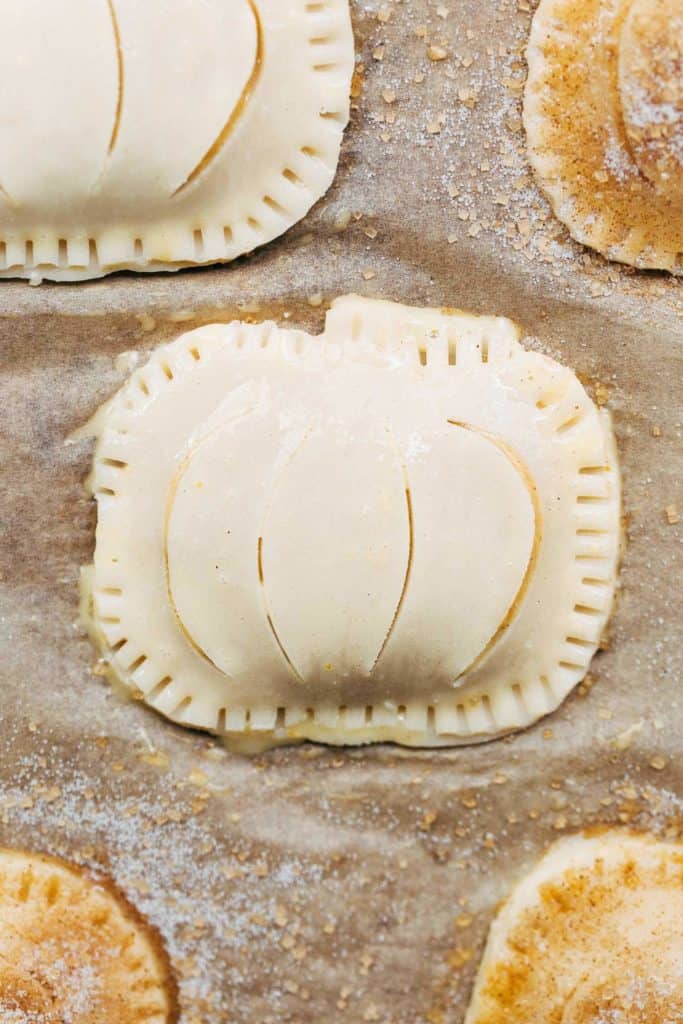
To half of the pumpkins, cut 4 rounded slits on the surface as these will act as the ridges to our pumpkins. I like to think of these as two sets of parentheses, one being wider than the other. Just don’t cut the slits too close to the edge, as this could cause the pie crust to break once crimped.
How to make mini pumpkin pies
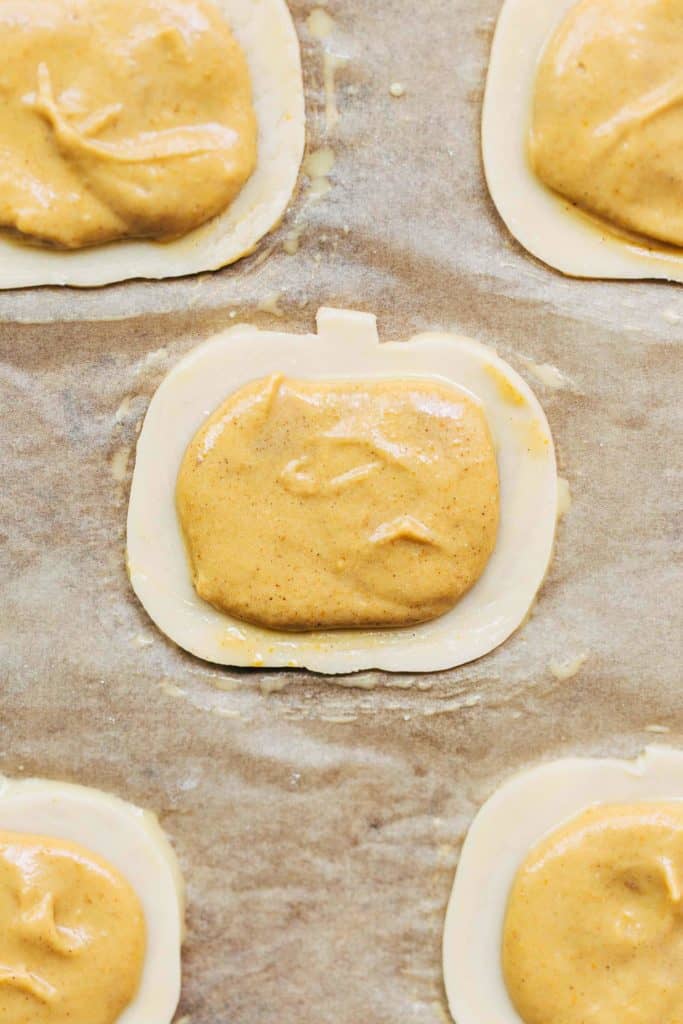
After the filling is prepped and the pumpkins are made, it’s time to build and bake these pies. For the filling, spoon one tablespoon into the center of 10 of the pumpkins. Leave a 1/4 inch boarder around the edges.
To those edges, brush on an egg wash and place the slit pumpkins on top. Use a fork to crimp the edges closed. Try not to dig the fork in too deep as this could warp the shape of the pumpkins. Just give them a small border of crimps around the edges.
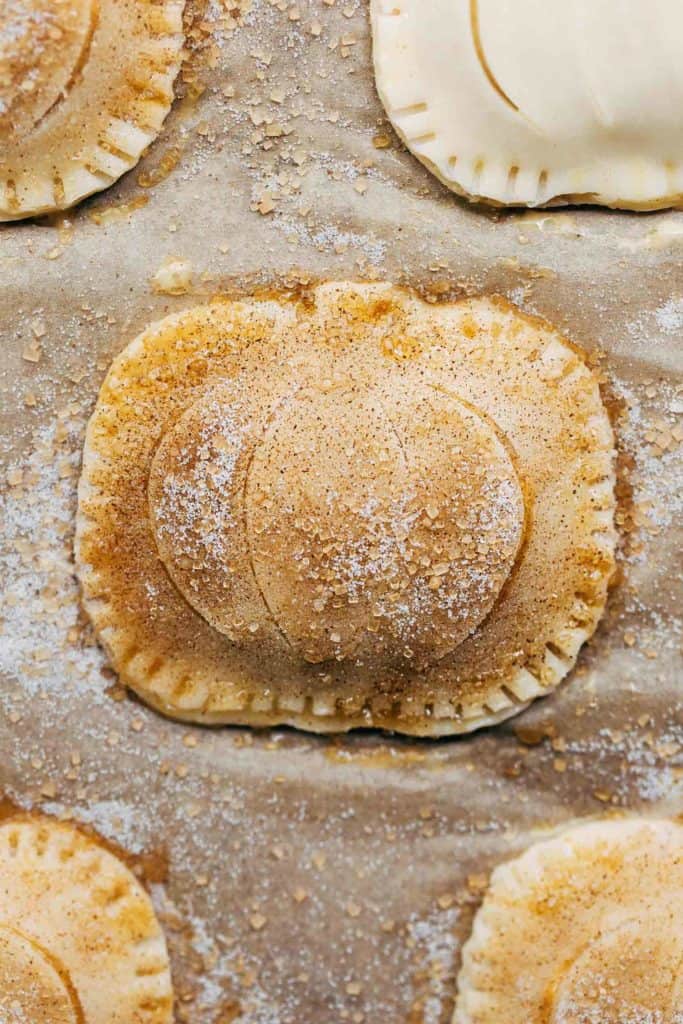
For a golden and crisp crust, the egg wash is brushed onto each pumpkin. This also allows a layer of cinnamon sugar to stick to the surface. The cinnamon sugar adds some sweetness and a bit of a crunch, eliminating the need for an icing or drizzle. Again, we’re going for quick and easy here!
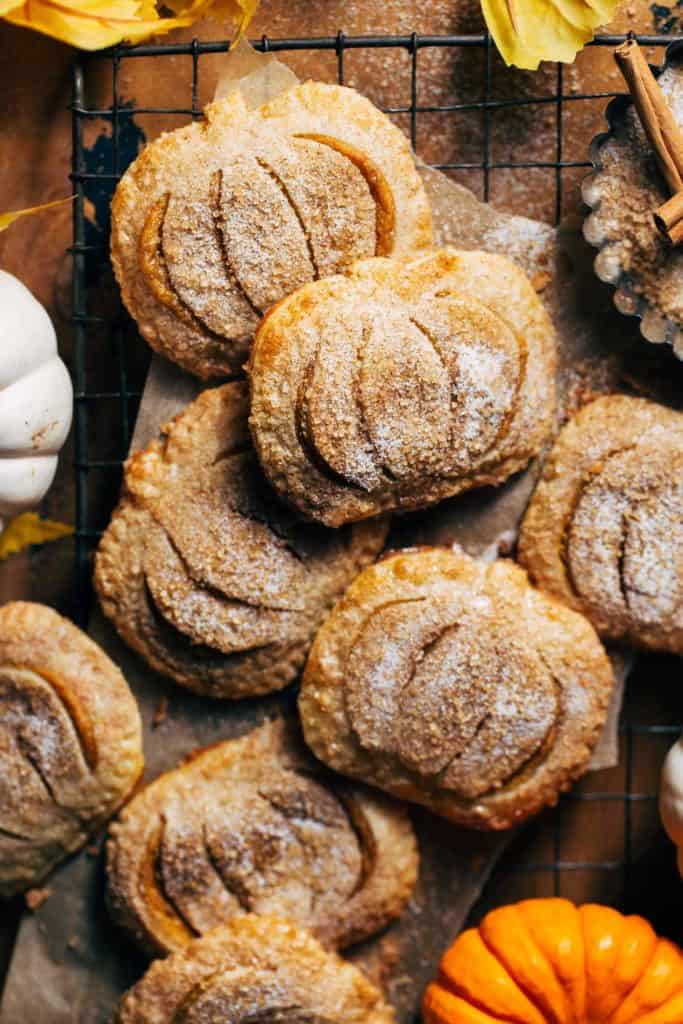
These pies bake for just 12 minutes. You know they’re ready when the edges are a light golden brown and the centers are puffed. Remove the pies from the oven and allow them to cool on the baking sheet for about 5 minutes before transferring to a cooling rack. This rest time helps firm up the bottom of the pies, making them easier to move.
Can these pumpkin pies be made gluten free?
If you can get your hands on a store bought gluten free crust, go for it! Otherwise, use my homemade gluten free pie crust used in my gluten free peanut butter and jelly pop tarts. My tip is to work with this dough when it’s close to room temp. If it’s too cold, it will break on you. Also use a spatula to help lift the pumpkin cut outs, just to ensure they don’t crack!
Then, before baking, freeze the pies for about 10 minutes. This will firm up that butter again which will give you a delicious flaky crust. This dough also bakes at a lower temp, so bake the pies at 375F for about 15 minutes.
Can I make these pies ahead of time and bake later?
Yep! Fill and crimp the mini pumpkin pies but leave off the egg wash. Store the bare pies in an air tight container in the refrigerator. They will keep for a couple days.
Then to bake, apply the egg wash and cinnamon sugar and bake as usual. I also recommend this route if you’re only baking these pies for a couple people. Bake what you need, and chill the bare pies until you want another fresh batch.
How to store mini pumpkin pies
Since there’s dairy in this dessert, they must be chilled in an air tight container. They will keep for about 5 days. The good new is that they can be toasted back to life! My husband actually did this and it turned out great. Just toast for a couple minutes and you’re good to go, just make sure to place them in vertically for easy removal. This can be in a toaster or toaster oven.
For more pumpkin dessert recipes, check out my:
- Brown Butter and Maple Chewy Pumpkin Cookies
- Pumpkin Bread with Maple Glaze
- Healthy Pumpkin Bread
- Pumpkin Chocolate Chip Cookies
- Pumpkin Cupcakes
- Cookies & Cream Pumpkin Cheesecake Brownies
- Pumpkin Chocolate Chip Cookie Cake
- Butterscotch Pumpkin Bundt Cake
- Pumpkin Chocolate Chip Muffins
- Pumpkin Cheesecake
- Cream Cheese Frosted Pumpkin Bread
Make sure to tag me @butternutbakery on Instagram and leave a review below if you make these mini pumpkin pies. To pin this recipe and save it for later, you can use the button on the recipe card, the buttons above or below this post, or on any of the photos above. Happy baking!
Watch how to make these mini pumpkin pies:

Mini Pumpkin Hand Pies
- Total Time: 42 minutes
- Yield: 10 pies
Description
These mini pumpkin pies are baked with a cream cheese pumpkin filling and a cinnamon sugar crust. They’re so quick and easy to make!
Ingredients
Pie Filling
- 1 box store bought pie dough, containing 2 sheets *see notes for GF option
- 4 oz cream cheese, room temp
- 1/2 cup (100g) light brown sugar, packed
- 1/2 cup (115g) pumpkin puree
- 1/2 tsp pumpkin pie spice
- Pinch of salt
Cinnamon Sugar
- 1 large egg
- 1/2 cup (100g) granulated sugar
- 1 tsp ground cinnamon
Instructions
- Remove the pie dough from the refrigerator and allow the sheets to come to room temp while you make the filling.
- In a bowl using a fork, mash and mix together the cream cheese and brown sugar.
- Once smooth, mix in half of the pumpkin puree. Once combined, mix in the other half along with the pumpkin pie spice and salt.
- Preheat the oven to 400F and line a large baking sheet with parchment paper.
- Lightly dust your surface with flour and unroll one of the pie sheets. Use a rolling pin to gently smooth the surface, just enough to smooth out any wrinkles and ridges.
- Using a pumpkin-shaped cookie cutter or a homemade pumpkin template (I made mine out of the box the pie dough came in – see notes for details), cut out your pumpkins. Roll out the scraps to cut out a few more pumpkins. You should be able to get about 10 pumpkins per sheet.
- Transfer these pumpkins to the refrigerator while you cut out the other sheet.
- Now place half of the pumpkins on the baking sheet, spaced evenly apart. If you can’t fit all 10 pumpkins, leave the excess in the refrigerator and bake after the first batch is done.
- Fill the center of each pumpkin with a tablespoon of the filling, leaving a small border around the edge.
- Beat the egg with about 2 teaspoons of water. Brush the bare border of each filled pumpkin with the egg wash.
- To the other half of the pumpkins, cut 4 slits to resemble the ridges of a real pumpkin. I like to think of it as two sets of parentheses, a larger one going on the outside with a narrow set on the inside.
- Place the vented pumpkins on top of the filled pumpkins and gently press down on the seems to seal the pies shut. Then crimp the edges with a fork and brush the surface of each pumpkin with the egg wash.
- In a small dish, mix together the cinnamon and sugar. Sprinkle about 1 teaspoon of the cinnamon sugar on top of each pumpkin.
- Bake for 12-14 minutes. Allow the pumpkins to cool on the baking sheet for about 5 minutes, then transfer to a cooling rack.
- Now they’re ready to enjoy!
Notes
GLUTEN FREE – Use the pie dough recipe from my gluten free peanut butter and jelly pop tarts. Make sure you let the dough chill before use. Then when rolling, if it’s breaking apart, let it rest for a few minutes. It’s much easier to work with when it’s closer to room temp. Then once the pies are formed, freeze them for about 10 minutes before baking. Bake at 375F for about 15 minutes.
PUMPKIN TEMPLATE – The size of the template I made is 3.5″ wide by 3″ tall. I recommend cutting a template out of something thick like cardboard as this makes it much easier to work with. Otherwise, I suggest this pumpkin cookie cutter.
- Prep Time: 30 minutes
- Cook Time: 12 minutes
Join Our Community


Meet Jenna
I’m the creator, baker, and photographer behind Butternut Bakery. Here I share desserts for every diet because I believe everyone should have a chance to indulge!
LOVE how easy and delicious these are – I made some for my neighbors and they’re already requesting a second batch. I was too lazy to cut them into pumpkins so I used a mason jar lid for similarly sized circles. I probably added 1.5-2 tbs of cinnamon sugar per pie since we just finished midterms and deserve it!
SOOOOO GOOD! I did simple circles and pressed the edge with a fork. Turned out fantastic! Recipe takes like 20 minutes tops. Easy peasy!
Can I substitute the pumpkin purée for pumpkin pie filling?
I’m making these for work and wondered the best way to store them. Should I keep them in the fridge or is it okay to keep them out for a bit?
So easy to make, super cute and delicious!!
I am here from Tiktok:) These are GREAT! I would just be careful with the amount of filling to crust ratio. I found that one set of slits (parenthesis as she mentions) was better to keep the filling inside and still looks just as cute. Also, I would recommend a little extra cinnamon sugar on the top.
Super cute & yummy! I love the cream cheese in the filling, and the tip on mixing the pumpkin in slowly is KEY! Mine was lumpy the first time around because I have a bad habit of not reading things thoroughly. Great recipe, thanks for sharing!
Is it possibly to use puff pastry sheets instead? My grocery store didn’t have any pie dough sheets
These look so yummy! I’m just curious, about how many calories are in each serving?
These are so cute! I have a partial can of pumpkin purée in the fridge right now and a box of pie crusts in the freezer. Can’t wait to try this!