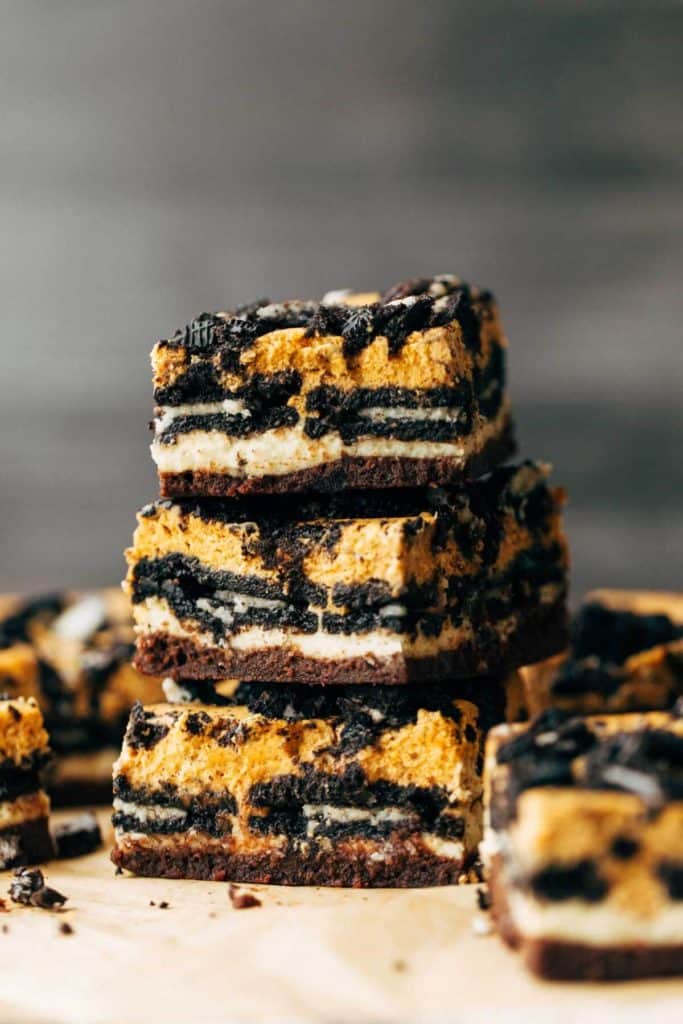
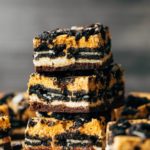
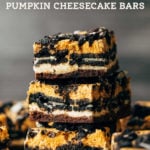
Cookies & Cream Brownie Pumpkin Cheesecake Bars
If you’re looking for the BEST pumpkin dessert, your search ends here. These are the ultimate pumpkin cheesecake bars baked with a brownie crust, vanilla cheesecake, Oreo cookies, and pumpkin cheesecake. It’s rich, creamy, and surprisingly easy to make.
How to make layered cheesecake bars
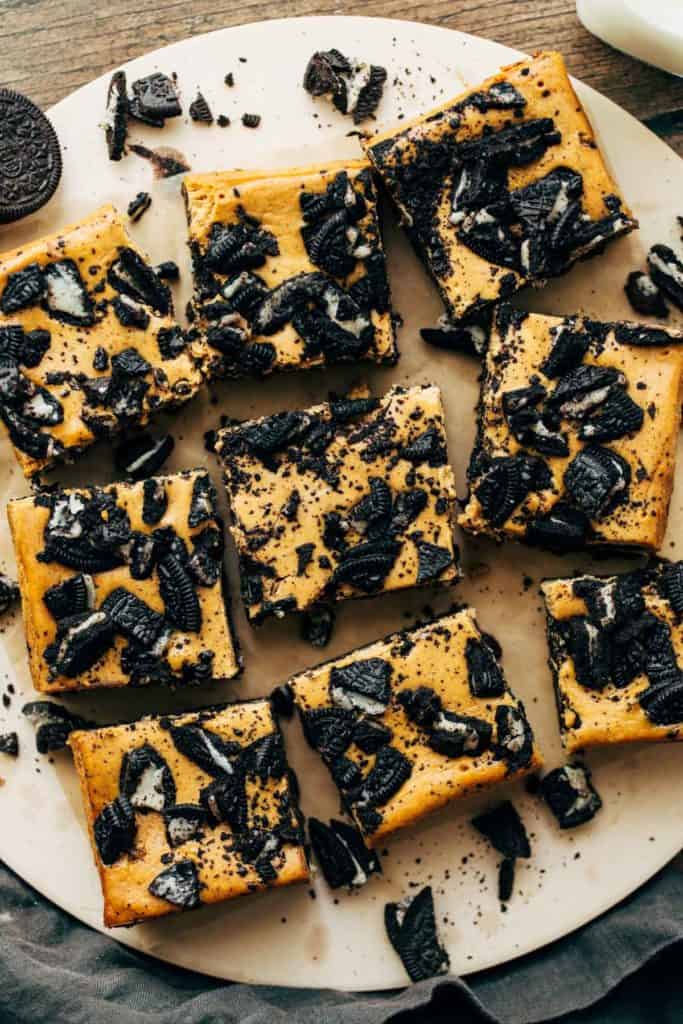
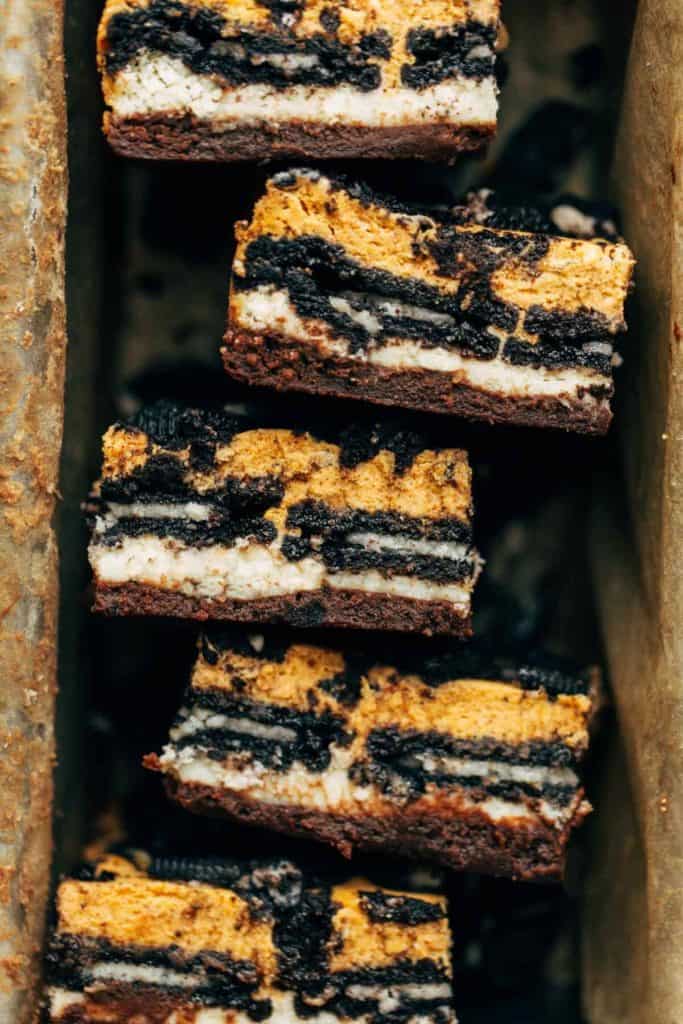
These pumpkin cheesecake bars have four different layers: brownie, vanilla cheesecake, oreos, and pumpkin cheesecake. But don’t be fooled, these bars are actually very easy to make! Here’s how to create a 4 layer cheesecake bar:
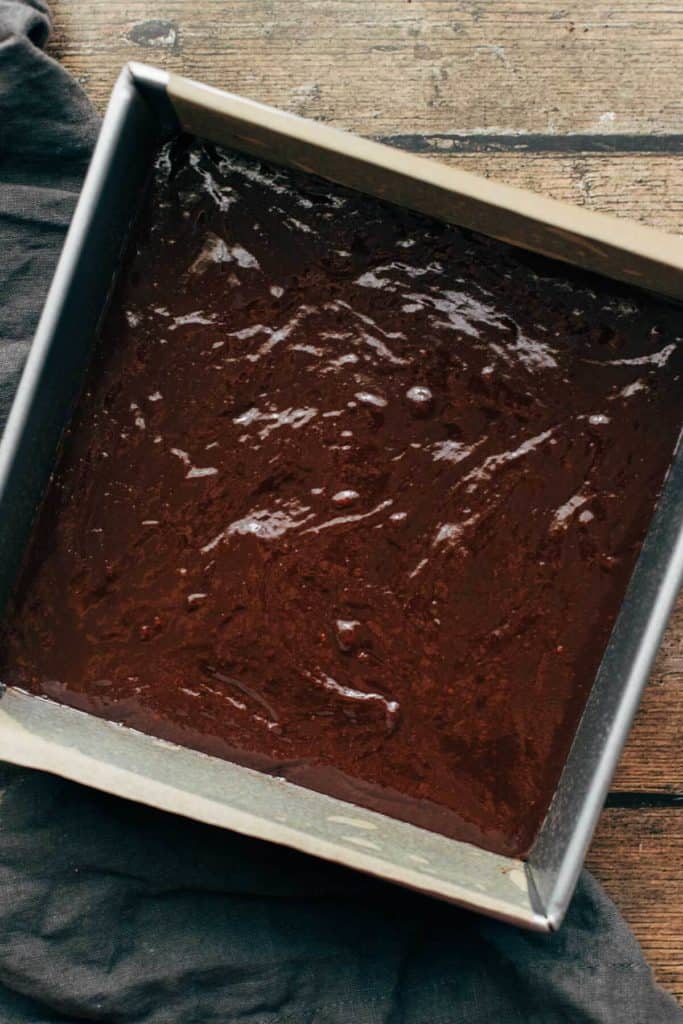
- Make the brownie batter – This recipe requires a quick and simple brownie batter that bakes at the bottom of the pan. It bakes right along with the cheesecake batter so there’s no need to pre bake it.
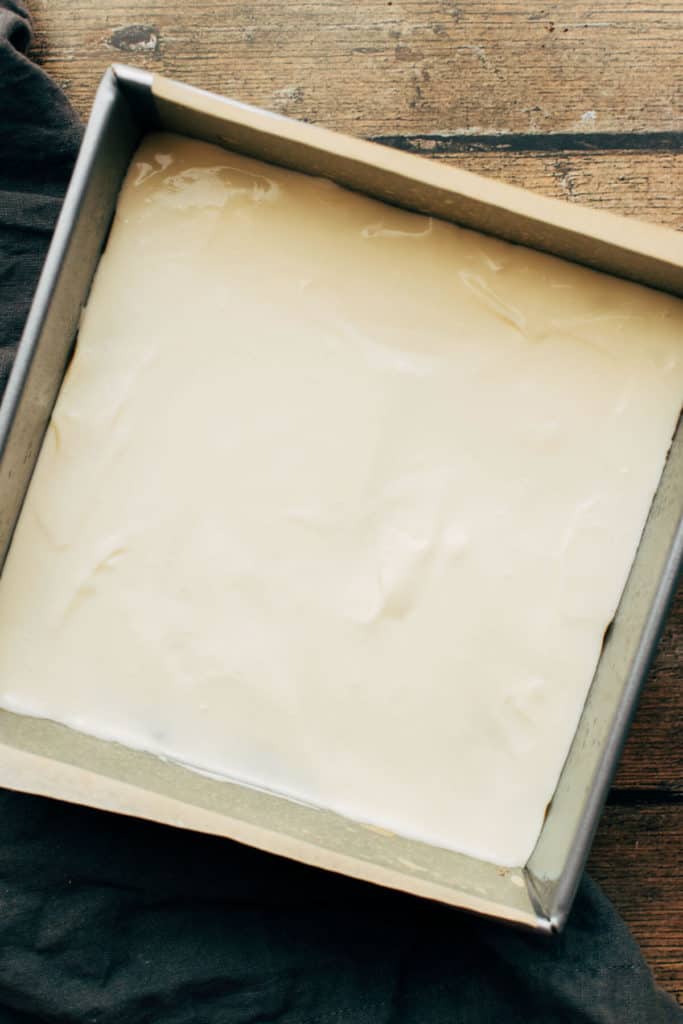
- Make the cheesecake – The recipe starts out with one cheesecake batter which is then split into two. As a whole, the batter is a plain vanilla cheesecake. Half of it is poured on top of the raw brownie batter and the other half is reserved for the pumpkin layer. Pumpkin puree and spices are mixed into create a delicious pumpkin cheesecake.
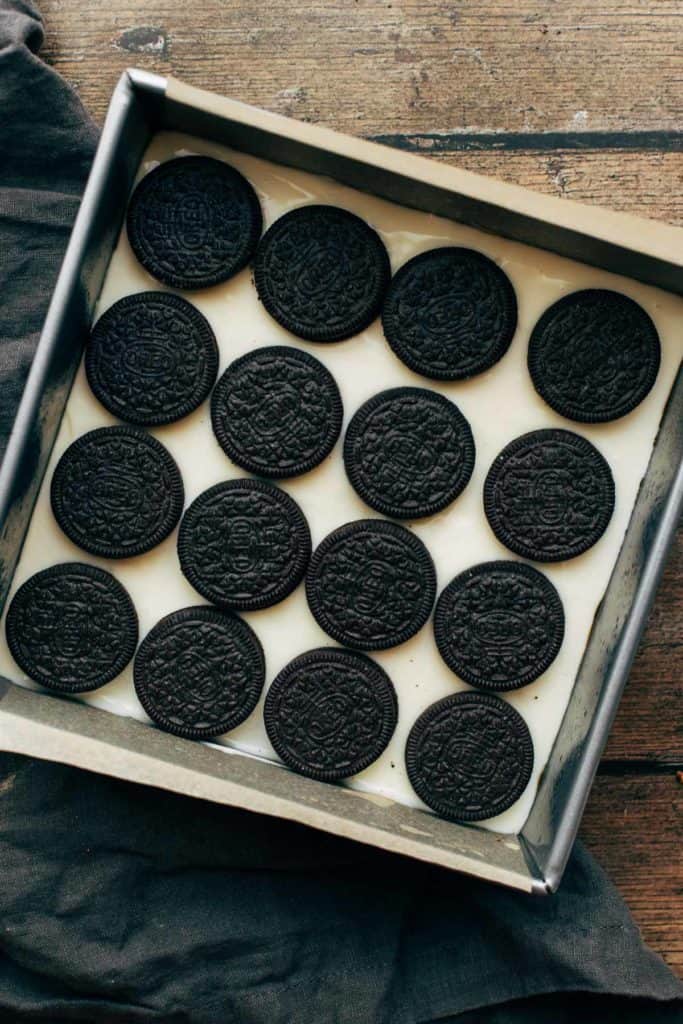
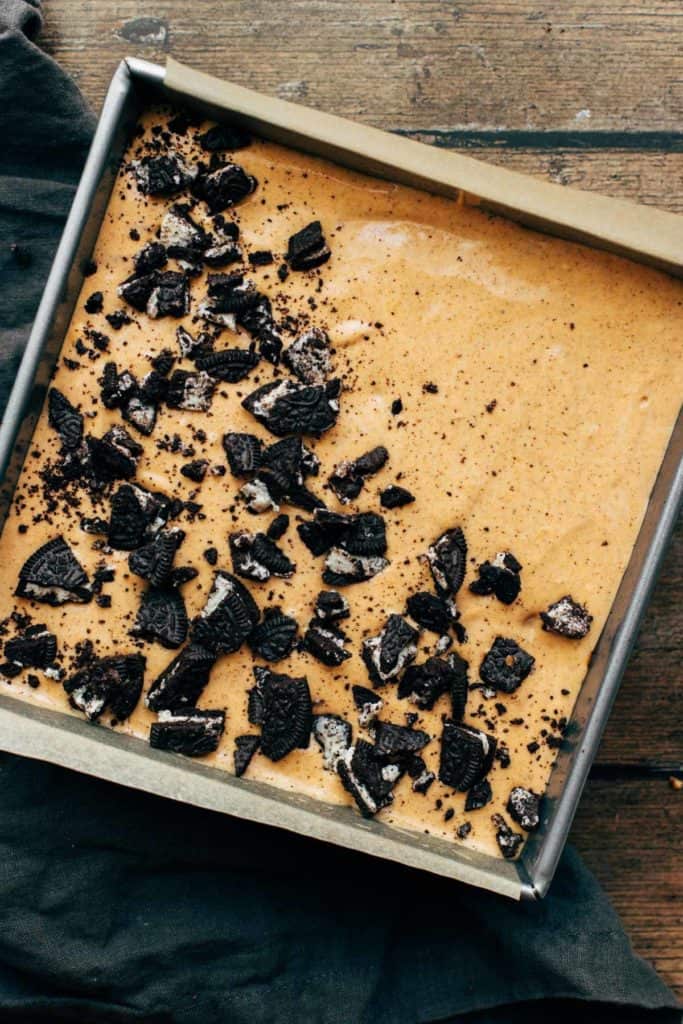
- Place the Oreos – After the vanilla cheesecake layer is spread even, place a layer of Oreos on top. Try not to push them is as we want them suspended between the two cheesecake layers. Then just pour the reserved pumpkin cheesecake on top and it’s ready to bake!
Tips for baking cheesecake bars
The trickiest part about this recipe is the cheesecake, although when I say tricky I just mean it requires a tiny bit more work than the rest. As we all know by my many cheesecake recipes, there are so many things that can go wrong. So here are a few simple tips to ensure it turns out just right!
- The Cream Cheese – If you can, always try to use Philadelphia full fat cream cheese or any cream cheese that isn’t generic. The difference in quality is huuuge when it comes to baking a cheesecake, so always use the best you can find.
- Room Temperature Ingredients – Before you start anything, make sure all of your refrigerated ingredients are at room temperature…especially the cream cheese. This prevents lumps and over mixing (adding too much air to the batter can create cracks). To speed up the process, add the cream cheese (still in the wrappings) and eggs to large bowl of warm water. Let it sit for about 30 minutes and your cream cheese will be perfectly softened.
- Low and slow – Always keep your mixer on low speed, whether you’re using a hand or a stand mixer. This means the mixing process will take a little bit longer, but it also ensures your cheesecake turns out smooth and crack-free.
- Jiggle Test – To make sure your cheesecake is done, crack open the door and nudge the pan. If the center wobbles like a bowl of milk, it’s not done. If it has a firm jiggle to it, it’s ready.
- Gradual Cooling – When the cheesecake is done baking, remove it from the oven and allow it to cool at room temperature for about 30-45 minutes. If you placed it straight into the fridge, the drastic temperature difference would cause large cracks. Then, once it’s at room temperature, it can continue to cool in the refrigerator for about 2 hours.
Things to keep in mind when baking these bars
The brownie batter – Make sure the butter and chocolate are cooled down before mixing in the sugar and egg. If it’s too hot, it will melt the sugar and possibly scramble the egg.
Chilling – These bars must chill for at least 2 hours before slicing. This allows the center to set up so that each slice shows those distinct layers. But, be careful not to chill the bars inside the pan overnight. The moisture from the bars will sink into the parchment paper, making it too soft to lift the bars out and slice. This will just make it harder to get the bars out. So, after the bars are firm and chilled, remove the bars from the pan, slice, and then store in the refrigerator in an air tight container.
The cookies – The Oreo cookies will become soft and tender as they’ll absorb the moisture from the cheesecake layers. They’ll have a slightly different texture, but overall the bars have a really silky and creamy finish.
Can I make these gluten free?
I haven’t tested it, but try swapping the flour with Bob’s Red Mill 1-to-1 gluten free baking flour and the Oreo cookies with gluten free sandwich cookies.
For more pumpkin desserts, check out my:
- Brown Butter & Maple Pumpkin Cookies
- BEST EVER Pumpkin Bread
- Pumpkin Cinnamon Rolls
- Pumpkin Cheesecake Cookies
- Gluten Free Pumpkin Muffins
- Vegan Pumpkin Cookies
Make sure to tag me @butternutbakery on Instagram and comment below if you make these Oreo Brownie Pumpkin Cheesecake Bars. To pin this recipe and save it for later, you can use the button on the recipe card or on any of the photos above. Happy baking!
Watch how to make these pumpkin cheesecake bars:

Cookies & Cream Brownie Pumpkin Cheesecake Bars
- Total Time: 2 hours + 2 hours chilling
- Yield: 9 cheesecake bars
Description
Brownie crusted cheesecake bars baked with layers of vanilla cheesecake, Oreos, and pumpkin cheesecake.
Ingredients
Brownie Layer
- 5 tbsp unsalted butter
- 2 oz dark chocolate, chopped
- 1/2 cup (100g) granulated sugar
- 1 large egg
- 1 tsp vanilla extract
- 1/4 tsp salt
- 1/4 cup (34g) all purpose flour
- 2 tbsp cocoa powder
Cheesecake Layers
- 16 oz cream cheese, room temp
- 3/4 cup (150g) granulated sugar
- 1/4 tsp salt
- 2 large eggs, room temp
- 2 tsp vanilla extract
- 1/2 cup (120g) sour cream, room temp
- 3/4 cup (190g) pumpkin puree
- 1 1/2 tsp pumpkin pie spice
- 1 tsp cinnamon
- 24 chocolate sandwich cookies
Instructions
Brownie Layer
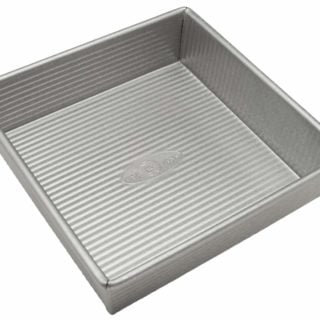
- Spray an 8×8 baking dish with nonstick spray and line the bottom and sides with parchment paper. Allow the paper to hang over the sides of the dish so it’s easy to lift the bars out later.
- To a large heat-safe bowl, add the butter and chopped chocolate. Microwave in 30 second intervals until smooth and melted. It shouldn’t take more than 60 seconds.
- Allow the mixture to cool for 10 minutes, then mix in the sugar, egg, vanilla, and salt. Once smooth, fold in the flour and cocoa powder.
- Spread into an even layer at the bottom of the baking dish and set aside.
Cheesecake Layers
- Preheat the oven to 325F.
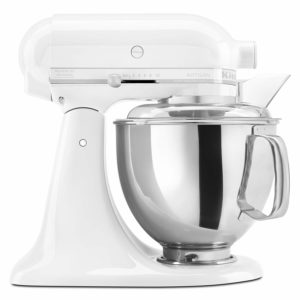
- In a large mixing bowl, either using a hand or stand mixer with the whisk attachment, mix together the cream cheese, sugar, and salt until smooth. Mix on low/medium-low speed.
- Once smooth, scrape down the sides and bottom of the bowl and mix in the eggs and vanilla.
- Scrape down the bowl again and mix in the sour cream.
- Spread about half of the mixture into an even layer on top of the brownie base.
- To the remaining cheesecake batter, mix in the pumpkin puree, pumpkin pie spice, and cinnamon.
- To the regular cheesecake layer, place 16 chocolate sandwich cookies on top in an even layer.
- Gently pour the pumpkin cheesecake batter on top and spread it even. Chop 6-8 additional sandwich cookies and sprinkle on top.
- Bake for 1 hour and 15-20 minutes. When done, allow the bars to cool at room temp for about 30 minutes, then transfer to the refrigerator to chill completely for at least 2 hours or until the bottom of the pan is completely cooled.
- Lift the bars out of the pan and slice. Don’t leave the bars in the pan overnight as the paper will turn a bit soft and it will be difficult to slice the bars. Enjoy!
- Prep Time: 30 minutes
- Cook Time: 1 hour 20 minutes
Join Our Community


Meet Jenna
I’m the creator, baker, and photographer behind Butternut Bakery. Here I share desserts for every diet because I believe everyone should have a chance to indulge!

Could these be made as cupcakes? I would imagine the cooking times would have to be a bit less?
OMG so so so yummy!! Mine came out a bit mushy even though I refrigerated them overnight so maybe I should have baked them more? I used Double Stuff gluten free, as well as gluten free flour blend and all turned out AMAZING!! Can’t wait to make again for Thanksgiving. Thanks for coming up with this glorious combination and for sharing it with the world!
Hi. Is it okay if I leave them in the fridge until tomorrow night or do I have to take it out of the fridge after 2 hours?