Description
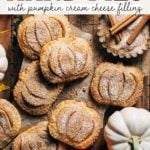
These mini pumpkin pies are baked with a cream cheese pumpkin filling and a cinnamon sugar crust. They’re so quick and easy to make!
Ingredients
Pie Filling
- 1 box store bought pie dough, containing 2 sheets *see notes for GF option
- 4 oz cream cheese, room temp
- 1/2 cup (100g) light brown sugar, packed
- 1/2 cup (115g) pumpkin puree
- 1/2 tsp pumpkin pie spice
- Pinch of salt
Cinnamon Sugar
- 1 large egg
- 1/2 cup (100g) granulated sugar
- 1 tsp ground cinnamon
Instructions
- Remove the pie dough from the refrigerator and allow the sheets to come to room temp while you make the filling.
- In a bowl using a fork, mash and mix together the cream cheese and brown sugar.
- Once smooth, mix in half of the pumpkin puree. Once combined, mix in the other half along with the pumpkin pie spice and salt.
- Preheat the oven to 400F and line a large baking sheet with parchment paper.
- Lightly dust your surface with flour and unroll one of the pie sheets. Use a rolling pin to gently smooth the surface, just enough to smooth out any wrinkles and ridges.
- Using a pumpkin-shaped cookie cutter or a homemade pumpkin template (I made mine out of the box the pie dough came in – see notes for details), cut out your pumpkins. Roll out the scraps to cut out a few more pumpkins. You should be able to get about 10 pumpkins per sheet.
- Transfer these pumpkins to the refrigerator while you cut out the other sheet.
- Now place half of the pumpkins on the baking sheet, spaced evenly apart. If you can’t fit all 10 pumpkins, leave the excess in the refrigerator and bake after the first batch is done.
- Fill the center of each pumpkin with a tablespoon of the filling, leaving a small border around the edge.
- Beat the egg with about 2 teaspoons of water. Brush the bare border of each filled pumpkin with the egg wash.
- To the other half of the pumpkins, cut 4 slits to resemble the ridges of a real pumpkin. I like to think of it as two sets of parentheses, a larger one going on the outside with a narrow set on the inside.
- Place the vented pumpkins on top of the filled pumpkins and gently press down on the seems to seal the pies shut. Then crimp the edges with a fork and brush the surface of each pumpkin with the egg wash.
- In a small dish, mix together the cinnamon and sugar. Sprinkle about 1 teaspoon of the cinnamon sugar on top of each pumpkin.
- Bake for 12-14 minutes. Allow the pumpkins to cool on the baking sheet for about 5 minutes, then transfer to a cooling rack.
- Now they’re ready to enjoy!
Notes
GLUTEN FREE – Use the pie dough recipe from my gluten free peanut butter and jelly pop tarts. Make sure you let the dough chill before use. Then when rolling, if it’s breaking apart, let it rest for a few minutes. It’s much easier to work with when it’s closer to room temp. Then once the pies are formed, freeze them for about 10 minutes before baking. Bake at 375F for about 15 minutes.
PUMPKIN TEMPLATE – The size of the template I made is 3.5″ wide by 3″ tall. I recommend cutting a template out of something thick like cardboard as this makes it much easier to work with. Otherwise, I suggest this pumpkin cookie cutter.
- Prep Time: 30 minutes
- Cook Time: 12 minutes


