Mini Apple Hand Pies
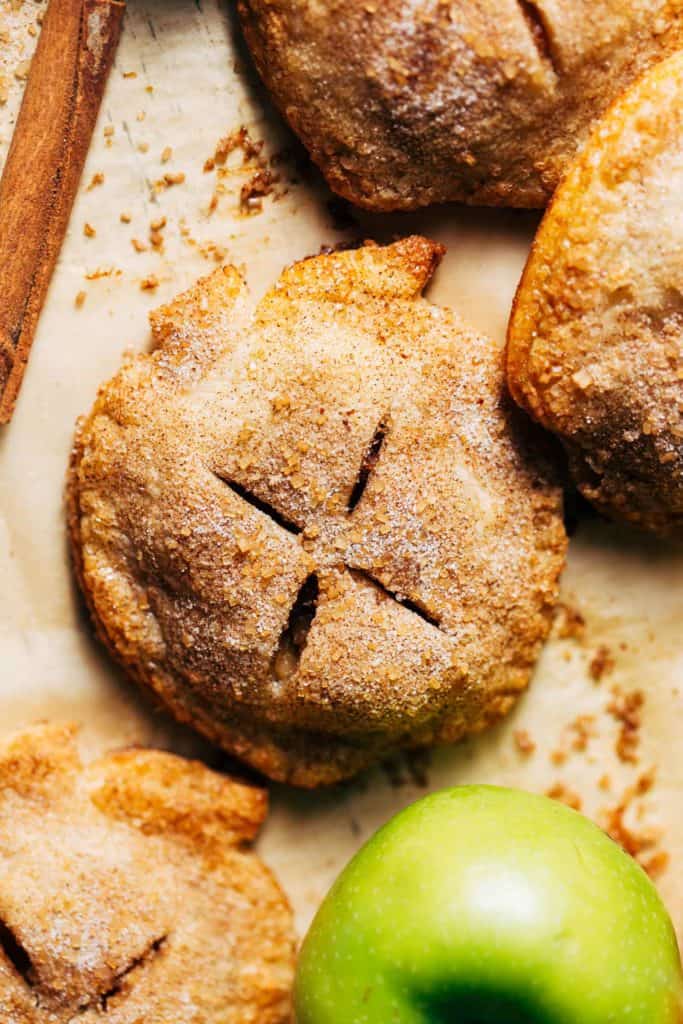
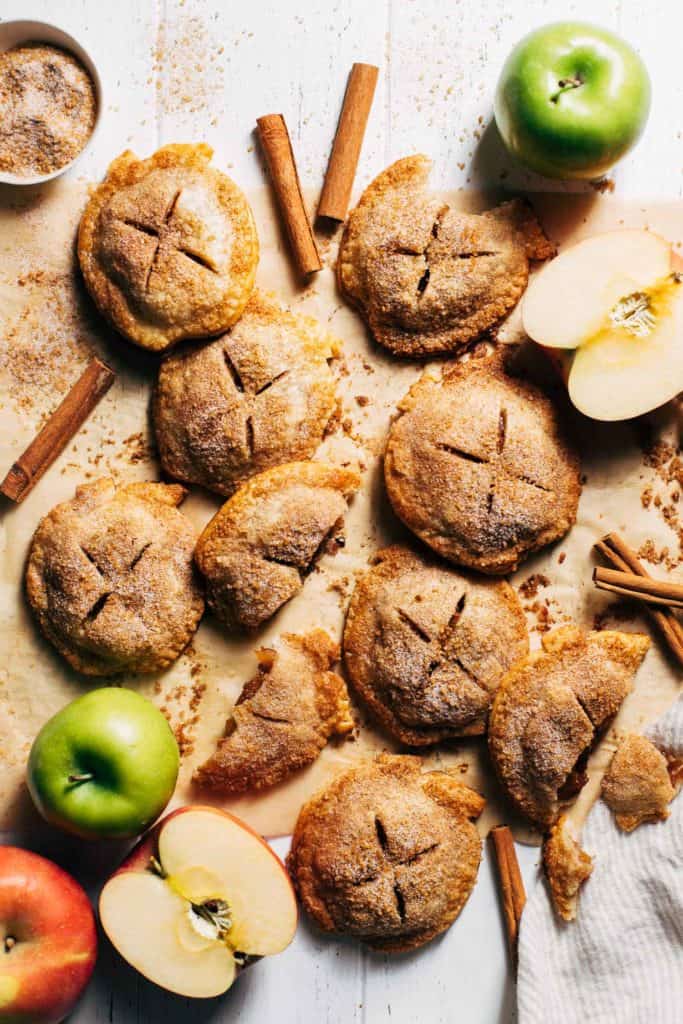
These apple hand pies taste JUST as delicious as homemade apple pie, without all the work. The filling is ready in 10 minutes using 6 simple ingredients, and the crust is made using store bought pie dough with a cinnamon sugar coating. In other words, they’re quick, easy, and ready in under an hour!
What makes these the BEST apple hand pies?
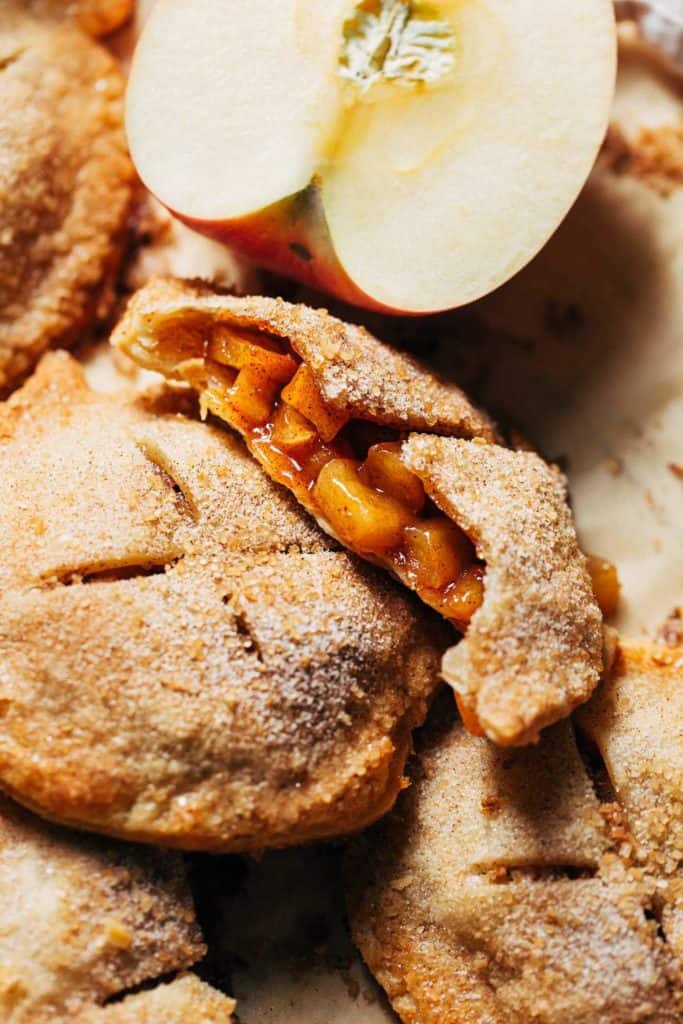
For starters, the flavor of these pies is so good that you would never even know they’re semi-homemade. The filling is perfectly spiced with tender apples and jammy texture, giving these pies a rich consistency just like a slice of apple pie.
They’re also very easy to make, especially compared to baking an entire apple pie from scratch. The filling comes together so fast, and the crust is made using store bought pie dough because sometimes we just need a shortcut! But to liven up the crust, an egg wash and cinnamon sugar are coated on the surface to give these pies a sweet and crunchy exterior.
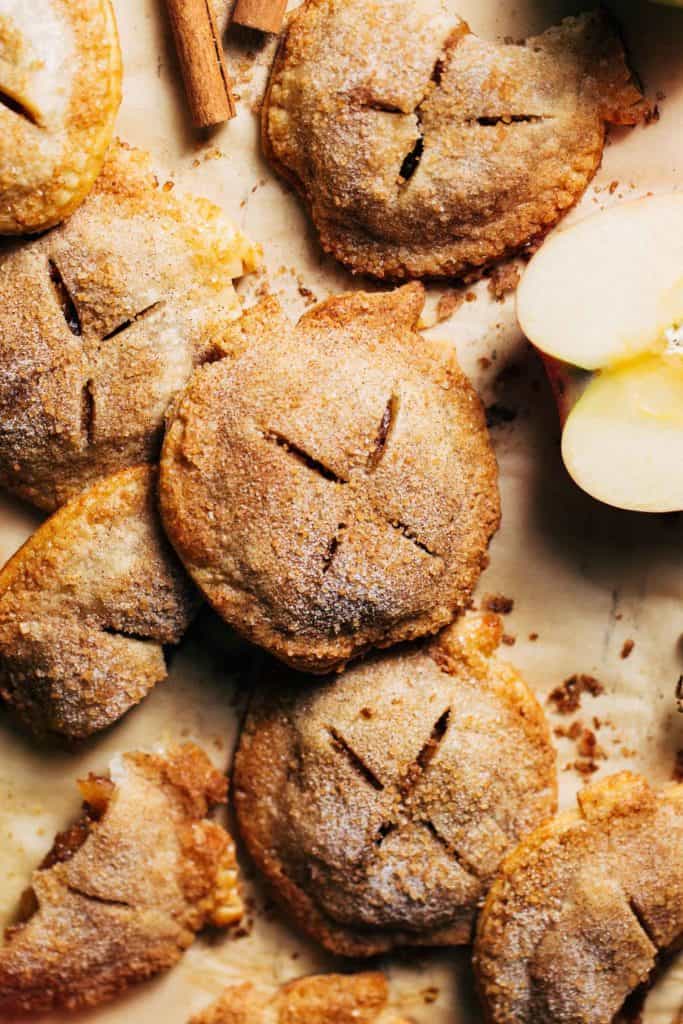
Last but not least, they’re shaped like little apples! I took notes from my mini pumpkin pies and used a homemade apple stencil to cut out apple-shaped slices of pie dough. But you can also use an apple-shaped cookie cutter to make this recipe even easier.
How to make a quick and easy apple hand pie filling
The filling is made using only 6 ingredients and comes together in minutes. Here’s what you’ll need:
- 2 Apples (fuji or honeycrisp)
- Butter
- Brown Sugar
- Cinnamon
- Lemon Juice
- Cornstarch
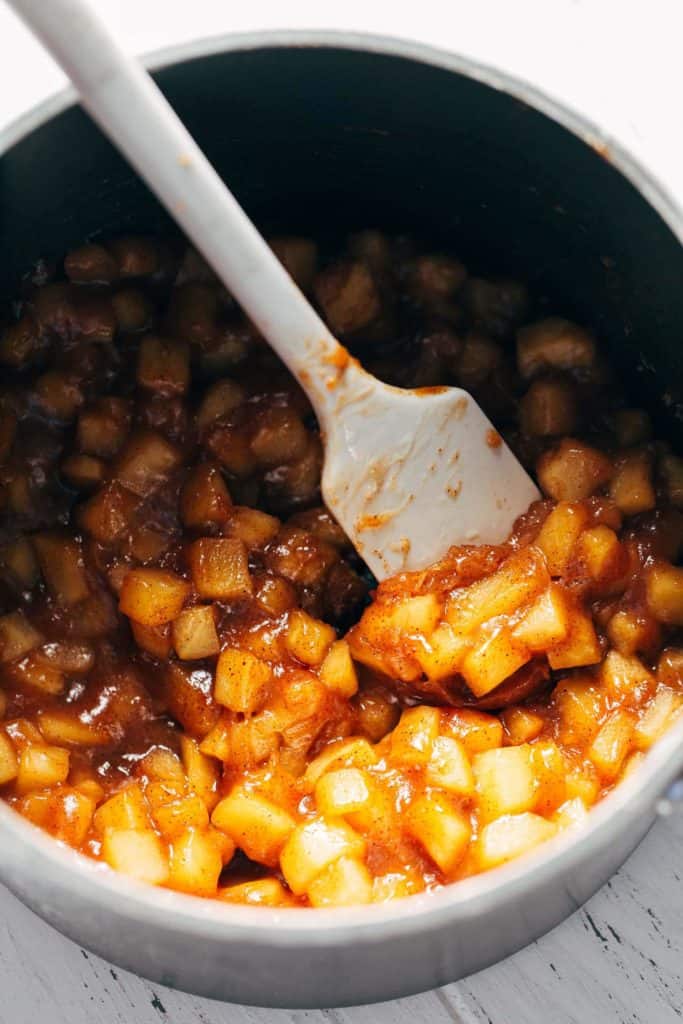
Everything is combined in a saucepan, minus the cornstarch, over medium heat. After about 10 minutes, the apples will tenderize and release their juices. The mixture will seem a bit runny, which is where the cornstarch comes in. This immediately thickens up the filling to give it a perfect jammy texture.
But before mixing it in, the cornstarch is combined with a bit of water. This is so the cornstarch can seamlessly blend with the apples. If it’s tossed in my itself, you’d be left with bits of cornstarch all throughout the filling which would not look or taste very appetizing.
How to shape these mini apple hand pies
After the filling is prepped, it’s time to cut out the tiny apples. For this recipe, we’re using store bought pie crust. One, because it’s just as good as homemade and two, because I wanted this recipe to be quick and easy. This time of year can get so busy, and sometimes you just don’t have time to bake everything from scratch!
To cut out our tiny apples, start by thawing the crust just a bit. It should be refrigerated, so allow it to rest at room temperature for about 15-20 minutes. This will make it easier to roll out and smooth for cutting.
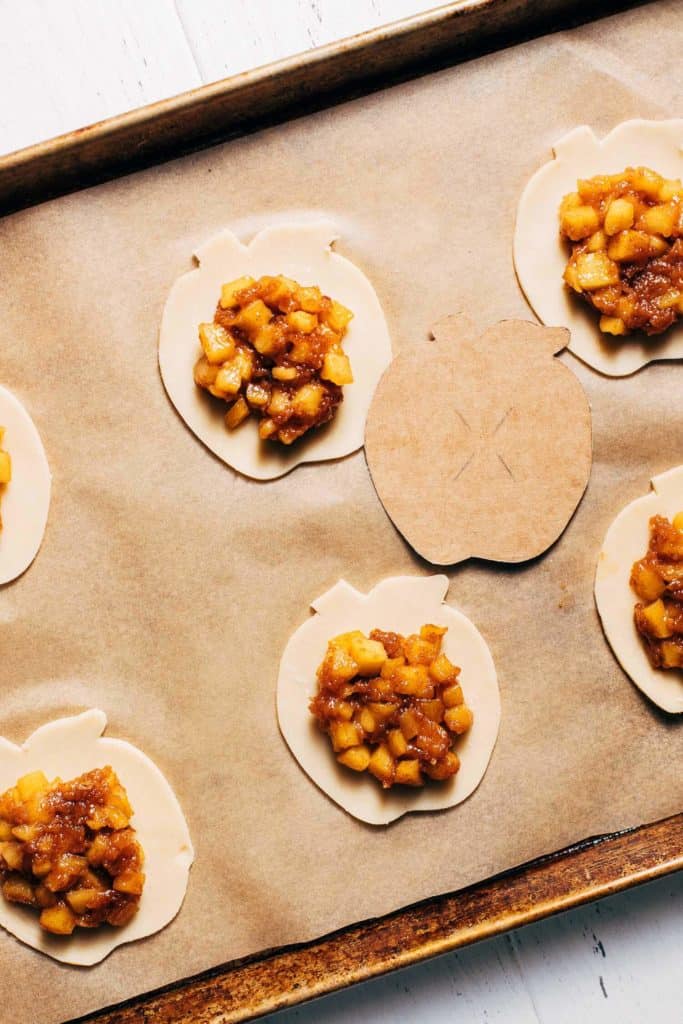
For the apple shapes, you can either use an apple cookie cutter or make your own out of cardboard. For mine, I used the box that the pie crust came in. I made a rough outline of an apple that’s about 3.5″ wide by 3.75″ tall. Then I went back in and drew a harsher line as the true outline of the apple.
After cutting it out, just lay it on top of the rolled out crust and use a small paring knife to cut around it. Between the two crusts, you should get about 16 apples total.
If you can get your hands on a store bought gluten free crust, go for it! Otherwise, use my homemade gluten free pie crust used in my gluten free peanut butter and jelly pop tarts. My tip is to work with this dough when it’s close to room temp. If it’s too cold, it will break on you. Also use a spatula to help lift the apple cut outs, just to ensure they don’t crack!
Then, before baking, freeze the pies for about 10 minutes. This will firm up that butter again which will give you a delicious flaky crust. This dough also bakes at a lower temp, so bake the pies at 375F for about 15 minutes.
Simply swap the butter with vegan butter, and the pie dough with puff pastry dough. If you didn’t know, most store-bought puff pastry is naturally vegan. Follow all the same instructions, but bake at 350F for about 20 minutes. As for the egg wash, swap with a mixture of 2 tbsp milk alt with 1 tbsp maple syrup.
I also suggest just cutting out 3.5″ round slices of puff pastry rather than apple shapes. If you cut apples, they may lose their shape when baked so it won’t be worth the extra detail in the end.
Yep! Fill and crimp the mini apple pies but leave off the egg wash. Store the bare pies in an air tight container in the refrigerator. They will keep for a couple days.
Then to bake, apply the egg wash and cinnamon sugar and bake as usual. I also recommend this route if you’re only baking these pies for a couple people. Bake what you need, and chill the bare pies until you want another fresh batch.
Store the apple hand pies in an air tight container at room temperature where they’ll keep for about 4 days. To last even longer, store in the refrigerator for about 1 week.
For more apple recipes, check out my:
- Caramel Apple Muffins
- Apple Cider Donuts
- Apple Butter Spice Cake
- Cinnamon Sugar Apple Butter Pie
- BEST EVER Apple Pie
- Apple Crisp
- Apple Pie Cupcakes
- Apple Cider Cake
Make sure to tag me @butternutbakery on Instagram and leave a review below if you make these apple hand pies. To pin this recipe and save it for later, you can use the button on the recipe card, the buttons above or below this post, or on any of the photos above. Happy baking!
Watch how to make these apple hand pies:

Mini Apple Hand Pies
- Total Time: 52 minutes
- Yield: 8 pies
Description
These delicious apple hand pies take all the work out of making apple pie. The filling is just 6 simple ingredients, and the crust is store bought pie dough with a coating of cinnamon sugar – baked and ready in under an hour!
Ingredients
Pie Filling
- 1 box store bought pie dough, containing 2 sheets *see notes for GF option
- 2 tbsp unsalted butter (reg or plant-based)
- 2 1/2 cups finely chopped fuji or honeycrisp apples (about 2 large apples)
- 1/4 cup (50g) light brown sugar, packed
- 1 tsp ground cinnamon
- Juice of 1/2 lemon
- 1/2 tsp cornstarch, mixed with 1 tbsp water
Cinnamon Sugar
- 1 large egg
- 1/2 cup (100g) granulated sugar
- 1 tsp ground cinnamon
Instructions
- Remove the pie dough from the refrigerator and allow the sheets to come to room temp while you make the filling.
- In a saucepan over medium heat, melt down the butter.
- Once melted, mix in the apples, brown sugar, cinnamon, and lemon juice. Heat for about 10 minutes, or until the apples are tender and swimming in its juices.
- Mix together the cornstarch and water in a small dish and pour into the pot with the apples. Stir and heat for about 30 seconds and watch as the filling begins to thicken. Remove from heat and allow the filling to cool while we prep the pie dough.
- Preheat the oven to 400F and line a large baking sheet with parchment paper.
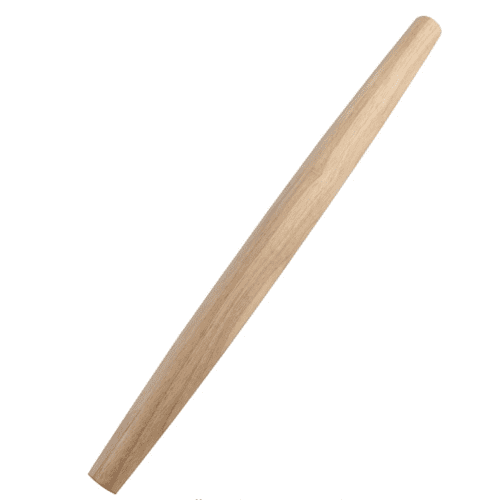
- Lightly dust your surface with flour and unroll one of the pie sheets. Use a rolling pin to gently smooth the surface, just enough to smooth out any wrinkles and ridges.
- Using an apple-shaped cookie cutter or a homemade apple template (I made mine out of the box the pie dough came in – see notes for details), cut out your apples. Roll out the scraps to cut out a few more apples. You should be able to get about 8 apples per sheet.
- Transfer these apples to the refrigerator while you cut out the other sheet.
- Now place half of the apples on the baking sheet, spaced evenly apart. If you can’t fit all 8 apples, leave the excess in the refrigerator and bake after the first batch is done.
- Fill the center of each apple with a tablespoon of the filling, leaving a small border around the edge.
- Beat the egg with about 2 teaspoons of water. Brush the bare border of each filled apple with the egg wash.
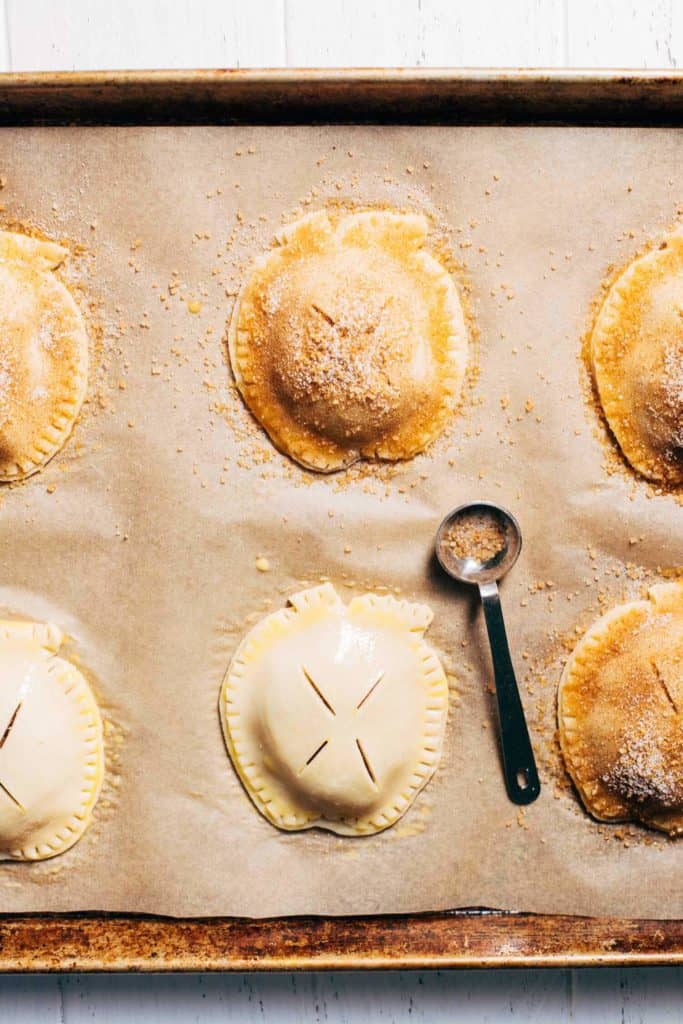
- To the other half of the apples, cut 4 slits in the center as shown in the photos.
- Place the vented apples on top of the filled apples and gently press down on the seems to seal the pies shut. Then crimp the edges with a fork and brush the surface of each apple with the egg wash.
- In a small dish, mix together the cinnamon and sugar. Sprinkle about 1 teaspoon of the cinnamon sugar on top of each apple.
- Bake for 12-14 minutes. Allow the apples to cool on the baking sheet for about 5 minutes, then transfer to a cooling rack.
- Now they’re ready to enjoy!
Notes
GLUTEN FREE – Use the pie dough recipe from my gluten free peanut butter and jelly pop tarts. Make sure you let the dough chill before use. Then when rolling, if it’s breaking apart, let it rest for a few minutes. It’s much easier to work with when it’s closer to room temp. Then once the pies are formed, freeze them for about 10 minutes before baking. Bake at 375F for about 15 minutes.
VEGAN – Swap the butter with vegan butter, and the pie dough with puff pastry dough. If you didn’t know, most store-bought puff pastry is naturally vegan. As for the egg wash, swap with 2 tbsp milk alt mixed with 1 tbsp maple syrup. Follow all the same instructions, but bake at 350F for about 20 minutes. I also suggest just cutting out 3.5″ round slices of puff pastry rather than apple shapes. If you cut apples, they may lose their shape when baked so it won’t be worth the extra detail in the end.
APPLE TEMPLATE – The size of the template I made is 3.5″ wide by 3.75″ tall. I recommend cutting a template out of something thick like cardboard as this makes it much easier to work with. Otherwise, I suggest this apple cookie cutter. It’s slightly larger than the template I used, so you may only be able to get about 6 apples per pie dough sheet.
- Prep Time: 40 minutes
- Cook Time: 12 minutes
Join Our Community

Meet Jenna
I’m the creator, baker, and photographer behind Butternut Bakery. Here I share desserts for every diet because I believe everyone should have a chance to indulge!



I’ve made these several times and they’re always a huge hit!! Delicious!
Such a good recipe! I made them for a Halloween party in the shape of ghosts, and again for Thanksgiving in the shape of maple leafs. It’s a really easy recipe. The only thing I did differently was add a tsp of vanilla to the pie filling which I do recommend.
I made these for Thanksgiving – a half-recipe, as we had a small group and I already had a pumpkin pie on the menu. They were a huge hit! So cute, so easy to make and have ready in the refrigerator. I popped them into the oven after I pulled out the side dishes, and they were warm and gorgeous by the time we got around to dessert. I used a 3-inch round cookie cutter, and they were perfect. Thank you so much!
I just made these for the first time. They turned out great! I had a little filling left over, so I might add more to each pie. My apple template came from #cricut. Oh, and I made 10 pies with a little dough left over. 🙂
LOVED this recipe. It was a big hit!
Can you also freeze the unbaked pies and thaw them out to bake later?
These were so fun to make! The filling came together nicely. I was low on cinnamon so added apple pie spice and a splash of vanilla. I just cut the dough into shapes and filled them per the instructions. Husband said they’re better than McDonalds. Considering I’m gluten free and couldn’t try them, I was super happy with the results. Thanks!