BEST EVER Apple Pie
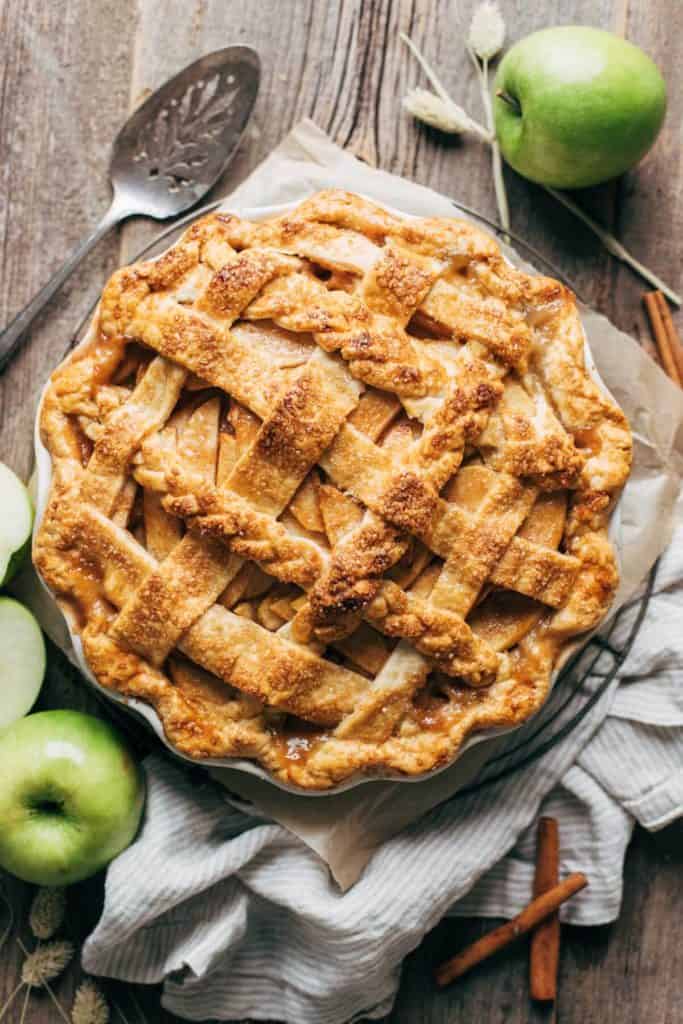
This apple pie recipe is absolute perfection. The homemade crust is buttery and flaky with a caramelized exterior, and the center is full of tender and flavorful apples. With the filling coated in an apple caramel sauce, each apple slice is packed tightly into this pie, making every single slice tall and FULL of fresh apples. This post is also loaded with helpful tips to ensure your apple pie turns out just right.
The best apples to use in apple pie
An apple pie is nothing without the perfect apples. And not all apples are created equal which is why you should choose ones that are ideal for baking. Here are a some of my favorites that you can find in almost any grocery store:
Granny Smith – The classic tried and true apple. They’re perfect for baking because they hold their shape and are deliciously tart. The flavor helps to balance out any sweetness, making them my number one pick for apple pie.
Honeycrisp – These apples are sweet but slightly sour. They stay fairly firm while baking and are great to mix with Granny Smith apples for a bit more sweetness. The downside is that they’re only available a few months out of the year.
Fuji – My absolute favorite apple for snacking because of its sweetness. They’re crisp and firm, similar to Honeycrisp, but are just a touch sweeter. These can be found almost all year round and are also great to mix with Granny Smith apples.
Braeburn – Another crisp and sweet apple but has a touch of citrusy flavor. It will hold its shape while baking, but not as well as a Granny Smith.
I opted for half Granny Smith and half Honeycrisp to get the perfect balance of sweet and tart, but you can easily swap them out with any of the above apples to make this apple pie uniquely yours.
The secret to a perfect apple pie crust
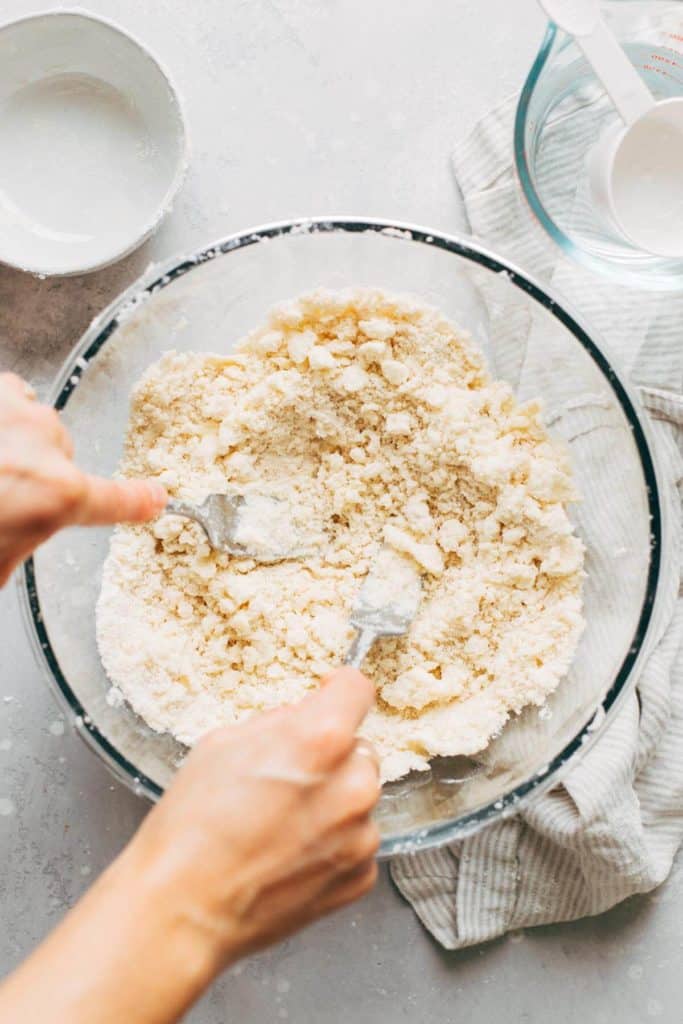
Just like pizza, it’s all about the crust. Getting that perfectly flaky pie crust is easier than it looks. The trick is to keep your butter COLD. As you incorporate it into your flour, leave pea sized chunks. It’s better to under than over work your dough.
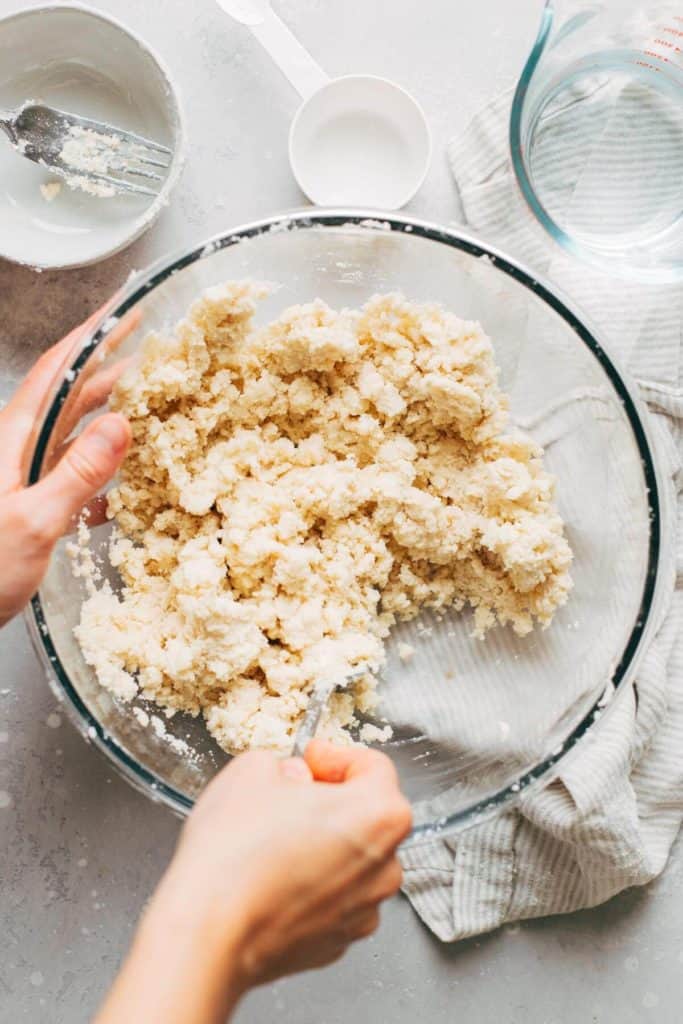
When hydrating your dough, gradually add the water to make it easier to mix in. You also don’t want to add it all at once just in case your dough doesn’t need it. Making pie dough is a sensitive process, one too many tablespoons of water or flour and your dough can turn out too sticky or too dry. If the water in this recipe isn’t enough, add 1 tablespoon at a time until you reach the right consistency.
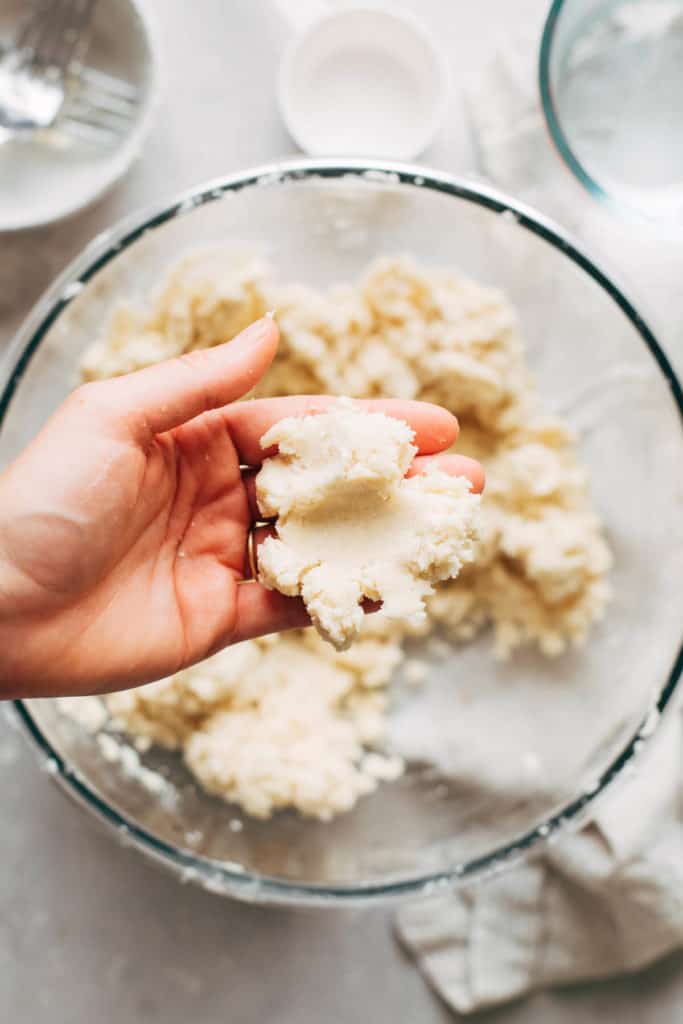
The consistency you should be looking for is crumbly but moldable. The second picture above shows what the dough looks like after it has been hydrated with an adequate amount of water. It may appear dry and crumbly, making it LOOK like it needs more water even though it doesn’t.
At this step, pinch a bit of dough between your fingers. If it holds together well (like the picture above) then it’s ready to go. If it’s still too crumbly, add one tablespoon of water at a time until it’s there.
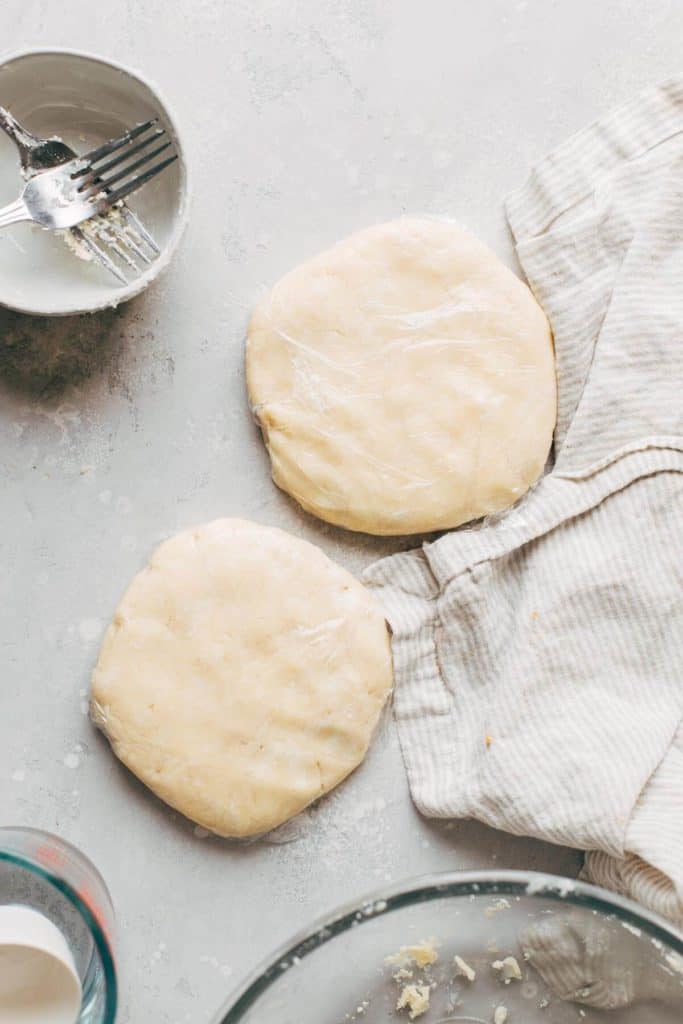
When you’ve wrapped each half of pie dough in plastic wrap, allow it to chill and firm up. This makes it easier to roll out the dough later on.
Perfect apple pie filling (not soupy)
It’s so disappointing to slice into an apple pie that is either one, thin and soupy on the inside or two, has a huge gap between where the filling ends and the top crust starts. Luckily this recipe doesn’t have either of those! So here’s how to bake a perfect apple pie filling:
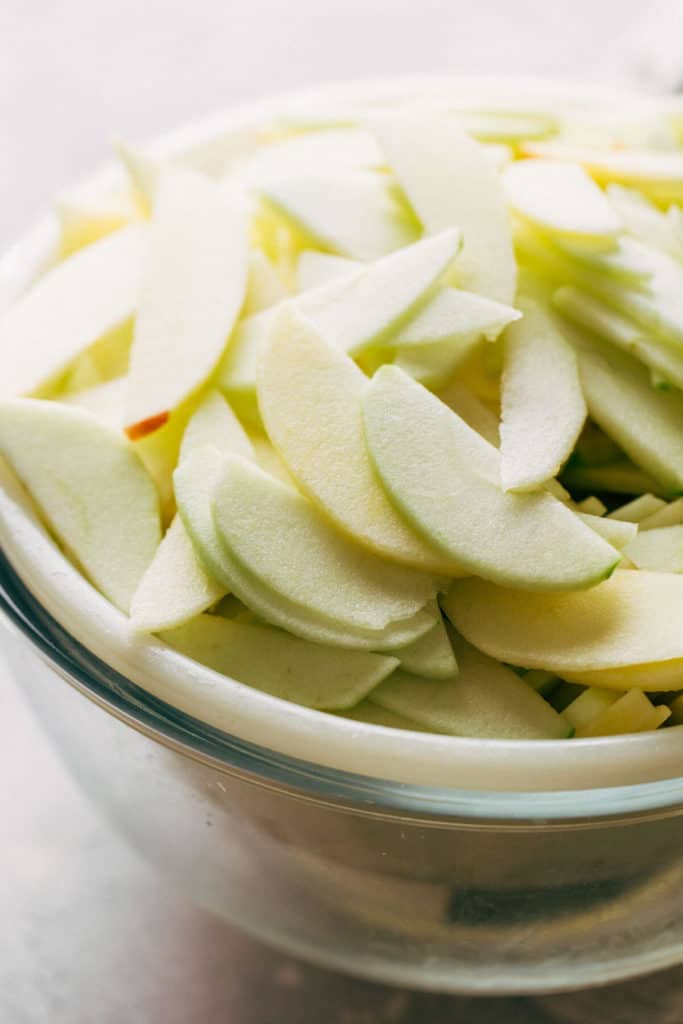
- Allow the apples to macerate before adding them to the filling. In this recipe, the apples are sliced and tossed in sugar and lemon juice. This draws out the apple juices. It essentially gives them a head start before they’re baked, allowing the apples to decrease in volume before the top crusted is added. Otherwise, you’ll be left with that big gap under the top crust.
- The juices that are drawn out from the apples is then cooked down and used in the filling. That juice is full of pectin, which is a soluble fiber that helps the filling sauce thicken (along with a bit of flour). Cooking the juices with some additional brown sugar and butter creates a caramel-like sauce that coats the apples, holding them all together like glue.
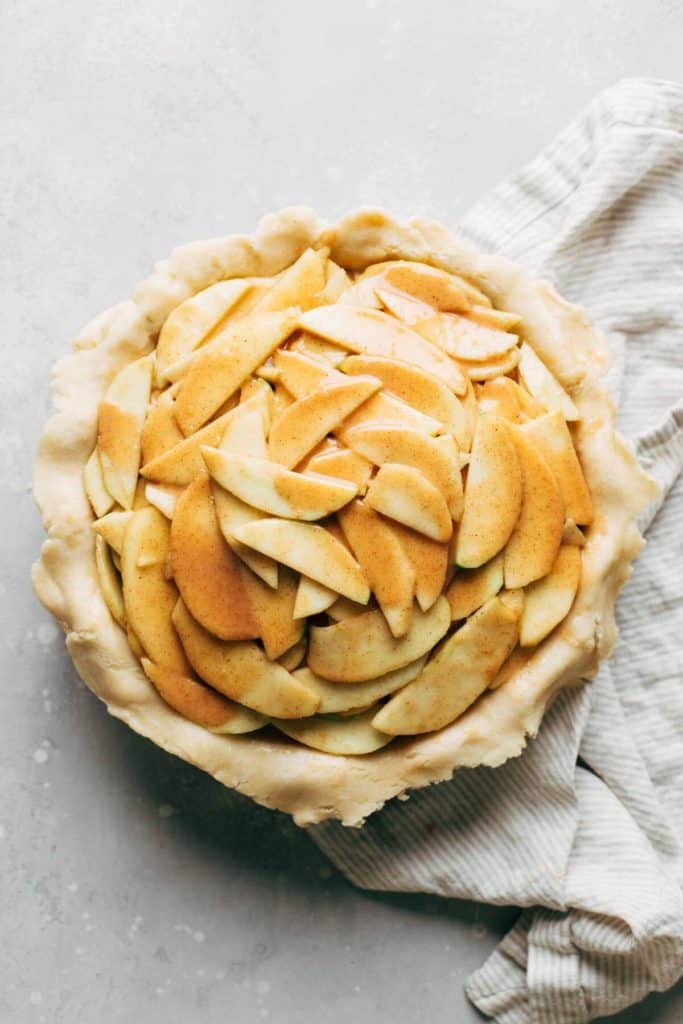
- Pack in the apples. And I mean, make sure there are NO gaps between them. Work with a cup at a time, scooping the apples into the pie shell, arranging them tightly, and then scoop in more. Firming pressing the apples into the crust does two things. One, it prevents the filling from shrinking inside the pie. Two, it compacts the apples so once you cut into the pie, each slice holds together.
Besides the technical aspects, the pie filling is incredibly flavorful without being overly sweet. It allows the apples to shine, with an additional hint of sweetness and warm spices to bring this entire pie together.
Tips of forming the pie dough
When the pie dough is ready and chilled, work with just one half at a time to ensure each half stays as cold as possible. Otherwise, the butter will start to melt and your pie crust will no longer be light and flaky.
Take one half out of the refrigerator and let it warm up just a bit. If you try to roll out cold hard dough, it will crack and break. Giving it a chance to warm up just a bit gives it some flexibility. It should only take about 15 minutes.
Roll the dough out onto a lightly floured surface using a floured rolling pin. Roll it to about two inches larger than your pie dish. Once you’ve placed the bottom crust in, leave the overhang as is and brush the entire inside of the pie with an egg white.
The egg white acts as a barrier between the filling and the dough. It prevents the bottom of the crust from turning too soft or soggy. The bottom crust is then is placed in the freezer to allow that egg white to set.
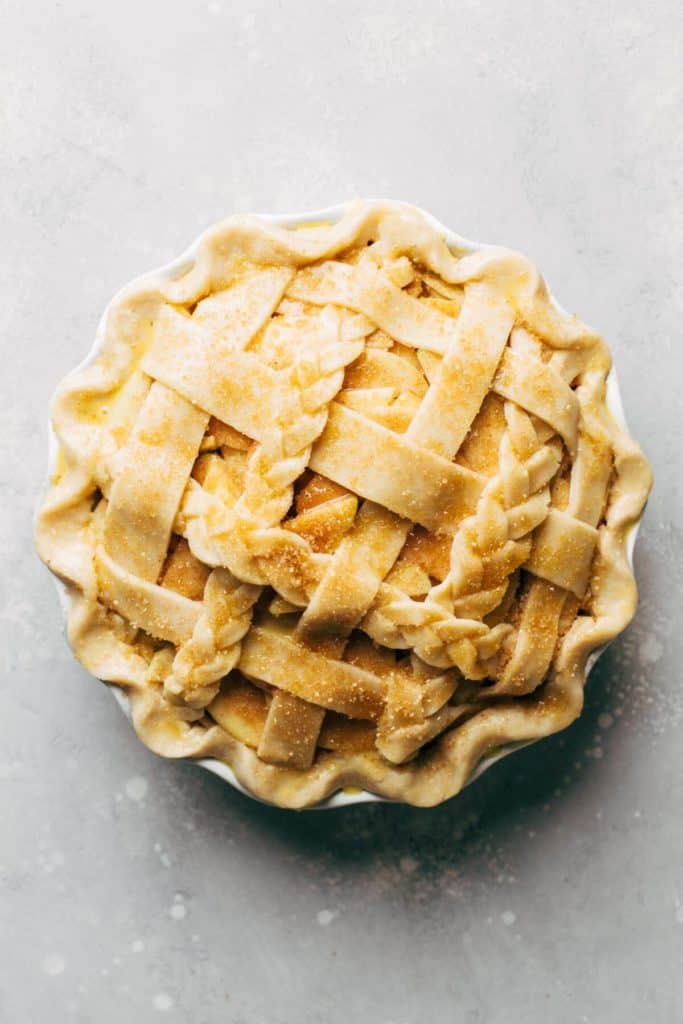
Once the filling is placed into the frozen bottom crust, apply the lattice on top. Allow the strips to hang over the edges, across the excess bottom crust that hangs all around the edge of the pie. Then tuck that bottom crust excess over the lattice excess in order to bring the two together. This makes for a smooth and seamless crimped crust all around the outside.
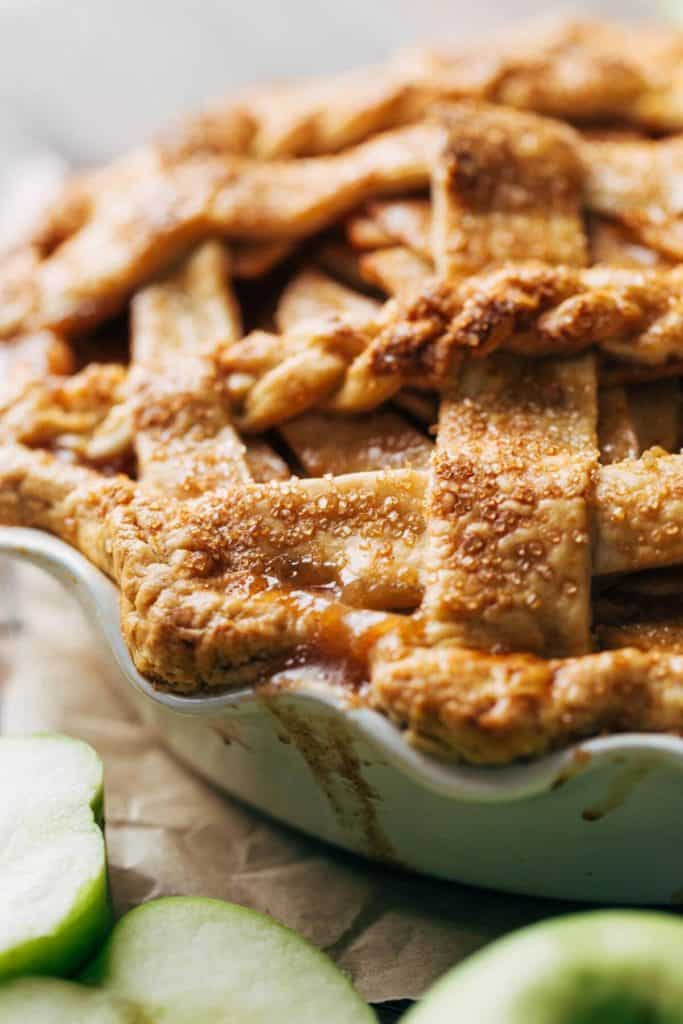
Now all that’s left to do is apply the egg wash and some additional sugar. The sugar helps the crust caramelize, giving it a lightly crisp exterior. I prefer raw or demerara sugar for its texture and color.
Serving your apple pie
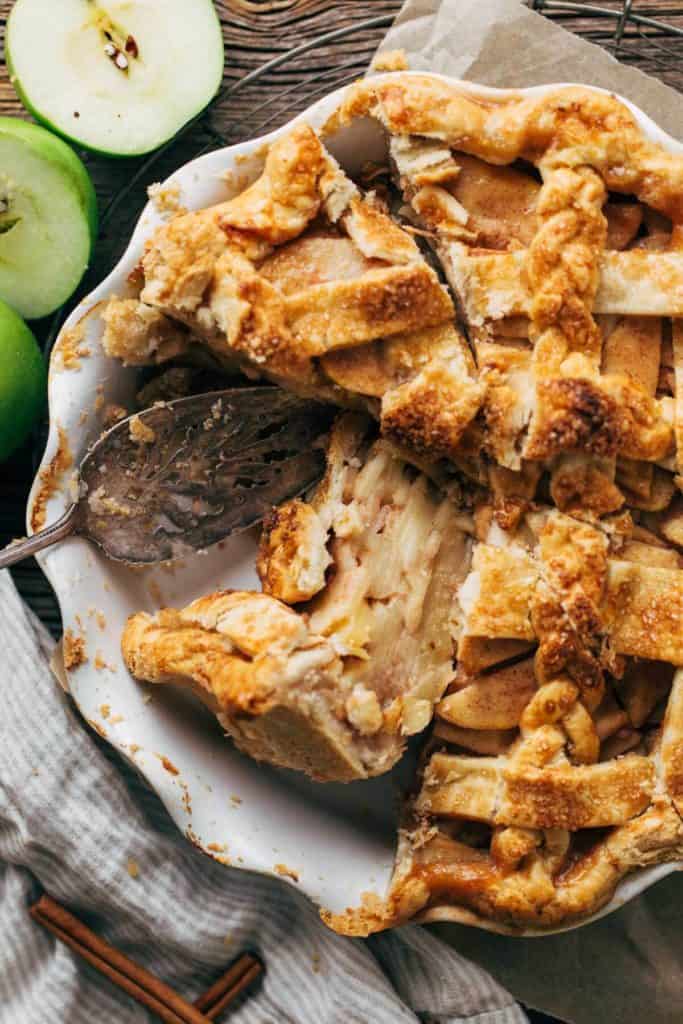
I know, it’s so tempting to dig into your apple pie when it’s fresh from the oven. But patience is key to getting that solid center and well-rounded flavor.
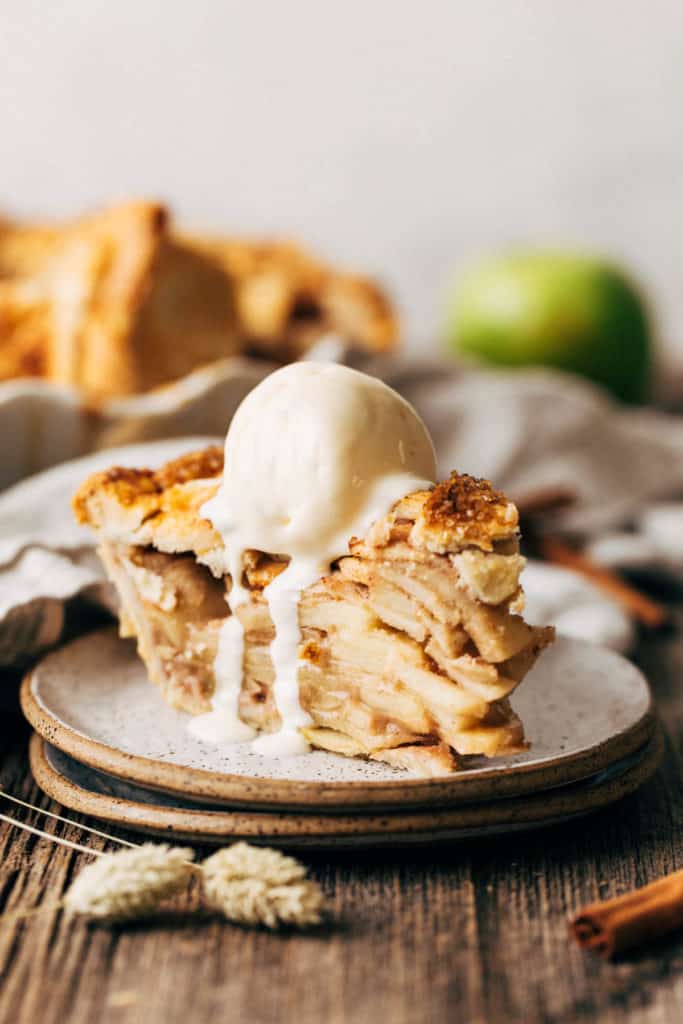
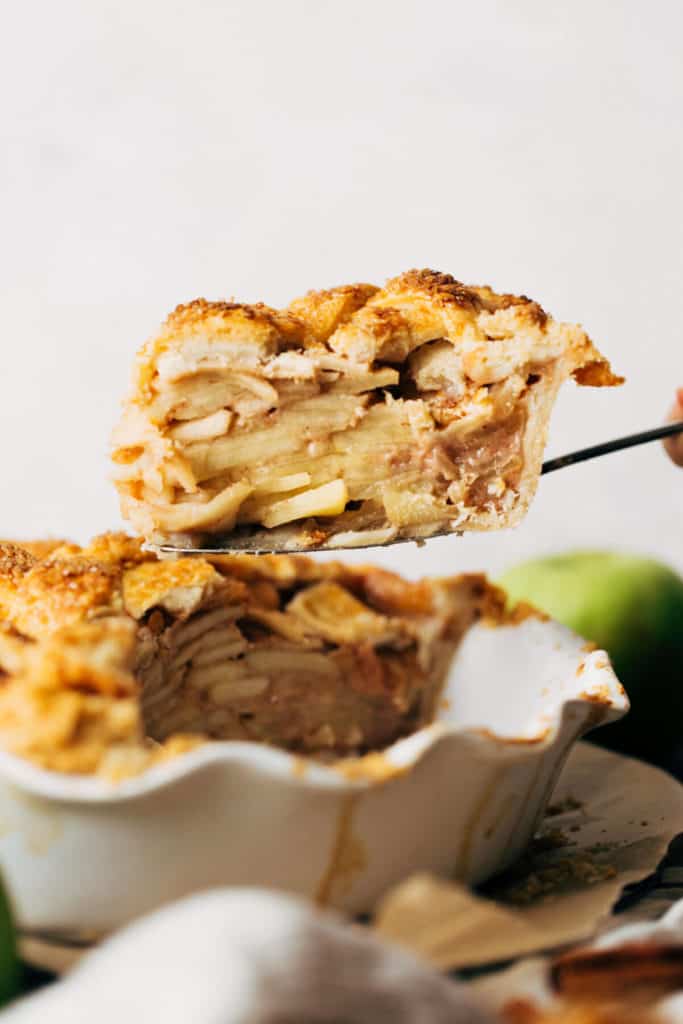
Allow your pie to cool at room temperature for at least an hour. Then, cover it in foil and place in the fridge so that the pie can stiffen and the juices can absorb into the filling. This will help give you the perfect slice like the one above. Just look at those apple layers!
You can serve your apple pie cold or warm. I recommend popping it in the oven at 300 for about 15 minutes before serving if you want a warm slice. Topping it with ice cream not only adds some extra indulgence, but it also helps to balance out the tartness of the apples. It’s an absolute must for me.
How to store apple pie
Keep the pie in the refrigerator to get the most out of it. Place it in an air tight container and it will keep for up to a week. Otherwise, it can sit at room temperature for about 3 days.
For more apple recipes, check out my:
Make sure to tag me @butternutbakery on Instagram and comment below if you make these Caramel Apple Muffins. To pin this recipe and save it for later, you can use the button on the recipe card or on any of the photos above. Happy baking!
Print
BEST EVER Apple Pie
- Total Time: 4 hours
- Yield: 8-10 slices
Description
This classic apple pie recipe is your new go-to. The center is tender and flavorful and the crust is light and buttery, making each slice absolute perfection.
Ingredients
Pie Dough
- 2 1/2 cups (310g) all-purpose flour
- 3 tsp granulated sugar
- 1/4 tsp salt
- 3/4 cup (170g) unsalted butter, cold and cubed
- 5 tbsp vegetable shortening, cold and cubed
- 1/3 cup ice water
- 1 whole egg + 1 egg white for brushing
Apple Pie Filling
- 2 lb (before cutting) Granny Smith apples (4-5 apples)
- 2 lb (before cutting) Honeycrisp apples (3–4 apples)
- 1 lemon
- 1/2 cup (110g) unsalted butter
- 6 tbsp all-purpose flour
- 1/4 cup apple juices (from your sliced apples)
- 1/3 cup + 2 tbsp granulated sugar
- 1/2 cup (100g) light brown sugar, packed
- 2 tsp cinnamon
- 1/2 tsp nutmeg
- 1 tsp vanilla extract
- Raw sugar for sprinkling
Instructions
Pie Filling
- First, prepare the filling. Fill a large bowl with water and squeeze in half of your lemon. Peal your apples and place them in the water so they don’t brown.
- Once they’re all pealed, go back and slice them into 1/8 inch apple slices. Place them in a colander nested inside a large bowl and toss with the 2 tablespoons of granulated sugar and the juice of half a lemon.
- Let the apples macerate in the refrigerator while you prep and allow the pie dough to chill (a total of about 2.5 hours*). It should produce 1/4 worth of apple juice in the bowl. Toss them halfway through to make sure all of the apples have a chance to release their juices. When ready, reserve your 1/4 of apple juice for the filling then let the apples continue to macerate in the refrigerator.
Pie Dough
- Mix your flour, sugar, and salt in a large bowl.
- Add the cold and cubed butter and shortening and cut them into the flour using a pastry cutter or two forks. Press them in until you’re left with pea-sized lumps of butter.
- Mix in the ice water. I recommend filling a measuring glass with ice water and grab your 1/3 from there, avoiding the ice. Use a wooden spoon or rubber spatula to combine.
- The dough should be fairly crumbling upon first look but if you squeeze a small piece of the dough in your hand, it should hold together. If it’s still too dry, add 1 tablespoon of water at a time until you reach the right consistency. Alternatively, if it’s too wet add 1 tablespoon of flour at a time.
- Use your hands to bring the dough together, still keeping it inside the bowl.
- Split the dough in half and scoop each half onto two sheets of plastic wrap. Form both of them into disks, wrap in the plastic wrap, and refrigerate for at least 2 hours or overnight*.
Pie Filling
- Roll out your pie dough on a well-floured surface. For a 9 inch pie pan, roll it out to about 12 inches in diameter. Place it in your pie dish and allow the excess dough to hang over the edges, leaving them untouched for the time being.
- Brush the inside of the pie dough with an egg white, covering the bottom and sides. Place in the freezer and then roll out the top half of your pie dough. Slice it into strips, transfer to a cookie sheet, and place them back in the refrigerator to chill.
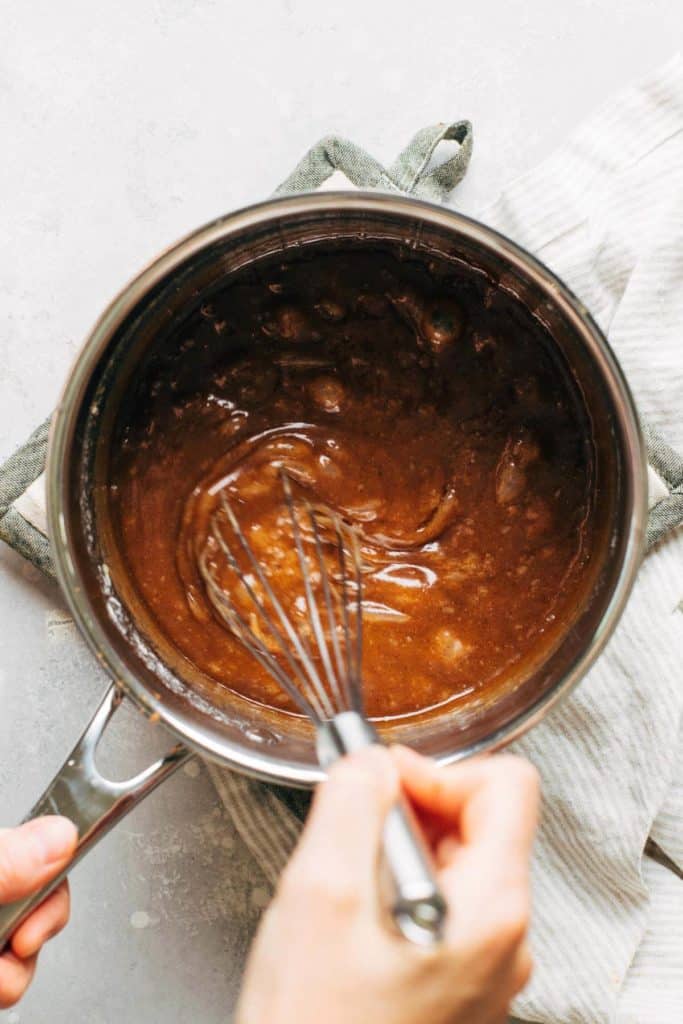
- Now work on the filling. In a medium saucepan, melt the butter over medium heat. Then mix in the flour and whisk for about 3 minutes. Add the apple juices, 1/3 cup granulated sugar, brown sugar, cinnamon, nutmeg, and vanilla and whisk together. Bring to a boil for about 1 minute and then simmer for another minute. It should reach a thin caramel consistency (see picture in post for reference).
- Remove from heat and take the apples out of the refrigerator. Transfer them to a large bowl thoroughly toss with the warm sauce. Careful as the sauce will be hot but the cold apples will help to cool it down.
- Remove your pie from the freezer and start to fill it. Don’t dump in the apples all at once. Work with about 1 cup at a time and tightly stack them into the pie so they’re nice and snug with very few gaps. You should have a slight mound of apples that’s taller than the pie dish. Pour over any remaining sauce.
- Apply a lattice top and fold the bottom crust excess over top the lattice excess, molding them together to help create a smooth crimped edge all around the outside of the pie. Place your completed pie in the freezer while you preheat the oven to 425F.
- Once preheated, take the pie out of the freezer and brush the top with an egg wash (one whole egg mixed with 1 tbsp water). Generously sprinkle with raw sugar, sanding sugar, or regular granulated sugar (about 2 tbsp). Place a large rimmed baking sheet on the lower oven rack to catch any juices that may pour out while the pie bakes.
- Bake on the middle rack for 15 minutes at 425F then drop to 350F and bake for 50-60 minutes. Check it every so often to make sure the top doesn’t brown too quickly. If it does, cover it with foil.
- It’s ready when the edges are bubbling and the crust is a deep golden brown. Let it rest at room temperature for about an hour then transfer to the fridge for at least another hour to set.
- Serve at room temperature or warm it up in a 300F oven for 15 minutes. Top with ice cream and enjoy!
Notes
TIMING – If you prefer to let the pie dough chill overnight rather than just the 2 hours, prepare your apple slices on the day you’re ready to bake the pie as the apples will not hold up well overnight. Let them macerate for at least an hour, but if that doesn’t provide you with 1/4 cup of juices you can sub with apple cider.
- Prep Time: 3 hours
- Cook Time: 1 hour
Join Our Community

Meet Jenna
I’m the creator, baker, and photographer behind Butternut Bakery. Here I share desserts for every diet because I believe everyone should have a chance to indulge!


So delicious!
I made this for my family for thanksgiving and we all agreed it was the most incredible apple pie we’ve ever had. Delicious and easy!!
Hi there, I was wondering if I can make the apple filling in advance and freeze it? If so, how long will it keep in the freezer? Thank you!
Ok the crust is PHENOMENAL, but my pie keeps turning out dry. I used 1/4 cup of apple juices, and even got bigger better apples the second time I made it. And still…the pie has no juice in it. I don’t want to give up on it because the flavor is amazing. Any suggestions?
I made this recipe for thanksgiving and I was my first time EVER making a pie! The instructions were easy to follow and the pie itself was a huge hit. Thank you for the amazing recipes!
This was hands down THE best apple pie I’ver ever had. I had a feeling it was going to be good after making the filling but man I wasn’t ready for the final product. Packed with apples, a gooey caramel-y filling, and a light flakey crust. Couldn’t ask for anything else!
one of my favorite recipes and definitely my favorite apple pie recipe. always get so many compliments!
my one question is-i know the filling should be made the day you bake and you said the dough can be chilled overnight but can i make the dough further in advance then that? would i have to freeze it? I would love to be able to prepare my dough the sunday or monday before thanksgiving and then do the filling and bake wednesday.
I made the caramel syrup twice and followed the directions carefully and each time it seized up. I gave up after tossing a two sticks of butter. Do you have any other tips or steps that you can provide? I love ALL of your recipes that I have made and was really hoping this pie could work for me. Thank you!
Best,
Bhavna
OUTRAGEOUS. Seriously delicious and perfectly. Congratulations for yet another masterpiece!