Chocolate Peanut Butter Pie
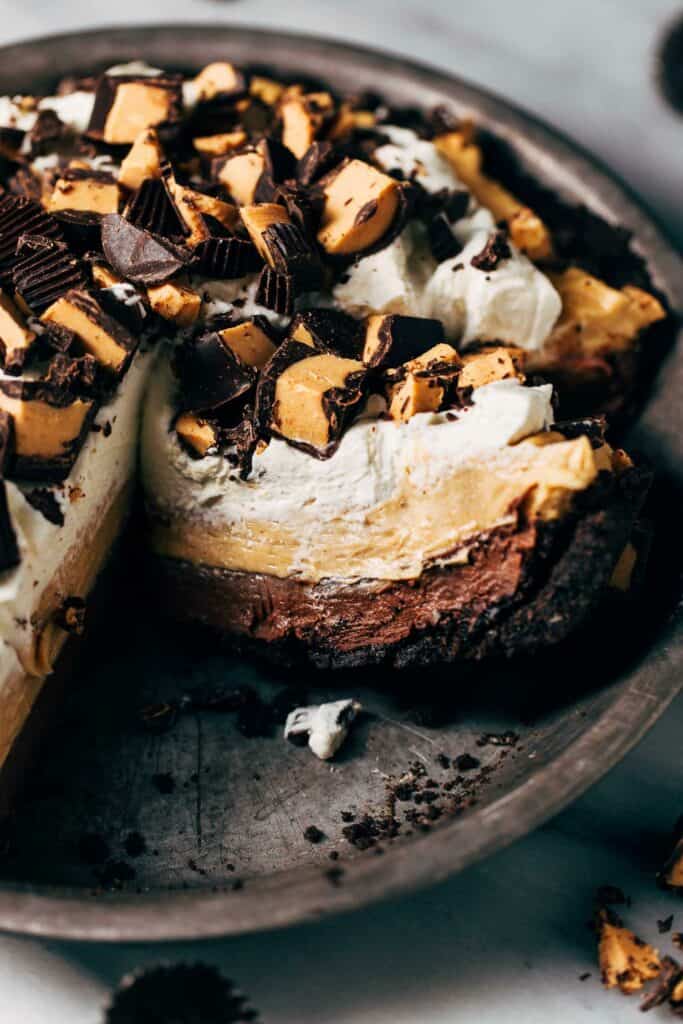
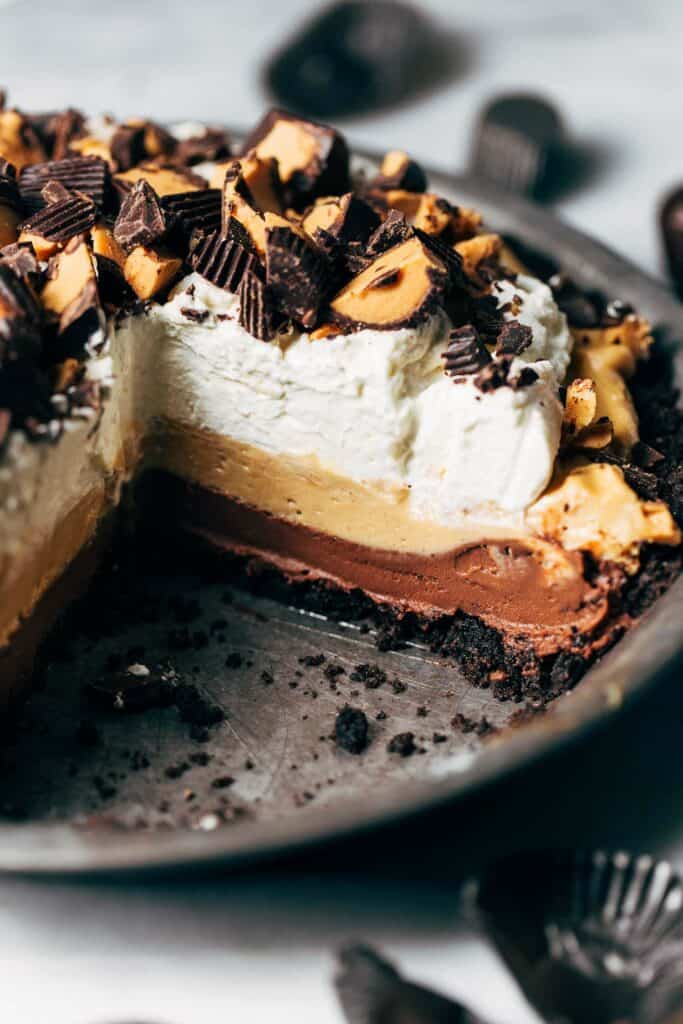
Layered with homemade chocolate pudding in a sweet Oreo crust and topped with creamy peanut butter mousse, this homemade Chocolate Peanut Butter Pie strikes the perfect balance of rich flavors and luxurious textures. Perfect for when you need a dessert that’s indulgent but not overly sweet!
It’s no secret that I love a good peanut butter dessert. From peanut butter cookies, peanut butter chocolate cake, to homemade peanut butter cups, I can’t get enough! I even sneak it into energy balls and banana muffins for breakfast.
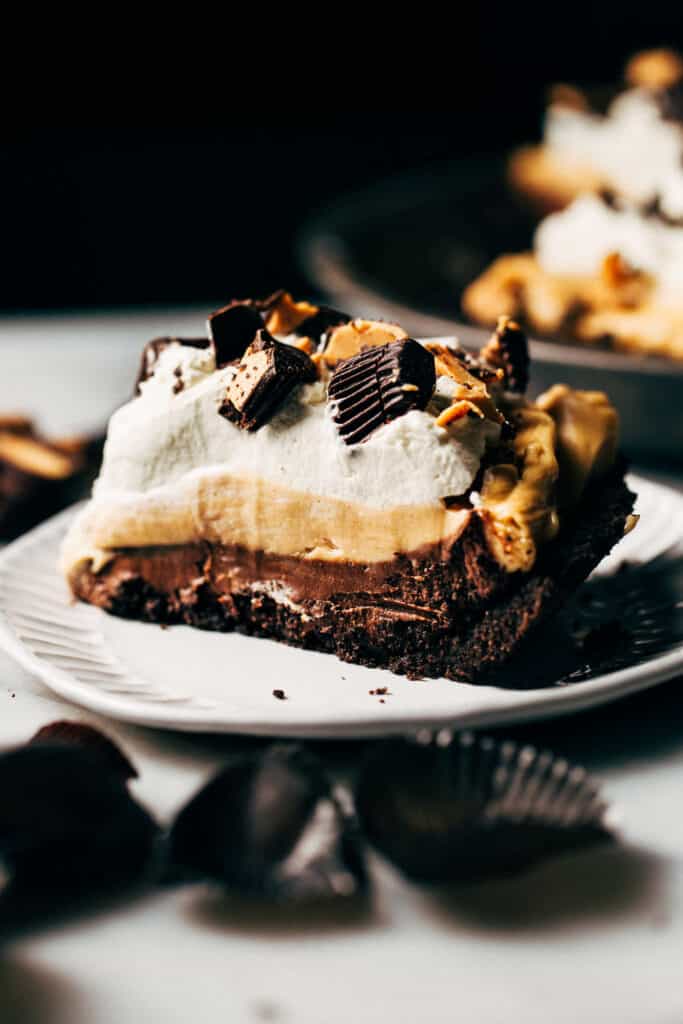
This chocolate peanut butter pie recipe is a bit more indulgent but not too much! It starts out with an Oreo pie crust as the base, adding a crunchy chocolate flavor with a hint of creamy taste. You’ll then make a homemade chocolate pudding as the first layer to add creamy chocolate decadence to each bite, followed by a layer of peanut butter mousse that is light and airy but still packed with flavor.
Balanced Flavor & Texture
Normally, peanut butter pies like this are very dense and sweet. While this recipe still has all the right elements, I’ve made some tweaks to make sure it’s not too sweet and not overly rich so it can be enjoyed anytime!
- Using dark chocolate: Instead of using milk chocolate in the pudding layer, I use unsweetened cocoa powder and chopped dark chocolate with just a touch of sugar. This allows the chocolate flavor to shine without it being overly sweet.
- Less sweet mousse: I use just ¼ cup of powdered sugar in the peanut butter mousse layer as the heavy cream, cream cheese, and peanut butter are already rich enough. This makes sure the natural flavor of peanut butter shines in each bite without it being too overpowering.
Easy Peanut Butter Mousse
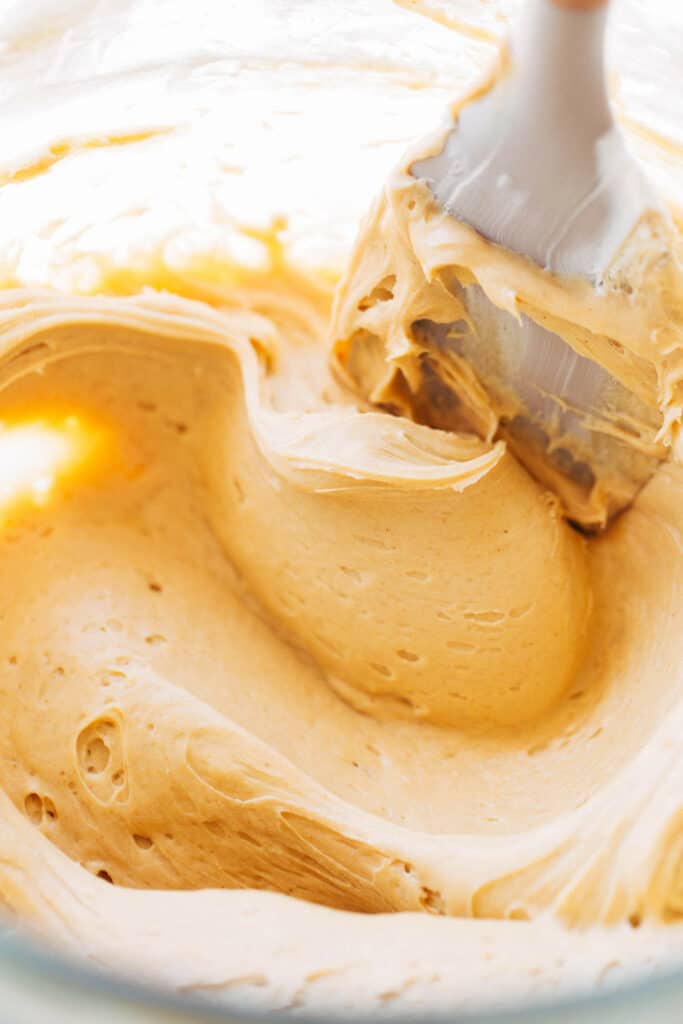
It may sound fancy, but the peanut butter mousse layer is super easy to make! It uses six simple ingredients, including cream cheese and heavy whipping cream. This gives the mousse a stiff texture with a touch of tangy flavor while the heavy cream thins it out, incorporating a bit of air and fluffiness. One of the things I love about it is that it’s NOT made with Cool Whip, which keeps a natural flavor with less junky ingredients. I could seriously eat this stuff by the spoonful!
Key Ingredient Notes
- Oreo Cookies & Butter – This simple two-ingredient crust comes together easily. The butter helps moisten the cookies, so they press together easily and set perfectly after a 15-minute bake.
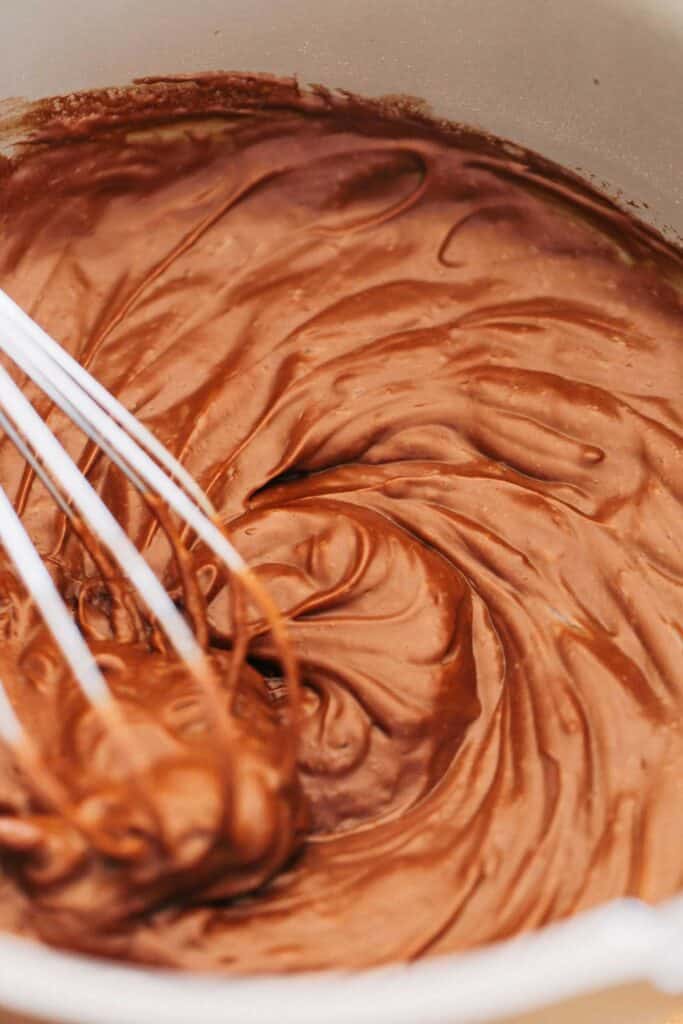
- Cornstarch – This is whisked into the chocolate pudding to give it a classic thick pudding texture.
- Cocoa & Chocolate – The pudding layer is made with REAL dark chocolate chunks and cocoa powder to let the chocolate flavor shine. Opt for high quality chocolate here, it makes a difference!
- Egg Yolks – The yolks by themselves give the pudding a creamy texture and help that layer set properly.
- Cream Cheese & Heavy Whipping Cream – This makes up the base layer of the peanut butter mousse. The cream cheese keeps things thick and stable, while the heavy cream incorporates a light and fluffy texture.
- Creamy Peanut Butter – You’ll want to use creamy peanut butter to add to the mousse to keep in line with the smooth texture. This is your standard Jif or Skippy peanut butter.
- Peanut Butter Cups – Chopped peanut butter cups get sprinkled on top of the final pie to add texture and reinforce that classic chocolate peanut butter taste!

Chocolate Peanut Butter Pie Baking Tips
Whether it’s a birthday celebration or for a special occasion, this peanut butter chocolate pie always hits the spot. Here’s everything you need to know to make sure it turns out just right:
- Process the Oreo cookies so that everything is finely ground. This will help the crust set better when baked and will create a more even texture.
- Slowly add the milk to the pudding mixture, whisking as you go to make sure there are no lumps in the pudding.
- Keep constantly whisking the pudding ingredients so the milk doesn’t burn or scorch. This takes 10 minutes of patience!
- The pudding will go from liquid to thick very quickly, so instantly remove it from the heat right as it thickens into a rich pudding consistency.
- Use room temperature cream cheese for the mousse. This will help it whip smoother and faster.
- Trickle in a small amount of heavy cream at first, then scrape down the bowl. It’s important to thin out the cream cheese before adding in all of the heavy cream.
- Be careful not to over whip the cream. This can happen very fast and very easily, so really keep an eye on it once it starts to thicken.
- Gently fold the peanut butter into the whipped cream layer so you don’t deflate the incorporated air. This keeps the mousse light and fluffy.
Customize It!
This no bake peanut butter chocolate pie is very forgiving and can be customized to your liking. Here’s a few different options to change things up a bit:
- Experiment with different types of cookies for the crust. Use different flavored Oreos (like peanut butter or double chocolate), or use gluten free Oreos to make the pie completely gluten free!
- Create a crunchy layer by chopped adding roasted peanuts in between the pudding and peanut butter mousse layer.
- Instead of peanut butter, use creamy sunflower seed butter and sunflower seed butter cups for a nut-free dessert.
- Swap the dark chocolate in the pudding with milk chocolate to bump up the sweetness.
Chocolate Peanut Butter Pie FAQs
If you don’t have a stand mixer, you can use a hand mixer instead, although it may take a bit longer to whip the cream and achieve stiff peaks.
To make this pie gluten free, use gluten free Oreo cookies for the crust and make sure that all other ingredients, such as chocolate, cream cheese, peanut butter, and peanut butter cups, are also made without gluten.
A standard 9″ pie dish works perfect. This can be glass, metal, or ceramic.
Keep the chilled pie covered in the refrigerator for up to 3 days for optimal texture. Store in an airtight container or tightly wrapped with plastic wrap to keep it fresh.
More of my favorite pie recipes:
- Double Chocolate Cream Pie
- Brownie Bottom Nutella Pie
- Fudgy Brownie Pie
- Peanut Butter Chocolate Chip Cookie Pie
- Key Lime Cookie Pie
Make sure to tag me @butternutbakery on Instagram if you make this chocolate peanut butter pie. I love seeing my recipes come to life in YOUR kitchen! To pin this recipe and save it for later, you can use the button on the recipe card, the buttons above or below this post, or on any of the photos above. And if you have any questions, ask me on Instagram! That’s the best way to reach me. Happy baking!
Watch how to make this chocolate peanut butter pie:

Chocolate Peanut Butter Pie
- Total Time: 3 hours 45 minutes
- Yield: 10 slices
Description
This chocolate peanut butter pie recipe is layered with homemade chocolate pudding, peanut butter mousse, and topped with fluffy whipped cream and a pile of peanut butter cups! The textures are so indulgent but the pie, surprisingly, isn’t overly sweet.
Ingredients
Oreo Crust
- 20 Oreo sandwich cookies, finely ground (regular or gluten free)
- 1/4 cup (55g) unsalted butter, melted
Chocolate Pudding
- 1/4 cup (50g) granulated sugar
- 2 tbsp cornstarch
- 2 tbsp unsweetened cocoa powder
- 1/2 tsp instant espresso powder (optional)
- 1/4 tsp kosher salt
- 1 cup (240g) whole milk
- 2 large egg yolks
- 3.5 oz dark chocolate, chopped (or use milk chocolate for a sweeter flavor)
- 1 tbsp unsalted butter
- 1 tsp vanilla extract
Peanut Butter Mousse
- 4 oz cream cheese, room temp
- 2 cups (480g) heavy whipping cream
- 1/4 cup (45g) powdered sugar
- 1 tsp vanilla extract
- 1 cup (250g) creamy peanut butter
- Peanut butter cups, chopped for topping (gluten free if needed)
Instructions
Oreo Crust
- Preheat the oven to 325F.
- Run the Oreos through a food processor until finely ground. Mix in the melted butter until evenly moistened.
- Pour it into a 9 inch pie dish and press it into the bottom and up the sides.
- Bake for 15 minutes.
Chocolate Pudding
- In a medium saucepan, whisk together the sugar, cornstarch, cocoa powder, espresso powder, and salt.
- Slowly whisk in the milk until smooth, then whisk in the egg yolks.
- Place over medium heat and continue to whisk until thickened. This will take about 10 minutes and it will go from liquid to thick very quickly, so keep a close eye on it once it starts to steam.
- Once thickened, remove from heat and whisk in the chopped chocolate, butter, and vanilla.
- Pour into the pie crust and spread even. Transfer the pie to the refrigerator while we make the mousse.
Peanut Butter Mousse
- In the bowl of a stand mixer using the whisk attachment (you can also use a hand mixer, it will just take some extra time and elbow grease), add the cream cheese and mix until smooth.
- With the mixer running, slowly pour in a small amount of heavy cream. Once smooth, scrape down the bowl and mix in another small amount. Once the cream cheese is thinned out, pour in the remaining heavy cream along with the powdered sugar and vanilla and whip on high speed.
- Whip until it reaches stiff peaks. Keep a close eye on it as it should reach this point within a minute or two.
- Scoop half of the whipped cream into a separate bowl.
- To the whipped cream in the large mixing bowl, add the peanut butter and use a rubber spatula to fold the two together. It will appear somewhat chunky and split at first, but just keep folding and it will smooth out into a glossy mousse.
- Pile the mousse on top of the chocolate pudding layer and spread even.
- Plop the remaining whipped cream on top and sprinkle with chopped peanut butter cups.
- Chill the pie (covered or uncovered) for at least 3 hours or overnight. Then slice and enjoy!
Notes
GLUTEN FREE – This pie can easily be made gluten free just by swapping the Oreos with gluten free Oreos. Also make sure all other ingredients are gluten free, especially the peanut butter cups.
Join Our Community

Meet Jenna
I’m the creator, baker, and photographer behind Butternut Bakery. Here I share desserts for every diet because I believe everyone should have a chance to indulge!



I liked everything but the peanut butter mousse part. The recipe itself is really good and easy to follow, but the peanut butter mixed with the cream cheese and whipped cream, I feel, altered the the flavor of the peanut butter to be kind of almost tangy for me? Don’t let this deter you from making this tho! Everyone has different tastebuds and I believe it was intended not to be too sweet. Not to mention the chocolate pudding was superb; I was just expecting the mousse to taste more like inside of a Reese’s peanut butter cup kind of peanut butter especially with the pudding being dark chocolate too, so it kind of threw me off when I tasted it initially. Someone suggested adding more powdered sugar to possibly make it a little sweeter so if I make this again perhaps I’ll try that!
I make this every year and it’s always a hit! Can this be made ahead and stored in the freezer for a few days, and then thawed in the fridge prior to serving?
Not too sweet! So delicious!
The instructions were super clear, and the outcome was absolutely delicious! I followed the recipe exactly for the first Peanut Butter Chocolate Pie, then for the second one, I swapped out the peanut butter fold-in for crushed Oreo crumbs and both versions were so good. The textures and layers of flavor were perfect for a varied crowd (aka family).
I had never made pudding from scratch before, but Jenna was spot on- right at 10 minutes (I set a timer), it thickened up almost instantly. And that whipped cream recipe with the added cream cheese was a game changer. Smooth, rich, and just the right amount of tang. I wanted to just keep eating it out of the bowl.
This one’s going into regular rotation. Thank you!!
A solid recipe! But keep in mind, the author is not kidding when she says the mousse is less sweet. I like a sweet and salty dessert, but I think the filling could use another 1/4 cup powdered sugar. I wasn’t too bothered by the mousse itself – rather, I wasn’t a fan of the whipped cream portion. The cream cheese does a great job stabilizing the whipped cream, but it also gives it a very savory flavor, especially with the minimal amount of sugar. The chocolate pudding portion is delicious, though! I could eat it all by itself.
Amazing recipe! Absolutely outstanding! Everyone loves this when I make it. Could you please give us the Potato Chip Crumble part of the recipe please? It seems to be missing. Thank you!
This recipe is AMAZING. I’ve made it twice already and it’s a new favorite. I love the real and simple ingredients.