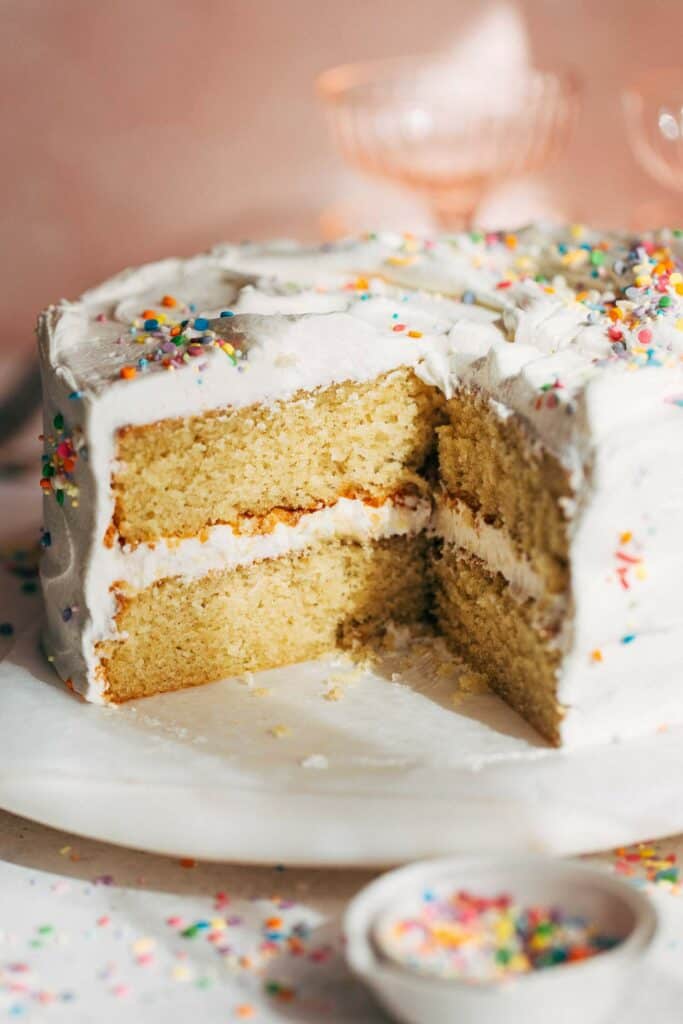
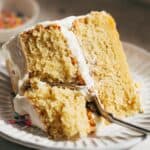
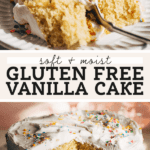
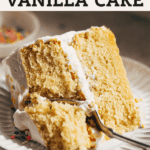
Moist Gluten Free Vanilla Cake
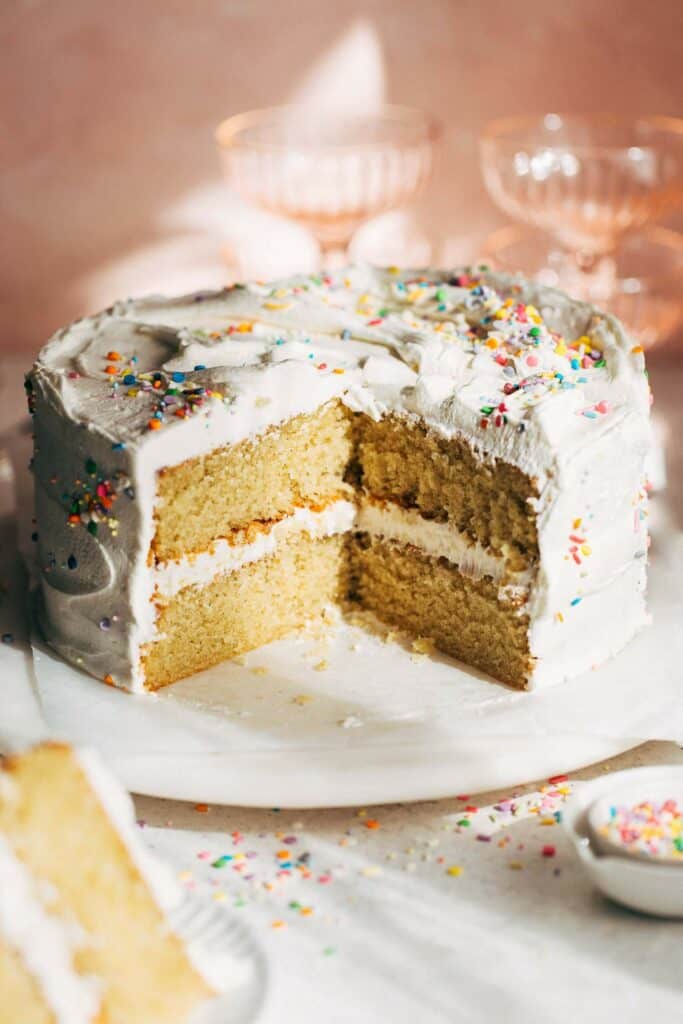
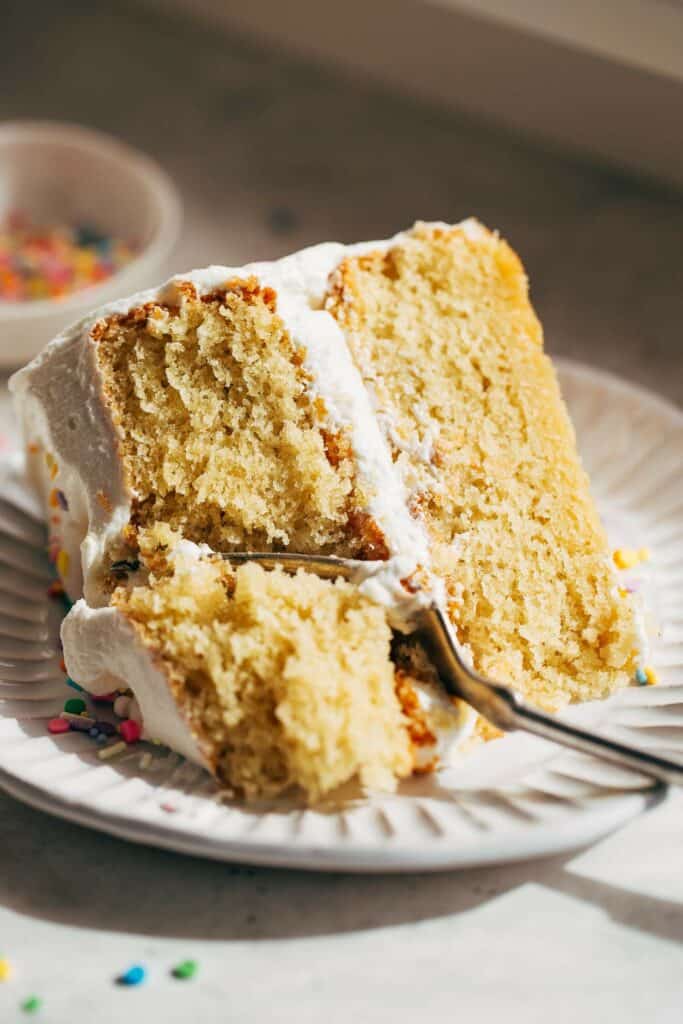
This gluten free cake is SO moist, SO soft, and SO spongy that you can’t even tell it’s gluten free! These fluffy layers of gluten free vanilla cake taste just like box cake mix (in a good way) and are completely smothered in smooth vanilla buttercream. Perfect for birthdays, celebrations, or a Tuesday afternoon.
What makes this gluten free cake recipe so good?
So my husband isn’t a very reliable taste tester because he rarely ever shows strong emotions toward food.
That being said, he tried a bite of this cake (even without the buttercream) and he said, and I quote, “Sh*t that’s good!”.
Nick’s review aside, this cake is in fact incredibly good and these are just a few reasons why:
- Texture – Gluten free flour tends to be pretty heavy, but adding cornstarch into this cake mix lightens everything up. It creates a soft and spongy consistency that feels SO similar to box cake mix.
- Moist – This cake is so so moist because it’s made with a combination of both butter and oil. Butter is there to add delicious flavor while the oil creates a very moist crumb. The right combination of the two always leads to a delicious cake!
- Flavor – A tablespoon of vanilla is mixed in to the batter to give this cake extra flavor. It’s a very vanilla cake which makes it very very good.
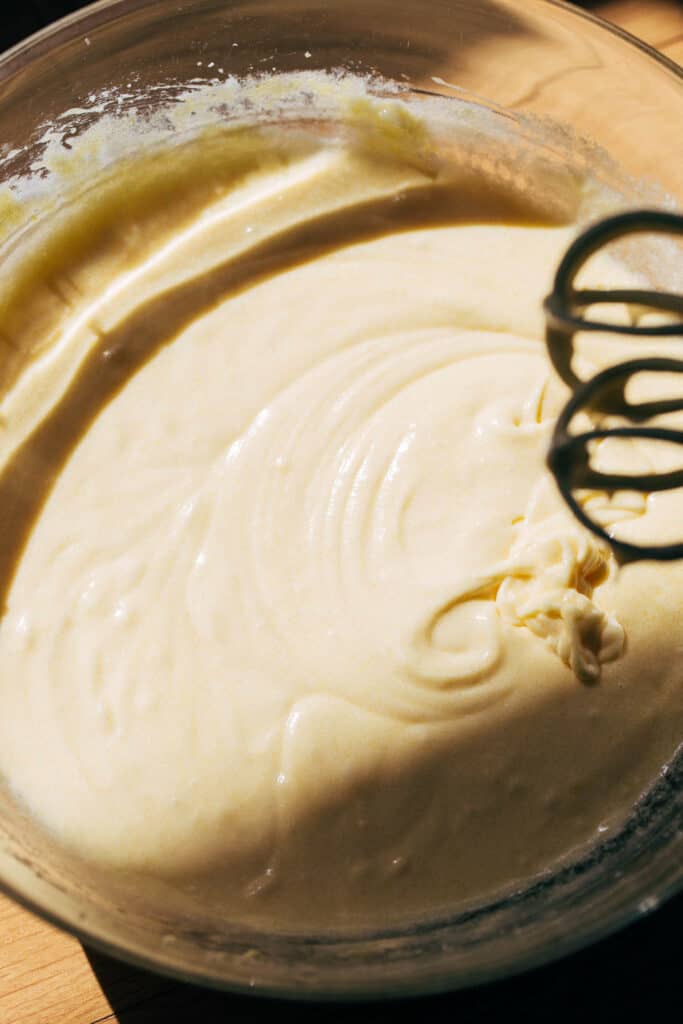
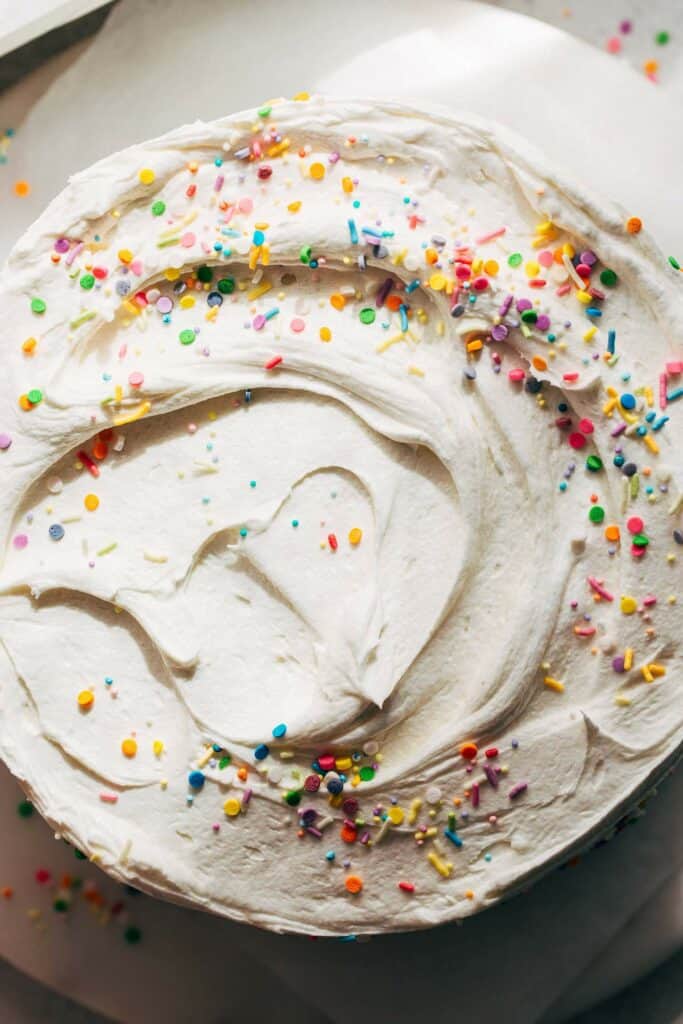
Not only do we have a delicious gluten free cake, but it’s paired with the smoothest vanilla buttercream. Using a really fun and easy trick, you will be left with the silkiest American buttercream you have ever had!
Tips for baking gluten free vanilla cake
To ensure your gluten free cake turns out pillowy soft, here’s everything you need to know:
- Butter & Sugar – When mixing the two together, give it a good 3 minutes. It’s important that the mixture is light and fluffy in order to create air bubbles. Baking powder feeds off of those bubbles to bake a more lifted cake (and gluten free cake needs all the help it can get).
- Eggs – Since a pretty decent quantity of eggs is going into this batter, it’s important that they are at room temperature. Otherwise, they can bring down the entire temperature of the batter which can lead to an uneven bake. In a pinch, let the eggs sit in a bowl of warm water for 15 minutes before use.
- Gluten Free Flour – Make sure to use a gluten free flour that is 1, intended for baking and 2, includes xanthan gum in the mix. I also highly recommend weighing the flour instead of measuring. If you don’t have a food scale, spoon the flour into the measuring cup and level it off because on the flip side, packed in cups of flour lead to dry cakes.
- Baking – To evenly distribute the batter between the two pans, it’s best to use a large scoop (like an ice cream scoop) and alternate scooping between the two pans. Then spread the batter as even as possible before baking.
- Cooling – Ensure the cakes are COMPLETELY cooled before frosting, otherwise the buttercream will melt.
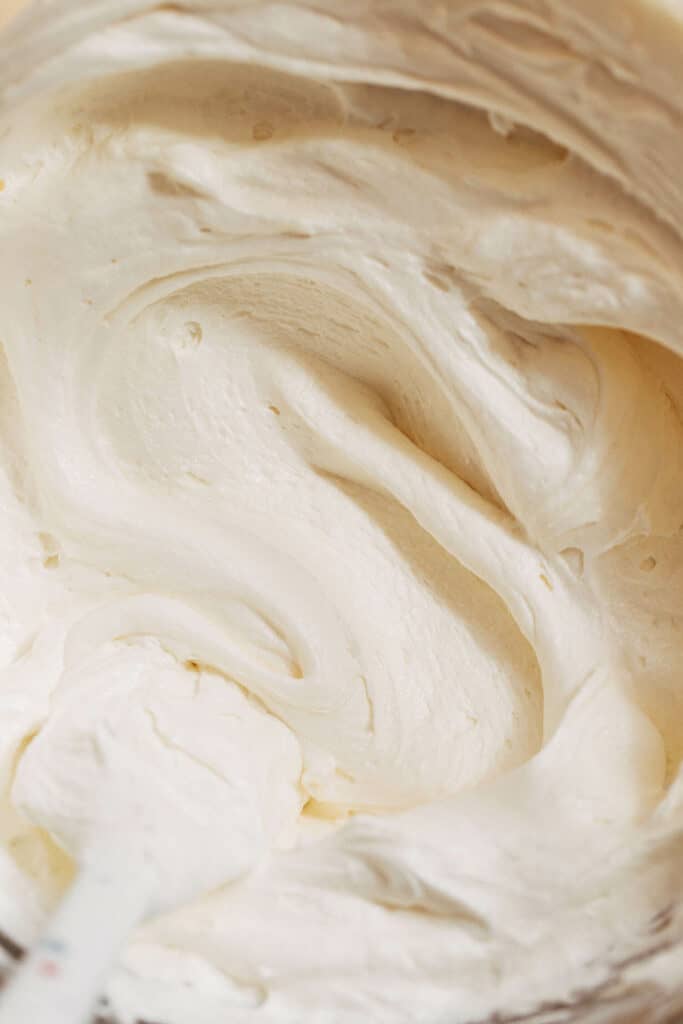
How to make smooth vanilla buttercream
If you struggle with your buttercream turning out with tiny little air bubbles all throughout, this simple tip will easily fix that!
First, add all of the ingredients to a mixing bowl fitted with the paddle attachment. This includes butter, milk, vanilla, salt, and powdered sugar. This goes against typical buttercream protocol but just trust the process.
Then mix on low speed just to combine everything. Be careful not to crank up the speed otherwise your entire kitchen will be covered in powdered sugar.
Once smooth crank up the speed to a notch below the highest setting and let it go for 10 minutes, scraping down the bowl halfway through.
This high and constant speed knocks out all of the air bubbles to leave you with an incredibly smooth vanilla buttercream.
The amount is just enough to frost the cake in a thick layer of buttercream. Alternatively, frost in a thinner layer and use the rest to pipe decorations on top of the cake.
Gluten Free Vanilla Cake FAQs
Any cup for cup baking flour will work as long as xanthan gum is in the mix. I personally use Bob’s Red Mill 1 for 1 gluten free baking flour.
Unfortunately the two aren’t a one for one swap, especially in baking. For the best results, stick with cornstarch.
If you prefer a 3 layer cake, the batter can be spread across 3 8″ pans. Just make sure to reduce the bake time by about 5 minutes as the layers will be thinner. Alternatively, it should be enough batter to spread across 3 6″ pans. The bake time should be similar to this recipe.
I haven’t tested it, but try subbing the eggs with an additional 1/2 cup of milk and 1/2 cup of unsweetened applesauce.
I have a gluten free vanilla cupcake recipe that’s just as delicious!
If you prefer chocolate frosting, try my sour cream chocolate frosting used on my gluten free chocolate cake or my fudgy chocolate frosting used on my vegan chocolate cake.
Once the cake is decorated keep it in the refrigerator, preferably in a cake container. It should keep soft and moist in the refrigerator for up to 4 days.
For more gluten free cake recipes, check out my:
- Gluten Free Chocolate Cake
- Gluten Free Vanilla Cupcakes
- Gluten Free Chocolate Cupcakes
- Gluten Free Lemon Poppy Seed Bread
- Gluten Free Banana Bread
- Gluten Free Cinnamon Rolls
Make sure to tag me @butternutbakery on Instagram and leave a review below if you make this gluten free cake recipe. To pin this recipe and save it for later, you can use the button on the recipe card, the buttons above or below this post, or on any of the photos above. Happy baking!
Watch how to make this gluten free vanilla cake:
Moist Gluten Free Vanilla Cake
- Total Time: 2 hours
- Yield: 10-12 slices
- Diet: Gluten Free
Description
This is the BEST gluten free vanilla cake! It’s so incredibly soft, moist and plush with so much vanilla flavor. So much so that it tastes JUST like regular box cake mix. To take it over the top, it’s smothered in incredibly silky smooth vanilla buttercream.
Ingredients
Gluten Free Vanilla Cake
- 1/2 cup (110g) unsalted butter, room temp (reg or plant-based)
- 1/3 cup (75g) vegetable oil
- 1 3/4 cup (350g) granulated sugar, divided
- 4 large eggs, room temp
- 1 tbsp vanilla extract
- 2 1/4 cups (300g) cup for cup gluten free baking flour*
- 1/4 cup (30g) cornstarch
- 2 tsp baking powder
- 1/2 tsp baking soda
- 1/2 tsp kosher salt
- 1 cup (240g) milk, room temp (reg or plant-based)
- 1 tbsp apple cider vinegar
Vanilla Buttercream
- 1 1/2 cups (340g) unsalted butter, room temp (reg or plant-based**)
- 2 tbsp milk, room temp (reg or plant-based)
- 1 tsp vanilla extract
- Pinch of kosher salt
- 5 cups (550g) powdered sugar, spooned and leveled***
Instructions
Gluten Free Vanilla Cake
- Preheat the oven to 350F and grease two 8″ round cake pans. Line the bottom of each with parchment paper and set aside.
- In a measuring glass, combine the milk and vinegar. Set aside.
- In a medium bowl, whisk together the gluten free flour, cornstarch, baking soda, baking powder, and salt. Set aside.
- In a large mixing bowl using a hand or stand mixer with the paddle attachment, whip together the butter with 3/4 cup of granulated sugar.
- Mix on medium high speed until light and fluffy.
- Add in the remaining 1 cup of sugar and oil and mix until smooth.
- Now mix in the eggs, two at a time, followed by the vanilla. Mix well to fully combine.
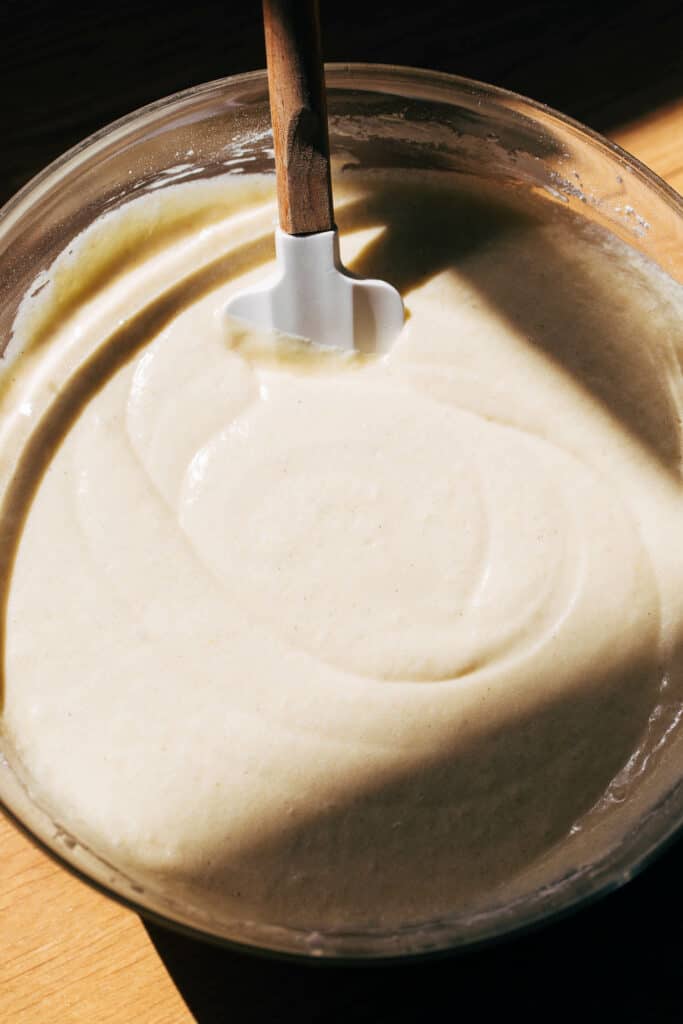
- Pour in half of the dry ingredients and mix.
- Right before it’s fully combined, mix in the milk and vinegar mixture.
- Again, right before it’s fully combined, mix in the remaining dry ingredients to create a smooth batter. It should be pretty thin and pudding-like.
- Evenly divide the batter between the two cake pans and spread even.
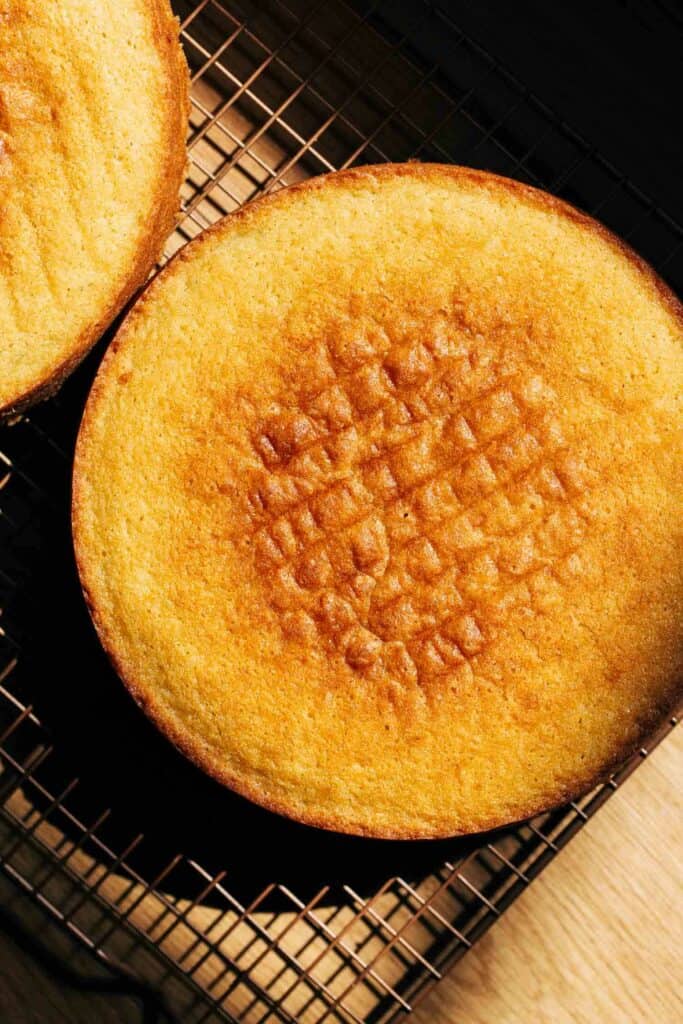
- Bake for 35-40 minutes or until a toothpick in the center comes out clean. They should be golden around the edges and right in the center.
- Allow the cakes to cool for about 10 minutes in the pan. Then run a knife along the sides, turn out onto a cooling rack, and peel back the parchment paper.
- Completely cool the cakes either at room temp or in the refrigerator before frosting. *Make-ahead: Allow the cakes to cool completely and then wrap each one in plastic wrap. The layers can be stored in the refrigerator for up to 2 days or frozen for a couple months.
Vanilla Buttercream
- In a stand mixer with the paddle attachment, add all of the ingredients.
- Run on low speed just to combine.
- Once everything is smoothed together, crank up the speed to a notch below the highest setting and let it go for 5 minutes.
- After 5 minutes, stop and scrape down the bowl. Then crank the speed back up and run for another 5 minutes.
- This 10 minutes of mixing knocks out the air bubbles to leave you with an incredibly smooth vanilla buttercream.
- To assemble, spread a layer of buttercream between the two cake layers.
- Cover the entire cake in a thin layer of frosting (crumb coat) and chill for 20 minutes. This locks in the cake crumbs so they don’t get caught in the final layer of frosting.
- Once chilled, coat the cake in the remaining frosting. It should be enough to do one thick layer or a thinner layer with enough left to pipe decorations on top.
- Finish with some sprinkles and enjoy!
Equipment
 Buy Now →
 Notes
GLUTEN FREE FLOUR – Make sure to use a gluten free baking flour that includes xanthan gum. If it doesn’t, add 1/2 tsp to the recipe. I personally used Bob’s Red Mill 1 for 1 gluten free baking flour for this recipe.
PLANT-BASED BUTTERCREAM – Plant-based butter tends to be much softer than regular butter, so I recommend making the buttercream right after the cakes bake and then both the cakes and the frosting can chill alongside each other. Chilling the frosting will help thicken the consistency.
SPOONED AND LEVELED – Make sure to spoon the sugar into a measuring cup and level it off with a flat edge. We want light and fluffy cups of powdered sugar, otherwise the buttercream will be way too sweet.
- Prep Time: 25 minutes
- Cooling Time: 1 hour
- Cook Time: 35 minutes
- Category: Dessert
- Method: Baking
- Cuisine: American
Join Our Community


Meet Jenna
I’m the creator, baker, and photographer behind Butternut Bakery. Here I share desserts for every diet because I believe everyone should have a chance to indulge!
This recipe is fantastic and easy, and it retains good texture in the fridge! I like that I can use milk and vinegar instead of purchasing buttermilk, and one stick of butter plus oil is certainly more economical than all butter. (For this first time I used Authentic Foods brand Steve’s GF Cake Flour Blend without added xanthan gum.) So far my issue with every vanilla cake recipe is that when I scale up for large batches I get a completely different product. As a bakery, do you have any tips for me before I attempt a large batch? Thank you!
I’ve made this now a few times & it’s excellent! I’d like to make a chocolate version & was wondering if you have a recommendation? I was thinking adding a cup of cocoa powder might do the trick. Thanks.
I made this to the letter of the recipe but used almond milk and Earth Balance plant based butter and it was not great. I think if you just want gluten free using real butter would prob be great but my dairy free option just didn’t work.
Hi!
Can I use this recipe for the funfetti cake? Someone on instagram said there was a GF version but I didn’t see it. So was wondering if I could use this GF vanilla cake recipe then add jimmies?? Thanks!!
I’m speechless— this is so good!! It does not taste gluten free, and the icing is heavenly! I made this as cupcakes, so just a heads up if anyone else does the same: bake it for 33-34 minutes, or else it might be a bit overdone. Thank you so much for this amazing recipe!
Hi! Could you use coconut milk and a sweet cream butter?
Our gluten free baker moved far away. So I’m going to give this a try. My daughter is gf sensitive. Can I use oat milk instead of nut milk?
Is it possible to make it a chocolate gf cake??
I am very excited to try this cake recipe. I have never made a gluten free cake before. Is this cake sturdy enough to use for a sculpted cake? Can I use shortening in place of the butter? I am going to be making the cake ahead of time will it freeze ok?
Thank you!
This recipe was incredibly delicious. The texture was amazing. I made 3 6” and had enough left over for a mini cake. It was absolutely AMAZING! The icing I loved the smoothness but it was a little gritty. I think I would have like another half cup if butter and 1 more cup of sugar. Maybe it’s just me. I will make again for sure.