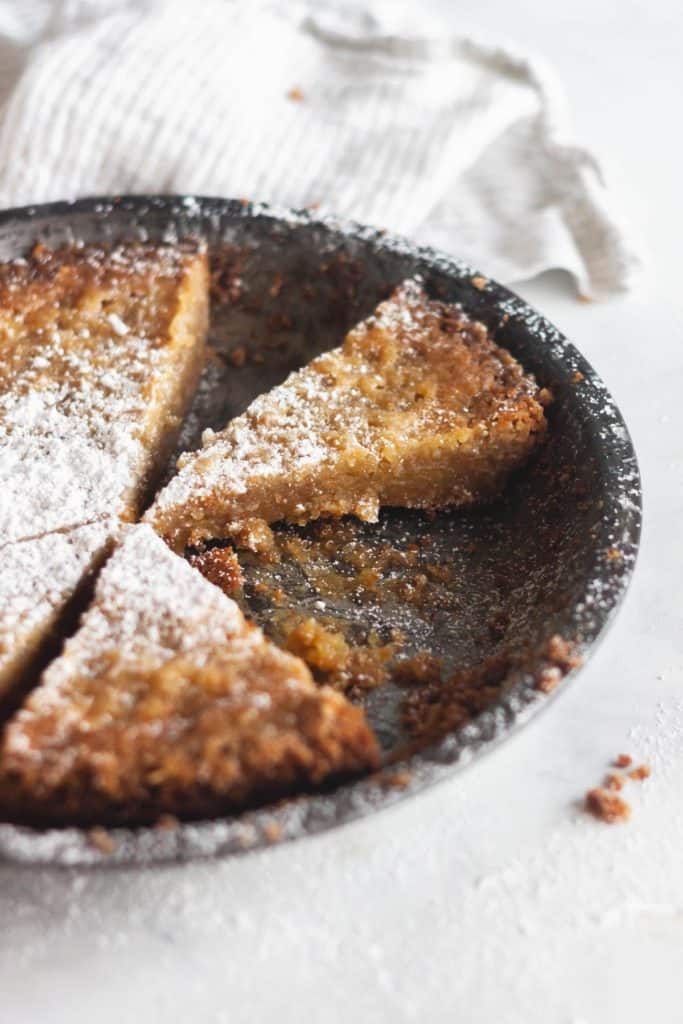
Crack Pie
I can’t get enough of Momofuku Milk Bar’s famous Crack Pie recipe from their New York Bakery. This rich and more-ish Crack Pie recipe pairs a homemade oat cookie crust with an ooey, gooey, buttery filling for a pie that really is as addictive as the name suggests!
What is the big deal about Momofuku Milk Bar’s Crack Pie?
Fun Fact: I’ve never been to New York City so I’ve never actually tried the famous Momofuku Milk Bar Crack Pie. As the name suggests, it is a super addictive pie made with a homemade oat cookie pie crust and a rich, buttery brown sugar filling.
I’ve always wanted to try it and since I’m not planning a trip there anytime soon, I figured I’d make crack pie in my own kitchen! I took the pie recipe straight from the Momofuku Milk Bar cookbook so I knew this was the real deal! Oh, and news flash, this stuff is in fact crack. It is so rich and more-ish! I could each the oat cookie crust by the fist full.
What does crack pie taste like?
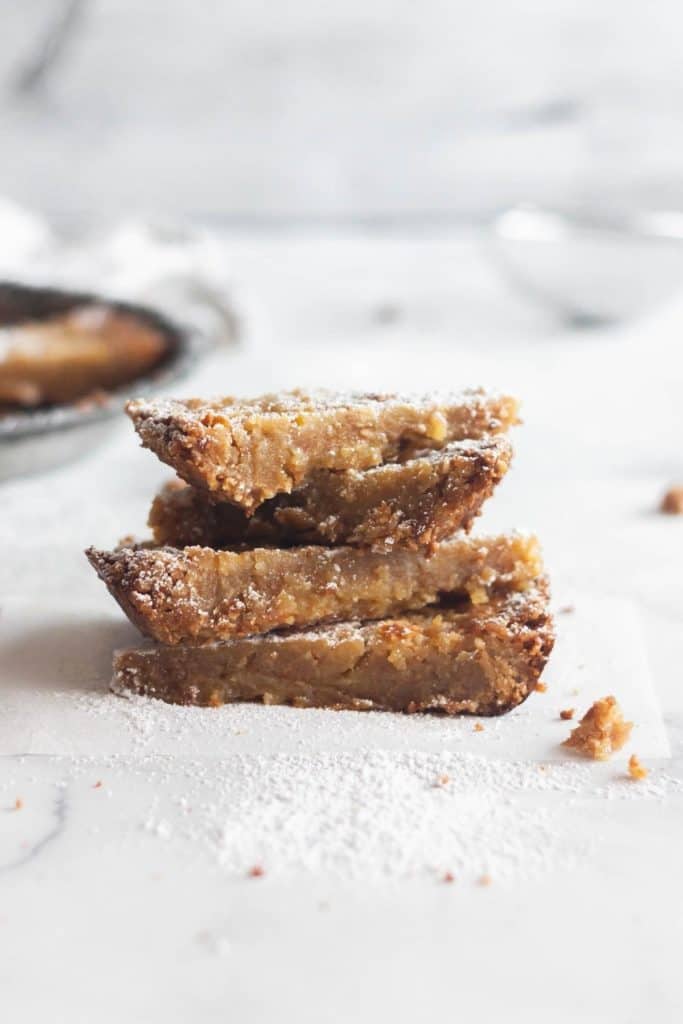
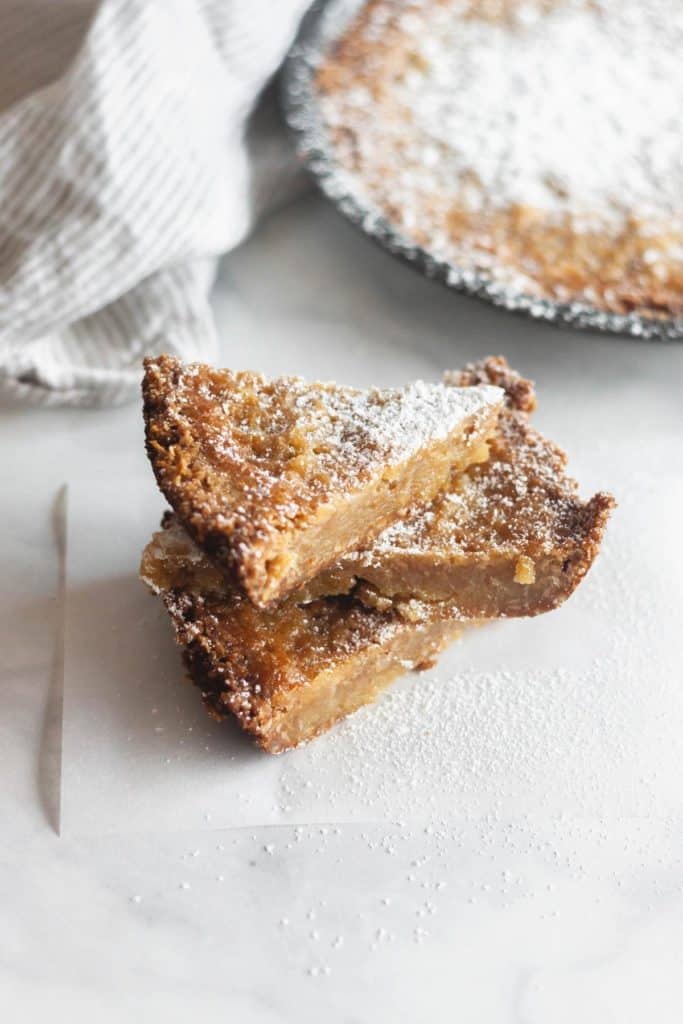
Now, to describe the taste is like trying to describe the taste of water. It’s just good and I need it. Considering the amount of egg yolks that go into the filling, I’d say its like a rich and thick custard. It’s gooey, it’s dense, it’s sweet, aaaaaand it’s addictive. This crack pie definitely lives up to its name! My favorite part is those bites closest to the crust. You get that ooey gooey center with the thick and thewy oat crust. Ugh, so good!
What size pie dish do I need?
I’ve been waiting to bake this pie ever since my mom gifted me the Momofuku Milk Bar baking book. This recipe calls for two 10-inch pies and I thought about splitting the recipe in half but nope. The more pie, the better. Bring it on.
The only issue is that I had an 8-inch pan and a 12-inch pan so I just had to make it work. I baked the larger pie for a couple minutes longer and they turned out the exact same. You can also use those disposal tin pie pans you can find at the grocery store if you’re short on pans.
Can I substitute the corn powder in the recipe?
I always plan out my blog content in advance. It not only saves time but it allows me to get all my ingredients at the grocery store in one go. When I looked at the ingredients, I somehow skipped over the corn powder. I was in the middle of making the filling (at 10pm on a weeknight) when I saw the one ingredient that I missed. So naturally, I start to panic. I’ve got the ingredients already mixed in the bowl I can’t leave to go to the grocery store!
Once that passed I thought…what the heck is corn powder?? Through a frantic Google search, I realized it’s pretty tough to find in stores unless you can get freeze dried corn (like, what?)
Since it was already late and I had no idea where I’d find it, I grabbed the only corn product I had – cornstarch.
I later purchased corn powder online to make a TRUE crack pie and it really does help bring a unique flavor to this recipe. But the cornstarch version turned out just fine. If you’re in in a real pinch, cornstarch WILL work but I definitely recommend planning ahead and purchasing the corn powder online!
How do I make the Oat Cookie Crust?
In true Christina Tosi fashion, some of the ingredients are a recipe in and of itself. For the crust, you basically bake a big oat cookie so you can crumble it up later. I mean that on it’s own is so so good. It’s chewy and sweet and everything you want in an oat cookie. I want to use it for every pie recipe from here on out! (And, I’ve started making just the cookies with a little of that addictive butter filling on top!)
For more delicious pie recipes, check out my:
- Cinnamon Sugar Butter Pie (with a Pecan Crust!)
- Best Pretzel Pecan Pie
- Apple Butter Crusted Pie (with Cinnamon Sugar)
- Turtle Brownie Pie (with Homemade Caramel!)
- Oreo Crust Chocolate Peanut Butter Pie (No Cream Cheese Recipe)
Make sure to tag me @butternutbakery on Instagram and leave a review below if you make this Crack Pie. Make sure to pin this recipe for later so you can make it for the Holidays! You can pin it using the button on the recipe card, above or below this post, or on any of the photos. Happy baking!
Print
Crack Pie
- Total Time: 1 hour 15 minutes
- Yield: 2 pies
Description
This is THE Momofuku Milk Bar Crack Pie recipe. With a thick and gooey center and homemade oat cookie crust, this is a pie like no other and is sure to get you hooked.
Ingredients
Oat Cookie (for the crust)
- 1/2 cup (110g) unsalted butter, room temp
- 1/3 cup (65g) light brown sugar, packed
- 3 tbsp granulated sugar
- 1 large egg yolk
- 1/2 cup (68g) all-purpose flour
- 1 1/2 cups (140g) old-fashioned rolled oats
- 1/8 tsp baking powder
- 1/16 tsp baking soda (just a pinch)
- 1/2 tsp kosher salt
Crust
- 1 Oat Cookie Recipe (seen above)
- 1 tbsp light brown sugar, packed
- 1/4 tsp kosher salt
- 4 tbsp unsalted butter, melted
Crack Pie Filling
- 1 1/2 cups (300g) granulated sugar
- 3/4 cup (150g) light brown sugar, packed
- 1/4 cup (35g) milk powder
- 1/4 cup (35g) corn powder*
- 1 1/2 tsp kosher salt
- 1 cup (220g) unsalted butter, melted
- 3/4 cup (180ml) heavy cream
- 1/2 tsp vanilla extract
- 8 large egg yolks**
Instructions
Oat Cookie
- Preheat the oven to 350F and line a large cookie sheet with parchment paper.
- Using a hand or stand mixer with the paddle attachment, mix together the butter and sugars. Mix on medium-high speed for 2-3 minutes until fluffy and pale.
- Scrape down the sides of the bowl and mix in the egg yolk on low speed. Increase to medium-high and beat for 1-2 minutes or until the sugar is fully dissolved and the mixture is pale yellow.
- On low speed, add in the flour, oats, baking powder, baking soda, and salt. Mix until it just comes together.
- As best as you can, spread the dough in an even layer on the parchment paper. It should be about 1/4 inch thick. I struggled with this a bit but found that if I applied pressure in small and short strokes (with a rubber spatula) that I was able to slowly spread it even. It won’t cover the entire pan. It’ll just look like a big cookie blob.
- Bake for 15 minutes or until it has golden brown edges and a dull top. Cool completely before using. If you’re making it ahead, you can crumble it up into an air-tight container and store in the fridge. It will keep up to 1 week.
Crust
- After the cookie has cooled, crumble it up into a food processor along with the brown sugar and salt. Pulse until it resembles wet sand. In Christina’s recipe, she says that if you don’t have a food processor, to “fake it till you make it and crumble the oat cookie diligently with your hands.”
- Transfer the crumbs to a bowl and add the melted butter. I mixed it lightly with a fork then got my hands in there to fully incorporate it. It should be wet enough to where it can form a ball. If it doesn’t, add 1 to 1 1/2 tablespoons of butter at a time until you get there. I had to add a whole extra 1 1/2 tablespoons to get mine to the right consistency.
- Evenly divide the oat crust between two 10-inch pie pans (Christina uses disposable aluminum pans you can find at the grocery store). Press in firmly to make sure the bottom and edges are covered. Use the crusts immediately or wrap well in plastic wrap and store in the fridge for up to 2 weeks.
Filling
- Preheat the oven to 350F and have the room temperature oat cookie crusts ready.
- For this part, Christina says you MUST use a stand mixer with a paddle attachment for this. It makes all the difference in creating that smooth and silky filling. But I think if you’re careful, a hand mixer can do the job. Just take it slooooowww. Be careful to not whip ANY air into this pie.
- Combine the sugar, brown sugar, milk powder, corn powder, and salt in the bowl of the stand mixer. Mix on low to evenly blend.
- Add in the melted butter and mix on low for 2-3 minutes until the dry ingredients are moist.
- Add in the heavy cream and vanilla and continue to mix on low for 2-3 minutes until white streaks from the cream have completely disappeared. Scrape down the bowl.
- Add in the egg yolks a couple at a time, mixing on low until it’s just combined. It should be glossy and smooth.
- Evenly divide the filling into the two pie crusts. They should be 3/4 of the way full. Bake for 15 minutes then open the oven door and reduce your temperature to 325F. When your oven reaches that temperature, close the door and bake the pies for another 5 minutes. They should be a little jiggly in the very center of the pie but not on the edges. If they’re still too jiggly, leave them in for an additional 5 minutes.
- Take the pies out of the oven and transfer to a cooking rack. Then freeze your pies for at least 3 hours or overnight. This is what gives you that dense center. Transfer to the refrigerator to thaw for at least 1 hour before serving. Serve cold.
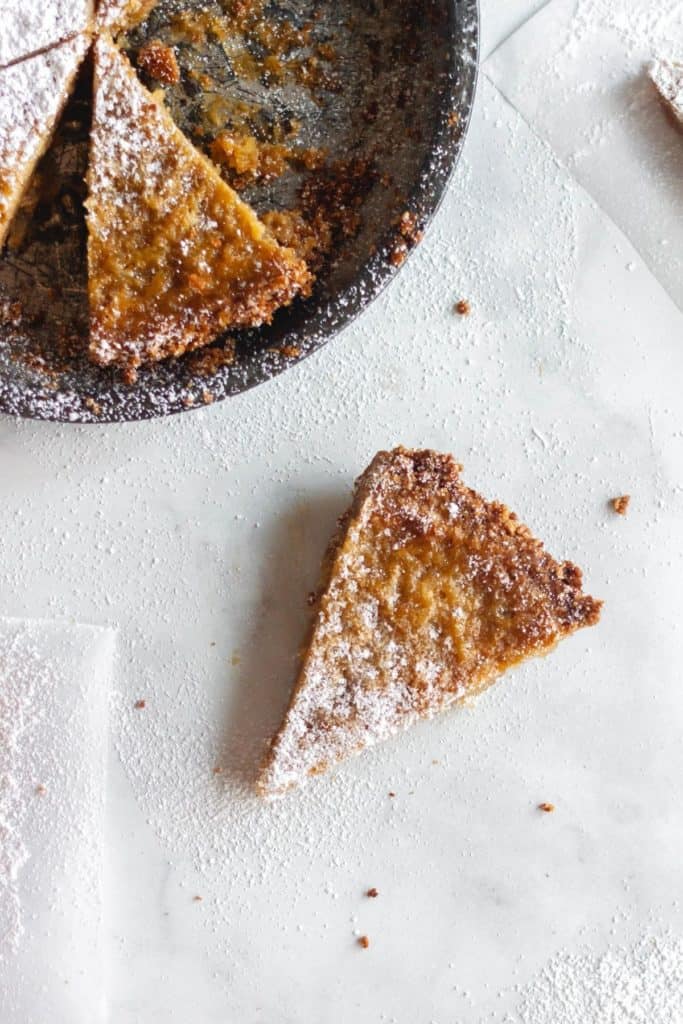
- Dust powdered sugar all over the top. Now welcome to heaven as you enjoy your first bite!
Notes
*CORN POWDER – This is not something you can find in grocery stores so definitely order online ahead of time! Although I have made this before with cornstarch instead of corn powder and it worked out, it just didn’t have that signature sweet corn flavor and it had a stickier consistency.
**EGG YOLKS – Quickly separate your eggs by cracking your whole eggs into one bowl, carefully scooping out the yolks one-by-one with your hands, then transferring those to another bowl.
- Prep Time: 40 minutes
- Cook Time: 35 minutes
- Category: Dessert
- Method: Baking
- Cuisine: American
Join Our Community


Meet Jenna
I’m the creator, baker, and photographer behind Butternut Bakery. Here I share desserts for every diet because I believe everyone should have a chance to indulge!


I did not love this pie and I don’t understand the appeal. I found it overly sweet and one-note, and I have a hefty sweet tooth. I have made another of Christina Tosi’s recipes and was similarly unimpressed, so I think it’s a sign I should just avoid Milk Bar recipes.
I wasn’t sure what to expect with this recipe, but it looked intriguing and def looks like something I’d be into, so I gave it a whirl. I was a bit underwhelmed for my first few bites, but I checked the dish and half of one is already gone so… ya, its good.
For as many steps as this requires, it is a pretty easy recipe. My main complaints are that it’s time consuming and uses a good amount of dishes. Next time I will most likely cut the recipe in half by making the whole cookie for the crust, but only using half and halve the rest of the ingredients to avoid cutting an egg yolk in half. I dont think we’ll have any problem using up the rest of the cookie 🙂
Lastly, I baked mine in two 7″x11″baking dishes because I dont have two pie dishes. Seemed to work out fine but maybe a tiny bit thinner. Mine also turned out a lot yellower than the photos. Also took quite a bit longer to bake – probably could have done 20 mins at the higher temp and 10 mins at the lower temp.
Thanks again for your very detailed recipes and posts – suuupppper helpful!
Can I ask why this recipe yields 2 pies? Can I half it and just make one?
Can cinnamon be added?