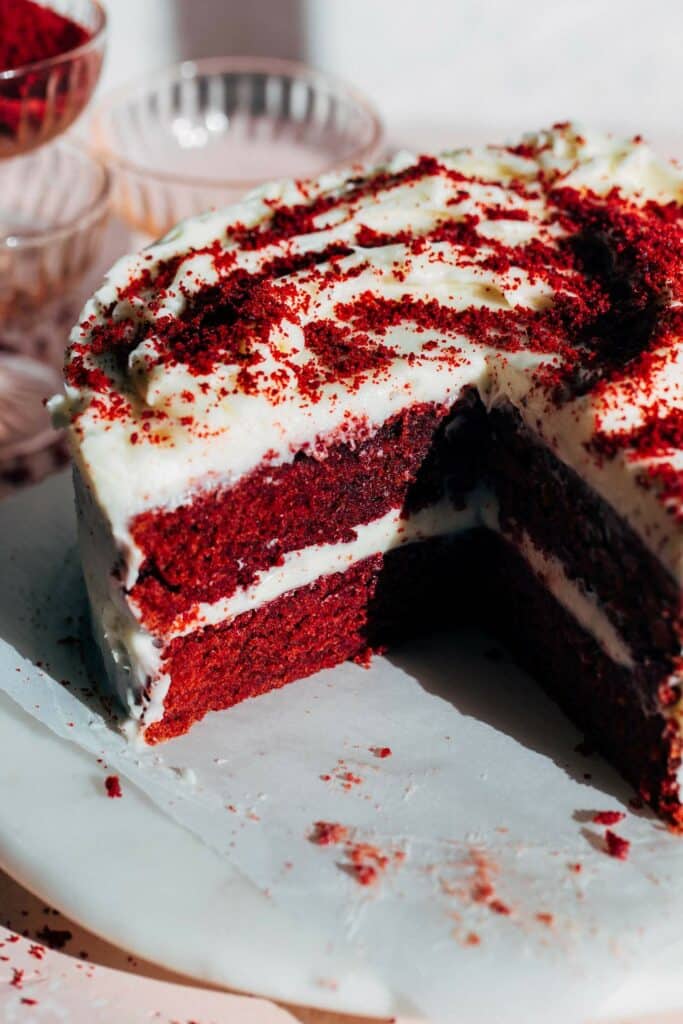
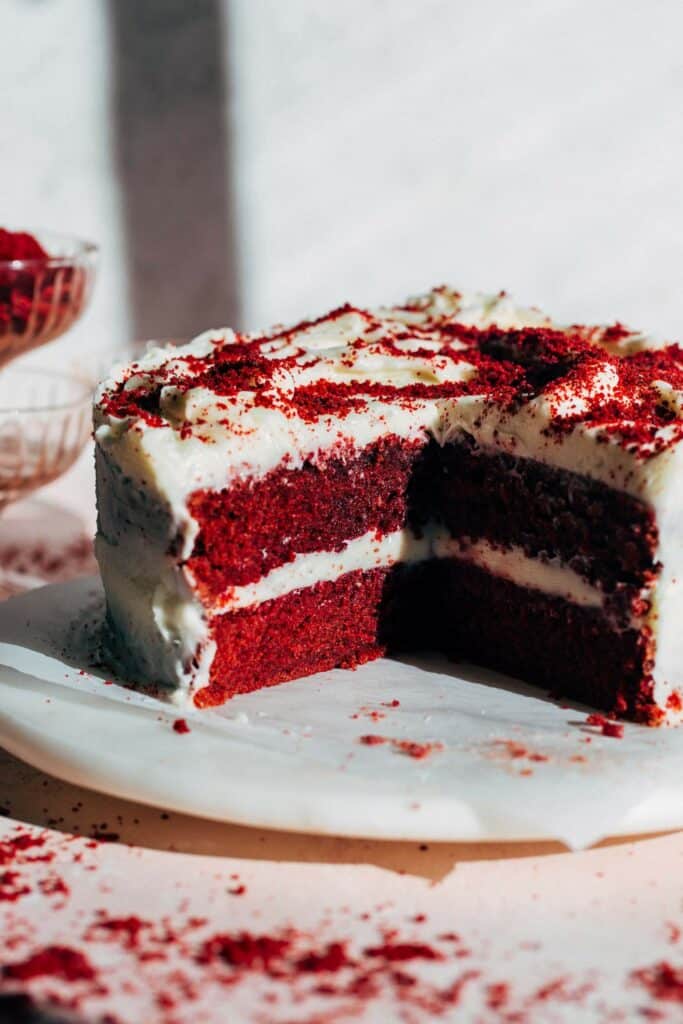
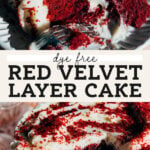
Natural Red Velvet Cake
Experience dye-free baking with this Natural Red Velvet Cake recipe! This cake uses the vibrant color of raw beets and is made without a drop of food dye in sight! Perfect for health-conscious dessert lovers, it’s a moist, flavorful treat that’s free of any beet taste.
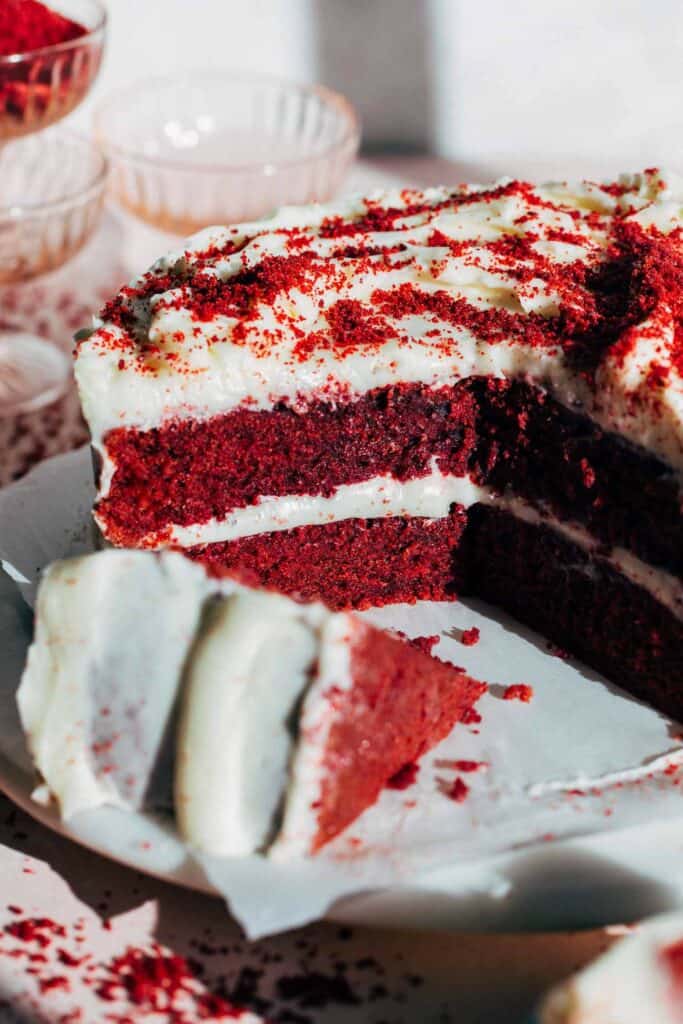
During the holidays, my sister shared her plan to remove food dye from my niece and nephew’s diet for health reasons. This got me thinking about red velvet cake! This special cake is typically made with a mix of cocoa powder and has a slightly acidic taste from ingredients like buttermilk or vinegar. Its vibrant red color usually comes from red food dye, which is known to be somewhat problematic. So I took on the challenge to create a naturally red, dye-free version of this classic cake along with a tangy and sweet cream cheese frosting.
Red Velvet Cake With Beets
Using naturally sweet beet puree is a fantastic healthy alternative to food dye that adds a vibrant red color to the cake. I’ve tested this many times and found the secret to making it work. The bright color comes from an acidic batter. Acid allows raw beets to retain their bright color, so the extra vinegar and omission of baking soda (as this neutralizes acid) create the perfect environment for this bright red cake.
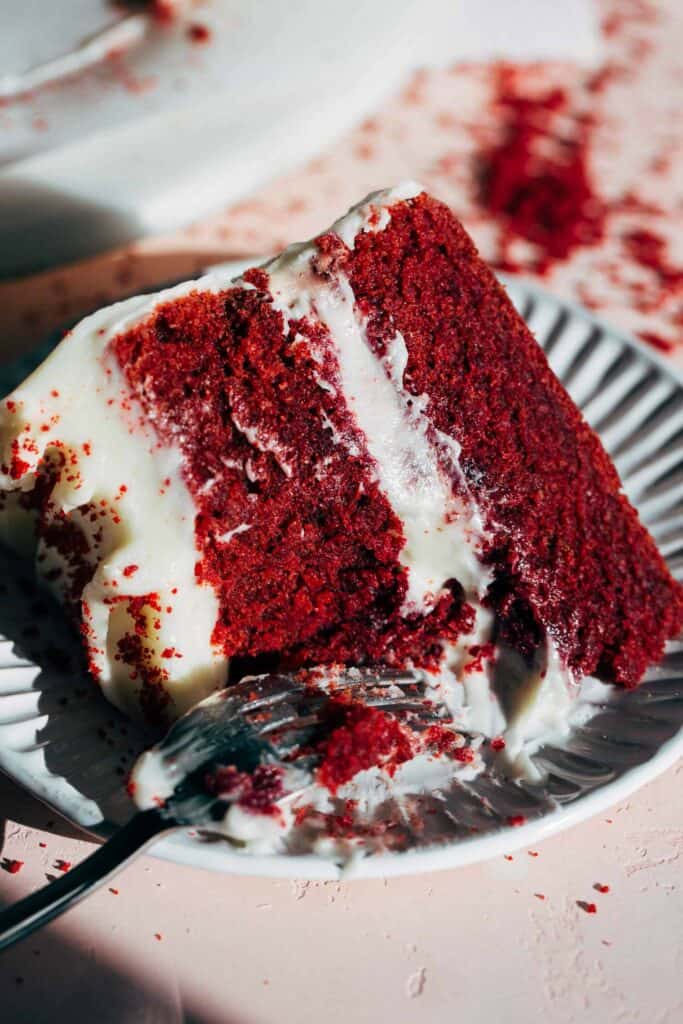
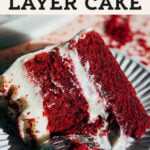
My husband hates beets, so I had him blind taste test this cake, and he had absolutely no idea it contained beets. He just thought it was a really good cake! This use of beets not only eliminates the need for artificial food coloring but also gives the cake its classic red velvet color, making it both healthy and delicious.
Using Milk Powder
Another unique feature of this no dye red velvet cake recipe is the addition of milk powder. Milk powder is an optional ingredient that enhances the cake’s stability, preventing it from sinking while baking. It’s a dry form of milk with moisture removed, and when added to the batter, it contributes to the cake’s structure and texture. I also use it in my brown butter brownies and vanilla cupcakes, which give them the perfect texture and flavor!

Red Velvet Cake Key Ingredients
- Cornstarch – Enhances the cake’s stability, preventing it from sinking during baking, and contributes to a moist and tender crumb.
- Unsweetened Cocoa Powder – Adds subtle chocolate flavor to the red velvet cake, contributing to its classic taste.
- Milk Powder – Though optional, this ingredient enhances the cake’s stability, preventing it from sinking during baking.
- Apple Cider Vinegar – Provides acidity to the batter, which, when combined with the beet puree, helps maintain the cake’s vibrant red color.
- Whole Milk – Adds richness and moisture to the cake, contributing to its tender and velvety texture.
- Beet Puree & Lemon Juice – Combined, they act as a natural food coloring agent in this recipe, giving the cake its distinct red hue without adding any beet flavor. The beets also add tons of moisture – like carrot cake but instead of carrots, it’s beets!
- Full Fat Cream Cheese – This is the primary ingredient in the creamy frosting, lending a rich and tangy flavor that complements the sweetness of the cake, creating the classic cream cheese frosting that pairs perfectly with red velvet cake.
How To Make Red Velvet Cake Without Food Dye
This natural red velvet cake gets all of its color from fresh beets. It’s an unexpected ingredient, but one that allows this cake to turn vibrant red. So much so that no one would ever notice it’s dye-free!
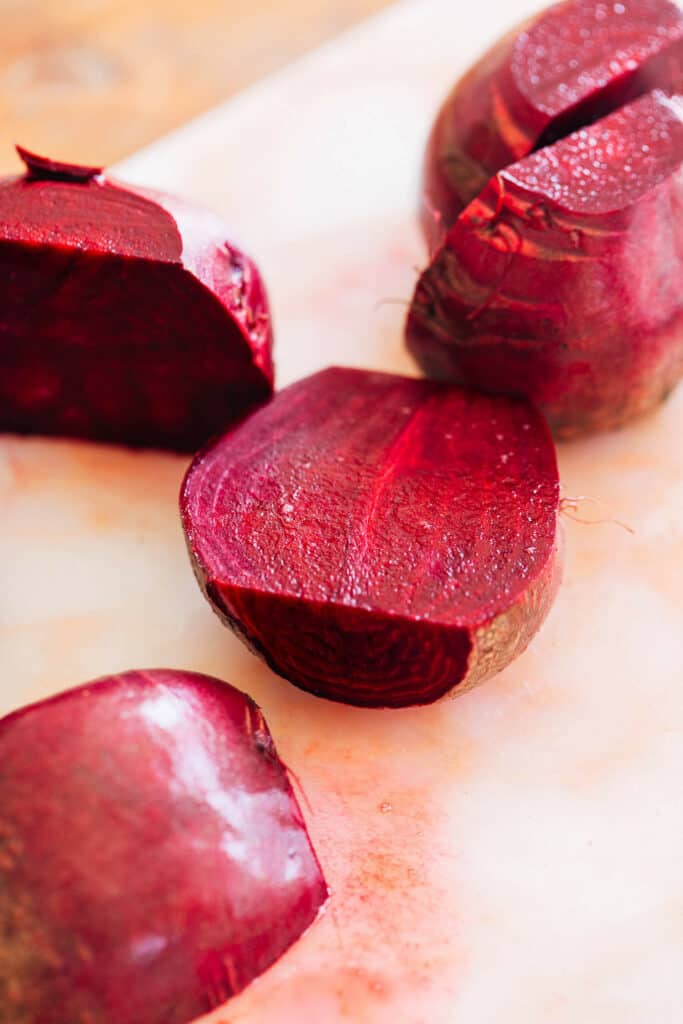
To prepare the beets:
Cut off the stems of the beets and rinse under cold water. Slice in half and place into a pot. Add water that covers a few inches over the beets, then stir in the lemon juice. Bring to a boil, then down to a simmer for 30-35 minutes or until the beets are fully cooked through and fork tender.
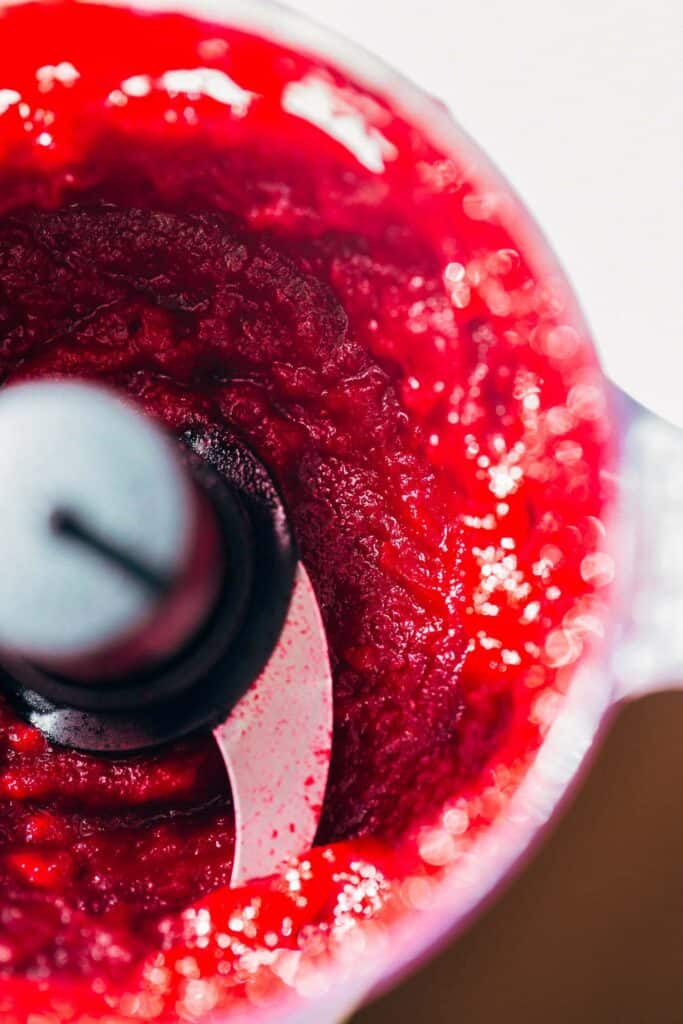
Remove the beets from the water (reserving the water) and place them on a cutting board. Scrape off the skins and transfer to a food processor along with ¼ cup of reserved water. Process until the beets reach the consistency of applesauce, making sure there are no large clumps of beets. Pour into a measuring cup to ensure you have one cup of puree, adding a few tablespoons of reserved water if you come up a bit short.
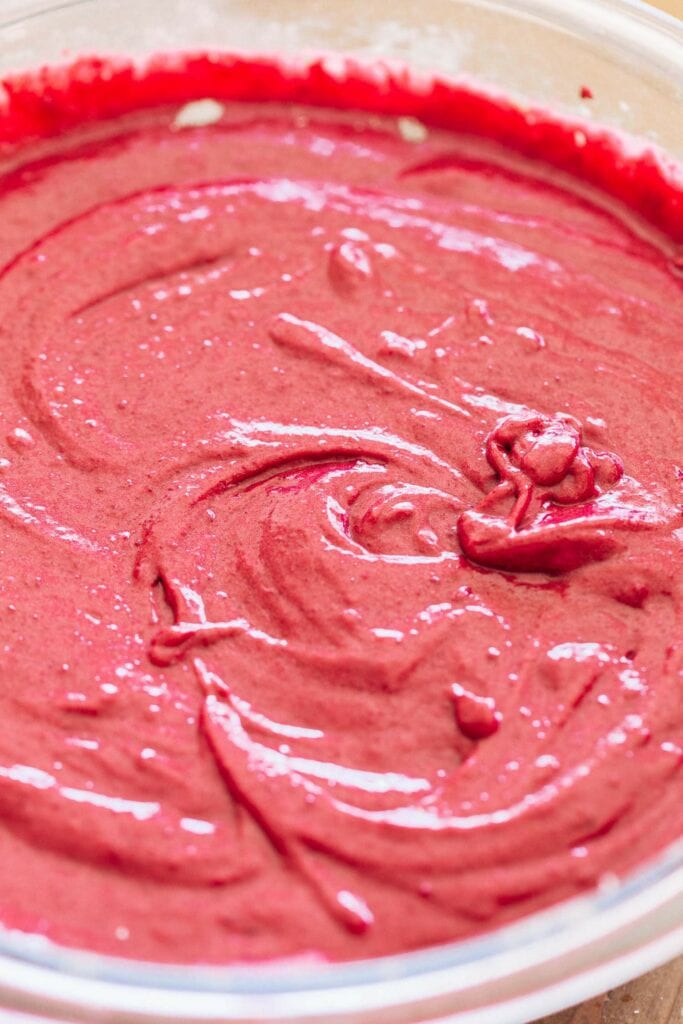
Once blended, the puree is mixed into the batter. The cake batter may look a bit more maroon with a purple hue, but the cake will turn bright red once baked.
Natural Red Velvet Cake FAQ’s
I don’t suggest this as the red color in this cake is dependent on a very delicate balance of acidity. Canned beets typically contain a preservative that can alter the color of this cake.
Yes, you can make the cake layers in advance and chill them overnight in the refrigerator, wrapped in plastic wrap. Frost the cake when you’re ready to serve for the best results.
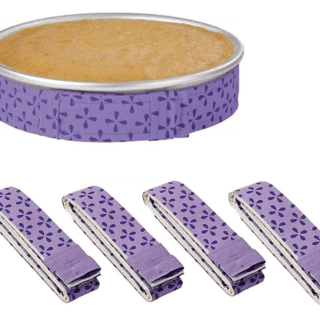
Cake strips are special fabric bands that, when dampened with water and wrapped around cake pans, help cakes bake evenly, preventing domed tops and excess browning at the edges. I’ve linked my favorite cake strips at the bottom of the recipe card below.
The best type of milk powder to use for stabilizing a cake is non-fat milk powder. Non-fat milk powder is low in moisture and helps improve the cake’s structure and texture without adding additional fat or flavor.
Unfortunately it’s not an easy swap as I’ve had to adjust the batter to make up for the extra moisture from the beets. I would need to make an entirely different recipe that would accommodate red dye so let me know if you’d like to see that!
Store the cake in a cake container in the refrigerator for up to 5 days. It’s okay to keep it at room temperature for about an hour, but the frosting will soften if left out too long.
To freeze, wrap the cake tightly in plastic wrap or aluminum foil, ensuring it’s airtight, and place it in an airtight container. Freeze for up to three months. To thaw, transfer it to the refrigerator for several hours or overnight before serving.
For more moist cake recipes, check out my:
- Moist Chocolate Cake
- Perfect Carrot Cake
- Funfetti Cake
- Natural Strawberry Cake
- Lemon Raspberry Cake
- Small Vanilla Cake
Make sure to tag me @butternutbakery on Instagram if you make this natural red velvet cake. I love seeing my recipes come to life in YOUR kitchen! To pin this recipe and save it for later, you can use the button on the recipe card, the buttons above or below this post, or on any of the photos above. Happy baking!
Watch how to make this natural red velvet cake:

Natural Red Velvet Cake
- Total Time: 3 hours 5 minutes
- Yield: 10-12 slices
Description
This moist and vibrant red velvet cake is made completely dye free! It gets its natural color all from fresh beets. They’re pureed and mixed into the batter to create that beautiful red velvet color WITHOUT the artificial dye. Most importantly, you cannot taste the beets one bit!
Ingredients
Red Velvet Cake
- 3 fresh beets (don’t use pre-packaged)
- 1 tbsp fresh lemon juice
- 1/2 cup (120g) whole milk
- 1 1/2 tbsp apple cider vinegar
- 2 1/4 cups (290g) all-purpose flour, spooned and leveled
- 1/4 cup (30g) cornstarch
- 3 tbsp unsweetened cocoa powder (do not use dutch-process cocoa)
- 1 tbsp dry nonfat milk powder
- 1 1/2 tsp baking powder
- 1/2 tsp kosher salt
- 1/2 cup (112g) unsalted butter, room temp
- 2 cups (400g) granulated sugar, divided
- 1/2 cup (108g) canola or vegetable oil
- 3 large eggs
- 2 tsp vanilla extract
Cream Cheese Frosting
- 1 cup (224g) unsalted butter, room temp
- 5 cups (550g) powdered sugar, spooned and leveled
- 1/2 tsp vanilla extract
- 12 oz full fat cream cheese, room temp
Instructions
Beet Puree
- First, make the beet puree. Cut off the stems and rinse the beets.
- Slice the beets in half and place into a pot. Fill the pot to where the water reaches a couple inches over the beets. Stir in the lemon juice.
- Bring to a boil then reduce to a simmer. Simmer for 30-35 minutes or until the beets are fork tender.
- Place the warm beets onto a cutting board or plate (reserve the water they were boiled in). Gently scrape away the skins with a fork and transfer the beets to a food processor.
- Add in 1/4 cup of the reserved water and blend until the beets reach an apple sauce consistency. Run a spoon through the puree to test and make sure there are no large clumps left in the mix.
- Pour the beet puree into a measuring glass to make sure it’s exactly 1 cup (240g). If you’re a little short, mix in a couple tablespoons of the reserved water.
Red Velvet Cake
- Preheat the oven to 350F and grease and line two 8” (or 9”) cake pans. Wrap the pans in damp cake strips if you have them.
- In a measuring glass, combine the milk and vinegar. Set aside.
- In a medium bowl, whisk together the flour, cornstarch, cocoa powder, milk powder, baking powder, and salt. Set aside.
- In a separate bowl using a hand or stand mixer with the paddle attachment, mix together the butter and 1 cup (200g) of sugar until light and fluffy.
- Now add in the oil and remaining 1 cup of sugar and mix until smooth.
- Mix in the eggs one at a time, followed by the vanilla and beet puree.
- Alternating between wet and dry, mix in half of the dry ingredients, then the milk and vinegar mixture, then the rest of the dry ingredients.
- Evenly divide the batter between the two cake pans. For 8” pans, bake for 35-40 minutes, for 9” pans, bake for 30-35 minutes. They’re ready when a toothpick comes out clean with a few moist crumbs.
- Allow the cakes to cool completely before assembling. *You can also chill the cakes overnight and frost the next day. Allow the cakes to cool at room temperature, then thoroughly wrap each cake with plastic wrap and chill in the refrigerator.
Cream Cheese Frosting
- While the cakes cool, make the frosting.
- In a large bowl using a hand or stand mixer with the paddle attachment, mix the butter until smooth.
- Mix in the powdered sugar one cup at a time, followed by the vanilla. Halfway through the cups, mix in the cream cheese until smooth, then continue with the rest of the powdered sugar. Scrape down the bowl and mix again.
- Store the frosting in the refrigerator while the cakes continue to cool.
- To assemble, level off the tops of the cakes if needed. *Optional – Preheat the oven to 350F and crumble the cake tops onto a baking sheet lined with parchment paper. Bake for 15 minutes or until dry and then blitz in a food processor to make decorative crumbles. Crumbled freeze dried raspberries also make a great natural decoration.
- Spread an even layer of cream cheese frosting between the two cakes and cover the entire cake in the remaining frosting. Decorate however you like and enjoy!

Notes
STORAGE – Keep the cake in a cake container in the refrigerator. It’s ok to keep at room temperature for about an hour, but the frosting will soften if left out too long.
- Prep Time: 1 hour
- Cooling Time: 1 hour 30 minutes
- Cook Time: 35 minutes
- Category: Dessert
- Method: Baking
- Cuisine: American
Join Our Community


Meet Jenna
I’m the creator, baker, and photographer behind Butternut Bakery. Here I share desserts for every diet because I believe everyone should have a chance to indulge!
It was delicious but it did taste a bit like beets and although the top looked very maroon, the inside looked brown-ish. Any thoughts? I didn’t make any substitutions
This can happen if your ingredients are too warm! It’s important that the egg yolk and sugar mixture is completely cooled before mixing in the other ingredients.