


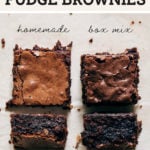
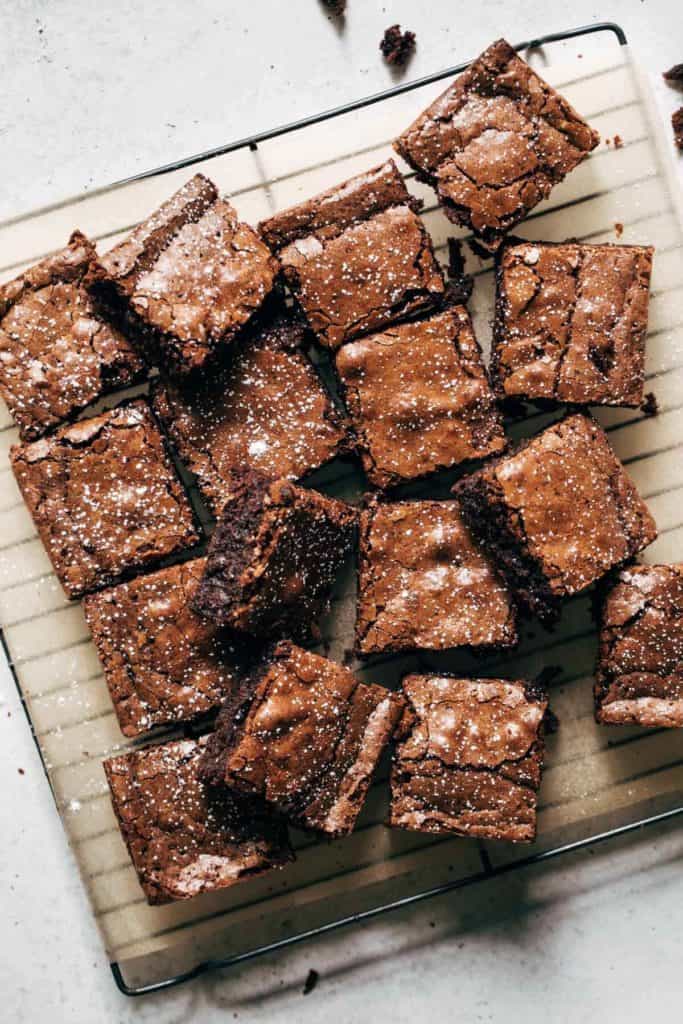
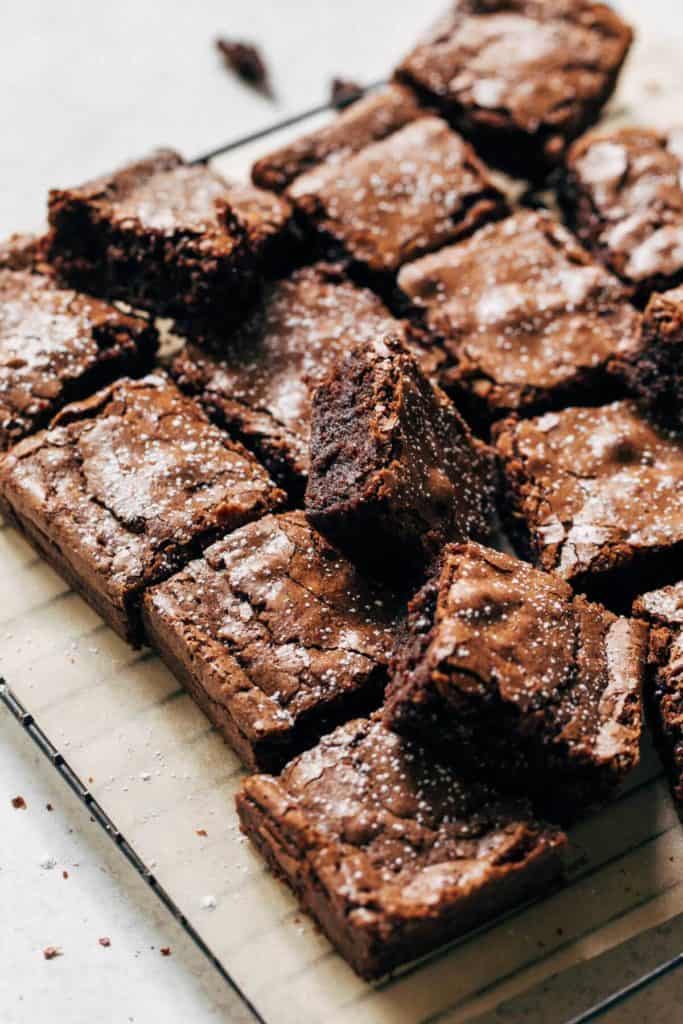
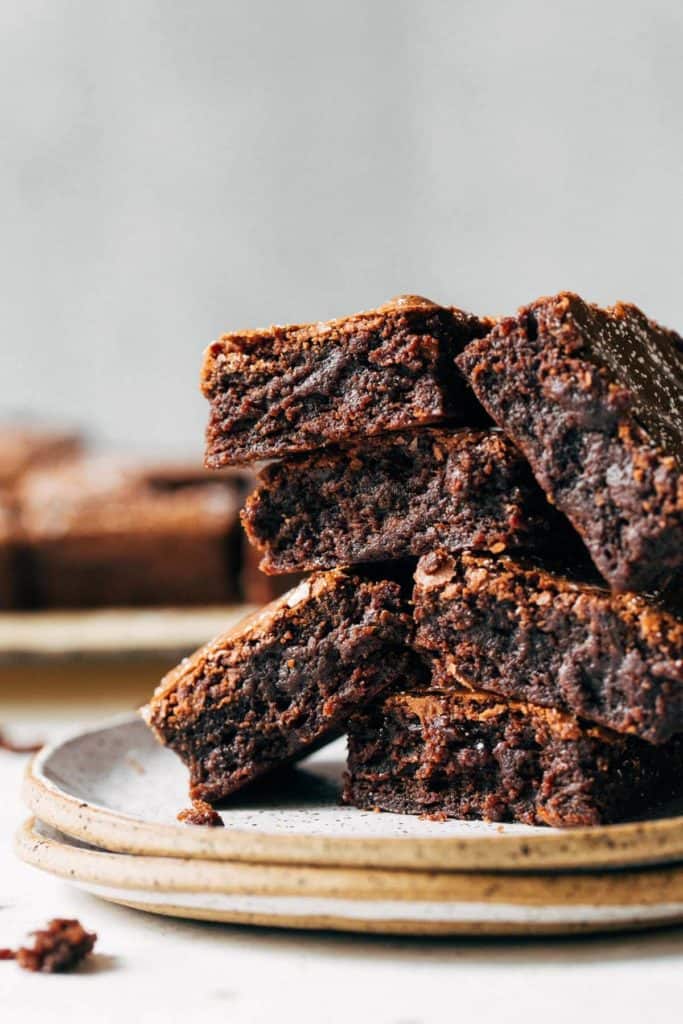
Yes that’s right, these chocolate fudge brownies rival the tried-and-true, the classic, the childhood (and adult) favorite box mix brownies. Dare I call these the best fudge brownies? They’re that perfect balance between not too cakey and not too fudgy with a silky smooth texture similar to boxed brownies…only BETTER!
What makes box brownies so good?
Seriously though, it’s a mysterious chocolate powder, oil, water, and eggs. Why is it so good??
The magic is in the texture. It has that paper thin crinkly top and a silky smooth texture. It’s not cakey, it’s not fudgy, it’s just in its own league. All that oil doesn’t hurt either.
When I was recipe testing these brownies, I did not intend on making them so similar to boxed brownies. But after one bite, I instantly recognized that texture. I ran to the store and picked up a box of brownie mix just to be sure!
What makes THESE the best brownies?
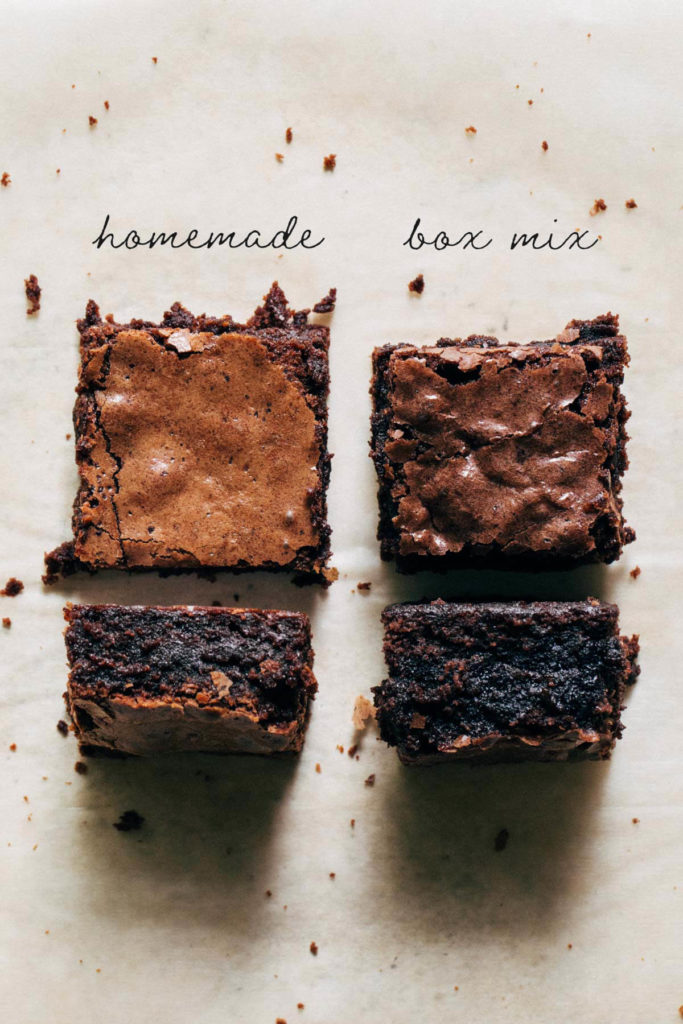
When comparing the two side by side, I was blown away. They were the exact same density, color, and texture. The only difference is the intensity of the chocolate and overall richness. For my recipe, it has a slightly deeper chocolate flavor due to the use of both real chocolate and cocoa powder.
My brownies also have that same airy quality to them as box mix brownies, but with a more dense texture. This is mainly due to two steps in this recipe:
- Whipping the sugar and eggs together to aerate the egg whites for a super smooth texture and crinkly top.
- Dropping the pan against the counter halfway through baking.
The whipped eggs create that light texture, while the pan banging condenses all of that down into a more dense consistency. Thus create a not too cakey, not too fudgy brownie!
How to make chocolate fudge brownies
For the longest time, I struggled with baking brownies. They were either too fluffy and cake-like or way too ooey gooey for my liking. Luckily, I discovered a couple tricks that totally changed my brownie game!
First, melt your chocolate, butter, and oil in a bowl over a pot of simmering water.
We’re using two different types of chocolate here, bittersweet and milk chocolate. The two create a very similar chocolate flavor to box mix brownies that’s slightly richer and deeper.
Next, sift together all of your dry ingredients (flour, salt, cocoa powder, and cornstarch). The cornstarch gives that tender chew that boxed brownies have.
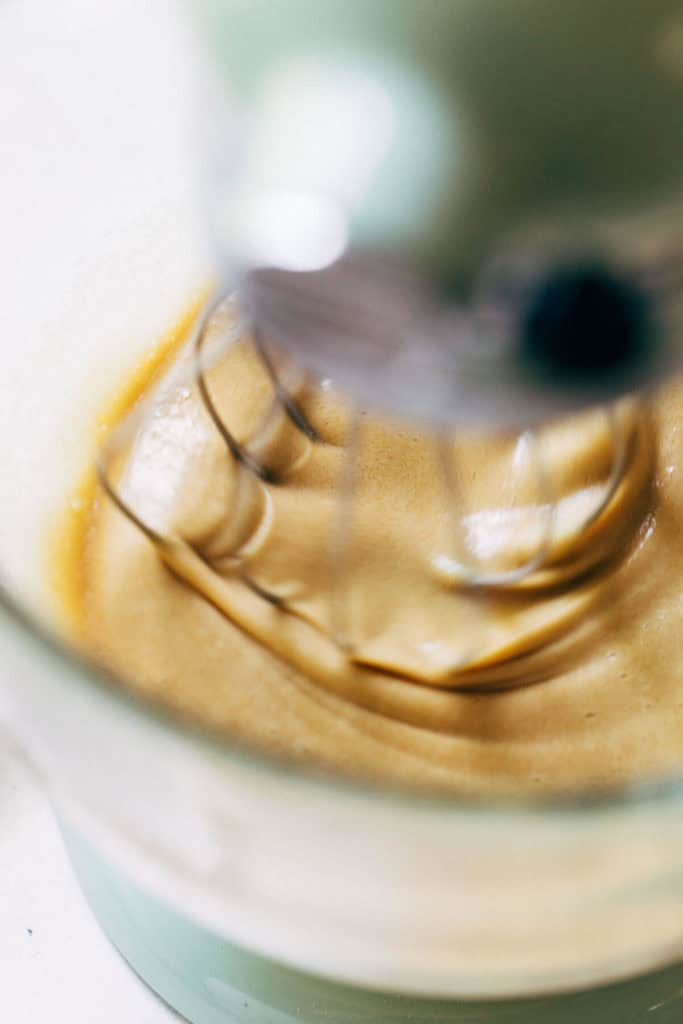
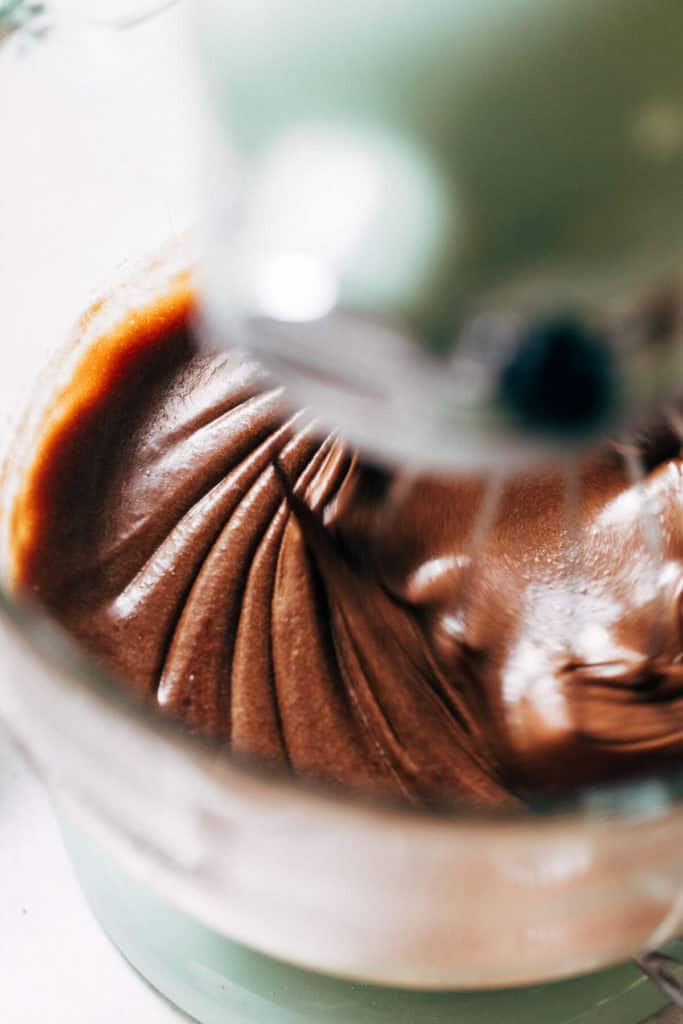
The first game changing trick is to whip your eggs and sugar together. Whip them on high until light and fluffy. This is called the “ribbon” stage which gives your brownies a super silky texture and that paper thin crust on top. You’re essentially making a meringue to create that crackly layer.
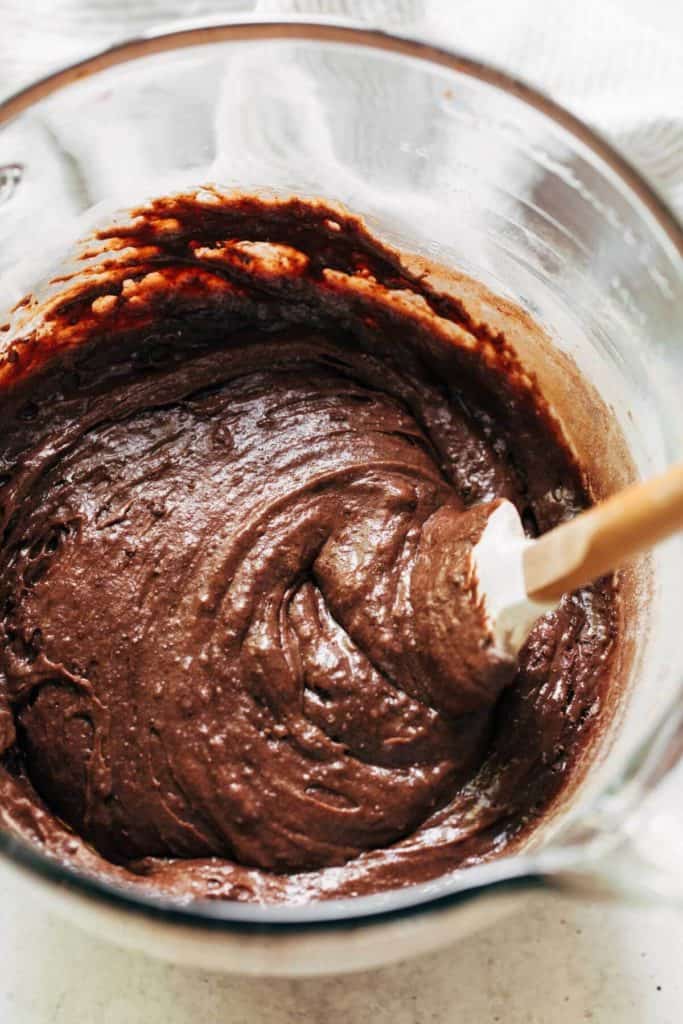
Mix in your chocolate and then FOLD in the dry ingredients. Folding ensures you don’t overwork the batter, leading to tough brownies.
The most game changing brownie trick is to drop the brownie pan against the counter halfway through baking. This is how you get that not quite cakey, not quite fudgy texture.
Pan banging brownies
Lets elaborate on that last step because it’s a very important one! It’s to secret to getting a perfectly dense brownie, one that doesn’t puff up in the center or edges while baking.
While your brownies bake, you’ll notice the edges start to puff up. This is what leads to that cakey texture that we’re not going for here.
To get that density, take the brownies out of the oven halfway through baking. Drop the pan against the counter a couple times and you’ll see the entire tray deflate. And when I say drop, I mean to just life the brownies up a few inches off the counter and drop them down. It should only take about 5-7 drops before they’re completely leveled out.
If using a glass baking dish, make sure to drop it against a towel to prevent any cracking or breaking.
Pop the brownies back into the oven to finish baking and they’ll come out nice and even. It’s also how you get those pretty cracks on top!
Allowing the brownies to cool
Unlike box mix brownies, it’s important to allow these homemade brownies to cool completely before slicing into them. This goes for just about any brownie recipe because there are a few ingredients that need to settle and solidify before digging in.
If you try to cut these brownie when they’re still warm, it will be like digging to a lava cake…unless that’s what you’re going for! The brownies won’t hold their shape and you’ll likely have to eat them with a spoon.
Allowing the brownies to cool completely gives the butter and chocolate a chance to come up to room temp, returning back to a more solid consistency.
To test and see if they’re ready to slice, make sure the pan is no longer warm to the touch – including the bottom.
You could also try and lift the brownies out of the pan by the parchment paper overhang. If they start to bend as you lift, they’re still too soft to cut into. Speed up the process by popping them in the fridge for about 30 minutes.
The best way to cleanly cut brownies
Once the brownies have cooled, grab the biggest knife you have, preferably one that’s the length of the entire pan of brownies. Cut straight down in one swift motion right down the center of the brownies, rather than dragging the knife through it. The dragging motion picks up crumbs along the way, preventing a nice and smooth cut.
Between each cut, wipe off your knife with a damp paper towel. Any remaining crumbs will grab onto the brownies as you’re cutting, leading to a messy edge.
Make one cut down the middle of the pan, then down the middle of each half. That’s the best way to ensure even brownie squares!
Another option is to use a pizza cutter. Give it a quick sprits with some nonstick spray and run it across the brownies. This is a great alternative if you don’t have a large enough knife.
How best to keep brownies fresh
Luckily for these brownies, their fudge texture helps keep them tasting fresh for days. But to ensure they stay just as delicious as day one, here are some tips to ensure they last:
- To really keep them fresh, refrain from cutting the entire pan and only slice off what you need. Keeping the rest of the pan in tact limits the amount of air entering the brownies. Cover the pan in plastic wrap and store at room temp.
- If sliced, they will keep in an air tight container at room temp for up to 3-4 days. Store them with a slice of bread to keep that moist texture!
- Store the sliced brownies in an air tight container in the fridge (without the bread) for up to 10 days.
But chances are, these brownies won’t stick around along!

For even more brownie recipes:
- Salted Caramel Brownies
- Salted Dark Chocolate Brownies
- Skillet Brownies (GF/DF)
- Brown Butter Brownies
Make sure to tag me @butternutbakery on Instagram if you make these better than boxed chocolate fudge brownies. I love seeing my recipes come to life in YOUR kitchen! To pin this recipe and save it for later, you can use the button on the recipe card, the buttons above or below this post, or on any of the photos above. Happy baking!
Print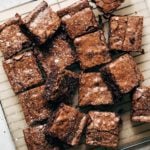
Better Than Boxed Chocolate Fudge Brownies
- Total Time: 1 hour
- Yield: 16 brownies
Description
These homemade fudge brownies are like the gourmet version of box mix brownies, but with a richer texture and deeper chocolate flavor.
Ingredients
- 1/2 cup (70g) all-purpose flour
- 2 tbsp cornstarch
- 1/4 cup (20g) dutch process cocoa powder
- 1 tsp salt
- 10 tbsp (140g) unsalted butter
- 3 oz bittersweet chocolate (chips or chopped)*
- 2 oz milk chocolate (chips or chopped)*
- 3 tsp any mild oil (vegetable, canola, melted coconut)
- 1 cup (200g) granulated sugar
- 1/4 cup (50g) dark brown sugar, packed
- 3 large eggs
- 1 tsp vanilla extract
- Powdered sugar for dusting (optional)
Instructions
- Preheat the oven to 350F and grease and line an 8×8 pan with parchment paper. Cut two strips the same width as the pan so that all sides of the pan are covered in parchment paper and it hangs over the edges for easy removal.
- In a bowl, whisk together the flour, cornstarch, cocoa powder, and salt. Set aside.
- Place the butter, chocolate, and oil in a microwave safe bowl. Heat in 30 second intervals, mixing between each time, until melted. It shouldn’t take more than 60-90 seconds. If you don’t have a microwave, you can also melt the mixture in a bowl over a pot of simmering water, ensuring the bowl doesn’t touch the water.
- Using a hand or stand mixer with the whisk attachment, whisk together the eggs and sugars on high until light and frothy. This will only take a couple minutes. *see picture in post for reference
- Making sure the chocolate isn’t too hot, turn the mixer down to low and pour in the chocolate in a slow and steady stream. Mix in the vanilla.
- Take the bowl off the mixer and fold in the dry ingredients using a rubber spatula – careful not to over mix.
- Pour the batter into the prepared pan and bake for 20 minutes. Then, take it out of the oven, close the door, and drop it against the counter a couple times (lift it just a couple inches off the counter and drop it back down 5-7 times). Place it back in the oven to bake for another 18-20 minutes.
- Let the brownies cool completely in the pan before removing and cutting. Top with a dusting of powdered sugar. Enjoy!

Notes
*This is the best chocolate combination to get that not too sweet not too bitter flavor. I highly recommend using these two, but you can also use what you have on hand as it won’t make or break the recipe. As long as you use 5oz total.
- Prep Time: 20 minutes
- Cook Time: 40 minutes
Keywords: chocolate fudge brownies, homemade brownies, fudge brownies, chocolate brownies

Some of the links above are affiliate links, which pay me a small commission for my referral at no extra cost to you! Thank you for supporting Butternut Bakery.

Oh my goodness, I am so excited, these are being made tonight!!
These look like HEAVEN! I think I need a pan STAT.
I NEED this right NOW. ???? (me being pregnant isn’t helping!) I have to ask – why the dropping against the counter?
Haha! I crave these and I’m not even pregnant! Dropping them helps to knock out any air that has built up while baking. That’s how you get that dense and fudgy texture 🙂
You most certainly can call these best chocolate brownies! I can’t stop ooh-ing and aahh-ing at the pictures. You nailed this recipe!
That makes me so happy to hear! Thank you!
What size pan when you double or triple the recipe size
For double, use a 9×13 baking pan
Can I substitute the vegetable oil for sunflower or olive oil?
Absolutely! You might get a little flavor from the olive oil but I think it would be delicious 🙂
Can nuts be added to these??
Absolutely!!
Making these tonight! Just placed back in the oven after tapping on counter. Cant wait for them to be ready. Hindsight, I wish I would have added some chocolate chips to batter at the end. Next time!
Yes next time! I’m sure they’ll still be delicious 🙂
Best brownies i ever did,sooo yummy, fudgy and crispy crakes from outside ,my kids loved it it just disappear in a second. Thank you so much
★★★★★
Aw yay! Thank you for sharing!
Don’t have enough butter during these crazy times, any substitute that you would recommend?
Use more oil or coconut oil if you have it 🙂
Can I use Imperial margarine instead of butter? Thank you!
Yes that should be ok!
Hi im about to make this on a small size pan 8.5 x 4.5 in
How much recipe do i need for this?
Hi Vicki – I would only use half the recipe 🙂
Hi! is 200g sugar a bit too sweet for brownies? Also does reducing the sugar will make the brownies less fudgy?
Please stick to the same amount in the recipe! Otherwise I can’t guarantee they’ll turn out the same. The sugar helps balance out the bitterness of the dark chocolate.
These are amazing!!! Just a note that if using the weight amounts, it does not double those when going to “2X”. I doubled the gram amounts and they turned out great!!! Thank you for the recipe 😄
Yay! Thanks for sharing Connie 🙂
These are very good. But I baked mine for 15 minutes after tapping and they were a bit overdone. Next time I would lessen cook time.
★★★★
Hi Nanette – It sounds like this is due to too much flour and cocoa powder. Make sure when you measure them out, to spoon them into the measuring cup and level it off. Otherwise it gets packed into the cup, thus adding too much to the batter.
Hey! Just made them and they seemed to be completely done after 14 mins in the oven. Oven temp was correct, not sure why they cooked so fast.
Thanks for the note! The amount of dry ingredients could lead the brownies to bake faster.
Made these and they are amazing! Not to stodgy and not to cakey.
Recipe was easy to follow and having pictures was great. ☺️☺️
★★★★★
Yay! Thanks for sharing Jess 🙂
if i dont have cornstarch can I sub more flour?
You could also use tapioca starch or sub more flour 🙂
Can we substitute flax meal for eggs?
I haven’t tested it but I don’t think it would be a major issue!
I tried substituting with flax eggs and both times it’ came out extremely greasy. I’m not sure what I did wrong. I’m guessing using eggs really helps give the batter it’s structure. Definitely going to make the regular recipe instead!
If I made this recipe but only wanted to make half of the brownies, could I freeze the rest and use it later?
Thanks 😊
Make all of the brownies but freeze half of the baked batch. Batter doesn’t freeze well 🙂
Okay thank you!!! And when you take them out of the freezer you just sit it out until it’s thawed out?
I’m excited to try these brownies! Would light brown sugar work instead of dark? I only have light right now.
Yep light brown is fine!
I have learned that if you cut brownies with a plastic knife, the brownies don’t stick to it! 🙂 I can’t wait to make these!
Oh interesting!