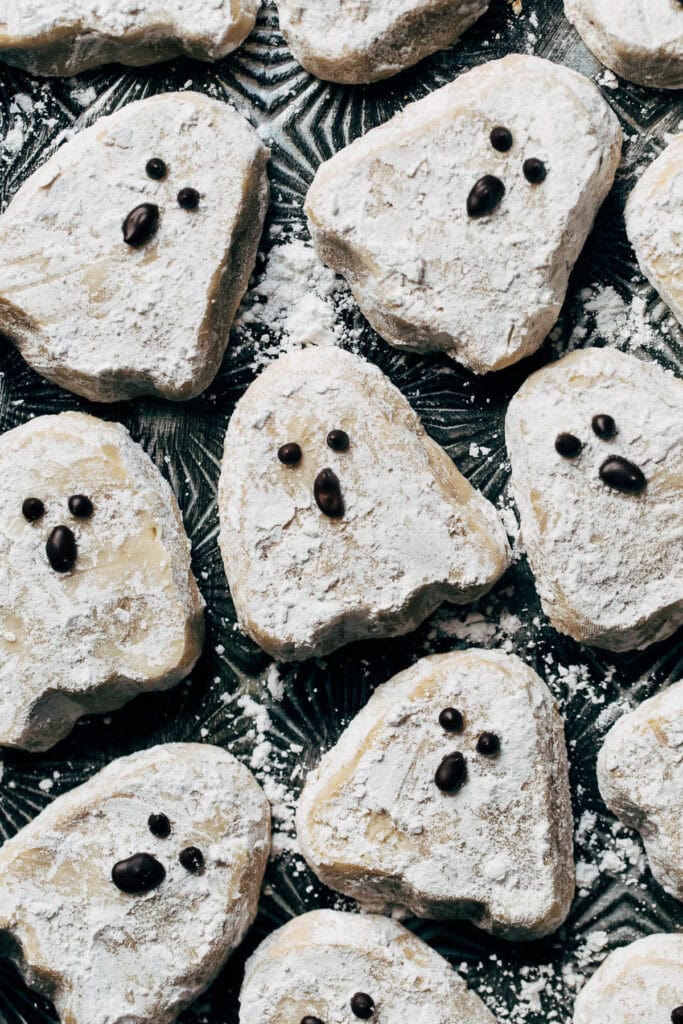
Slice and Bake Ghost Cookies
These ghost cookies are perfectly festive without being over the top! That goes for both the appearance and the work it takes to make them. They’re so simple using a buttery shortbread dough that’s rolled and shaped. Once chilled, it’s sliced, baked, tossed in sugar, and decorated with melted chocolate ghost faces! It’s the best Halloween cookie.
Shortbread Cookie Dough Tips
These cookies taste as good as they look! They’re made with a buttery shortbread dough that’s sliced thick, creating a tender and melt-in-your-mouth bake. To ensure yours turn out moist and NOT dry, follow these tips:
- Butter – Make sure your butter is room temperature, NOT soft. When pressed, room temperature butter will leave an imprint of your finger but still have some resistance to it. With soft butter, your finger will sink in with minimal effort. Using room temperature will prevent the dough from turning too sticky, thus difficult to handle.
- Flour – I say this all the time, but use a scale if you can. Otherwise, spoon the flour into your measuring cup and level it off with a flat edge. Never scoop directly into the container or bag of flour as this will pack it down into the cup.
- Cornstarch – Don’t skip this ingredient! Not only does it help thicken the dough, but it creates a soft texture once the cookies are baked.
- Egg Yolks – Use cold egg yolks to help cool the dough! If the dough is too warm, it’s difficult to shape.
- Mixing – Use a mixer to work in the flour as much as possible, but careful not to OVER mix. By removing the bowl from the mixer and finishing the mix by hand, this will allow you to create a homogenous dough without overworking.
How to Shape Ghost Cookies
The fun part! When I developed this recipe, I was trying to think of a way to make festive Halloween cookies with minimal effort. And what’s easier than a slice and bake cookie? So by shaping this dough into a really basic ghost shape, you’re able to bake so many ghost cookies without having to cut anything out.
To shape, the dough is first worked into one large ball in your hands. This is to ensure it’s fully combined and easy to split in half.
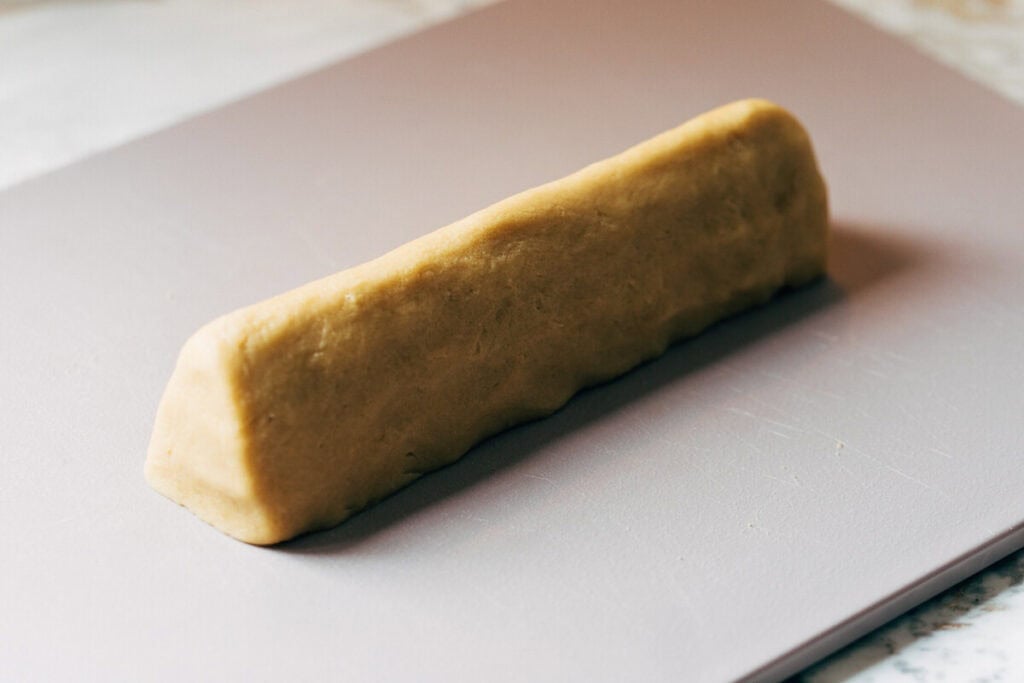
Once the dough is split in two, each half is rolled into a log that’s about 7 to 8 inches long. Then, squish in the sides to create a soft triangle shape with the log. Make sure to keep pressing the ends in towards each other to maintain the 7 to 8 inch length throughout this process.
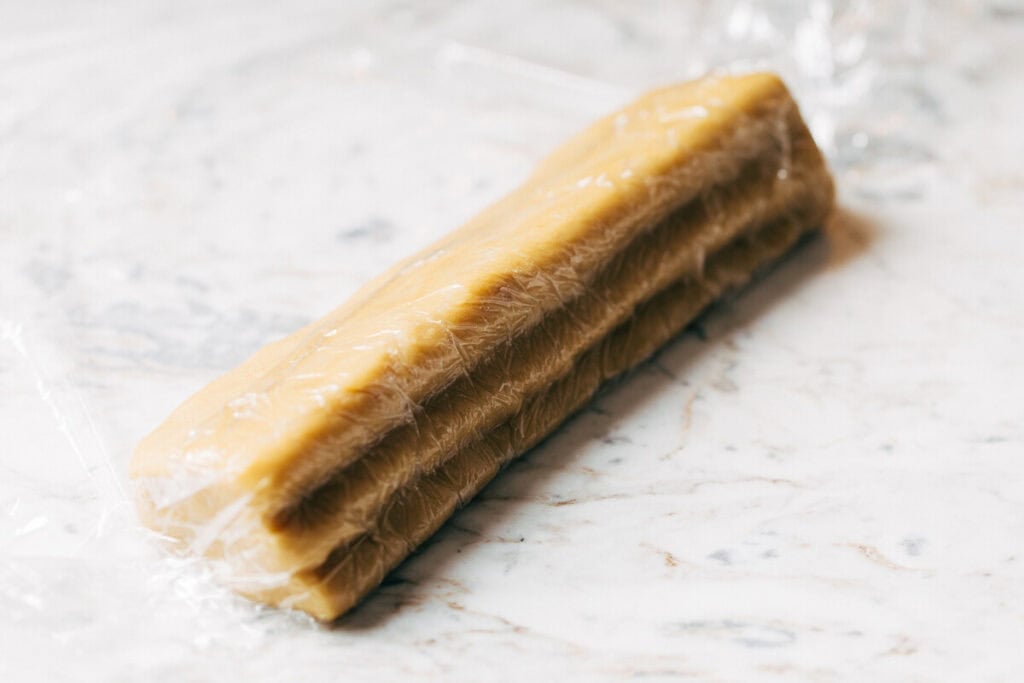
Now transfer the log to a sheet of plastic wrap. Flip the log over so that the underside is showing but is covered in the plastic wrap. Run your fingers along with bottom (over the plastic wrap) to create two ridges as these will be the floating bottoms of our ghosts. Once those are pressed in and the dough is pressed back to 7 to 8 inches, fully wrap the cookie dough and chill for 2 hours.
If at any point the dough is too sticky to handle, that means it just got too warm. Chill the dough for 30 minutes and try again.
How to Bake Tender Shortbread Cookies
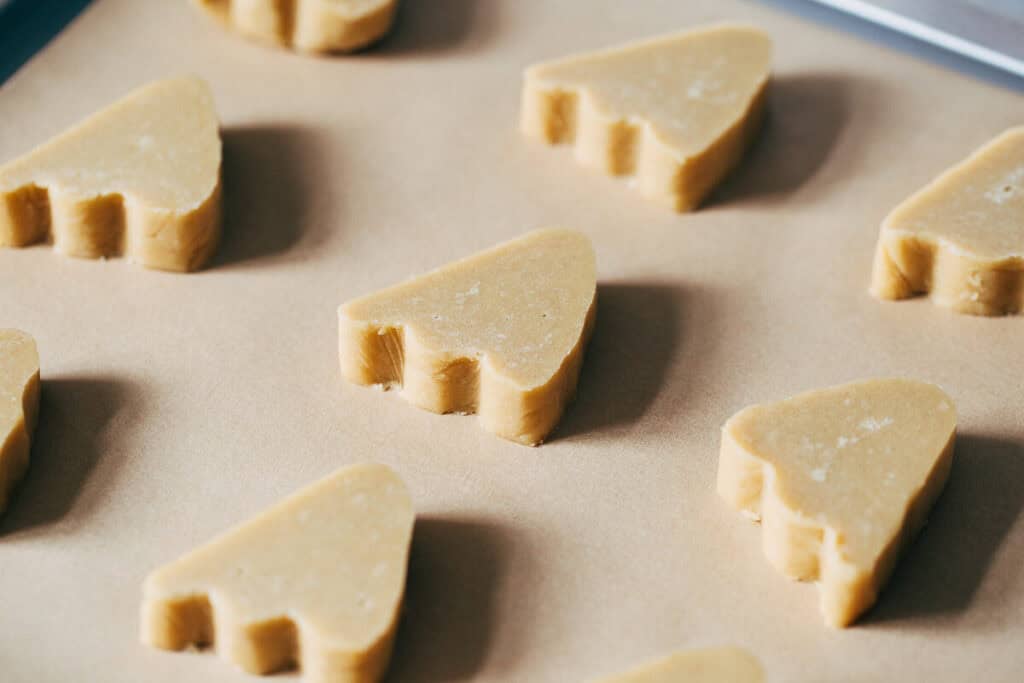
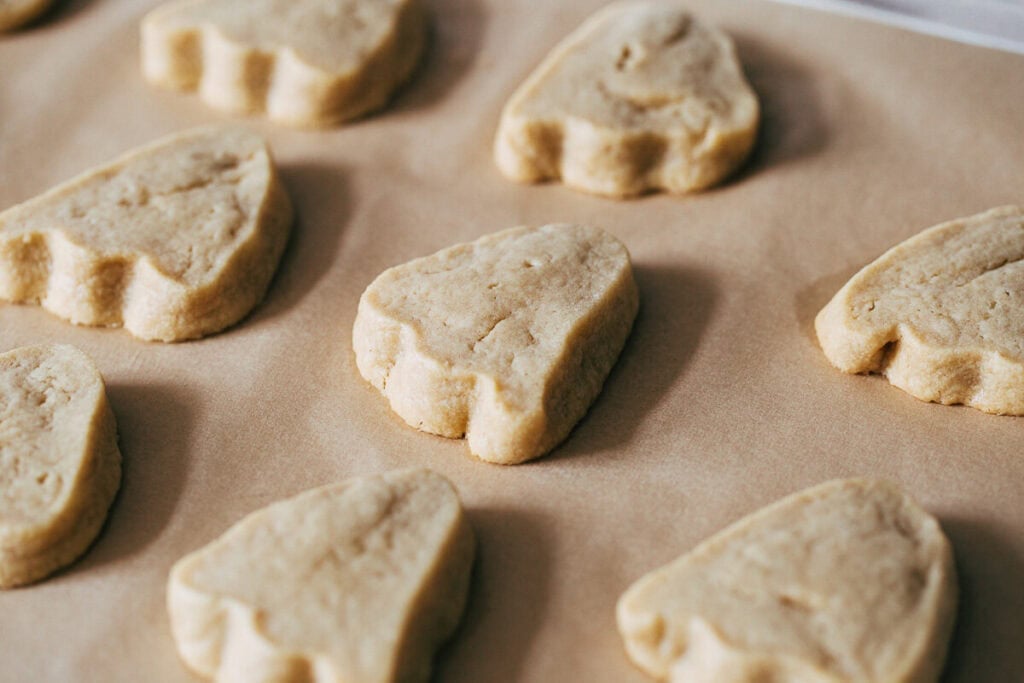
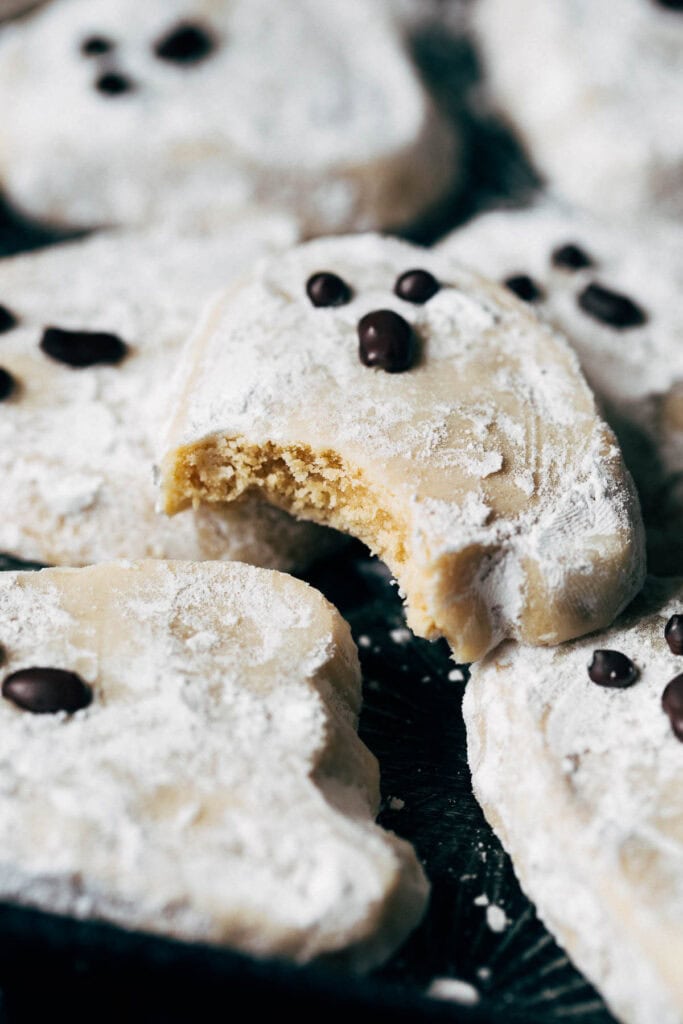
The key to baking the most melt-in-your-mouth slice and bake cookies is to slice them thick and to SLIGHTLY underbake them.
These cookies are sliced to nearly half an inch thick with each log providing 12 cookies. Then they’re baked just until the edges are set and the center still looks slightly underdone. Once cooled, that center will set into the most tender and soft consistency.
How to Decorate Ghost Cookies
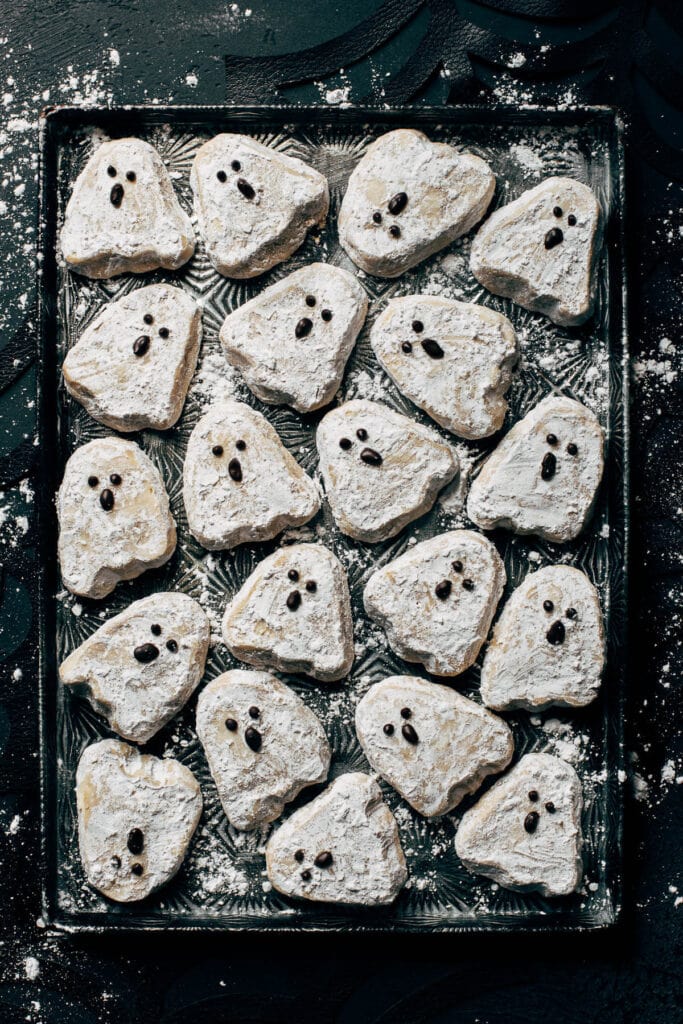
When the cookies have cooled to where they’re easy to handle but still warm, each one is tossed in powdered sugar. This first coating really sticks to the warm cookies.
Once the cookies have fully cooled, they’re tossed again. That sticky first layer helps the second layer stick, giving you a more opaque, white cookie.
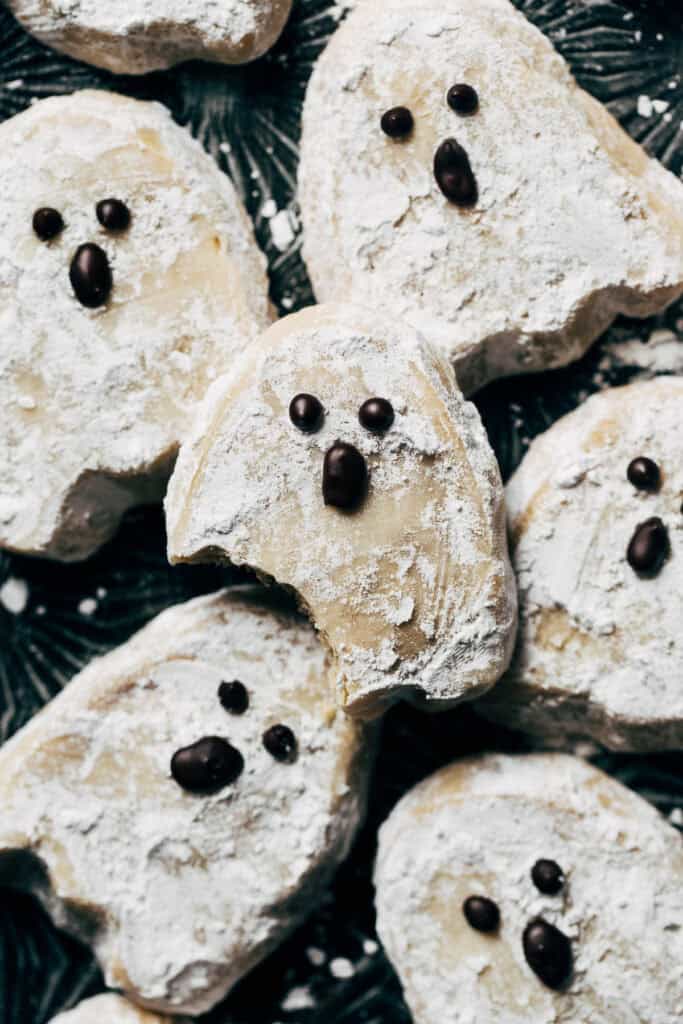
In order for the chocolate faces to stick, use a toothpick to scrape away a space for the eyes and mouth. This will also create a guide so your faces turn out just right!
Pipe the melted chocolate onto each cookie and watch these little ghosts come to life! Or come to afterlife?
Ghost Cookies FAQs
Once the logs are shaped and wrapped, you can keep them in the refrigerator for up to 3 days before baking.
If it’s slightly too sticky, chill the dough for 30 minutes before trying again. If it’s WAY too sticky, this sounds like there might not be enough flour. Try mixing in a couple extra tablespoons.
Sure! Just shape into two 7 to 8 inch logs and chill and bake as instructed.
I haven’t tried it, but I think they should work with a gluten-free baking flour. I like Bob’s Red Mill (the blue bag) or King Arthur measure for measure.
They last for about 3 days. They’re the softest the day of, but will turn into a more firm shortbread consistency after a day or two.
Once the faces have dried and set, store the cookies in a large container at room temperature.
For more Halloween recipes, check out my:
- Frosted Halloween Sugar Cookies
- Black Velvet Cake
- Monster Brookies
- Monster Cookies
- Halloween Candy Cookie Bars
- Sorting Hat Cupcakes
- Full Moon Brownie Cupcakes
- Pumpkin Cupcakes
- Vampire Bite Negroni
Make sure to tag me @butternutbakery on Instagram and comment below if you make these Slice and Bake Ghost Cookies. To pin this recipe and save it for later, you can use the button on the recipe card or on any of the photos above. Happy baking!
Watch how to make these ghost cookies!
Print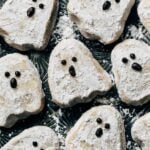
Slice and Bake Ghost Cookies
- Total Time: 2 hours 44 minutes
- Yield: 24 cookies
Description
These ghost cookies are made from buttery shortbread slice and bake dough that’s then tossed in sugar and decorated with spooky melted chocolate ghost faces. It’s the perfect Halloween cookie!
Ingredients
- 1 cup (224g) unsalted butter, room temperature
- 3/4 cup (150g) light brown sugar, packed
- Pinch of kosher salt
- 2 large egg yolks
- 1 tsp vanilla extract
- 1 tbsp cornstarch
- 2 cups + 2 tbsp (275g) all-purpose flour, spooned and leveled
- 1 cup (110g) powdered sugar, for rolling
- 1/4 cup chocolate chips, melted
Instructions
- In a large bowl using a hand or stand mixer with the paddle attachment, mix the butter and brown sugar on medium-high speed for 1 minute or until light and creamy.
- Then mix in the salt, egg yolks, and vanilla. Scrape down the bowl, add the cornstarch, and mix again until completely smooth.
- Mix in the flour on medium-low speed until mostly combined. Then remove the bowl from the mixer and bring the dough together by hand using a rubber spatula. Fold until the dough is all one color and all dry ingredients are fully blended in.
- Scoop the dough out with your hands and mold it into one large ball. It should be slightly sticky but easy to handle. If it’s TOO soft and sticky, chill the dough for about 15 to 30 minutes before continuing.
- Split the dough in half and on a clean work surface, roll each half into a 7 ½ inch long log. Keep squeezing in the log as you work to maintain this length.
- Now mold each log into a soft triangle shape.
- Lay out a large sheet of plastic wrap and place the dough on the edge. Roll in the plastic wrap just until the bottom side is covered and facing towards you. Using your fingers, press two long lines through the bottom. This creates the curvy ridges at the bottom for our ghosts. Squeeze in the two ends of the dough to condense it back together and fully wrap. Do this for both logs and then chill in the refrigerator for at least 2 hours or overnight.
- To bake, preheat the oven to 350F and line a large baking sheet with parchment paper.
- Slice one log into 12 cookies, each a little less than ½” thick. Leave the other log in the refrigerator while the first one bakes.
- Place on the baking sheet spaced only a couple inches apart and bake for 12 to 14 minutes.
- Allow the cookies to rest on the pan for about a minute, then transfer to a cooling rack. Once they’re easy to handle but still warm, toss each cookie in a bowl of powdered sugar.
- Then once the cookies have completely cooled, toss again in the powdered sugar to get a thicker layer.
- Using a toothpick, scrape away the shape of eyes and a mouth on each cookie. Then place the melted chocolate in a piping bag fitted with a small round tip and dot on the eyes and mouth.
- Allow the chocolate to set firm before storage. Enjoy!

- Prep Time: 30 minutes
- Chill Time: 2 hours
- Cook Time: 14 minutes
- Category: Dessert
- Method: Baking
- Cuisine: American
Join Our Community


Meet Jenna
I’m the creator, baker, and photographer behind Butternut Bakery. Here I share desserts for every diet because I believe everyone should have a chance to indulge!


Your description of forming the cookies isn’t easy to understand. Pictures would be helpful.
The flavour on these cookies is UNREAL, one of the best shortbread recipes I’ve ever tried. Also, so incredibly cute!
Such a cute Halloween treat and so fun to make with the kids! I was looking for something to make with my young girls (ages 5 and 3) and they had a blast making these and also loved eating them!
So cute, and they taste so good! I had black candy melts, so I melted a few instead of chocolate chips — probably not as tasty, but it worked. Wish I could post a photo here.
When I saw these I knew I had to make them for a scary movie night. They were easy to make and so cute!