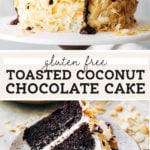
Gluten Free Toasted Coconut Chocolate Cake
The gluten free chocolate cake you’ve always dreamed of is here! This is one of the best chocolate cakes I’ve ever had or made…and it’s completely gluten free! It’s rich, fudgy, moist, and coated in a delicious toasted coconut buttercream. This is easily the best chocolate coconut cake recipe that just so happens to also be gluten free.
This post is sponsored by Bob’s Red Mill but all thoughts and opinions are my own. Thank you for supporting the brands that make Butternut Bakery possible!

How to make moist gluten free chocolate coconut cake
Let me tell you, this chocolate cake is SO GOOD! It has everything a good chocolate cake should have – it’s moist, fudgy, not too dense, rich, and so flavorful.
It’s also so incredibly easy to make, mainly because it involves just one gluten free ingredient – Bob’s Red Mill 1-to-1 Gluten Free Baking Flour. I use this exact flour in almost all of my gluten free recipes.
Why? For starters it’s so easily accessible. It can be found in most grocery stores but if you can’t find it at yours, you can always order it online. I always try to use ingredients that are both high quality and that everyone can get their hands on.
It’s also the perfect blend of gluten free flours including sweet and brown rice flour, tapioca flour, potato starch, sorghum gum, and xanthan gum. This mix is the closest you can get to baking with regular baking flour, or at least that’s my experience when using it. It creates bounce and chewiness when combined with the right ingredients.
So now that you’re equipped with the best gluten free baking flour, it’s time to make the batter which consists of 3 main parts:
Part 1: Dry Ingredients – Mix together the flour, cocoa powder, baking powder, baking soda, salt, and sugar. Yes, sugar is included in here because this recipe does not involve the creaming method (whipping air into the butter using the sugar granules) so it can go right in with the dry ingredients.
Part 2: Wet Ingredients – Combine the coconut oil, eggs, vanilla, coconut milk, and apple cider vinegar. Although this is a coconut chocolate cake, you can’t actually taste the coconut ingredients inside the cake. The reason for using coconut oil is because it acts like butter, but adds a delicious moist texture to the cake. The coconut milk has much more fat than regular milk, so it makes for a really rich cake…something needed to make up for the lack of gluten. As for the apple cider vinegar, the acidity helps create a tender texture.
Part 3: Hot Water – Once the wet ingredients are mixed into the dry ingredients, the last step is to add the hot water. It’s important to use HOT water because it activates the cocoa powder, enhancing that chocolate flavor. No need to boil, just turn your tap water as hot as it can go and grab your water from there.
After all three elements are combined, you should be left with a fairly thin batter that’s ready to bake! This recipe can be used with either 3 6″ cake pans or 2 8″ cake pans. The bake times vary, which are included in the recipe instructions.


Simple Coconut Buttercream
Or I should say coconut cream cheese buttercream? This buttercream is so smooth and delicious and full of coconut flavor.
The base is a classic American buttercream comprised of cream cheese, butter, and powdered sugar. To ensure it turns out perfect, always use room temperature cream cheese and butter!
Combine all three ingredients plus coconut extract and coconut milk. This thins out the buttercream to acheive that perfect spreadable consistency.
Tips for assembling a layer cake
Luckily this cake is very forgiving when it comes to smearing the frosting on the outside. Since it’s covered in toasted coconut, it hides all imperfections so no need for perfectly smooth edges.
First and foremost, make sure the cake layers are completely chilled. And not cooled, chilled. Especially when it comes to gluten free cakes as they can be more delicate. Luckily for this recipe, it holds together very well but to prevent an breakage, allow the cakes to chill in the fridge out of the pans for at least an hour.
Chilling the cakes not only strengthens the layers, but it also prevents the buttercream from melting all over the cake.
There’s also a very fine line between spreadable buttercream and thin buttercream. It must be robust enough to hold up each layer but not too thick to where you break the cakes while spreading it on. To ensure it doesn’t smoosh out the sides of the layers, pop the cake in the fridge for 20 minutes before spreading on the last outer layer of buttercream. This firms up each layer, so the cake doesn’t move around when adding the buttercream to the sides of the cake.
Once the cake is chilled, add the rest of the buttercream to the top of the cake and spread it out and over the sides. Push that buttercream down the sides as you rock the offset spatula back and forth (see picture below). This is the fastest way to frost a cake, and it also keeps the buttercream off the cake stand allowing for a clean presentation.

How to toast coconut
The process of toasting coconut is simple, but it’s very easy to go from golden brown to burnt in a matter of minutes. It’s important to keep an eye on the coconut during the last few minutes of baking to achieve the perfecting toasted color!
Whether you’re using shredded or chipped coconut, the same process applies. Preheat the oven to 325F and line a large baking sheet with parchment paper.
Spread an even layer of the coconut and bake for 4 minutes. At this point, the coconut will have barely changed color, if at all. Use a spatula to toss around the coconut and spread it even again. This allows it to toast evenly.
Bake for another 3-4 minutes, keeping an eye on it the last couple minutes. It will turn a light golden brown fairly quickly.
Remove from the oven and allow the coconut to cool completely. Then transfer to a container and store at room temp while you make the cake.
Chocolate Ganache Drip
After the buttercream is smeared on and the coconut is pressed into the sides, it’s time to add that glossy chocolate drip on top. This is an optional step but really signals to people that this isn’t just a coconut cake, it’s a CHOCOLATE coconut cake.
To make the ganache, prep equal parts chocolate and heavy cream. Add the chocolate to a bowl and the heavy cream to a measuring glass. Heat the heavy cream in the microwave for 30 seconds to 1 minute or until it starts to bubble.
Pour the hot cream over the chocolate and let it sit for about 30 seconds. Then, mix to combine. At this point it may be too thick to add to the cake. To test, scoop and lift a spoon out of the ganache and watch the chocolate run back into the bowl. If it runs in a smooth stream it’s ready. If not, we need to thin it out.
To thin out the ganache, use 2-3 teaspoons of oil. Add one teaspoon at a time, mixing between each addition until you reach that run-off-the-spoon consistency.
Pour the ganache into the center of the cake and push it over the sides using an offset spatula. In order for the chocolate to run over the coconut without getting stuck or clumped, you will need to use all the ganache at once so don’t be scared to pour it all on!

Baking the cakes in advance
To save time, you could bake the cakes in advance and assemble the cake the next day or a couple days later.
To do so, bake the cake as instructed. Let them cool in the pans for about 30 minutes, then remove and place on a cooling rack until the cakes have reached room temperature.
Wrap each cake layer individually in plastic wrap, making sure it’s COMPLETELY covered. Place the cakes in the fridge (avoiding stacking if you can) and they will keep for up to 3 days.
When you’re ready to assemble the cake, you can work with the layers while they’re chilled and straight from the fridge.
All other assembly instructions remain the same.

Can this be made into a sheet cake?
Yes! Follow all the same instructions and bake in a 9×13 baking pan. Spray it with nonstick spray and line the bottom with parchment paper. Bake for 30-35 minutes or until a toothpick in the center comes out clean.
Make sure to halve the frosting and ganache recipe if baking a sheet cake.
If you’d prefer a small batch, cut the recipe in half and bake in a 8×8 pan for 25-30 minutes. To us half of one whole egg, crack it into a small dish and beat it until it’s fully broken up. Use 2 tablespoons of the egg in the batter.
Another tricky measurement in this recipe is 3/4 cup. Half of 3/4 cup is 6 tablespoons. To halve one tablespoon, use 1 1/2 teaspoons. The rest are nice round measurements that are easy to cut in half.

For more delicious gluten free recipes, check out my:
- Gluten Free Chocolate Cupcakes
- Gluten Free Chocolate Chip Cookies
- Gluten Free Banana Bread
- Gluten Free Oatmeal Chocolate Chip Cookies
Make sure to tag me @butternutbakery on Instagram and leave a review below if you make this Chocolate Coconut Cake. To pin this recipe and save it for later, you can use the button on the recipe card, the buttons above or below this post, or on any of the photos above. Happy baking!
Print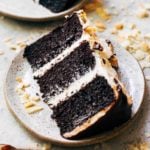
Gluten Free Toasted Coconut Chocolate Cake
- Total Time: 1 hour 20 minutes
- Yield: 6 or 8 inch cake
Description
Rich and moist gluten free chocolate cake coated in coconut buttercream, toasted coconut, and chocolate ganache.
Ingredients
Gluten Free Chocolate Cake
- 2 cups (280g) Bob’s Red Mill Gluten Free 1-to-1 Baking Flour*
- 1 cup (90g) unsweetened cocoa powder (use dark cocoa powder for a deeper color)
- 1 1/2 tsp baking powder
- 1 tsp baking soda
- 1/2 tsp salt
- 1 3/4 cup (360g) granulated sugar
- 1/3 cup (70g) coconut oil, melted
- 3 large eggs
- 1 tbsp vanilla extract
- 1 cup (220ml) canned full fat coconut milk**
- 1 tsp apple cider vinegar
- 3/4 cup hot water
Coconut Buttercream
- 8oz (226g) full fat cream cheese, room temp
- 1/2 cup (110g) unsalted butter, room temp
- 6 cups (720g) powdered sugar
- 2 tsp coconut extract
- 2 tbsp coconut milk (reserved from can)
- 2 cups toasted (chipped or shredded) unsweetened coconut
Chocolate Ganache
- 4oz bittersweet chocolate, chopped
- 4oz (1/2 cup) heavy whipping cream
- 2–3 tsp any mild oil, like vegetable, canola, or melted coconut
Instructions
Toasted Coconut
- Preheat the oven to 325F and line a large baking sheet with parchment paper.
- Spread the coconut in an even layer and bake for 4 minutes. It should be barely browned by that point.
- Move around the coconut to ensure even browning and bake for another 3-4 minutes until lightly golden.
- Allow the coconut to cool completely then transfer to a container. Store at room temp.
Gluten Free Chocolate Cake
- Preheat the oven to 350F and prep either (3) 6 inch round cake pans or (2) 8 inch round cake pans. Coat in nonstick spray and line the bottoms with parchment paper.
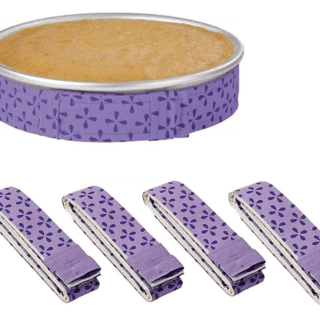
- I recommend wrapping the cake pans in dampened cake strips to ensure even baking. This is optional, but definitely encouraged.
- In a large bowl, either by hand or using a stand mixer with the whisk attachment, whisk together the gluten free flour, cocoa powder, baking powder, baking soda, salt, and sugar.
- In a separate bowl, combine the coconut oil, eggs, vanilla, coconut milk, and apple cider vinegar.
- Slowly pour the wet ingredients into the dry ingredients with the mixer running on medium-low speed. If mixing by hand, mix in the wet ingredients in thirds. The batter should be somewhat thick and fudgy.
- Once combined, slowly pour in the hot water and mix until smooth. The batter should now be fairly thin.
- Evenly distribute into the cake pans. For 6 inch cakes, bake for 35-40 minutes, for 8 inch cakes, bake for 30-35 minutes. Test a with a toothpick in the center to be sure they’re done. Bake for an additional 3-5 minutes or until the toothpick comes out clean.
- Let the cakes cool in the pans for about 30 minutes, then turn out onto a cooling rack.
- Transfer the cakes to the fridge for about an hour while you make the frosting. The cakes should be COMPLETELY cooled before assembling. If making the cakes a day ahead, see my notes within the post on how to store them.
Coconut Buttercream
- Using a hand or stand mixer with the whisk attachment, cream together the cream cheese and butter. Ensure they’re both at room temperature for a smooth buttercream.
- Mix in the powdered sugar one cup at a time on low speed, then increasing the speed as it mixes in.
- When it starts getting too thick, mix in the extract and milk. Continue with the rest of the powdered sugar.
Assemble
- Once the cakes are cooled, level off the tops if needed.
- Spread about 1/2 cup of buttercream between each layer and place the cake back in the fridge for 15 minutes to firm up.
- Spread the rest of the buttercream in an even (but not perfect) layer all around the cake. We’ll be hiding any imperfections with the coconut.
- Press the toasted coconut into the sides of the cake and transfer the cake back to the fridge while you make the ganache.
Chocolate Ganache
- Add the chocolate to a heat safe bowl and set aside.
- Measure out the whipping cream in a microwave save measuring glass and microwave for 30sec-1min or until it starts to bubble.
- Pour the hot cream over the chocolate and let it sit for about 30 seconds, then stir until smooth.
- To thin out for the cake drip, add 2-3 tsp of oil until it runs off your spoon in an even stream.
- Quickly pour about 3/4 of the ganache onto the center of the cake and push it over the sides to drip down. Add the remaining ganache if needed.
- Now dig in!

Notes
- *To measure properly, spoon the flour into your measuring cup and level it off with a flat edge. Don’t shake it or press it down into the cup.
- **Shake up the can before using.
- Prep Time: 40 minutes
- Cook Time: 40 minutes
Join Our Community


Meet Jenna
I’m the creator, baker, and photographer behind Butternut Bakery. Here I share desserts for every diet because I believe everyone should have a chance to indulge!

Hi. Can’t wait to try this. I don’t see your note on how to store the cakes if making ahead. Is it just wrapping in seran wrap and storing in the fridge? Thanks in advance.
I made this for my friend’s mom’s 90th birthday, and it was amazing!!! She loved it, as did everyone else. It was easy to make with the detailed instructions in the recipe. It was not only stunning to look at, but it was incredibly delicious!
The toasted coconut and ganache absolutely make this recipe. It’s easy to assemble and looks so impressive when done!
Should the cocoa powder be dutch process?
I made 1 12 recipes and it made the most perfect 9 inch layer cake. Everyone raved about it. I thought it was absolutely delicious. You would never know it was a gluten free cake. Thank you!
Jenna you did it AGAIN as always. i commented this last time but i am so confident in jenna’s recipes i will literally make it without trying it first and serve it. tonight i made this for a dinner party and it was a huge hit. my fiancé isn’t a huge coconut fan and even he raved about this. it is the most refreshing hint and so moist. i used the black velvet cocoa powder from the halloween cake for a dark black color. i can’t stop myself from eating this — i keep sneaking to the kitchen for more. i have made almost everything on this website to date and not one thing hasn’t been a hit. when is your cookbook coming out?!?!
How about King Arthur Gluten free flour