Chocolate Puff Pastry Christmas Tree
This three ingredient puff pastry Christmas tree is the perfect last minute Holiday dessert! Two sheets of frozen puff pastry are sandwiched with chocolate SunButter. The edges are cut, twisted, and baked for the perfect finger food dessert. It’s so quick, so easy, and so fun to make!
This post is sponsored by SunButter and all thoughts and opinions are my own. Thank you for supporting the brands that make Butternut Bakery possible!
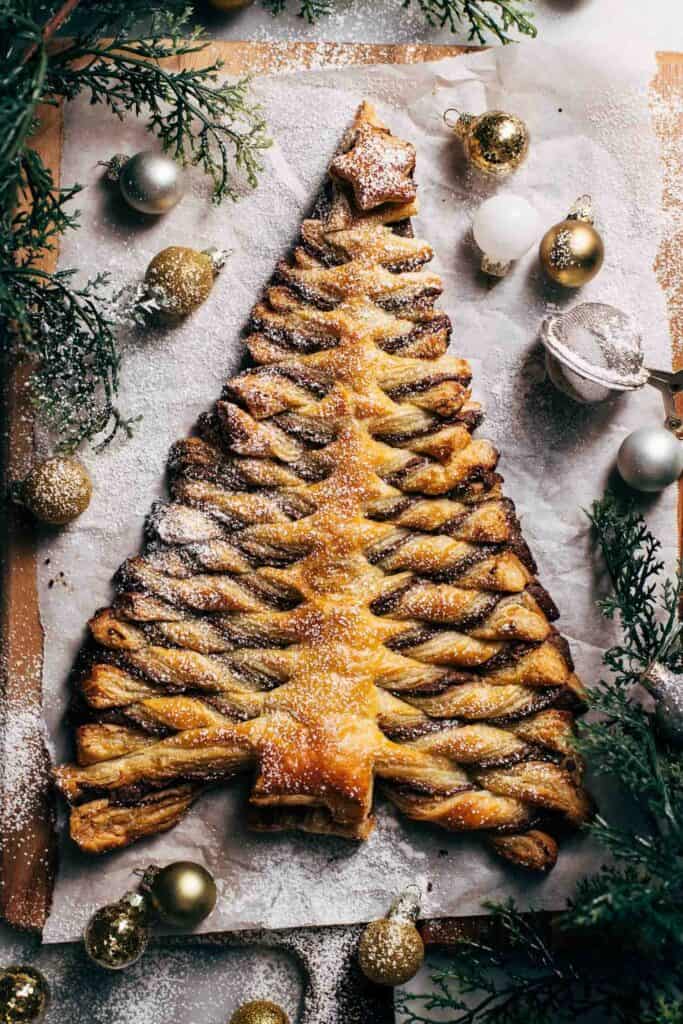
Chocolate puff pastry Christmas tree
This honestly might be the easiest dessert recipe on my website, and yet it looks so impressive! It only requires three simple ingredients and is ready in under an hour.
- Puff Pastry – This recipe uses pre-made frozen puff pastry. Just thaw and roll!
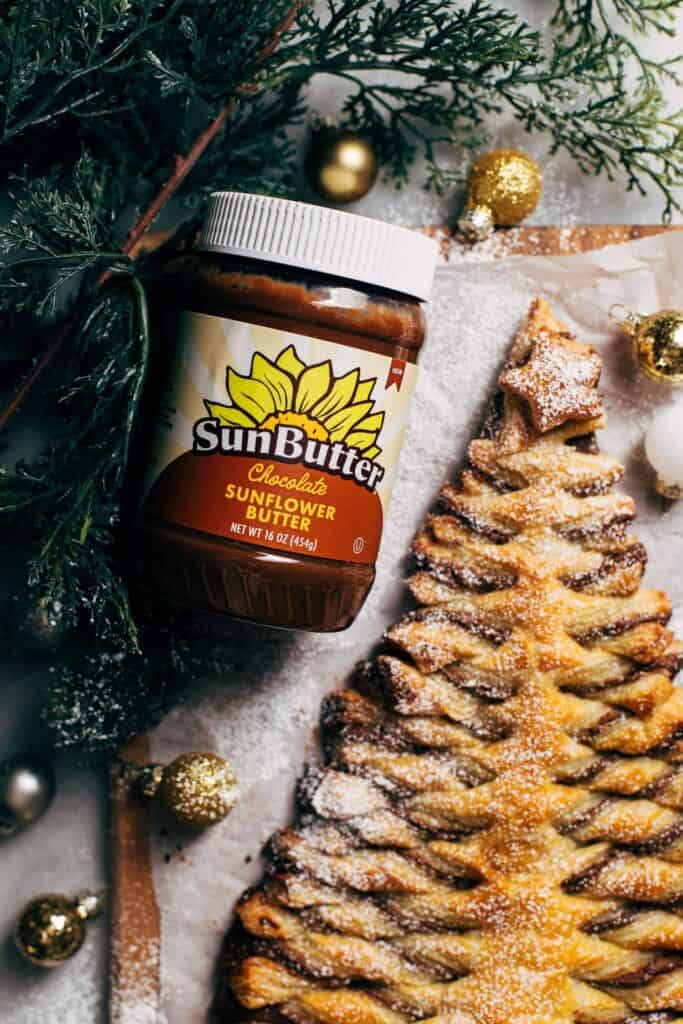
- Chocolate SunButter – All the flavor comes from this delicious chocolate sunflower seed spread. It’s so smooth and creamy and, personally, I think it has a slight marshmallowy flavor to it which I love! It’s not too sweet and is so so addicting. I could just eat it by the spoonful.
- Egg Wash – The golden crust comes from a simple egg wash on top. Just beat an egg and brush it over the pastry before baking.
So minimal yet so festive! This is the perfect last minute Christmas dessert.
How to make a puff pastry Christmas tree
All those twists may look complicated, but it’s actually so incredibly easy! Here’s how it’s done:
- Roll – Roll out two sheets of thawed puff pastry. Roll just enough to smooth out the seams.
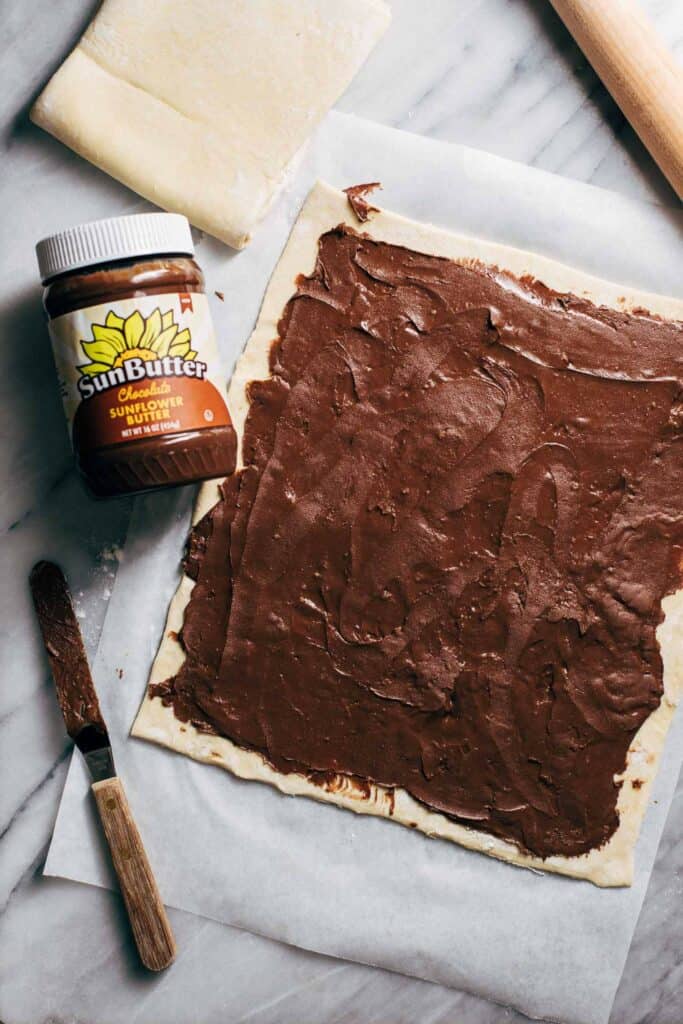
- Spread – Spread a layer of Chocolate SunButter on one sheet and lay the other on top.
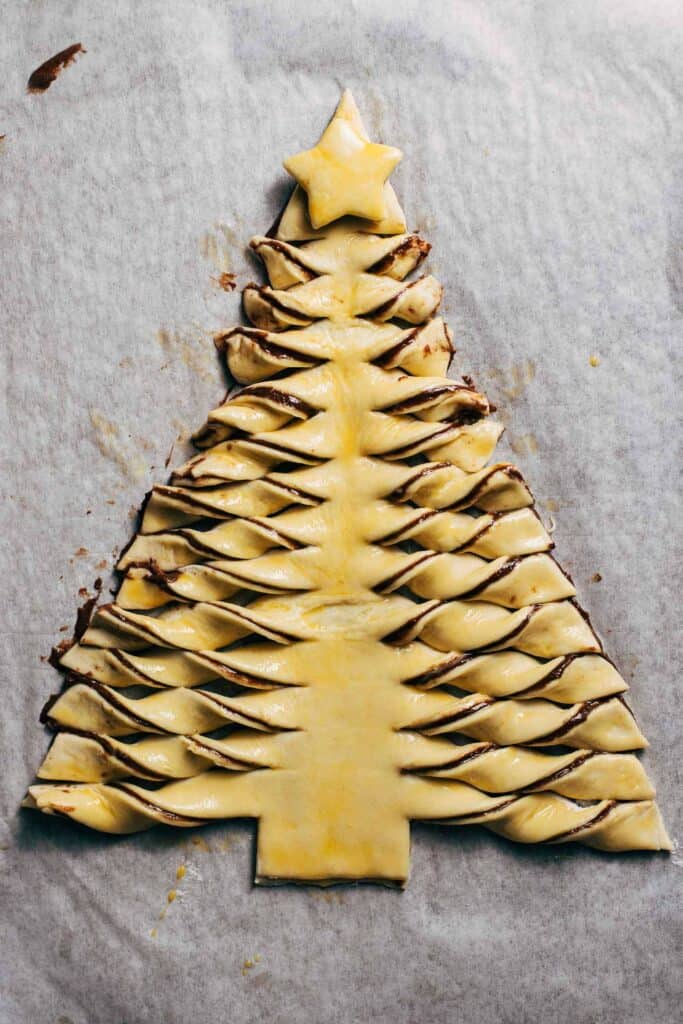
- Outline Cut – First cut the outline of a Christmas tree. At the bottom of the rectangle, cut out two strips on each side to create a short and stubby truck in the center. Then cut from the top center down to the left corner, then top center down to the right corner. Now we have the outline of a little tree!
- Cut Strips – Using a knife or pizza cutter, cut 1″ strips all up the sides of the tree. Careful not to cut through the center.
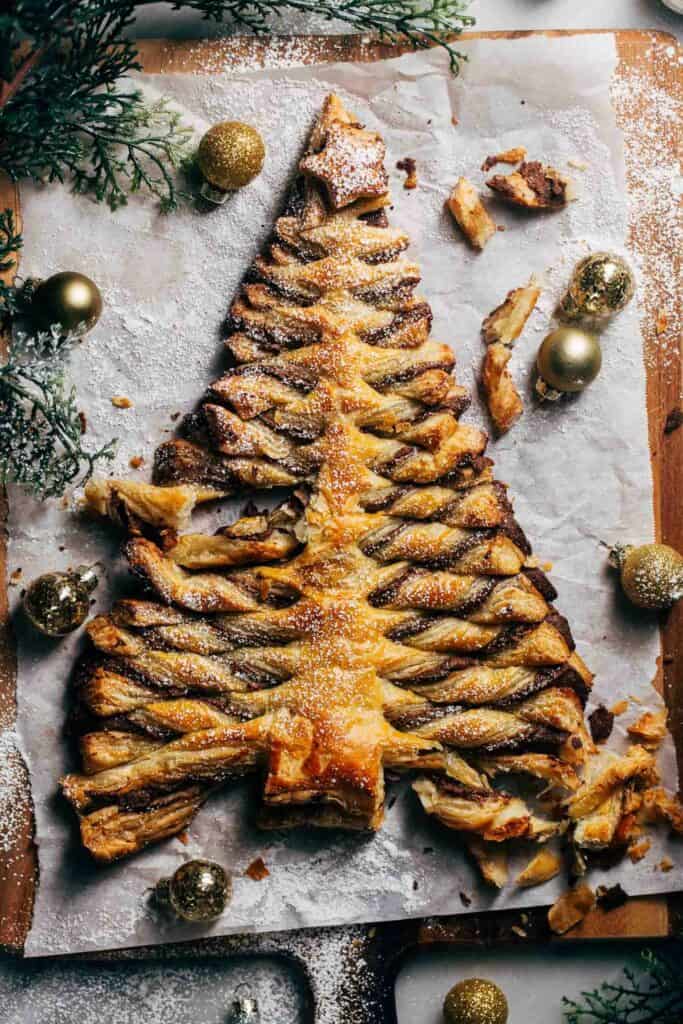
- Twist – Take each strip and twist it twice away from you. Continue all up the tree until you reach the short stubby strips at the top. Those can only withstand one twist.
- Star – It’s not a Christmas tree without a star on top! Cut a star from the scraps and place it on top of the tree.
What to do with excess puff pastry pieces
After cutting out a star, there should still be quite a bit of chocolate puff pastry leftover.
Instead of throwing them away, cut into strips and twist to make puff pastry chocolate twists. These can bake alongside our Christmas tree.
When to serve a puff pastry tree
This pastry is best served fresh! This is when it’s the crispiest and the gooiest.
If you have to travel with it, I suggest traveling with the unbaked tree and then baking it once you reach your location.
If that’s not possible, travel with the tree uncovered. Any condensation or warmth will make the tree too soft.
How to eat a puff pastry tree
This dessert is the perfect grab and eat treat! Just pull off a twist and enjoy.
For more quick and easy Christmas dessert recipes, check out my:
- Salted Peanut Butter Christmas Trees
- Dark Chocolate Almond Butter Fudge
- Chewy Spice Cookies
- Easy Candied Nuts
- Pistachio and Raspberry Thumbprint Cookies
Make sure to tag me @butternutbakery on Instagram and comment below if you make this puff pastry Christmas tree. To pin this recipe and save it for later, you can use the button on the recipe card or on any of the photos above. Happy baking!
Print
Chocolate Puff Pastry Christmas Tree
- Total Time: 45 minutes
- Yield: 10-12 servings
Description
This puff pastry Christmas tree is filled with chocolate and is SO easy to make! Using just three ingredients, spread chocolate between two sheets of puff pastry, cut into a tree, twist the ends, and bake. It’s the perfect centerpiece to any Holiday party.
Ingredients
- 2 sheets frozen puff pastry, thawed
- 1/2 heaping cup Chocolate SunButter
- 1 large egg, for egg wash
- Powdered sugar, for dusting (optional)
Instructions
- Preheat the oven to 400F and line a large baking sheet with parchment paper.
- Roll out one sheet of puff pastry on a lightly floured surface and place on the sheet of parchment paper.
- Spread on the chocolate SunButter, leaving a 1/2 inch gap around the sides.
- Roll out the other sheet of puff pastry and lay it on top of the other.
- Using a ruler as a guide for straight edges, cut out a short and wide tree trunk at the bottom of the rectangle.
- Then place the ruler from the top center of the rectangle down to the bottom left corner. Cut along the line. Repeat on the right side to reveal our triangle tree with a short stubby trunk. *Keep the cut offs to cut out stars or more twist strips.
- Using the ruler as a guide again, cut 1″ strips all up the tree on both sides. Do not cut all the way across. Leave an uncut gab in the center of the tree (see picture in post for reference).
- With all the strips cut, start twisting each one. Grab the ends, twist two times away from you, and press down the ends to keep the twists in place. Repeat this all the way up the tree. Once you get to the top 2-3 rows, only twist once as these pieces aren’t long enough for two twists.
- Beat an egg in a small dish and brush the surface of the pastry. From the scraps, cut out a star and place on top. Brush the star with egg wash as well.
- Bake for 25-30 minutes or until puffed and golden brown.
- Dust with powdered sugar and serve while it’s still warm. Enjoy!
- Prep Time: 20 minutes
- Cook Time: 25 minutes
- Category: Dessert
- Method: Baking
- Cuisine: American
Join Our Community

Meet Jenna
I’m the creator, baker, and photographer behind Butternut Bakery. Here I share desserts for every diet because I believe everyone should have a chance to indulge!
