Funfetti Cake
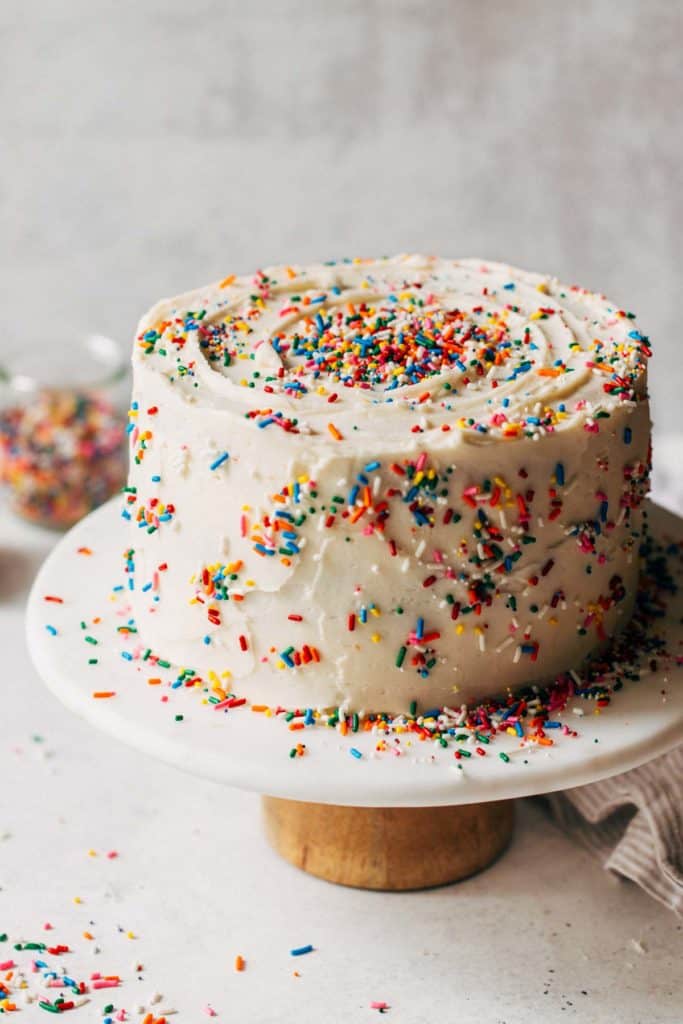
No birthday is complete without a sprinkle filled FUNFETTI CAKE! This recipe is super moist and loaded with sprinkles and real vanilla extract. The entire cake is smothered in a simple vanilla buttercream and loaded up with even more sprinkles. It’s so hard to look at this cake and not smile!
What flavor is Funfetti Cake?
Funfetti cake is more than your average vanilla cake! Not only is it loaded with sprinkles, but its texture is much richer than regular cake. It’s buttery, moist, and extra sweet.
Funfetti cake is also typically made with whole eggs rather than egg whites to give it that dense and rich texture. For my funfetti cake recipe, I also added oil to the batter to create a super duper moist cake. It also has a little extra vanilla extract for that bold vanilla flavor.
How to make Funfetti Cake from scratch
This cake is so rewarding to make from scratch. Not only is it impressive, but it’s way better than box mix funfetti cake. It has that homemade flare and flavor you just can’t get from a box.
To make sure yours turns out perfect, here’s a few tips to follow:
- Room temperature ingredients – It’s important to make sure your butter, eggs, buttermilk, and sour cream are all at room temperature before starting. Not only does it create an extra smooth batter, but it also allows the cake to bake evenly. Think of it this way, if you’re putting cold batter into a hot oven, it will take a few extra minutes to warm it all the way through which can lead to an uneven bake. Room temp is the way to go!
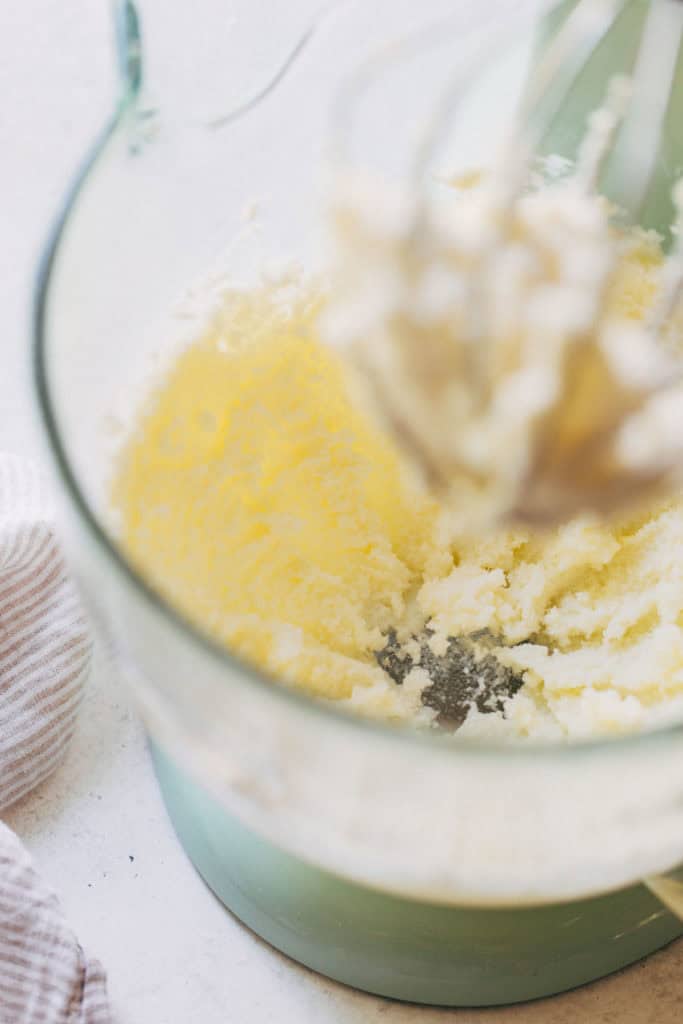
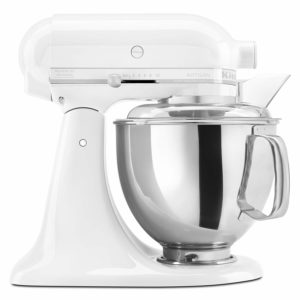
- Aerate – Since the batter uses whole eggs and oil, the cake can easily turn too dense and heavy. The first step in the recipe is crucial to get an airy cake by whipping the butter and sugar together. Whip for 3-4 minutes on high speed, or until it sticks to the sides of the bowl and reaches a fluffy consistency.
- Leaveners – Another key ingredient is the leaveners (baking powder and baking soda). Make sure yours aren’t expired before baking! Both should have an expiration date on the package. They last between 6-9 months unopened.
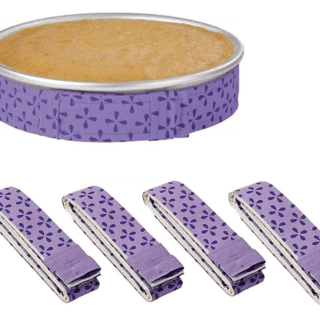
- Cake strips – This is optional, but if you reeeallly want a deliciously moist texture all throughout use cake strips. These strips are specifically designed to be wrapped around cake pans in order to keep the edges of the pan cool while the cakes bake. They’re damped before baking which prevents the outside of the cake from baking faster than the inside.
- Cake pans – This recipe is best for 3 – 9″ round cake pans. If you have 8″ cake pans, those will also work. Just make sure to leave out about 1 1/2 cups of batter. The amount of batter in this recipe is just a hair too much for 8″ pans and if they’re filled too high, the centers will sink when baked. This isn’t a HUGE issue as the centers will still be done, it will just be a bit more dense in the middle.
What can I use instead of buttermilk?
Buttermilk is used in this recipe due to its high acidity. Combined with baking soda, the two work together to break down gluten and create a light and tender texture.
If you don’t have buttermilk, you can make your own! Measure out one cup of milk, minus a tablespoon. Then add one tablespoon of white vinegar or lemon juice. Give it a stir and let the mixture sit for about 10 minutes to curdle.
Can I subtitute the sour cream?
Yes! A great sub for sour cream is 2% plain Greek yogurt. You could also sub the 1/2 cup of sour cream for an extra 1/2 cup of buttermilk if you’re really in a pinch.
What are the best sprinkles to use?
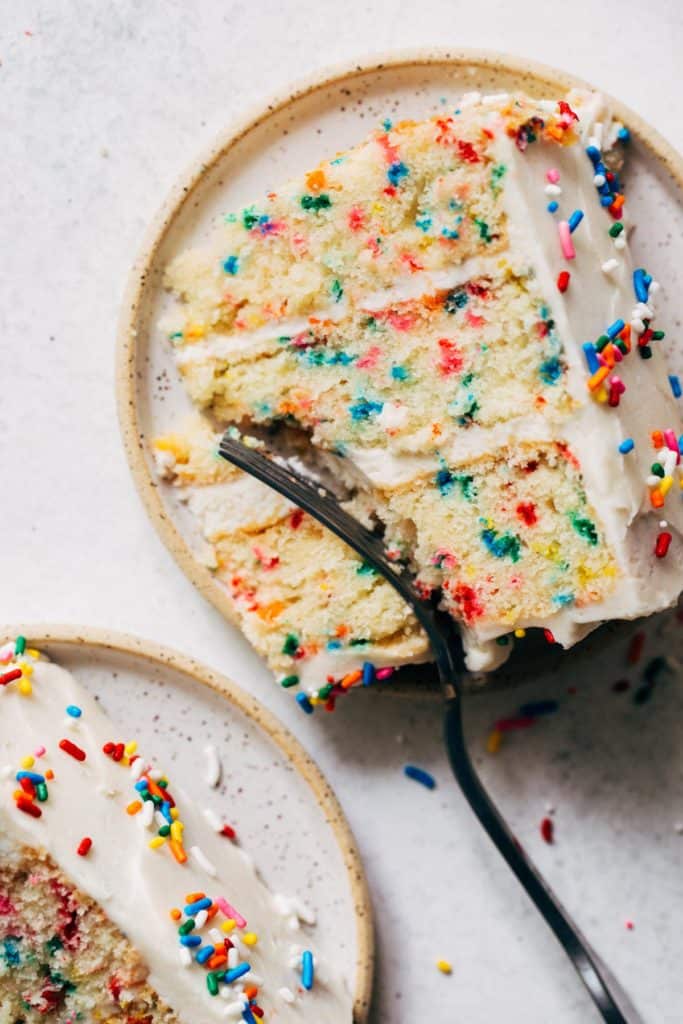
When it comes to adding sprinkles to cake batter, the type of sprinkles you use is very important. To mix into the batter, always use jimmies (these are the long and skinny sprinkles) because they won’t bleed into the batter. Don’t use nonpareils (the tiny balls) inside the cake because they bleed very easily and will muddy up the color of the cake.
As far as the outside of the cake, use whatever sprinkles you like! I chose a combo of both jimmies and nonpareils.
How do you decorate a funfetti cake?
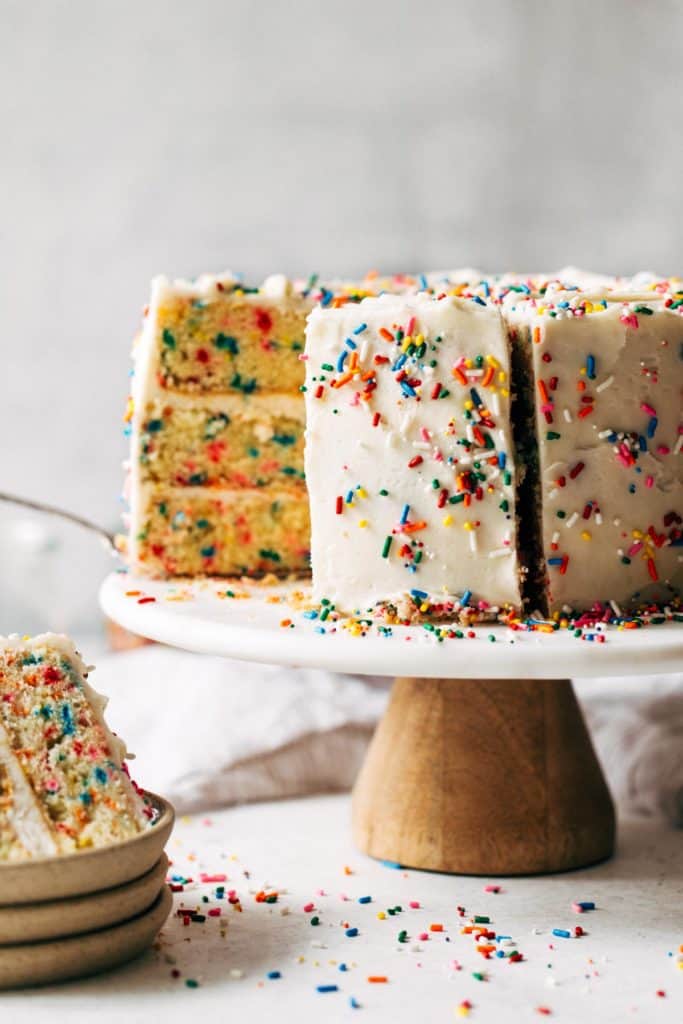
Now for the fun part! There are many ways you can decorate a funfetti cake. You can cover the entire cake in sprinkles, add buttercream swirls and a light dusting of sprinkles on top, or add sprinkle splatters like I did here.
To make the sprinkle splatters, add the sprinkles right when you’re done frosting to ensure they stick. If your buttercream is too thick or dry, the sprinkles will just bounce right off so make sure you have the texture just right!
First, mix together 2 parts jimmies and 1 part nonpareils. Then, place your cake over a large baking sheet to minimize the mess. I had tons of sprinkles fall into the baking sheet, and the rest were licked up by my dog sitting at my feet. Minimal clean up!
While the buttercream is still fresh, add a cluster of sprinkles to the top center of the cake. Then, randomly add smaller clusters of sprinkles all around the cake. To get the sprinkles on the side, grab a pinch of sprinkles and toss it against the sides of the cake in short and rapid motions. Go back round and gently press the sprinkles into the cake to make sure they stay there.
How to store your cake
If you are storing the whole cake pre-sliced, you can keep it in the fridge uncovered for a day. If you’re keeping it longer than that, I recommend using a cake container to ensure it doesn’t dry out. It will keep in the fridge untouched for 3 days for maximum freshness.
If it’s already sliced, you can either slice the entire cake and store the slices in a container, or place the entire cake in a cake container and press plastic wrap up against the sliced openings (this prevents it from drying out too quickly). Both stored in the fridge and will keep for up to 5 days.
For more cake recipes, check out my:
- Cookie Dough Cake
- Moist Chocolate Cake
- Perfect Carrot Cake
- Fresh Strawberry Sheet Cake
- Moist Olive Oil Cake
Make sure to tag me @butternutbakery on Instagram and leave a review below if you make this Funfetti Cake. To pin this recipe and save it for later, you can use the button on the recipe card, the buttons above or below this post, or on any of the photos above. Happy baking!
Watch how to make this funfetti cake:
Funfetti Cake
- Total Time: 2 hours 40 minutes
- Yield: 9″ layer cake
Description
This is the PERFECT funfetti cake recipe! It’s super moist, soft, and loaded with sprinkles.
Ingredients
Funfetti Cake
- 1 cup (220g) unsalted butter, room temp
- 2 cups (400g) granulated sugar
- 1/2 cup (110ml) vegetable or canola oil
- 4 large eggs, room temp
- 1 tbsp vanilla extract
- 3 1/4 cups (435g) all purpose flour
- 2 1/2 tsp baking powder
- 1/2 tsp baking soda
- 1 tsp salt
- 1/2 cup (125g) full fat sour cream, room temp
- 1 cup (225ml) buttermilk*, room temp
- 3/4 cup (140g) rainbow jimmies sprinkles
Buttercream
- 1 1/2 cups (330g) unsalted butter, room temp
- 5 cups (600g) powdered sugar
- 1 tbsp vanilla extract
- 2–3 tbsp milk
- 1/2 cup (90g) sprinkles for decorating
Instructions
Funfetti Cake
- Preheat the oven to 350F and grease and line the bottoms 3 – 9″ cake pans with parchment paper. You can also use 3 – 8″ cake pans but you will need to leave out about 1 cup of batter (If the pans are overfilled the cakes will sink in the middle. Make sure to only fill the pans a little over halfway). Line the pans in cake strips if you have them.
- Whisk together the flour, baking powder, baking soda, and salt and set aside.
- Using a hand or stand mixer, cream together the butter and sugar until light and fluffy mixing on medium high speed for 3-5 minutes with the whisk attachment. *see picture in post for reference
- With the mixer running on low, pour in the oil. Scrape down the bowl and give it another mix.
- Mix in the eggs one at a time followed by the vanilla. Scrape down the bowl after every 2 eggs.
- Mix in the sour cream.
- With the buttermilk and dry ingredients, mix into the batter alternating between the two, starting and ending with the dry ingredients (dry, wet, dry, wet, dry).
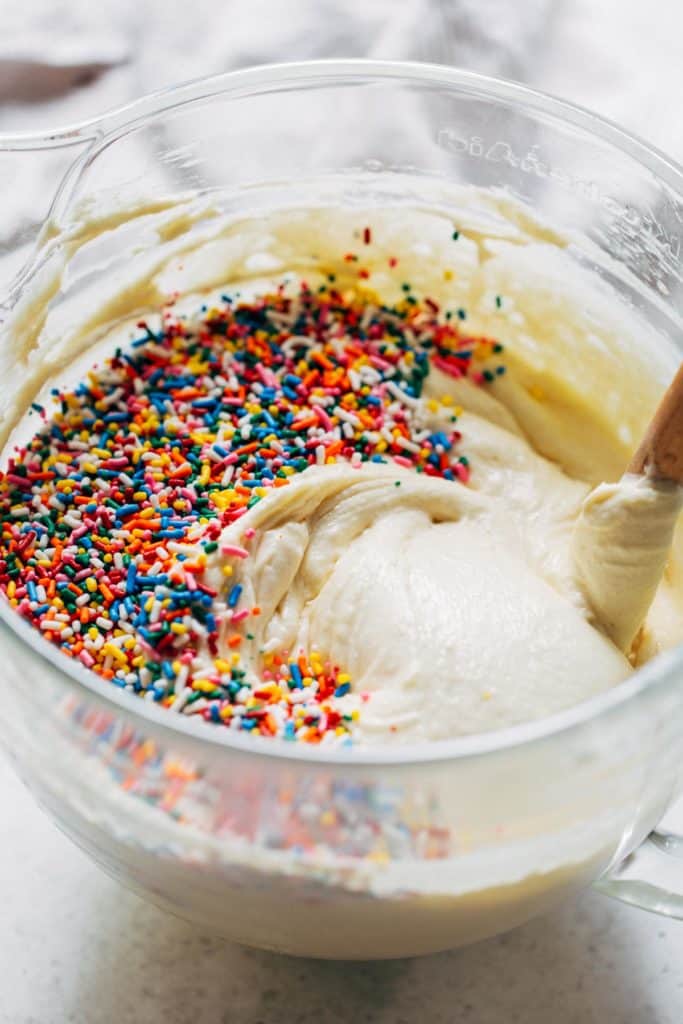
- Take the bowl off the stand once the batter is combined. Take a rubber spatula and give it a good mix, scraping down the bottom and sides of the bowl. Then, fold in the sprinkles.
- Pour into your cake pans and spread it even. For 9″ cakes, bake for 30-35 minutes. For 8″ cakes, bake for 35-40 minutes. They’re ready when a toothpick in the center comes out clean.
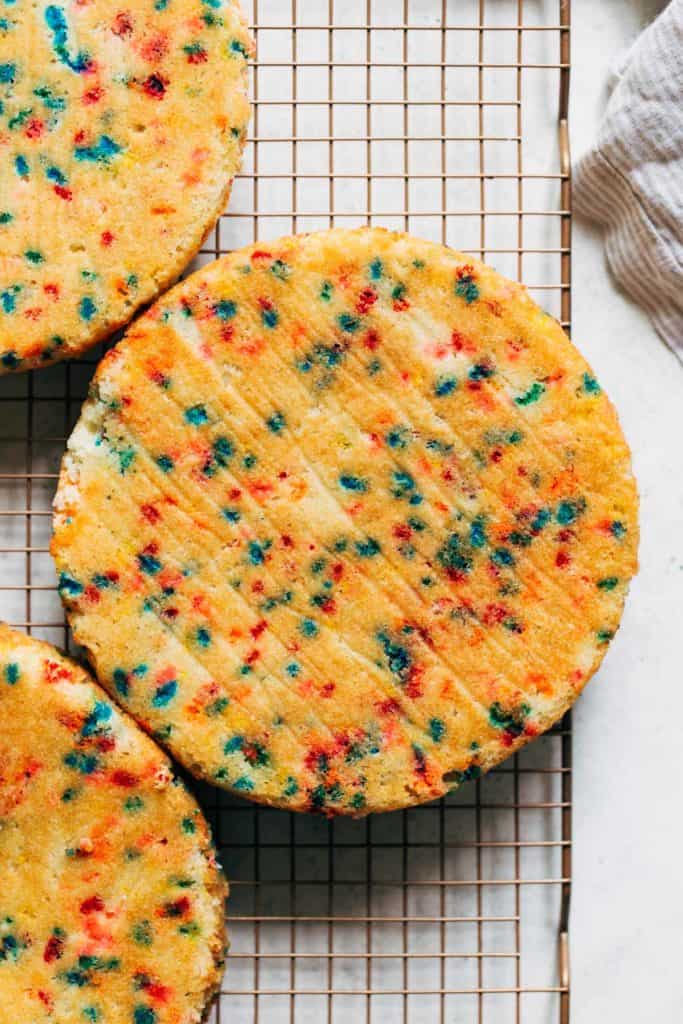
- Allow the cakes to cool in the pans for 30 minutes, then run a knife around the edges and turn them out on to a cooling rack and peel the paper off. If you’re frosting the cake that day, transfer the cakes (still on the cooling rack) to the fridge to completely chill before assembling (about 1 hour). If baking the cakes a day ahead, allow the cakes to cool to room temp on the rack for 1 hour, then wrap in plastic wrap and place in the fridge overnight.
Buttercream
- Mix the butter using a hand or stand mixer with the whisk attachment until smooth.
- Mix in one cup of powdered sugar at a time, adding the vanilla and milk as it begins to thicken.
- If the buttercream is still too thick when you’re done, add another tablespoon of milk.
Assemble
- Level off the chilled cakes if needed.
- Spread a thin layer of buttercream between each cake layer, then give the entire cake a thin crumb coat. Do so by spreading a very very thin layer all around the cake, just enough to enclose all of the crumbs. Place the cake in the fridge for 20 minutes.
- Frost the cake with the rest of the buttercream and decorate with extra sprinkles. Enjoy!
Notes
- *To make your own buttermilk if needed, mix together 1 cup of milk minus one tablespoon and add 1 tablespoon of white vinegar or lemon juice. Let it sit for 10 minutes to thicken and curdle like buttermilk.
- Prep Time: 2 hours
- Cook Time: 40 minutes
Join Our Community

Meet Jenna
I’m the creator, baker, and photographer behind Butternut Bakery. Here I share desserts for every diet because I believe everyone should have a chance to indulge!


This cake is sooo moist and amazing! Can I use this as just a white cake with no sprinkles will it still be this amazing?
One of the best cake recipes ever. I baked it for the first time and it came out super delicious. Undoubtedly the best cake i ever had. Thank you so much!!
Quite literally the best cake batter I’ve ever had!!! Cakes are baking now but the batter was so good I had to review now!
I made this for my birthday and it looks and tastes amazing. Thank you for making this recipe so easy to follow.
Have you tested this gluten free?
Can I use this batter to make cupcakes or a sheet cake??
Absolutely delicious! One of the best cakes I’ve ever made and everyone loved it, too. Very moist. I made it in a Bundt cake (cooked for 60 minutes) and it was amazing! Highly recommend!!
Hi Jenna!! I am wondering..,do you have a recommendation on scaling this recipe to make a large 1/2 sheet cake?
I would love your advice or tips if you have any! Thank you!!
Oh. Em. Gee. Yall. This is SO GOOD! Literally just took them out the oven and had to come leave a review. That delicious!
I’m not sure how it’s going to taste because it’s chilling with it’s crumb coat now. I took off a star because these cakes were barely a full inch high when divided between three 9 inch cakes. I followed everything exactly, and with a scale when applicable, and my baking soda and powder were brand new. Cooking time said 30-35, I set for 29, and by the time I got in there the cake had pulled away from the sides and the edges were super brown. And they were short. So, I’m praying they’re not dry. I suggest setting a timer for 3-4 minutes before the recipe suggests to toothpick check your sponge just to see. Recipe was easy to follow and batter along the sides of the bowl tasted amazing.