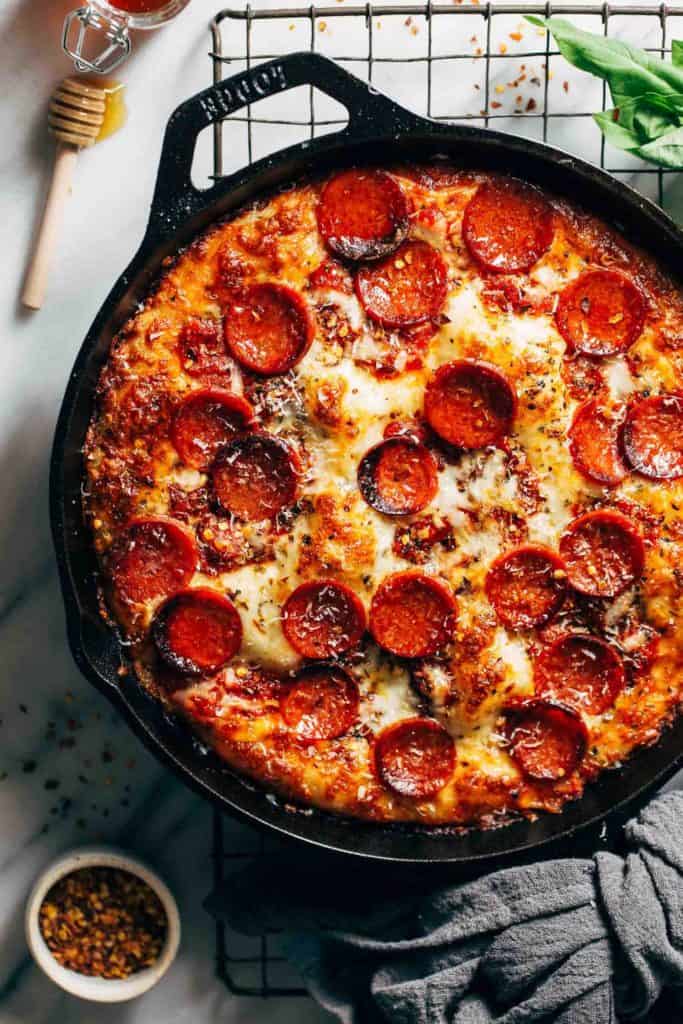
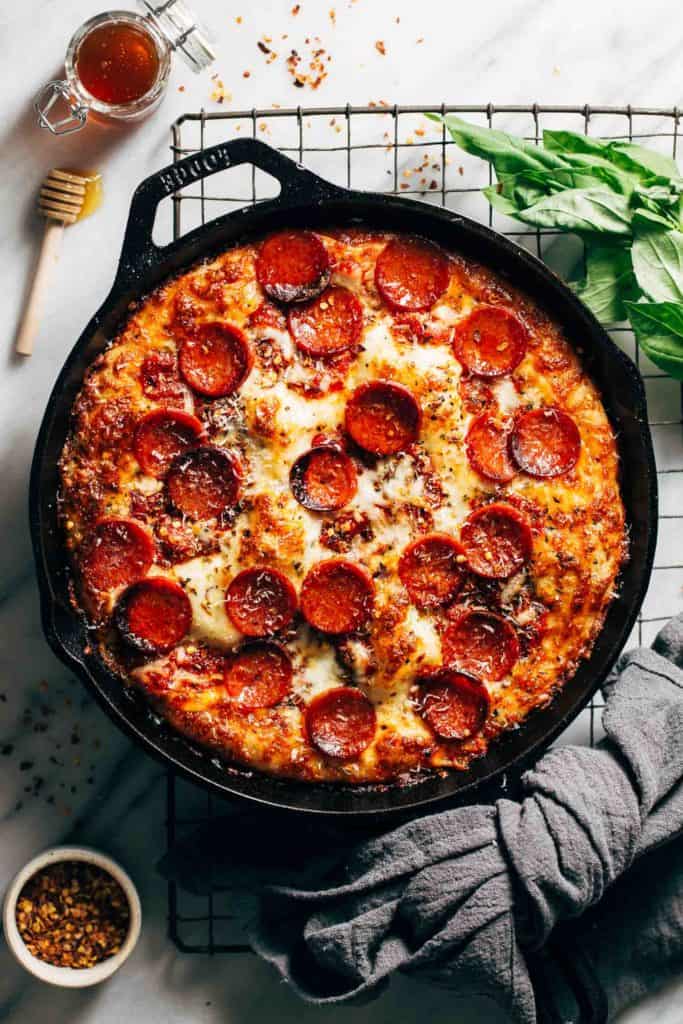
Spicy Detroit-Style Pizza
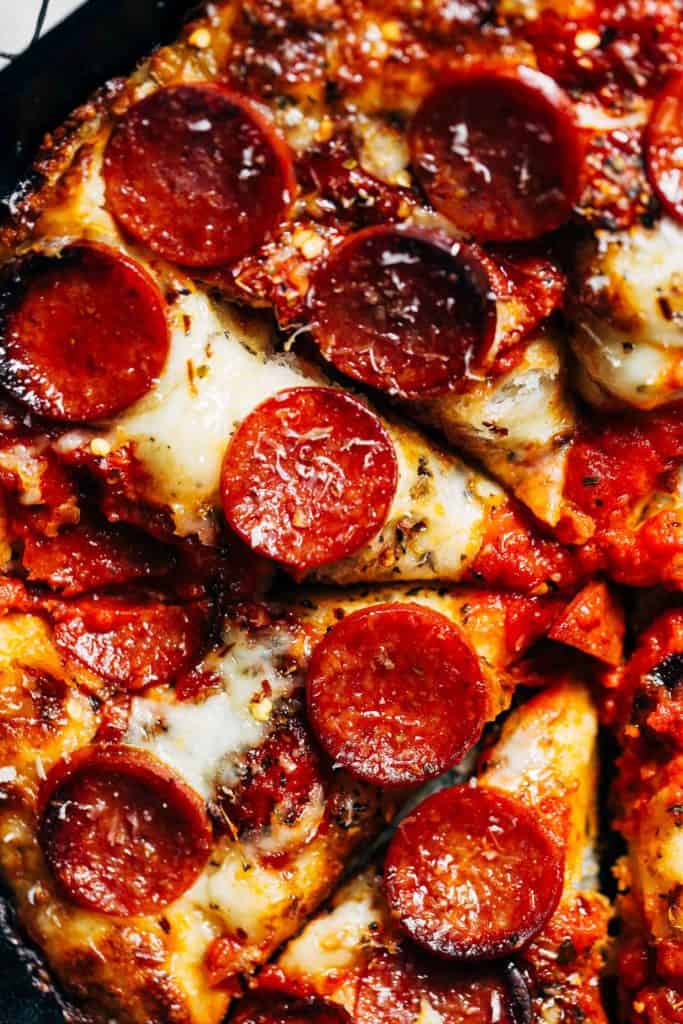
There was a Detroit-style pizza place down the street from where I used to live in Chicago and it had the fluffiest crust with the most delicious cheesy crisp edges. I haven’t been back in four years so it was only right that I made my own! This version is made in a skillet with a super fluffy crust, puddles of marinara, thick cut pepperoni, and a drizzle of hot honey. Its spicy, sweet, savory, and so addicting. I’ve also included a gluten free version!
What is Detroit-style pizza?
Detroit-style pizza is another variation of the many many mays to make pizza. There’s deep dish Chicago-style, thick and giant New York-style, or a more rustic Tuscan wood-fired style.
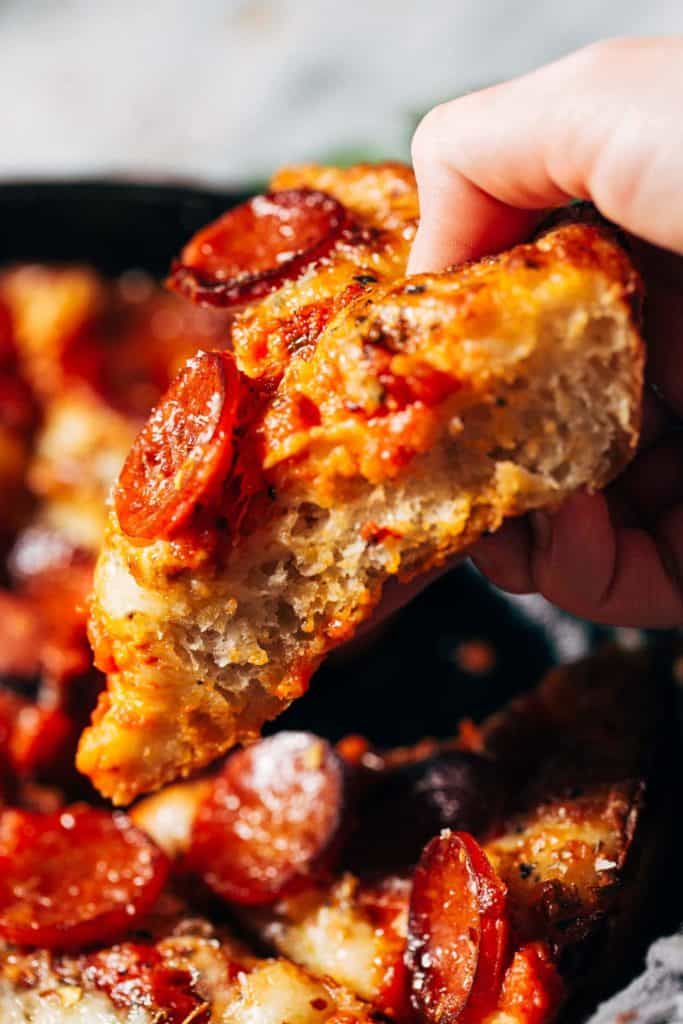
What makes Detroit-style pizza stand out is its signature fluffy focaccia-like crust and thick cut pepperoni.
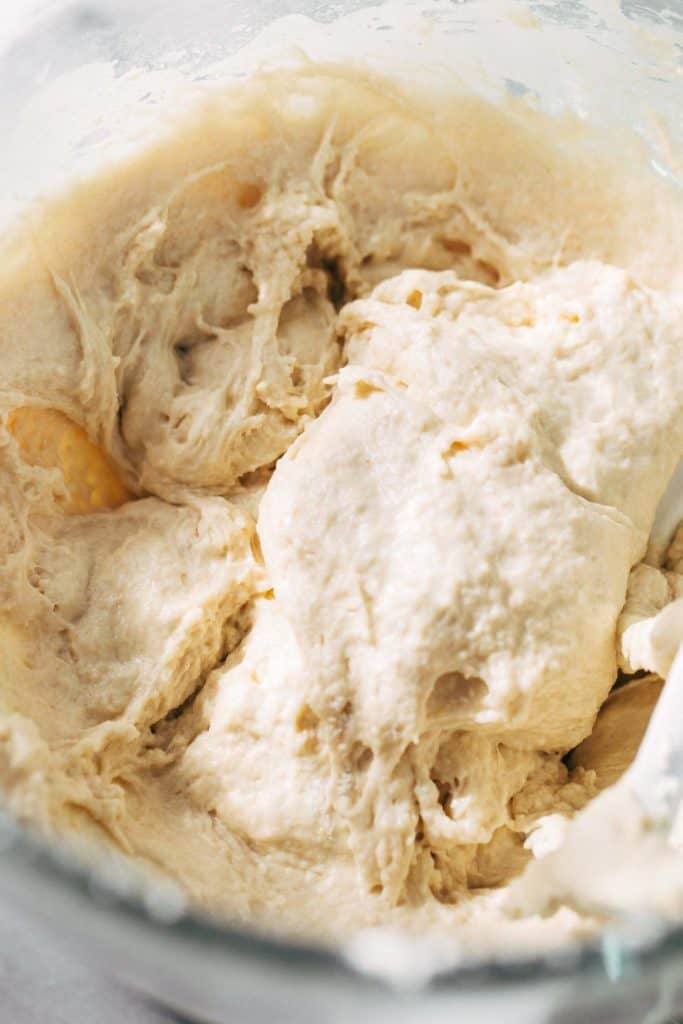
It starts off with a very wet and sticky dough, very similar to focaccia, which rises to create tiny air bubbles all throughout. The end result is a pillowy crust that leans more towards bread than thin crust.
Detroit-style pizza is also known for its pepperoni. It uses thick cut slices that bake into little cups. They basically hold all the grease that runs off the pepperoni, but in the best way. It’s much more flavorful and savory this way!
Another key factor is the cheese. It’s the first ingredient to go on the crust and it’s sprinkled all the way out to the edges. As the pizza bakes, the cheese crisps up and creates this ring of crunchy burnt cheese all around the edge. It’s….incredible.
All together, the pizza has a fluffy crust, thick cut pepperoni cups, and crispy golden cheese edges. What’s not to love?
How to make Detroit-style pizza
The dough is very simple to make, but does take some time. In this case, it’s important to start making the dough 2 hours before you’re ready to eat. Trust me, it’s well worth the wait.
Here are my top tips for making the dough:
- Flour – Make sure to gently spoon the flour into the measuring cup and rake off any excess with a flat edge. If too much flour is used, the dough will struggle to fully rise and the crust will likely be a bit too dense and chewy.
- Water – The water should be warm to the touch, but not too hot. Warm water will activate the yeast which allows the dough to rise. If the water is too cold or too hot, it will either kill or not activate the yeast.
- Kneading – Using a stand mixer makes this part really easy, especially because the dough is very sticky. It’s important to really work the dough for a full 5 minutes. This encourages gluten formation, leading to a strong and sturdy crust.
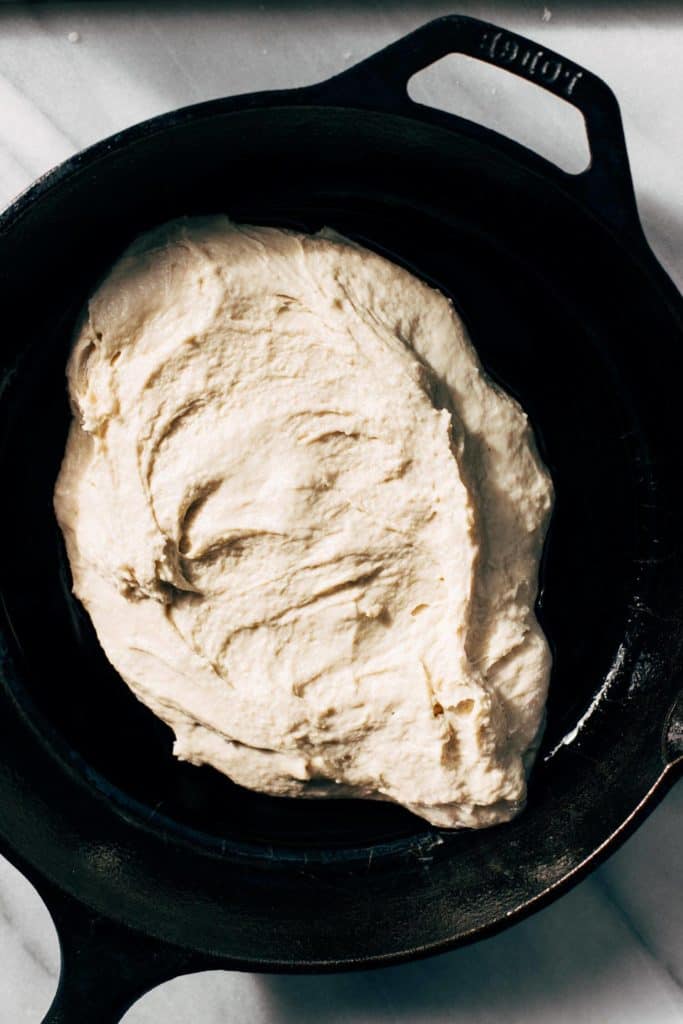
- Plop – After kneading, just plop the dough right into the center of a well-greased skillet. No need to fuss with it as it’s loose enough to spread out on its own. As the dough rises, it will naturally fill the pan.
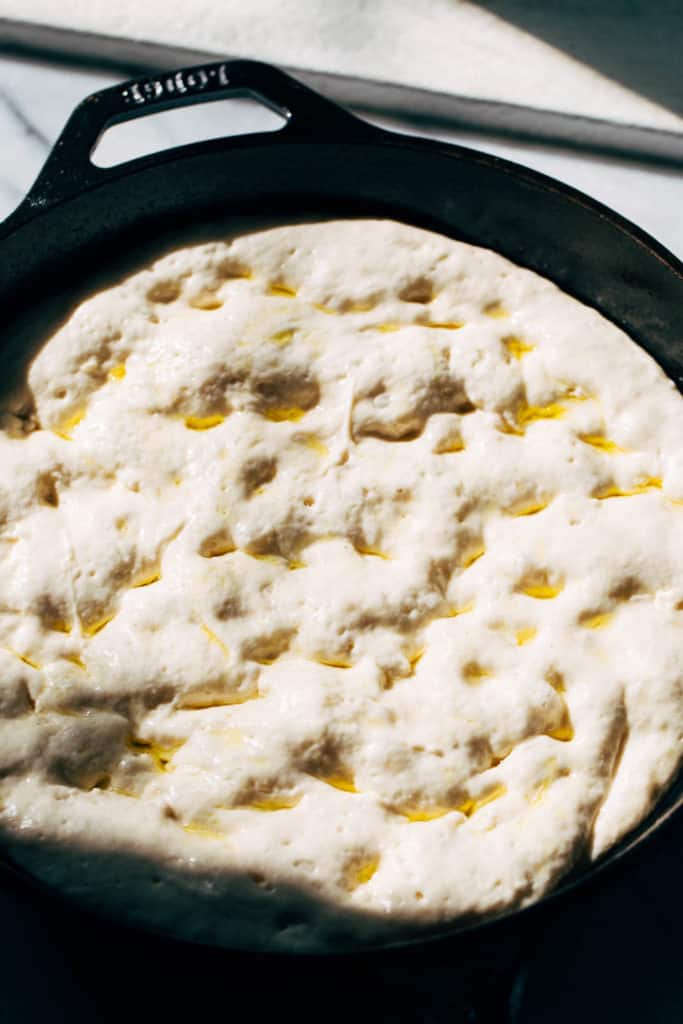
- Pressing – When the dough has risen, it’s time to add focaccia-like imprints. Lightly drizzle the dough with olive oil and lightly coat your fingers with some as well. Gently press into the crust, but don’t press all the way down to the bottom. Just press enough to nudge and spread out any uneven spots in the dough.
- Resting – After pressing, do not wait more than 30 minutes before topping and placing the pizza in the oven. It will continue to rise during this period, so if it rests too long the dough can become unstable. That’s why it’s important to start assembling the pizza 20 minutes after the second rise, that way it can be ready to bake in those following 10 minutes.
Detroit-style pizza toppings
The Cheese – Mozzarella cheese is best, specifically low-moisture mozzarella that’s freshly grated. This will melt and brown the best, but will not add any unnecessary moisture to the crust. So go with a hunk of mozzarella that you can grate yourself. It makes a world of a difference!
The Sauce – I find most jarred pizza sauce falls pretty flat in flavor. I prefer a hearty marinara for this recipe, Rao’s being my personal favorite. It’s not too smooth but it is FULL of flavor.
The Pepperoni – Don’t buy the pre-sliced packages of pepperoni. They just don’t cut it here! Pepperoni in natural casing comes in a sausage packaging that needs to be sliced. This allows full control over the thickness of the pepperoni, and this pizza requires about 1/8 inch slices. Any thinner and they’ll easily burn.
Hot Honey – If hot honey isn’t available, drizzle regular honey and add a few extra sprinkles of crushed red pepper. But for the best spice payoff, hot honey really takes this pizza over the edge.
Can this pizza be made in a different pan?
Yes, in fact traditional Detroit-style pizza is baked in an alloy steel 9×13 dish. To bake in this type of pan, follow these instructions:
- Pressing – When pressing into the dough after the 90 minute rise, really work the dough out to the edges of the pan.
- Assembly – Follow all of the same instructions for the topping, but more pepperoni may be required as there is more surface area to cover.
- Bake – Bake at 500F in the lower third of the oven for about 16-18 minutes. If making it gluten free, par bake the crust for about 5 minutes, then add toppings and continue to bake for about 12 minutes.
Can the dough be made overnight?
Yes, after the dough has been pressed like focaccia, cover the pan and chill the dough overnight. Then remove the pan from the refrigerator right when the oven starts to preheat. This will give it some time to warm up.
Then top and bake just as instructed.
Have fun with the toppings
Pepperoni is the classic and only topping for Detroit-style pizza, but feel free to add your favorites. Really anything goes! But when it comes to sliced veggies, try slicing a bit thicker as the high oven temp could burn them to a crisp if sliced too thin.
- Olives
- Sliced bell pepper
- Sliced red onion
- Mushrooms
- Crumbled cooked sausage (these would get extra crispy and so delicious)
- Giardiniera (after baking)
- Banana peppers (after baking)
For more savory recipes, check out my:
Make sure to tag me @butternutbakery on Instagram and leave a review below if you make this Detroit-style pizza. To pin this recipe and save it for later, you can use the button on the recipe card, the buttons above or below this post, or on any of the photos above. Happy baking!
Print
Spicy Detroit-Style Pizza
- Total Time: 2 hours 25 minutes
- Yield: 8 slices
Description
This Detroit-style pizza is made with a super fluffy crust, thick-cut pepperoni, and a drizzle of hot honey for added spice. It’s so easy to make and yields the BEST homemade pizza. I’ve also included a gluten free option as well!
Ingredients
Pizza Dough
- 2 1/3 cups (292g) all purpose or gluten free flour*, divided
- 1 tsp salt
- 1/2 tsp garlic powder
- 1 tsp instant yeast
- 1 cup lukewarm water
- 3 tbsp olive oil, divided
- 1 tbsp honey
Toppings
- 8 oz low moisture mozzarella cheese, hand shredded
- 3/4 cup pizza sauce (I prefer Rao’s marinara)
- 3 oz pepperoni in natural casing**, sliced to 1/8″ thick
- 1/4 tsp dried oregano
- 1/4 tsp dried basil
- 1/4 tsp cracked black pepper
- 3/4 tsp crushed red pepper
- Hot honey, to drizzle on top
- Parmesan cheese, to grate on top
Instructions
Pizza Dough
- Note: Start making the dough 2 hours before serving.
- In the bowl of stand mixer using the paddle attachment, add 1 cup flour, salt, garlic powder, and yeast. Mix to combine.
- Combine the lukewarm water, 1 tbsp olive oil, and 1 tbsp honey. With the mixer on medium-low speed, slowly pour in the water mixture.
- Once combined, add in the remaining 1 1/3 cup of flour and mix on medium speed for about 4 minutes. It should start to form into a sticky and smooth mass.
- While that’s mixing, drizzle a 12″ cast iron skillet with about 2 tbsp of oil. Use your hand to coat the entire pan, including the bottom and sides.
- When the dough is done mixing, scoop it into the center of the greased skillet.
- Lightly spray a sheet of plastic wrap and lay it on top of the skillet, greased side down to prevent it from sticking to the dough. Place the pan in a warm place and let it rise for 1 hour and 30 minutes. *See notes for overnight instructions.
- After 90 minutes, the dough should double in size and nearly cover the entire skillet. Lightly drizzle the dough with olive oil and stamp your fingers down into the dough to spread and even it out (see photo in post for reference).
- Leave the dough uncovered and let it rest for 20 minutes. During that time, adjust the oven rack to be on the lower third of the oven and preheat to 500F.
Pizza Toppings
- Grate the cheese and slice the pepperoni. Then combine the herbs and spices in a small dish.
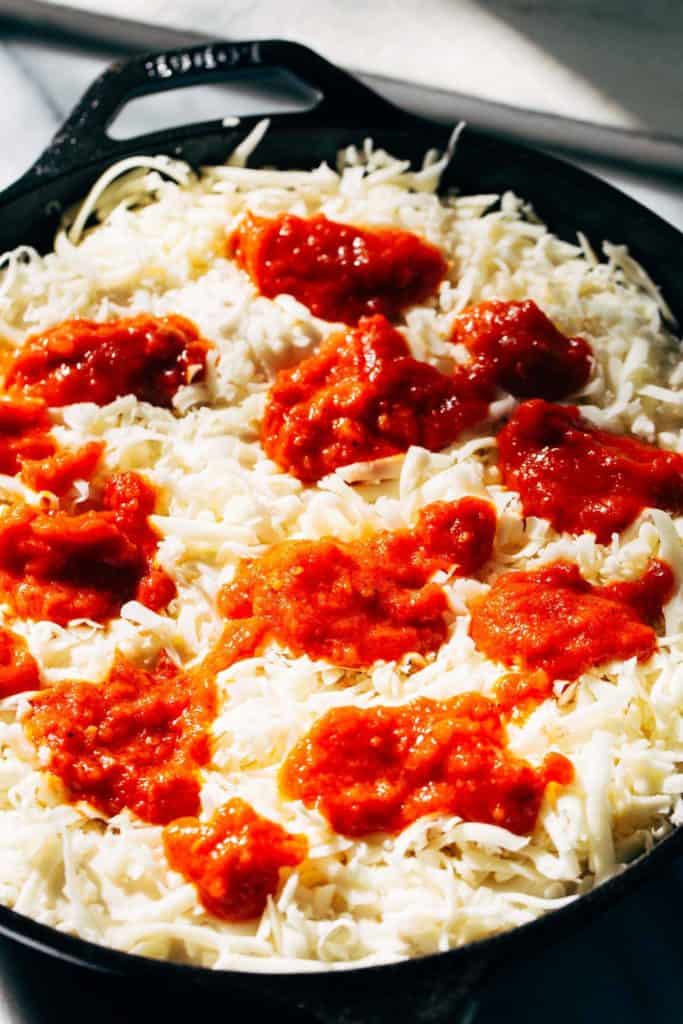
- After 20 minutes, assemble the pizza. Coat the entire surface of the dough with 2/3 of the cheese, sprinkling it all the way out to the edges.
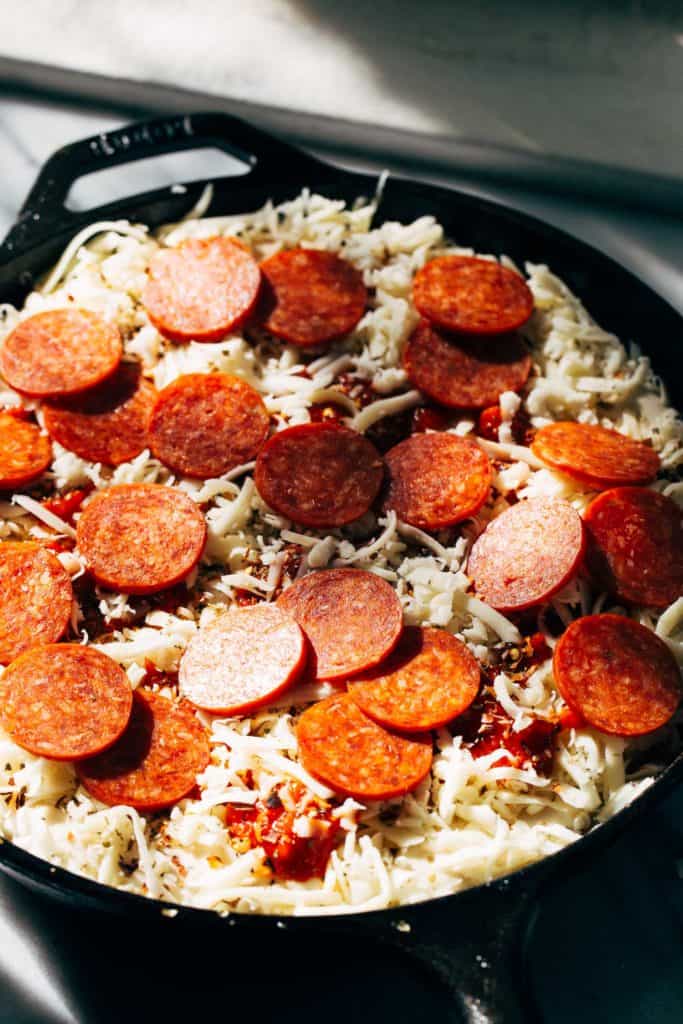
- Next, dollop spoonfuls of the sauce all over the surface of the cheese. Then sprinkle the remaining cheese on top along with 1/3 of the herb and spice blend.
- Scatter the slices of pepperoni on top.
- To bake, the GF pizza requires different instructions. See notes for details. For regular crust, bake on the lower third of the oven for 20-25 minutes.
- Allow the pizza to cool for about 15 minutes, then run a knife around the edge of the skillet and lift the pizza out of the pan and onto a serving dish.
- Sprinkle with the remaining herbs and spices, drizzle with honey, and grate some fresh parmesan on top. Let the pizza rest for another 10 minutes.
- To slice, I suggest using kitchen scissors to cut through the crispy cheese crust, and then use a large knife to make the slices. Enjoy!
Equipment
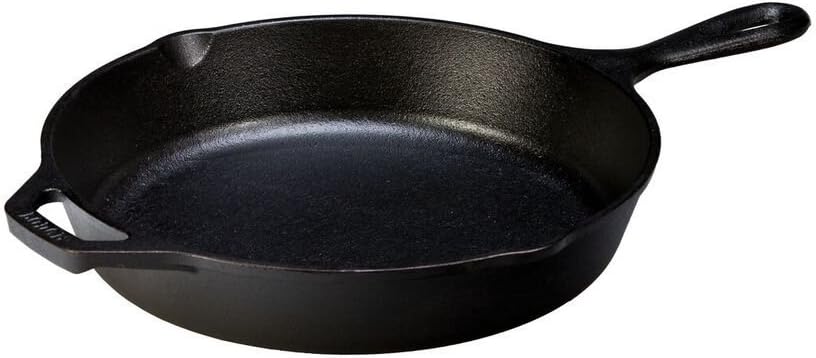 Buy Now →
 Notes
GLUTEN FREE – Follow all the same instructions up until baking. Bake the crust by itself at 500F in the center of the oven for 15 minutes. Remove the pizza and let it cool for about 10 minutes, then add the toppings as instructed and bake on the lower third of the oven for another 15 minutes. Allow it to cool and then slice and enjoy!
PEPPERONI – Pepperoni in natural casing comes in a sausage link that needs to be sliced. This is preferred because regular pepperoni is too thin and will burn quickly. This type of pepperoni is typically found near the deli section of the grocery store.
OVERNIGHT DOUGH – After the dough rests for 90 minutes, press into the dough as instructed but then cover the pan and chill in the refrigerator overnight. Follow all the same instructions for baking, but pull the dough out of the refrigerator right when you set the oven temperature. That way it can warm up as the oven preheats.
- Prep Time: 2 hours
- Cook Time: 25 minutes
- Category: Main Dish
- Method: Yeasted
- Cuisine: American
Join Our Community


Meet Jenna
I’m the creator, baker, and photographer behind Butternut Bakery. Here I share desserts for every diet because I believe everyone should have a chance to indulge!

Amazing and so easy!
Outstanding recipe.
For those concerned about temperature and time: 475F for 12 mins + 2-3 minutes broiled, or 475F for 14 mins unbroiled should do it beautifully 🙂
Best and easiest homemade pizza ever!! This was amazing and will be my go-to pizza recipe from now on. Thank you for the recipe
Hi Jenna,
Can you clarify at what temperature the pizza needs to be baked at?
20 mins at 500 seems too long. Thank you!
Wow. This is the BEST pizza! It’s basically focaccia bread with pizza toppings so it’s not a dense bread, so light and SO delicious. I have already made this 4 times (in way too close of a timeframe). I will say, I was concerned at how the dough looked the first time I made it. In an experienced baker, but the description made it seem like it would form into more of a ball. It does not. It’s very loose dough that does not hold together, but I decided to trust it the first go round and man it did not disappoint! Urging everyone to make this even if you’re not used to handling yeasted dough- it’s incredibly easy.
One question Jenna, is the 1.5 hour rise necessary even if it finished rising sooner? I’m not sure if it yields a lighter dough doing the full 1.5 or if I could get away with an hour?
Thanks for being the absolute best baking blog there is! I use your recipes exclusively unless you don’t have something specific. You’re the best!
We’ve been making this pizza several weekends in a row it’s really really good I’m curious if anyone has made it without frying it in the oil in the skillet and rather just baked it on a cookie sheet or on a sheet without the oil
This pizza was so easy to make I made this yesterday on Valentine’s Day because my husband love’s pizza. I want to tag you in it but I forgot. Next time I make it again I will tag you in it. I love all your recipes!