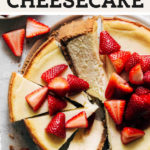
The BEST Classic Cheesecake
If you’re looking for the most perfect baked cheesecake recipe, the search is over. This Classic Cheesecake is super creamy and smooth with a delicious cinnamon spiced graham cracker crust. I’ve also included tons of cheesecake baking tips to ensure yours turns out perfect! By the end of the recipe, you’ll be a cheesecake baking pro.
Why I love this recipe
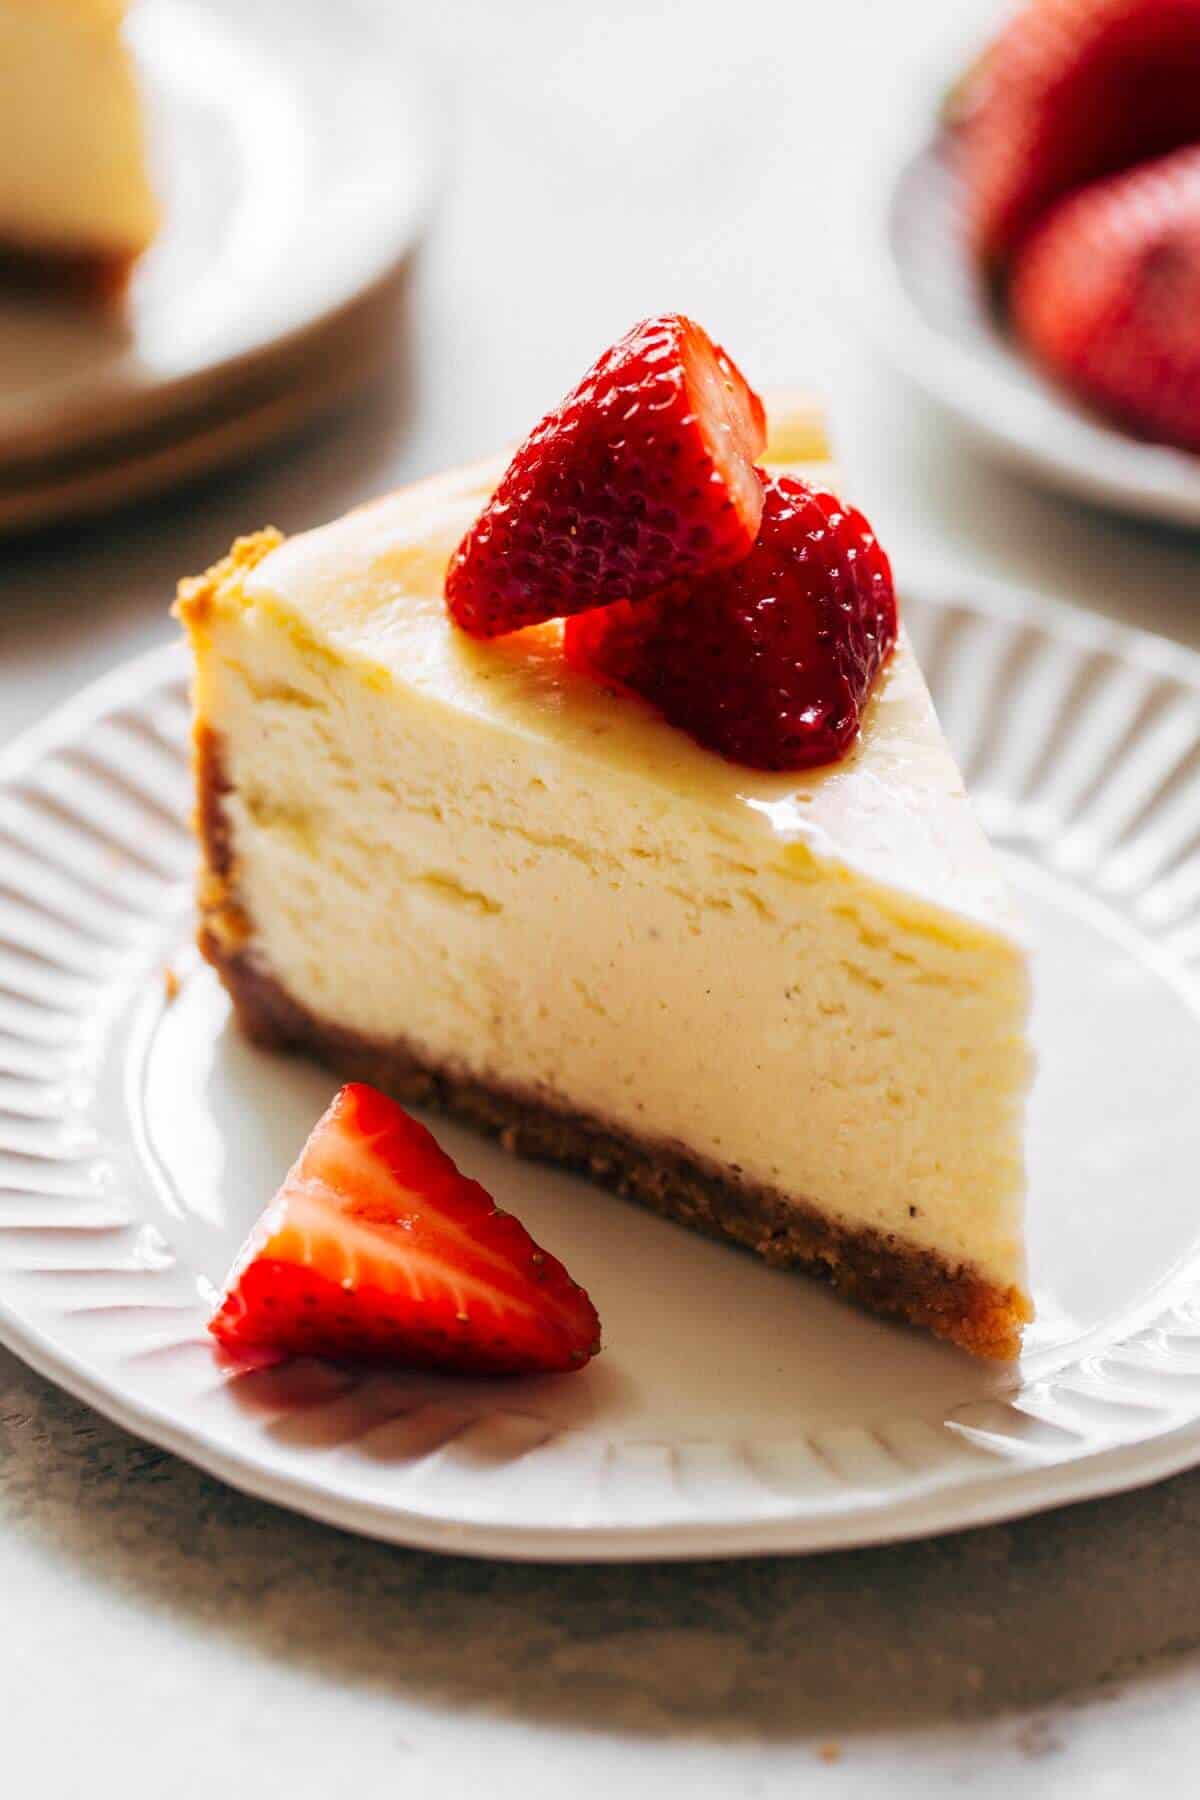
Where do I even begin… well for starters this cheesecake is insanely creamy but NOT soupy. It’s not uncommon for a cheesecake to turn out baked on the outside and thin on the inside. That’s not the case with this one! It’s baked low and slow, giving you a really smooth texture from top to bottom.
Not only does the cheesecake have the BEST texture, but the flavor is also spot on. I’ve flavored this cheesecake with vanilla bean paste for a stronger vanilla flavor. You can see the little specks of vanilla beans all throughout, making this cheesecake extra special.
If you don’t have vanilla paste on hand, vanilla extract is also totally acceptable, or even the seeds from a vanilla pod. We’re just adding a bit more than the norm for even more flavor.
This cheesecake also sits on top of a delicious cinnamon spice graham cracker crust. This type of crust is a classic choice for cheesecake, but I needed to spice it up a bit (pun intended). Adding a hint of cinnamon and a pinch of salt really bumps of the flavors, creating the perfect pairing to the cheesecake.
Last but not least, this recipe and post is FULL of cheesecake baking tips to ensure it turns out perfect. No cracks, no lumps, no burning. Just absolutely amazing cheesecake (better than Cheesecake Factory) made right at home.
How to make a graham cracker crust
Every good cheesecake starts with the crust. What makes this one extra special is that it’s spiced with a touch of cinnamon. It doesn’t overpower the crust, but it does provide some warmth and depth of flavor.
To make the crust, you will need:
- Honey graham crackers
- Sugar
- Cinnamon
- Salt
- Melted butter
First, ground up the graham crackers into a fine crumb. The fastest way is to use a food processor. If you don’t have one, add the crackers to a ziplock bag and use a rolling pin to smash them into as fine a crumb as you can.
Add the crumbs to a large bowl and toss in the sugar, cinnamon, and salt. Whisk until they’re evenly combined.
Last, mix in the melted butter until the crumbs are moistened. It should resemble wet sand.
How to keep the graham cracker crust from crumbling
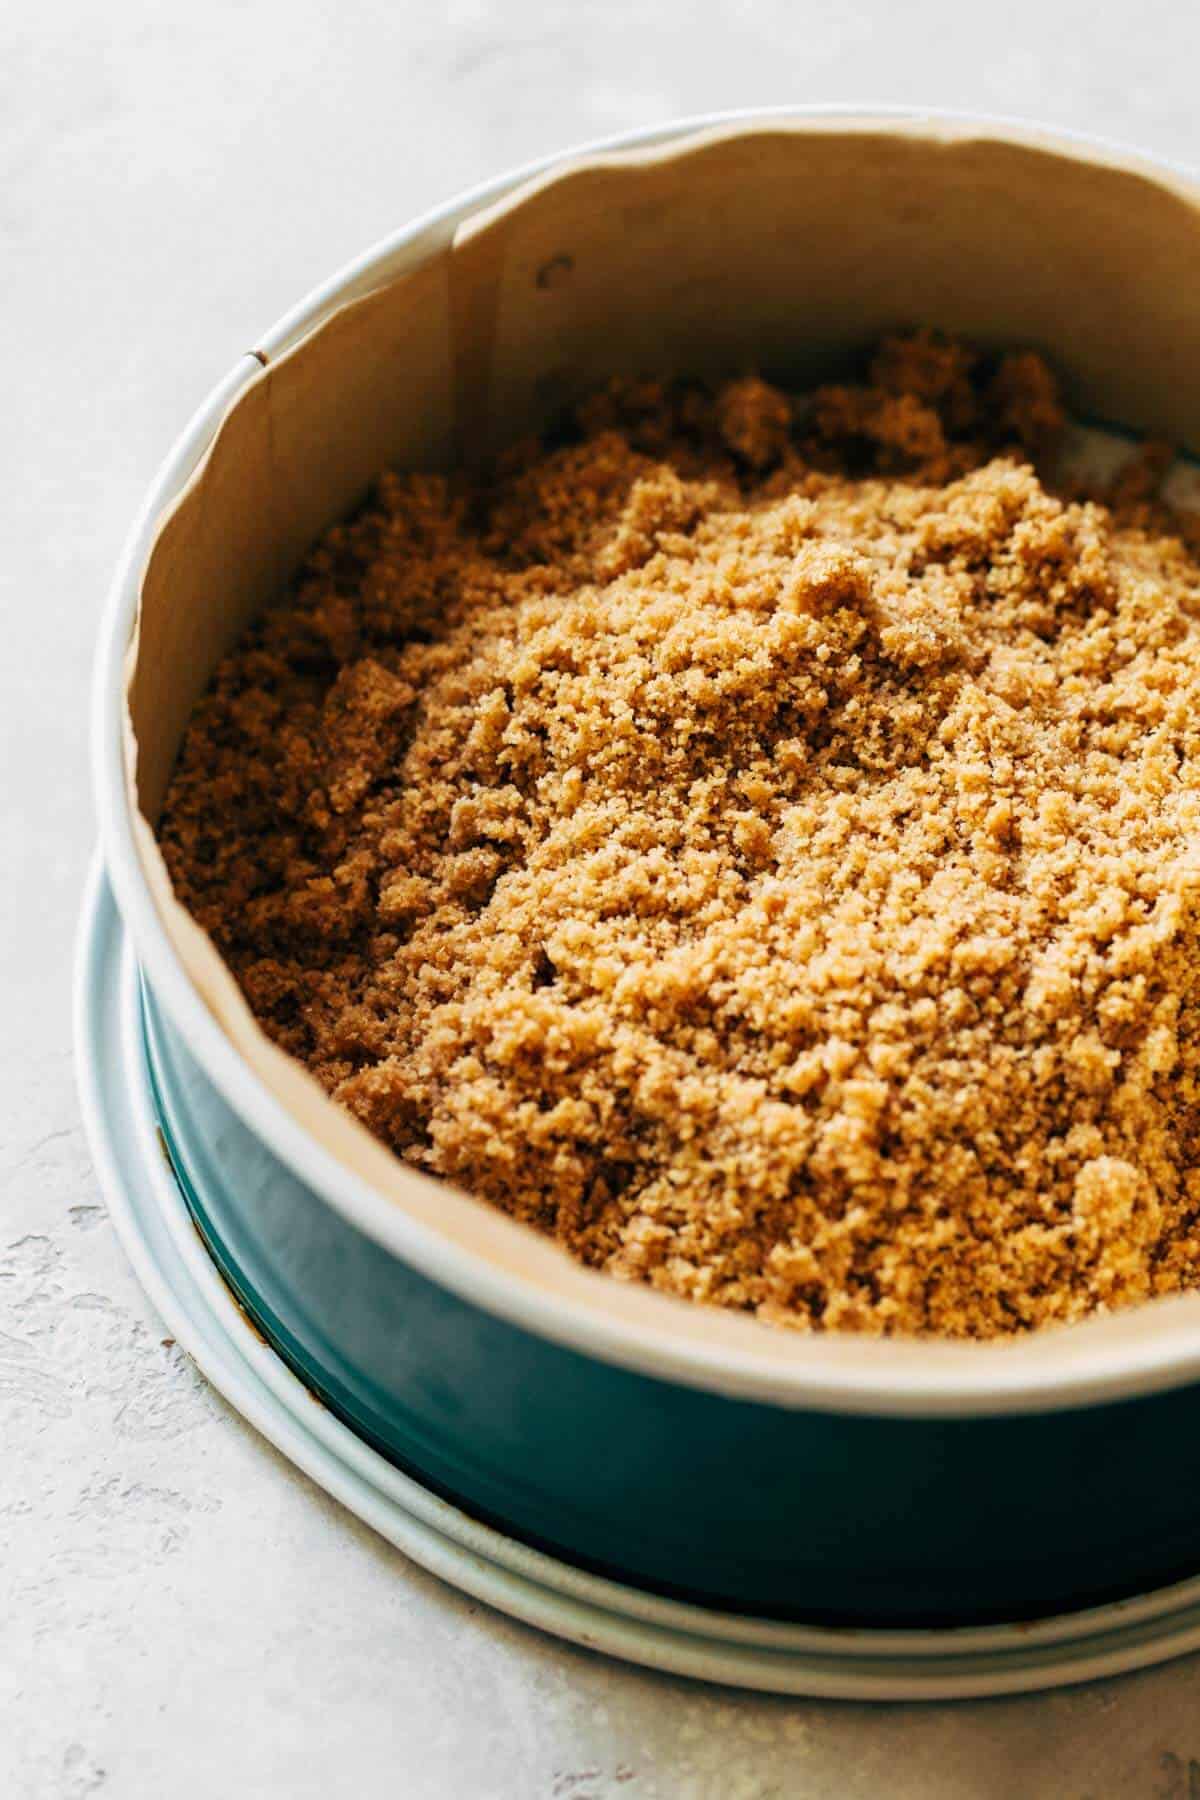
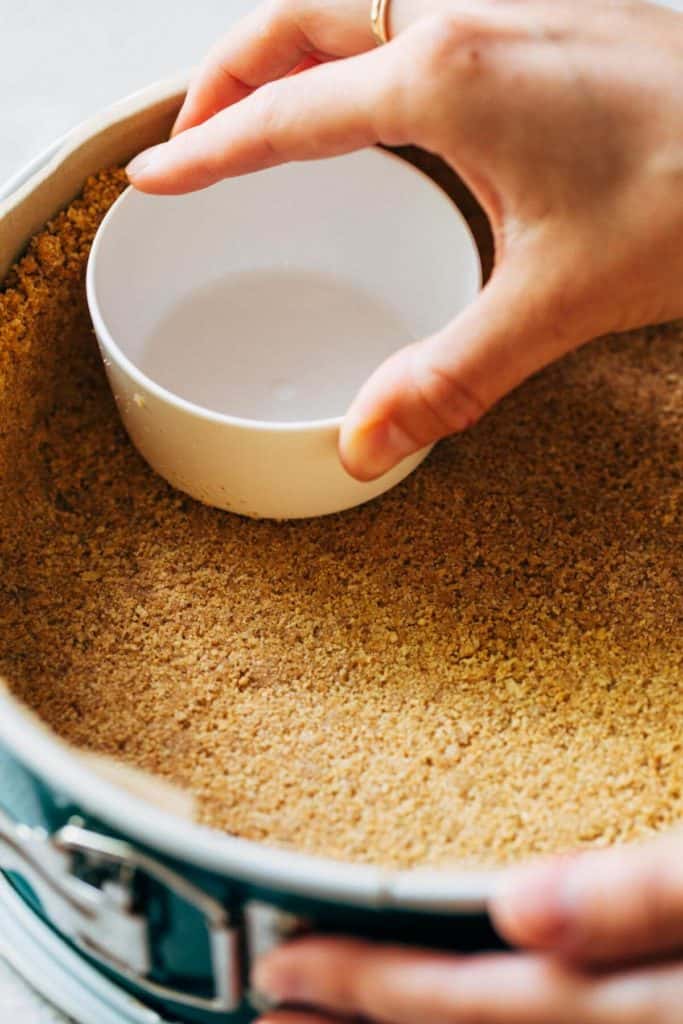
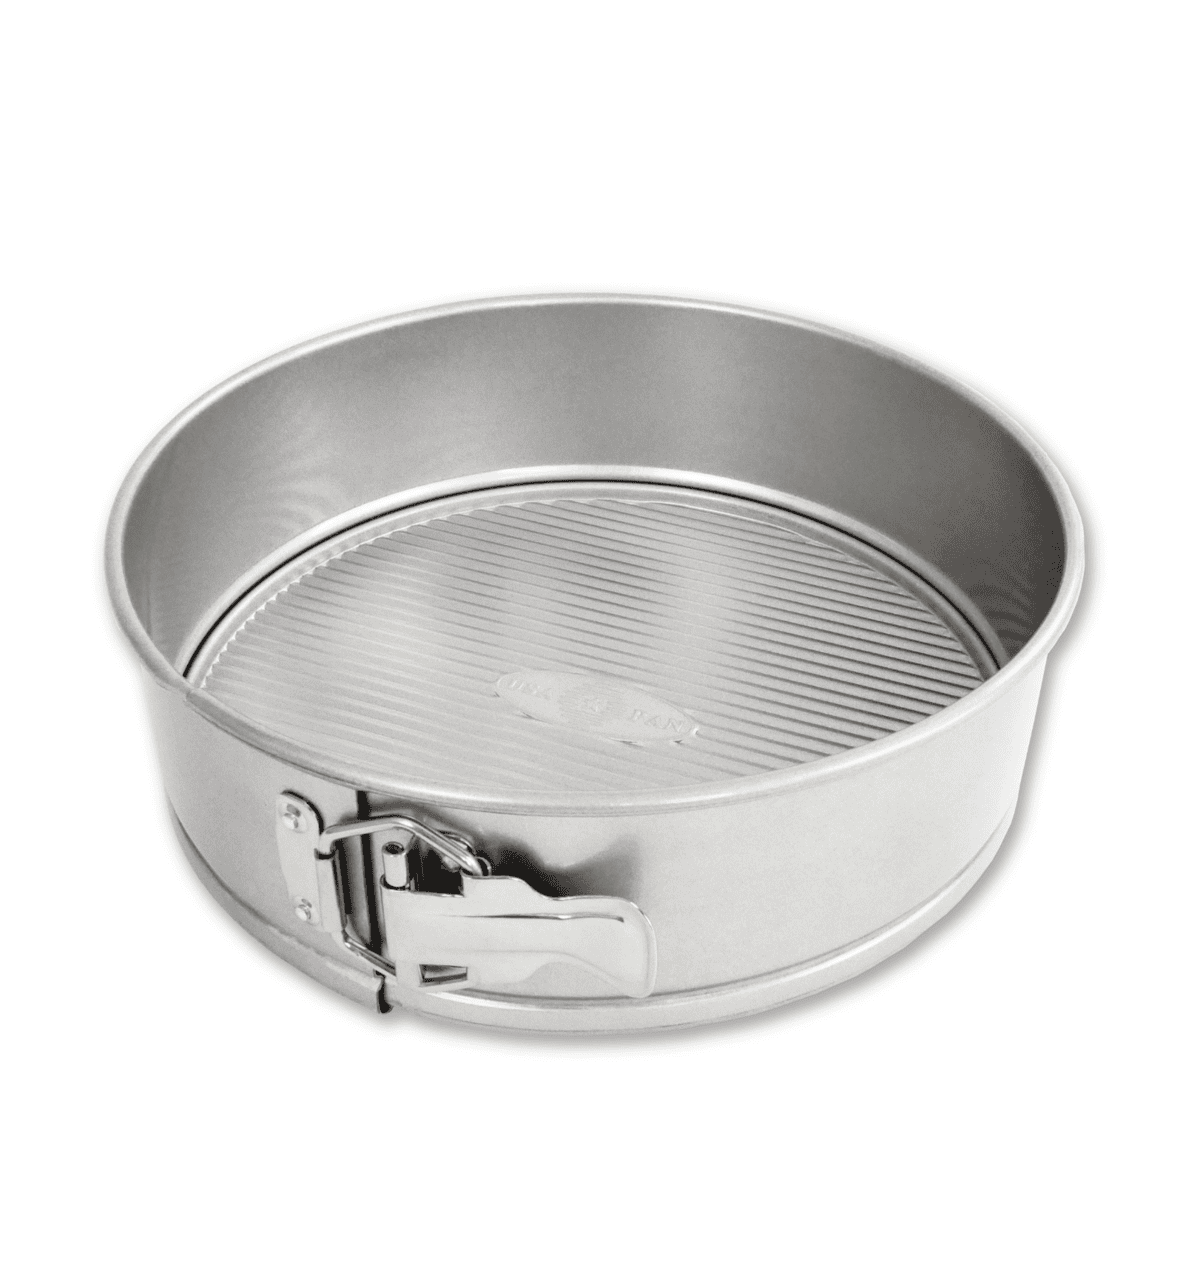
The key is to really press the crust into the springform pan. First, dump the crust into the center of the pan and use your hands to spread a loose and even layer.
Take a measuring cup, or anything that’s round with a flat bottom, and begin pressing the crust into the pan. Start from the center and work your way out.
As you reach the edges, begin to press the crust up against the walls using the edges of your measuring cup. You don’t have to apply too much pressure, but press it in just enough to where it holds together.
Pressing in the crust with a cup creates a much stronger structure, ensuring it doesn’t crumble when sliced.
Do you have to prebake the cheesecake crust?
Absolutely! The next step is to bake the crust at 350F for just 10 minutes. This helps lock in those crumbs so that it doesn’t mix in with the cheesecake batter. Otherwise, you’ll have crumbs in the cheesecake and a soggy graham cracker crust.
My top tips for baking perfect cheesecake
Now for the fun part, making the cheesecake batter! Cheesecakes were once one of the most daunting desserts for me to make. So many things can go wrong and there’s really no turning back after a big crack forms down the center. After years of practice, cheesecakes are now my absolute favorite dessert to bake. With these tips, it will surely be yours too.
- Parchment Paper – Before adding the crust, line the edges of a springform pan with parchment paper. I found that cheesecake tends to stick to the sides of the pan and as it cools, it shrinks. With the sides sticking to the pan, this creates tension in the center thus forming a big crack. Parchment paper prevents this from happening.
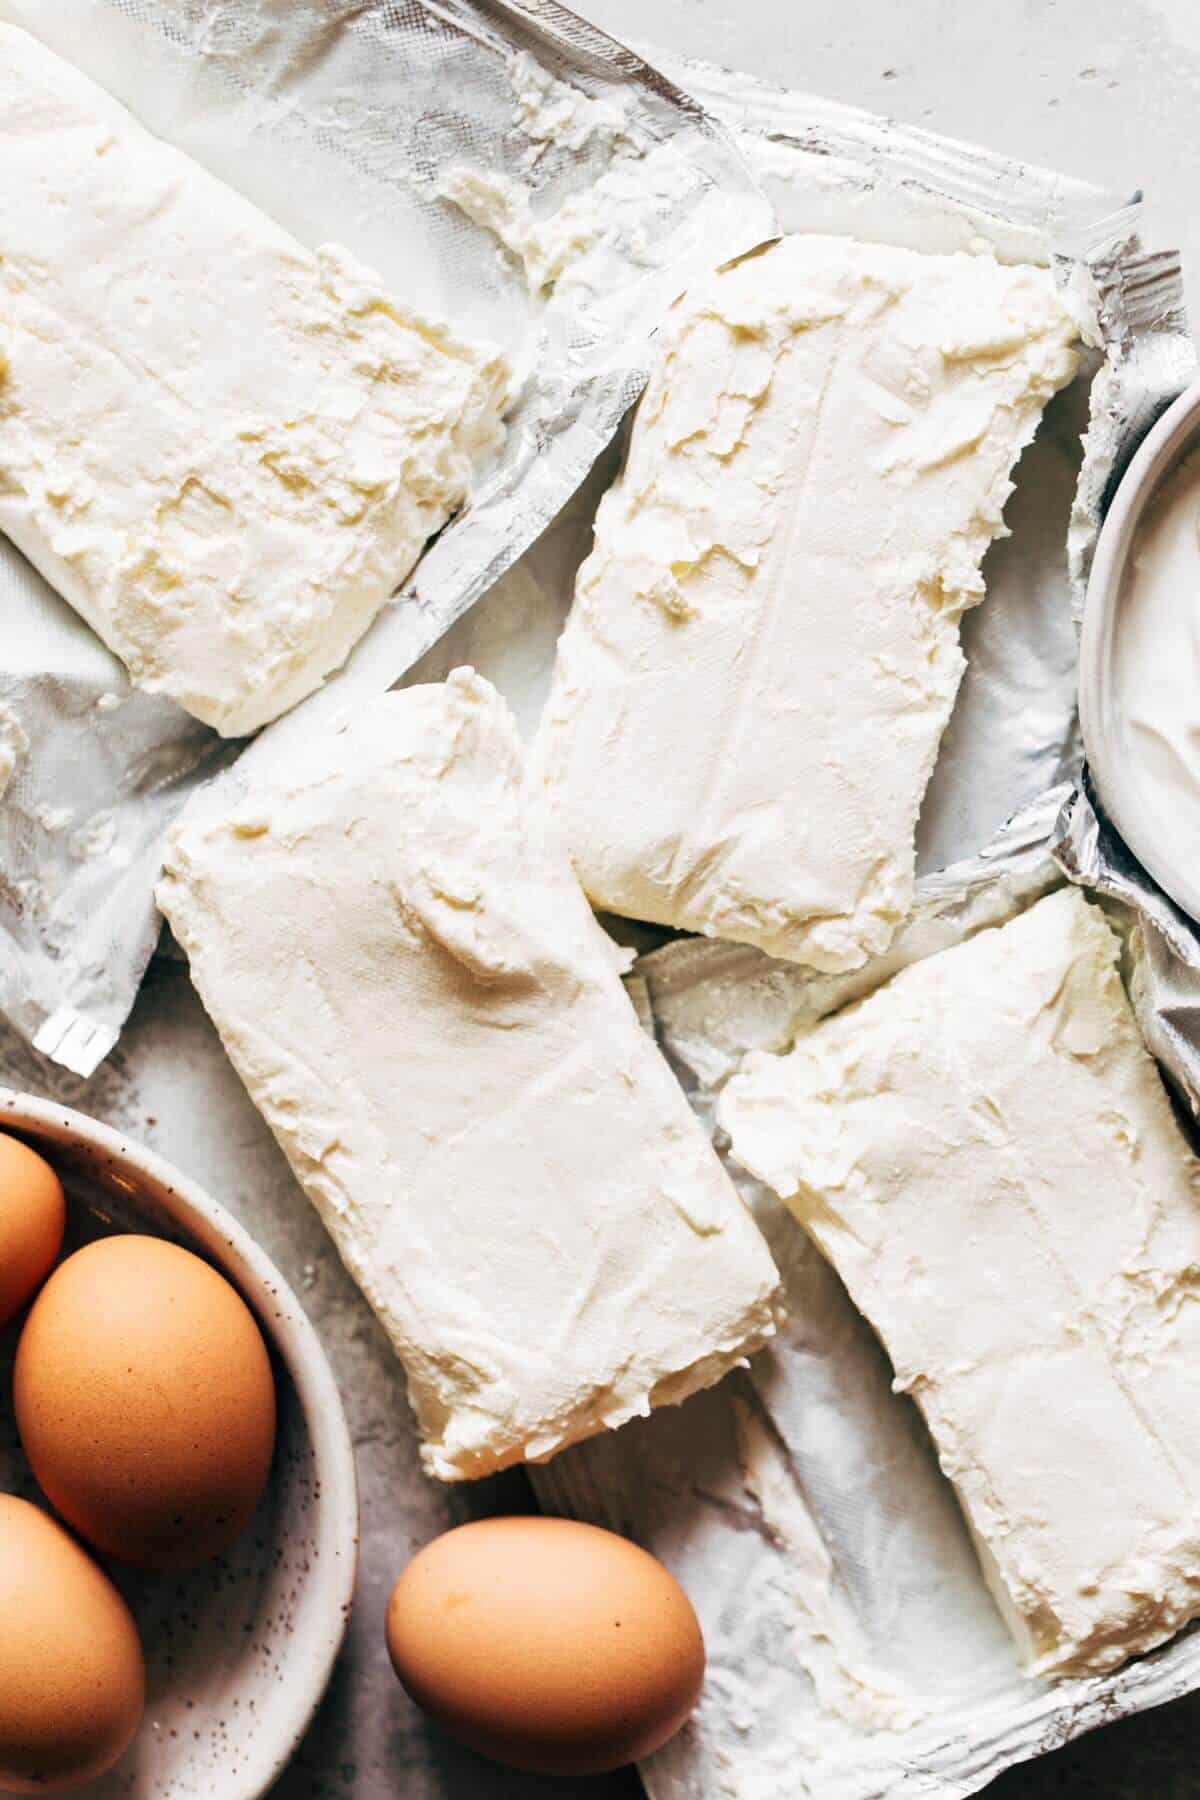
- The Cream Cheese – If you can, always try to use Philadelphia Full Fat Cream Cheese. It provides the BEST flavor and texture. And this is not sponsored, it’s just the only cream cheese I’ll ever use.
- Room Temperature Ingredients – Before you start ANYTHING, make sure all of your refrigerated ingredients are at room temperature… especially the cream cheese. This prevents lumps and over mixing (adding too much air to the batter can create cracks). To speed up the process, add the cream cheese (still in the wrappings) and eggs to large bowl of warm water. Let it sit for about 30 minutes and your cream cheese will be perfectly softened.
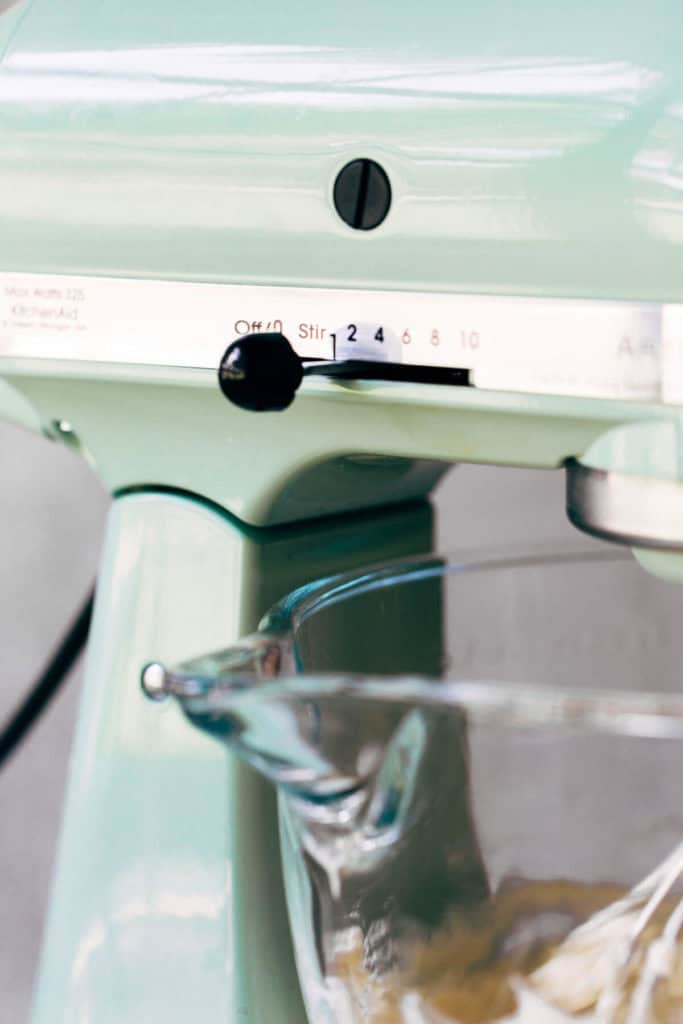
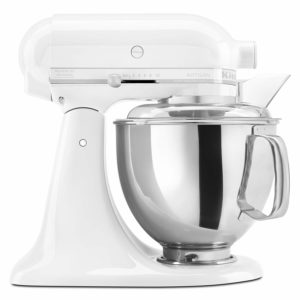
- Low and slow – Always keep your mixer on LOW speed, whether you’re using a hand or a stand mixer (although stand is preferred). This means the mixing process will take a little bit longer, but it also ensures your cheesecake turns out smooth and crack-free.
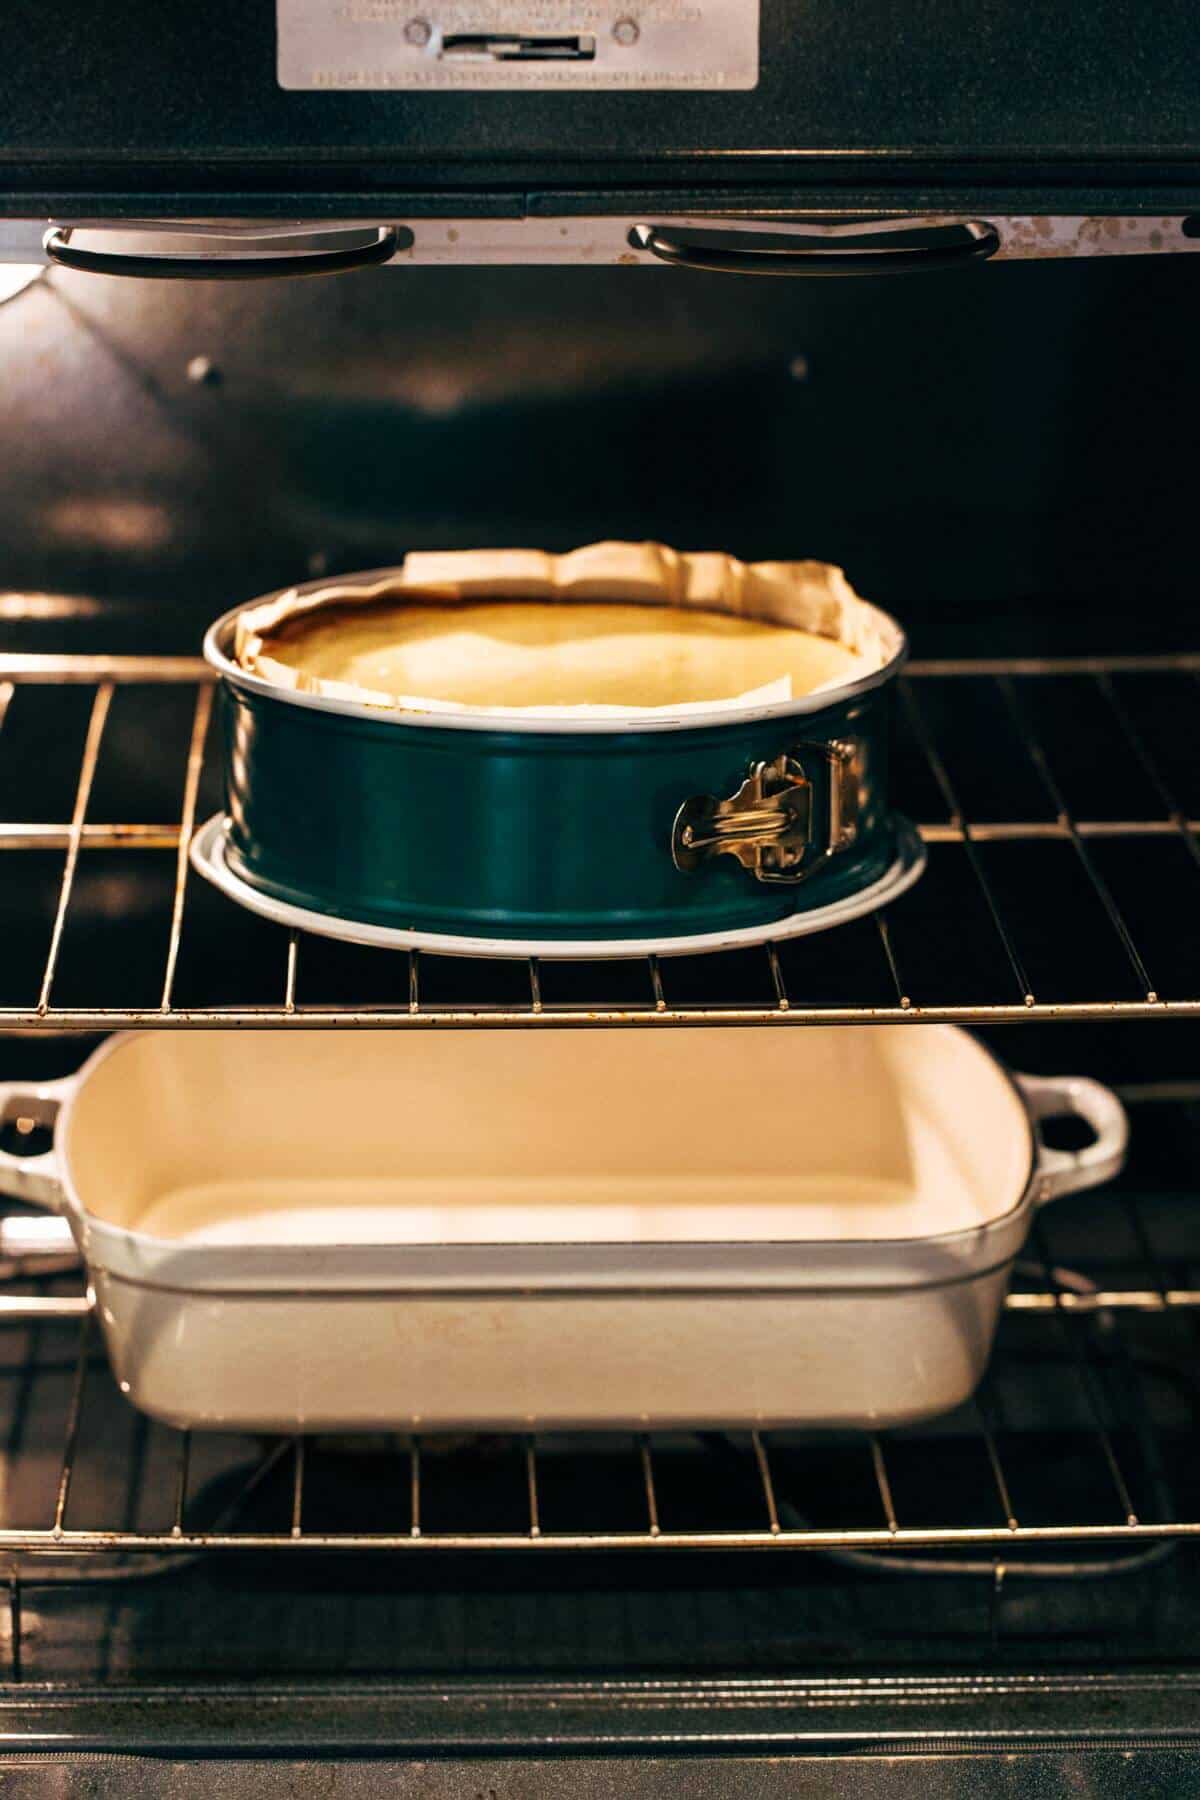
- Easy Water Bath – Most importantly, always bake your cheesecake in a water bath. Place a roast pan on the bottom rack of your oven and start a pot of boiling water on the stove top. When you’re ready to bake the cheesecake, pour the boiling water into the roast pan and then place the cheesecake on the middle rack above. Baking in a moist environment prevents the cheesecake from drying out and cracking.
- Jiggle Test – To make sure your cheesecake is done, crack open the door and nudge the pan. If the center wobbles like a bowl of milk, it’s not done. If it jiggles like jello, it’s ready.
- Gradual Cooling – I’ll cover this in more detail later in the post, but allowing the cheesecake to slowly come back to room temperature provides the perfect texture and stops any cracks from forming.
That’s it! These tips are essential to any cheesecake recipe and will ensure your cheesecake turns out crack-free and baked all the way through.
How to bake cheesecake to prevent cracks
When you start making the batter, start a pot of boiling water (about 6 cups) on the stovetop and place a large roast pan on the bottom rack of the oven.
When you’re ready to bake the cheesecake, slide the bottom rack out and carefully pour the boiling water into the roast pan.
Slide it back in and place the cheesecake just above the pan on the middle rack of the oven.
Try to do this process as quickly as possible, while still being careful not to burn yourself. We don’t want all the steam to escape the oven.
This is the process of baking a cheesecake in a water bath. It prevents the cheesecake from drying out, thus preventing cracks. You may be more familiar with placing the cheesecake INSIDE the roast pan and baking it that way. I prefer this method because it keeps the two completely separate, ensuring the water doesn’t leak into the cheesecake pan.
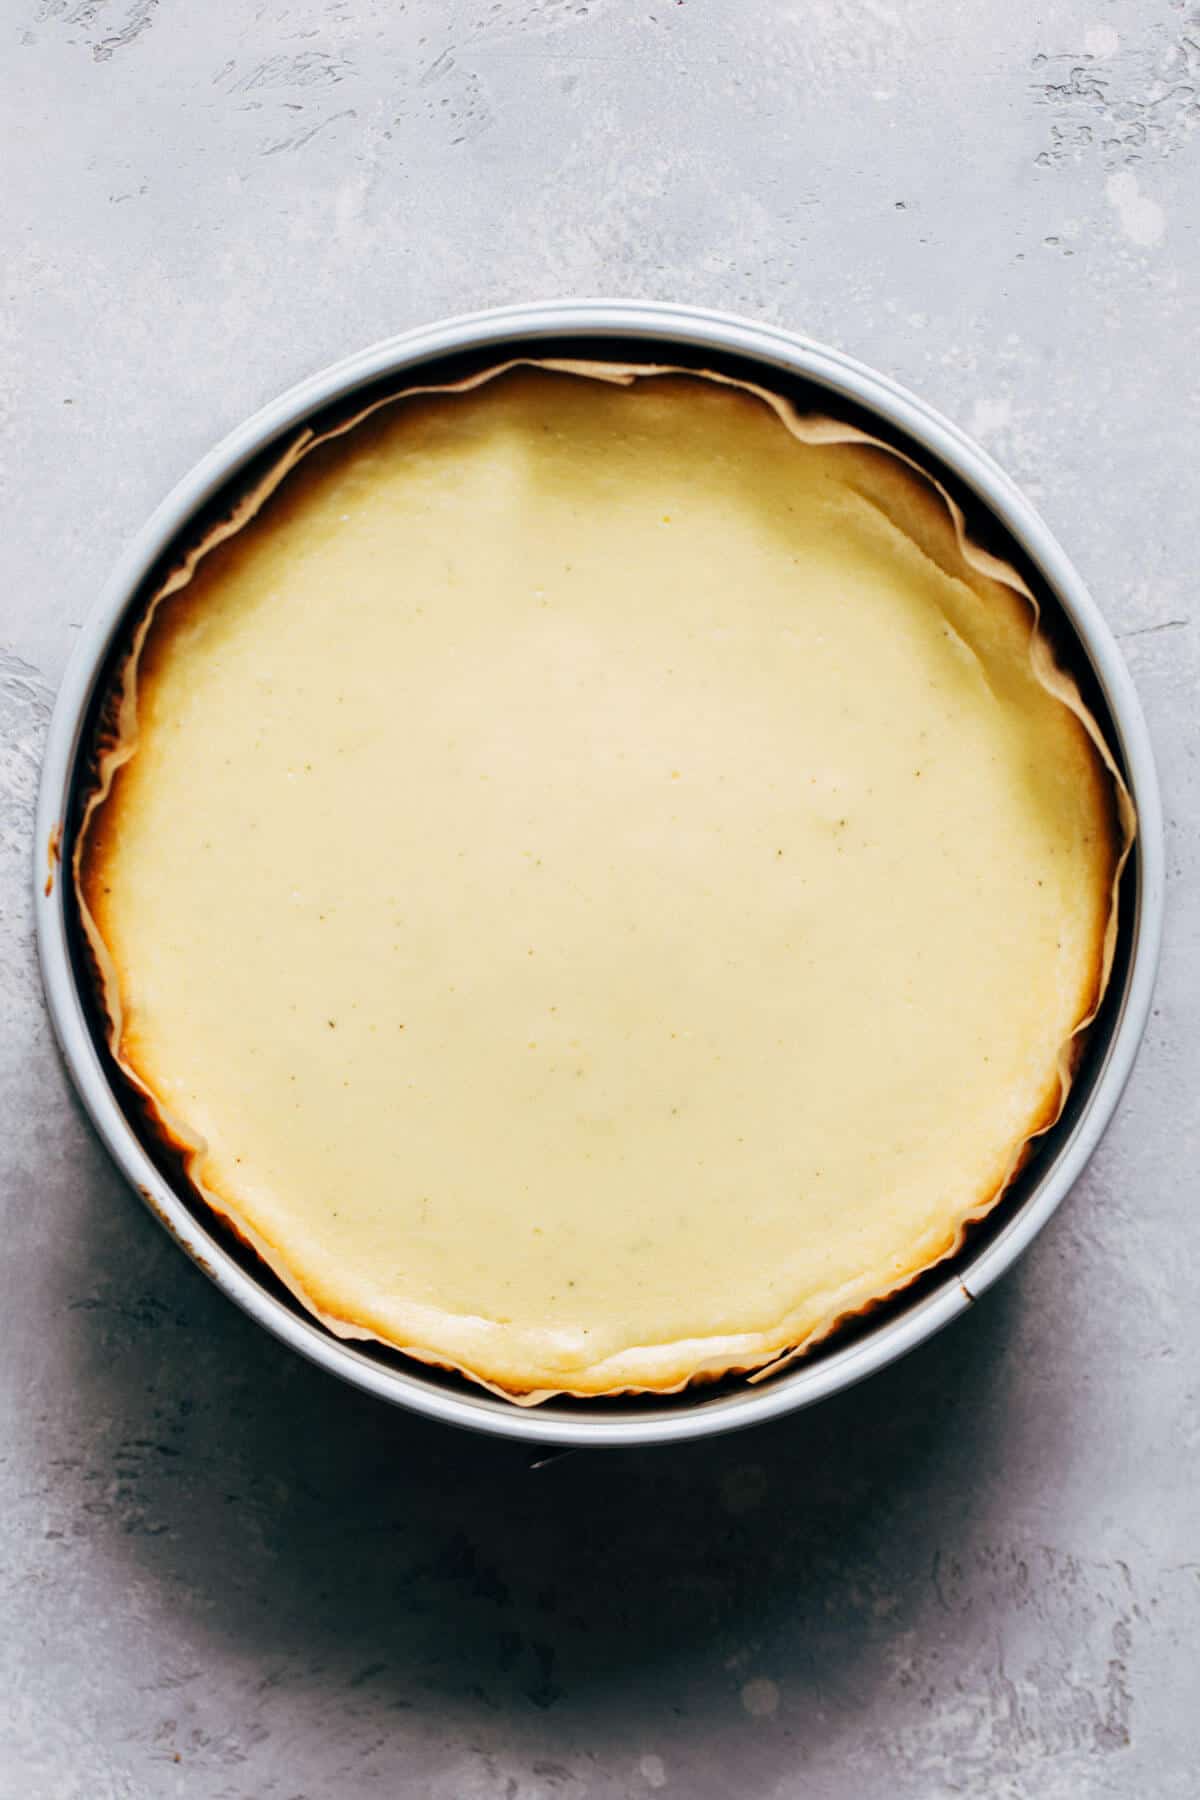
The cheesecake is then baked at a low temperature for about an hour. Low and slow will ensure the center bakes all the way through but a super soft and smooth texture.
To make sure the cheesecake is done, give the pan a gentle nudge with your oven mitt. If the center wobbles like a bowl of milk, it’s not done. If it jiggles like jello, it’s ready. The edges should also be slightly puffed up but they will settle as the cheesecake cools.

Chilling the cheesecake
When the cheesecake is done, turn the oven off and crack open the oven door with the cheesecake still inside. This allows it to come back to room temperature very slowly, while also gently baking the center all the way through.
Leave the cheesecake in the oven for another hour before taking it out. This process prevents the cheesecake from cracking. If you take it out right when it’s done, it will cool too fast. As the cheesecake cools, it shrinks and if this process happens too quickly, a crack will form down the center. Taking it out too soon could also leave you with an under baked center.
After the hour is up, take the cheesecake out of the oven and leave it at room temperature for about 30 minutes.
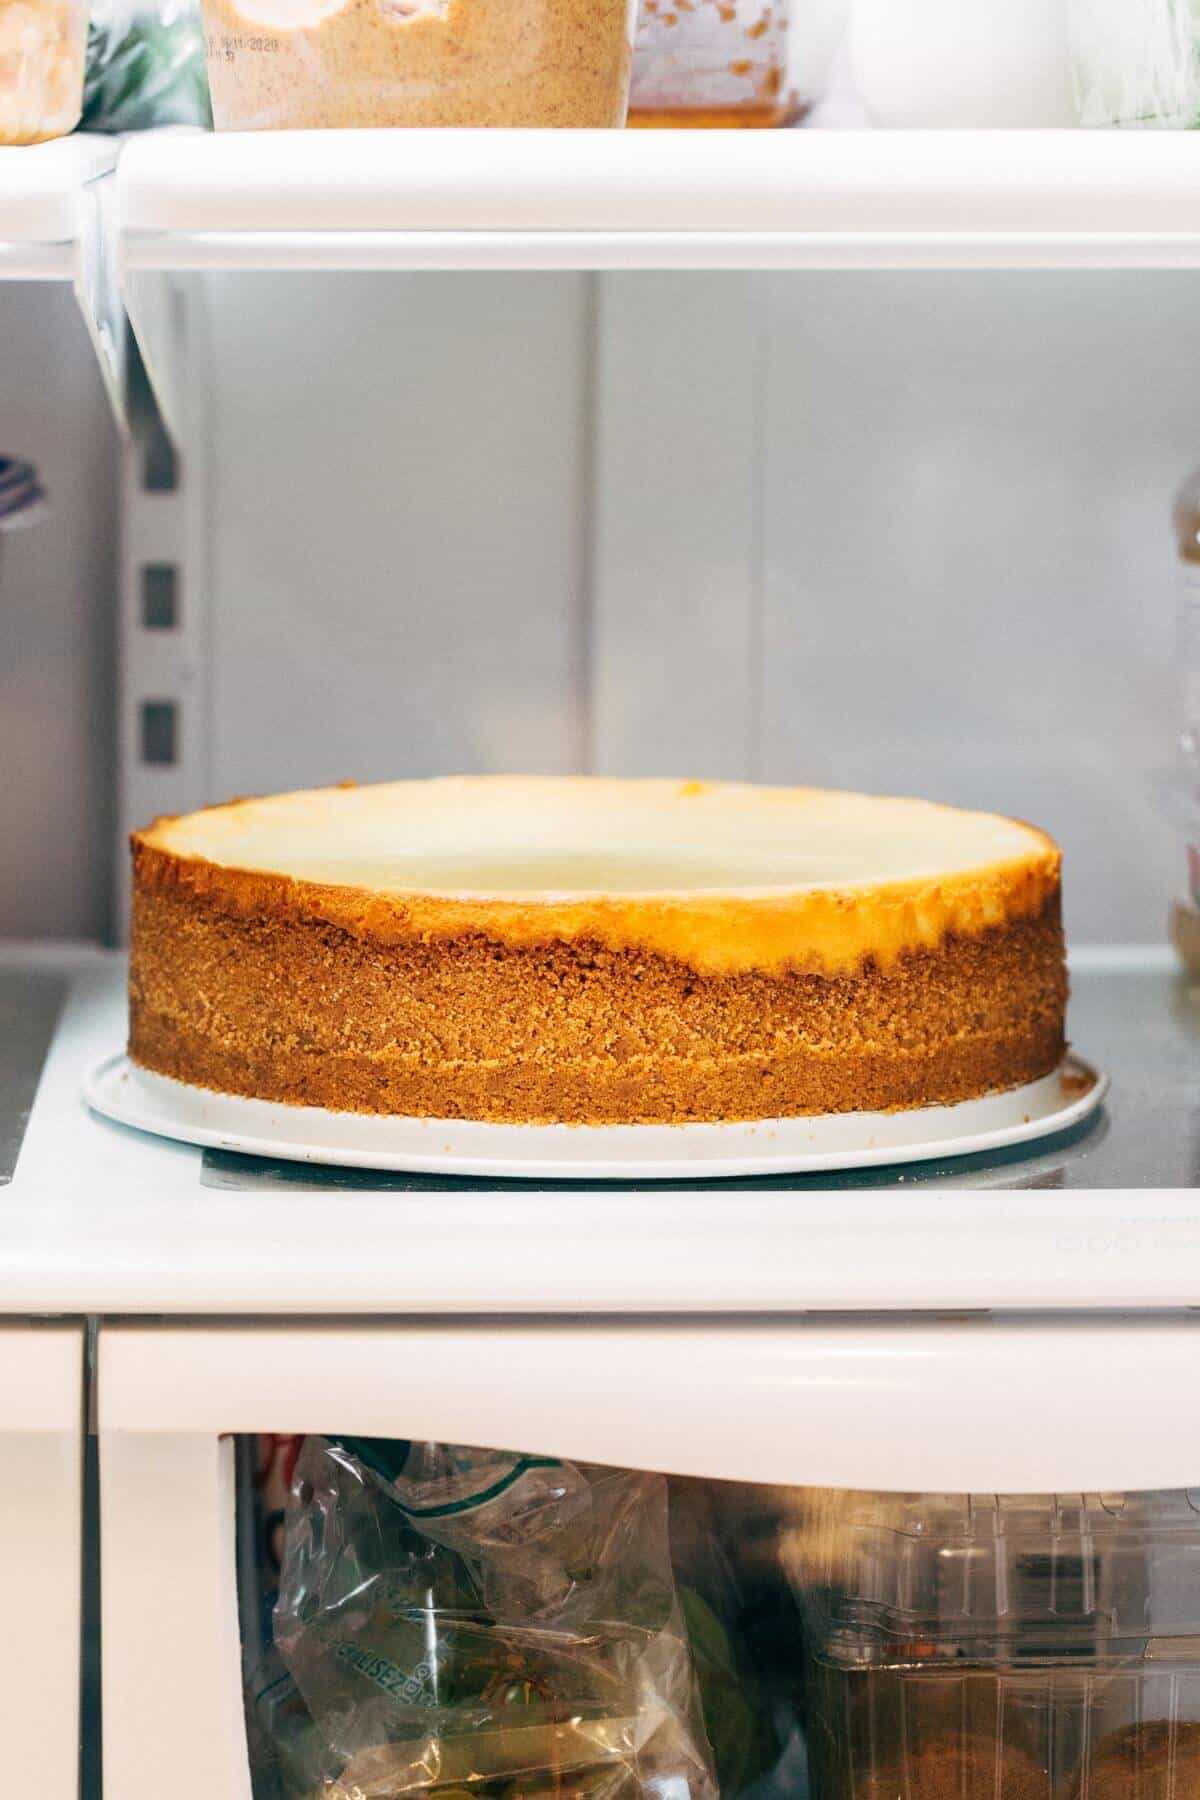
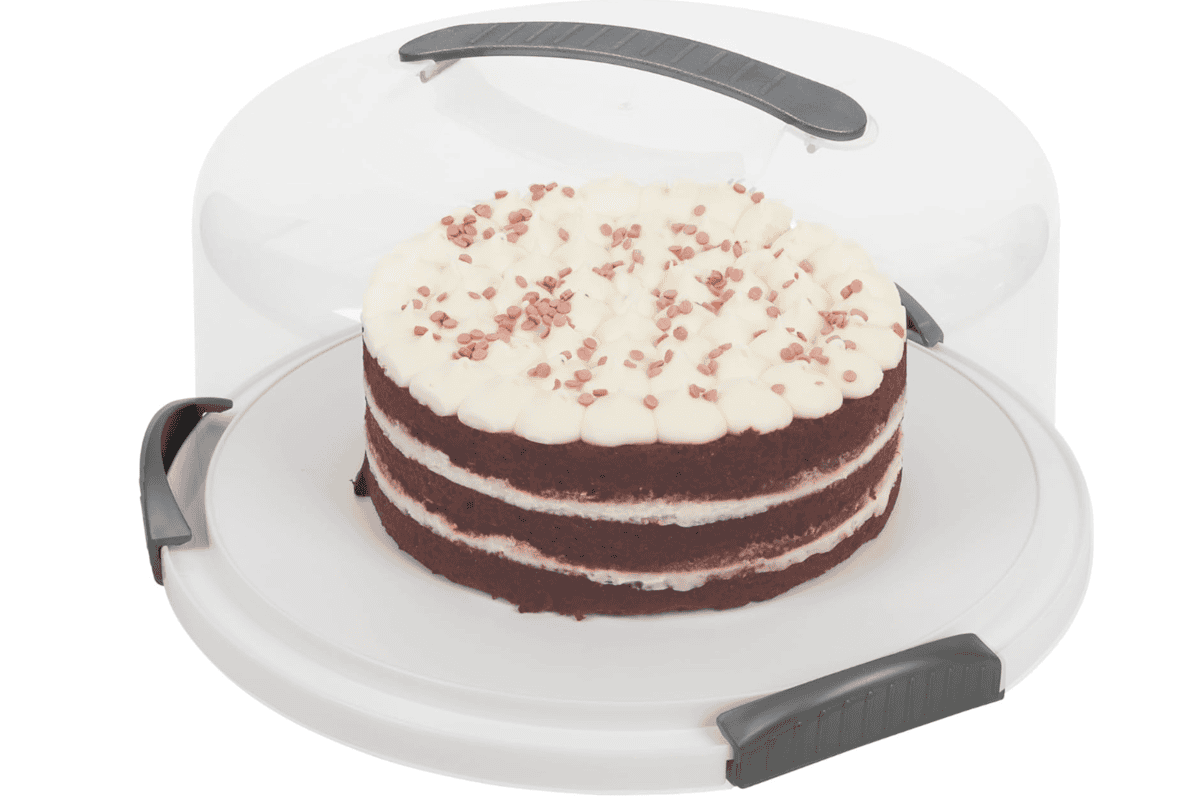
At that point, it should be firm enough to take the springform ring off. Peel back the paper and place the cheesecake in the fridge for at least 4 hours but preferably overnight. This helps the cheesecake completely settle, creating a super creamy texture that’s easy to slice.
How to remove cheesecake from a springform pan
After it’s completely chilled, take the cheesecake out of the fridge and run a large knife between the base of the pan and the crust. Keep lodging the knife under the cheesecake all around the pan until it pops loose.
With the crust packed in nice and tight and the filling cool and firm, you shouldn’t have any breakages. Lift the cheesecake onto your serving platter with two hands. It’s heavy so be careful!
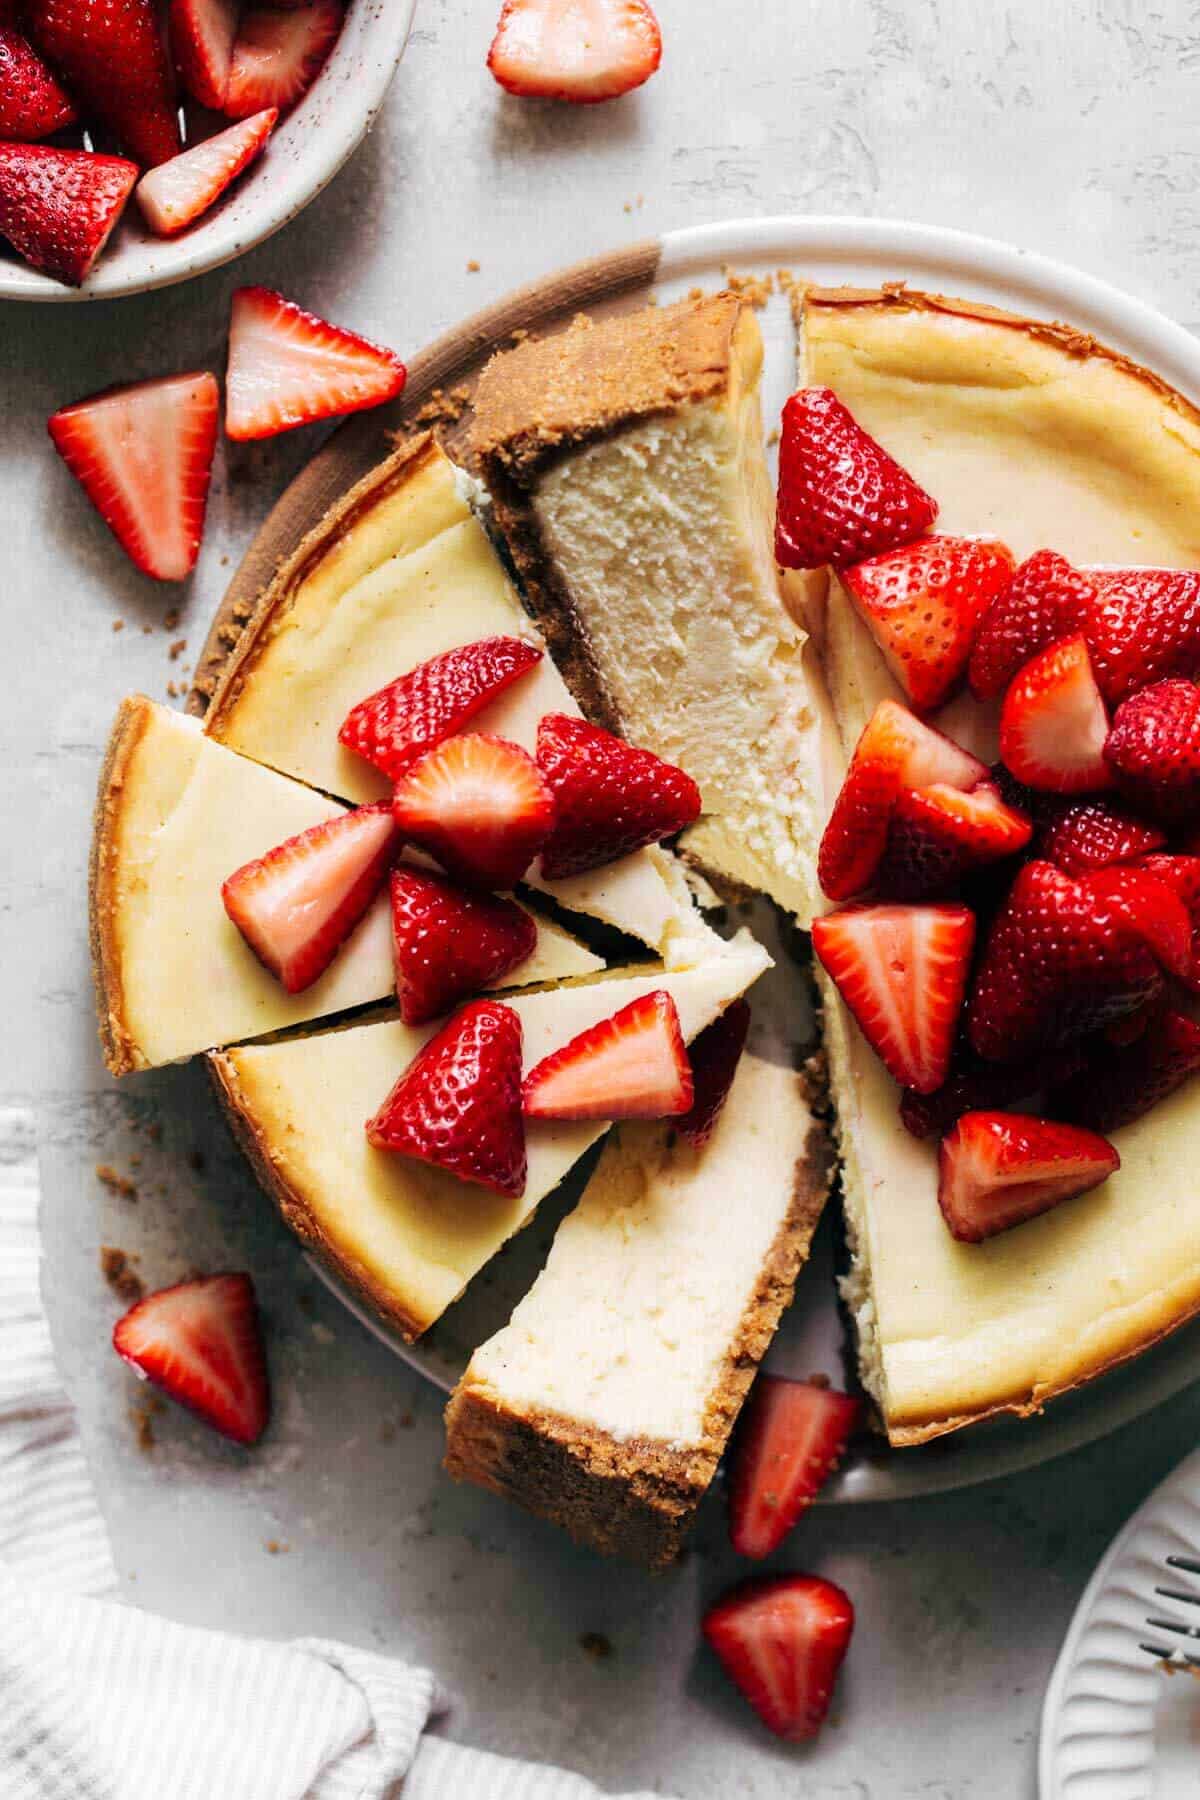
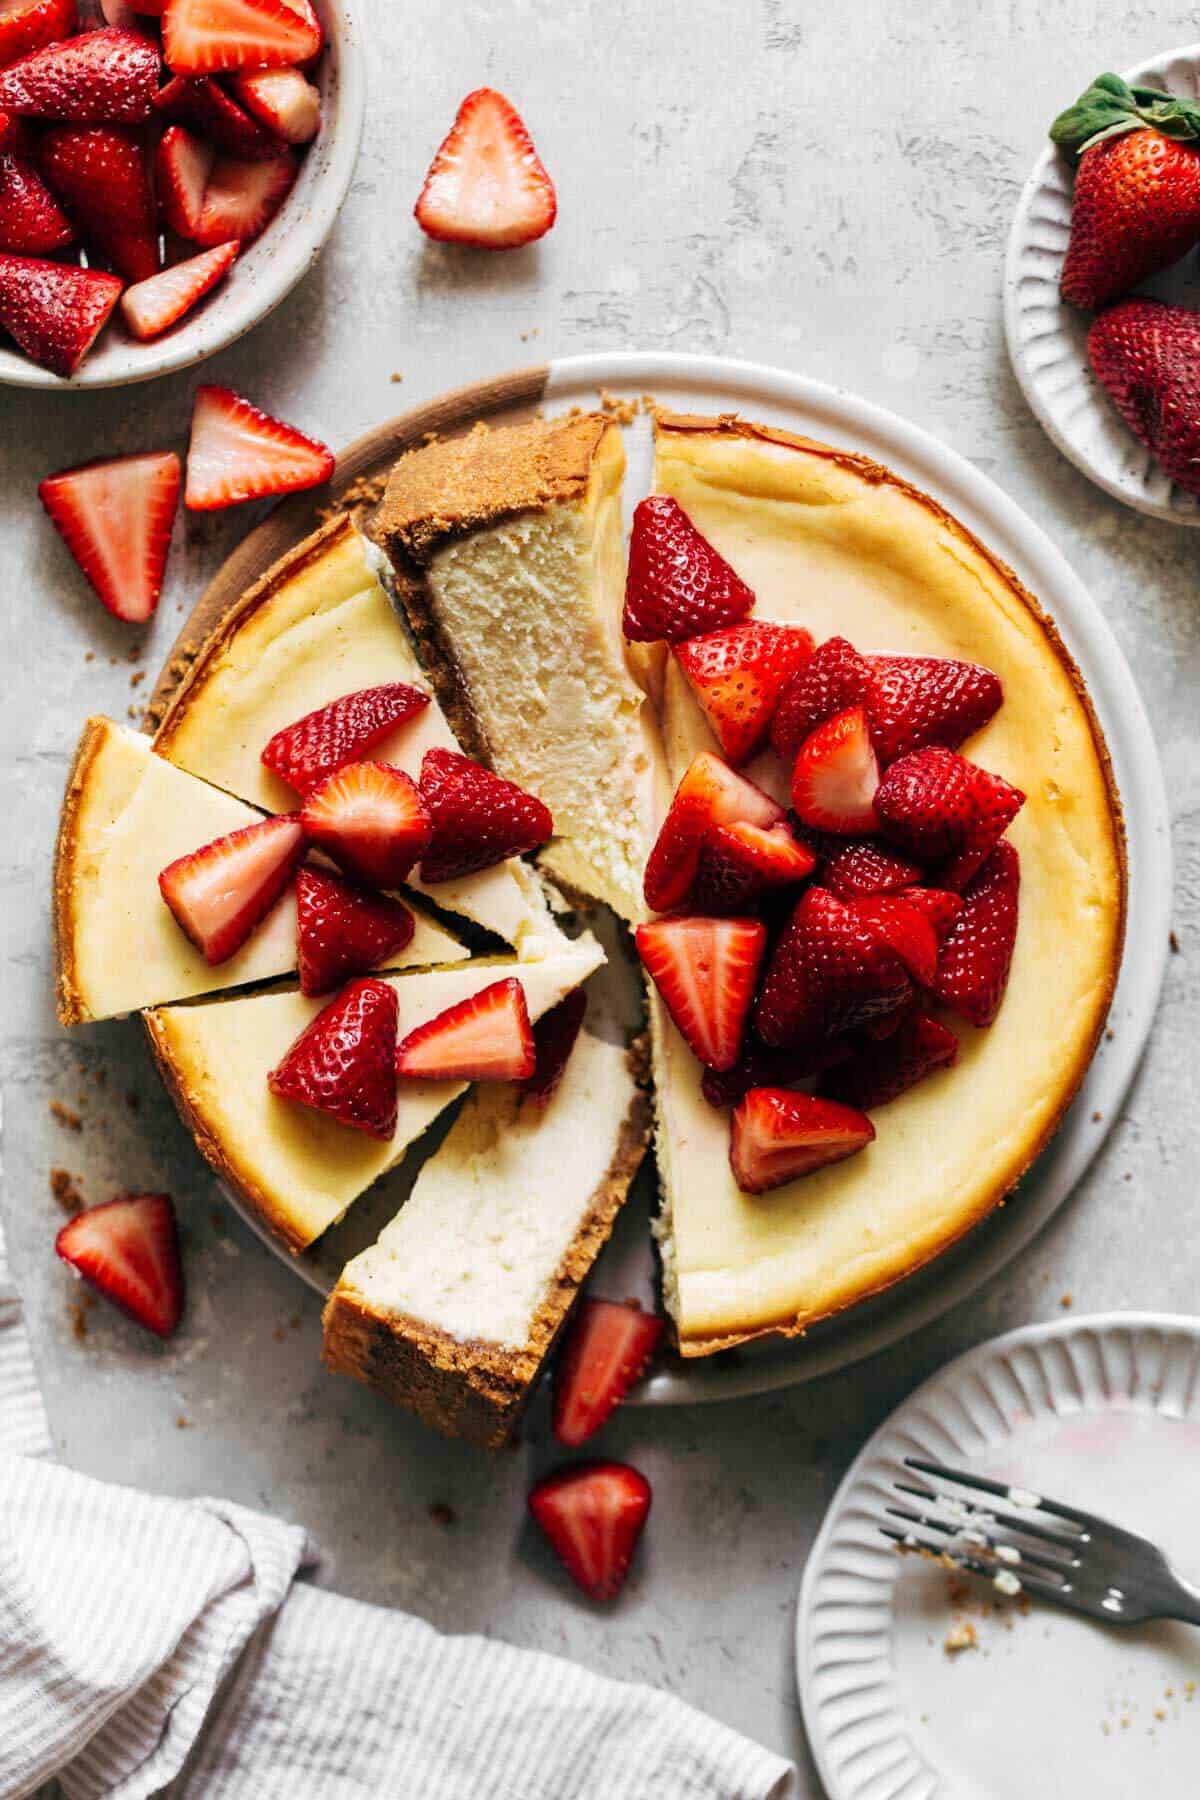
Cheesecake toppings
With a classic cheesecake, you can top it with just about anything. Its vanilla flavor pairs well with everything.
For my cheesecake, I chose strawberries. To make them nice and tender, I let them sit (or macerate) in a bowl with some sugar. The sugar draws out the juices to create a flavorful and soft strawberry perfect with every bite.
You could also top the cheesecake with homemade salted caramel, whipped cream, chocolate ganache, toasted nuts, chopped candies… the possibilities are endless. Just make sure to add the toppings AFTER the cheesecake has chilled!
What is the difference between Classic Cheesecake and New York Cheesecake?
If you’ve an avid Butternut Bakery reader, then chances are you’ve seen my New York cheesecake. So you might be wondering, what makes this cheesecake recipe so different?
The two may look very similar and the recipes are nearly identical (I have to admit, I used the same crust recipe because it’s just SO GOOD), but the textures and flavors are very different.
First, New York cheesecake is much more dense. The cheesecake is baked at a much lower temperature for almost twice the amount of time. This creates a darker exterior and a really dense center.
It also uses more cornstarch and eggs which also adds to that dense texture.
Another difference is lemon juice. It’s a signature ingredient in NY cheesecake that creates a tangy flavor unlike any other cheesecake.
On the opposite side, this classic cheesecake is a bit sweeter with a super soft texture and even color. Using less eggs and cornstarch and baking for half the amount of time provides a smooth cheesecake with a pale top.
This cheesecake also uses more vanilla, making it more sweet than tangy.
They’re very similar, so choosing between the two is deciding whether you like a soft and smooth cheesecake or a dense and tangy cheesecake. They’re both winners in my book!

For more cheesecake recipes, check out my:
- Baked Peach Cobbler Cheesecake with Fresh Peaches
- Pumpkin Cheesecake
- Banana Pudding Cheesecake Recipe
- Maple Syrup Cheesecake with Brown Butter
- Baked Salted Caramel Cheesecake
Make sure to tag me @butternutbakery on Instagram and leave a review below if you make this Cheesecake. To pin this recipe and save it for later, you can use the button on the recipe card, the buttons above or below this post, or on any of the photos above. Happy baking!
Print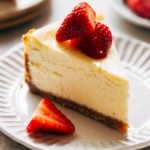
The BEST Classic Cheesecake
- Total Time: 2 hours 10 minutes + Overnight Chill
- Yield: 9″ Cheesecake
Description
This is the BEST cheesecake recipe because it’s creamy, smooth, and includes cheesecake baking tips and steps to ensure it turns out perfect.
Ingredients
Graham Cracker Crust*
- 2 cups (280g) honey graham cracker crumbs (about 2 sleeves) (regular or gluten free)
- 1/3 cup (70g) granulated sugar
- 1/2 tsp cinnamon
- Pinch of salt
- 1/2 cup (110g) unsalted butter, melted
Cheesecake Filling
- (4) 8oz blocks Philadelphia full fat cream cheese, softened
- 1 1/4 cups (255g) granulated sugar
- 2 tbsp cornstarch
- 3 large eggs + 1 egg yolk, room temp
- 2 tsp vanilla bean paste (or 1 tbsp vanilla extract)
- 1 cup (250g) sour cream
Strawberry Topping **see notes for additional topping options
- 1 pint fresh strawberries, halved or quartered
- 2 tbsp granulated sugar
Instructions
Graham Cracker Crust
- Preheat the oven to 350F and spray a 9″ springform pan with nonstick spray. Cut strips of parchment paper to line the sides.
- Whisk together the graham cracker crumbs, sugar, cinnamon, and salt.
- Mix in the melted butter until the crumbs are evenly moistened.
- Dump the mixture into the springform pan and press it into the bottom and sides of the pan using a measuring cup.
- Bake for 10 minutes.
- Remove from the oven and drop the temperature to 325F for the cheesecake. Place a large roast pan on the bottom rack of the oven.
Cheesecake Filling
- Before you start, make sure your cream cheese is softened and the eggs and sour cream are at room temperature. To speed up this process, place the cream cheese (still in the wrappings) and eggs in a bowl of warm water for about 20-30 minutes. Also include the sour cream, but place it in a ziplock bag. Then when you’re ready to use it, just snip off a corner and squeeze it into the batter.
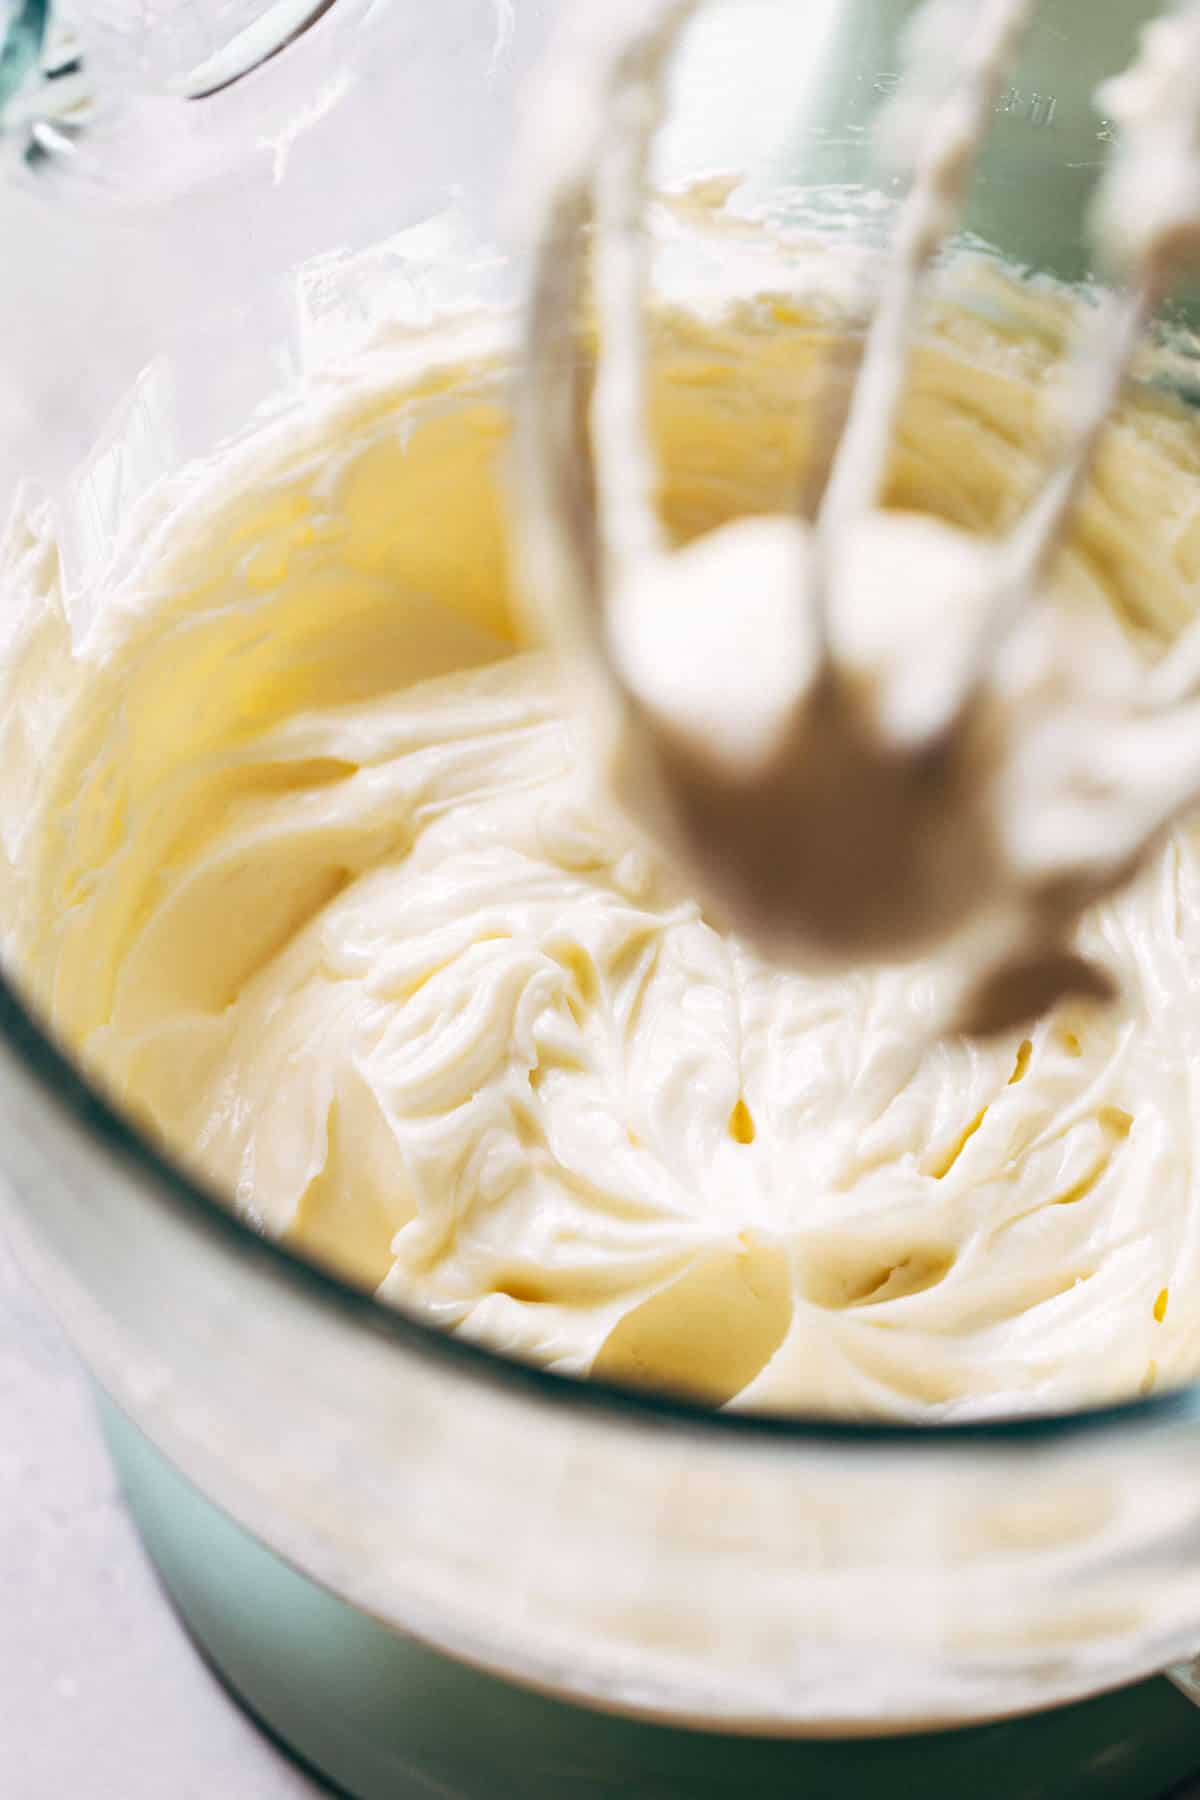
- To start, add the cream cheese, sugar, and cornstarch to a bowl of a stand mixer fitted with the whisk attachment. Mix on LOW speed just until it comes together and forms a smooth texture. Scrape down the bowl and mix on low for another 20 seconds.
- Pause and start a pot of boiling water (about 6 cups) on the stove top. This will be for the water bath that the cheesecake is baked in.
- Back to the batter. Mix in the eggs one at a time on LOW speed. Only add the next when the one prior is just incorporated. After the 2nd egg is mixed in, stop and scrape down the bowl. Mix for 20 seconds then continue with the rest of the eggs. Mix in the vanilla with the final egg yolk.
- Take the bowl off the mixer and fold in the sour cream using a rubber spatula. To fold, run the spatula around the bowl and through the center, dipping up from the bottom of the bowl.
- Pour the batter into the cooled graham cracker crust and give it a gentle shake to even it out.
- Open the oven door and slide out the bottom rack with the roast pan, just enough to gain access to the pan. Carefully pour the boiling water into the pan and push the rack back in. Place the cheesecake just above the roast pan on the middle rack (see picture in post for reference).
- Quickly close the door (to stop the steam from escaping) and bake for 1 hour and 10 minutes.
- When it’s done, the edges should be puffed up and the center sunken down. Give the springform pan a gentle nudge. If the center wobbles like a bowl of milk, bake for another 10 minutes. If it jiggles like jello, it’s done.
- Turn the oven off and crack open the oven door with the cheesecake still inside. Leave it there for an hour.
- Then, take the cheesecake out of the oven and let it sit at room temperature for 30 minutes.
- After the 30 minutes, remove the springform ring and peel back the parchment paper. Place the cheesecake uncovered in the fridge for at least 4 hours but preferably overnight.
Strawberry Topping
- Before you’re ready to serve, toss the strawberries in the sugar and let them macerate at room temperature for about 30 minutes. This will release the juices to create a tender strawberry.
- Top with the fresh strawberries and enjoy!
Notes
- *This crust recipe covers the bottom and sides of the cheesecake. If you just want a bottom crust, cut the recipe in half. Half of 1/3 cup is 2 tbsp + 2 tsp.
- **You can also top the cheesecake with homemade salted caramel, chocolate ganache, or a drizzle of 1/4 cup melted Nutella!
- Prep Time: 1 hour
- Cook Time: 1 hour 10 minutes
Join Our Community


Meet Jenna
I’m the creator, baker, and photographer behind Butternut Bakery. Here I share desserts for every diet because I believe everyone should have a chance to indulge!

Now THIS is the BEST cheesecake recipe. Im no baker but have all of my family and friends wrapped around my finger over this cheesecake. It is absolutely incredible!!! Ive had to make this recipe at least 50 times over the past couple years and every time it is a hit. Thank you Thank you Thank you!
I know many recipes claim to be the “best”, but I made this for the second time for Memorial Day and everyone said it was the best cheesecake they ever had! As long as you follow the instructions, you’re going to get a beautiful cheesecake that doesn’t crack, is the perfect texture, and has an amazing flavor! Will continue to make this and every other Butternut Bakery recipe! 🤩
This is truly the best cheesecake! I’ve made it so many times I decided it’s probably time to leave a comment since I’m here to make it again!
This was a big hit at a family party! My grandma said she liked it better than other recipes because this one was lighter and almost fluffy-like compared to a dense New York cheesecake. Thanks Jenna!
I made this for my Mother’s birthday. She said it was the best cheesecake she’s ever eaten. I made it with a graham cracker and amoretti crust. Can confirm it was amazing.
I made this for my mother for her birthday. I was amazing! It was so creamy and all I had was a tiny little crack about an inch. I was as so impressed!
I made this this past weekend for my nieces birthday. It was delicious. Even the few non-cheesecake eaters tried some and said it was delicious. I used 1T of Mexican vanilla and did sliced strawberries with a glaze. Making it again for Christmas in a few days. Your recipes are always so good. I’m going to try this next one with a Biscoff crust.
How long does the cheesecake last? I’d like to have it for Christmas Day, but I’d have to make it the 23rd. Thank you for your helpful guidance.