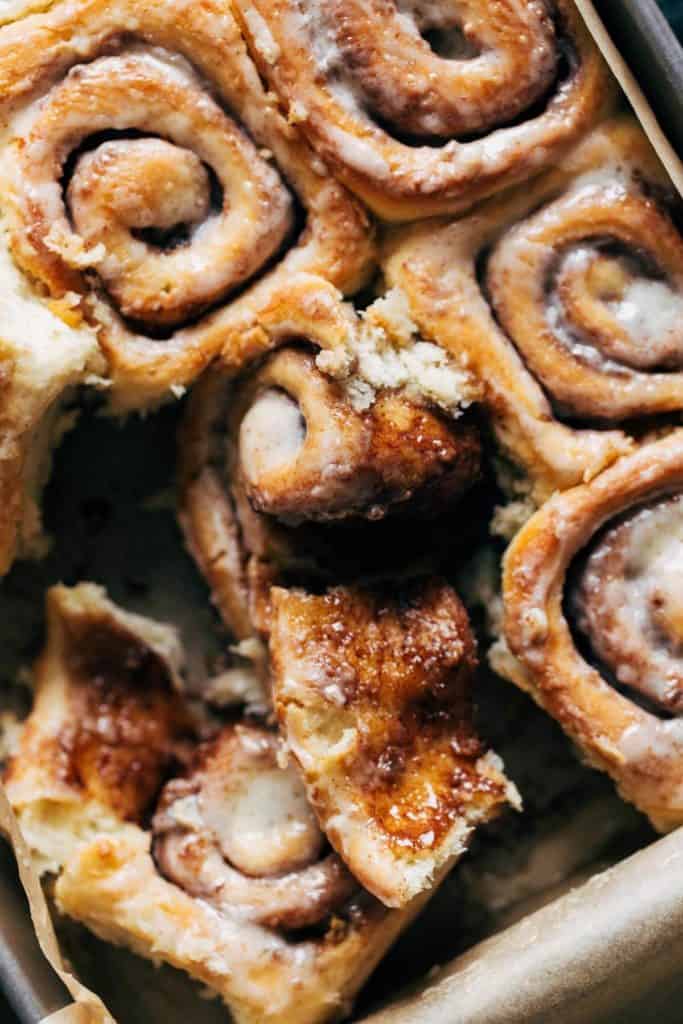
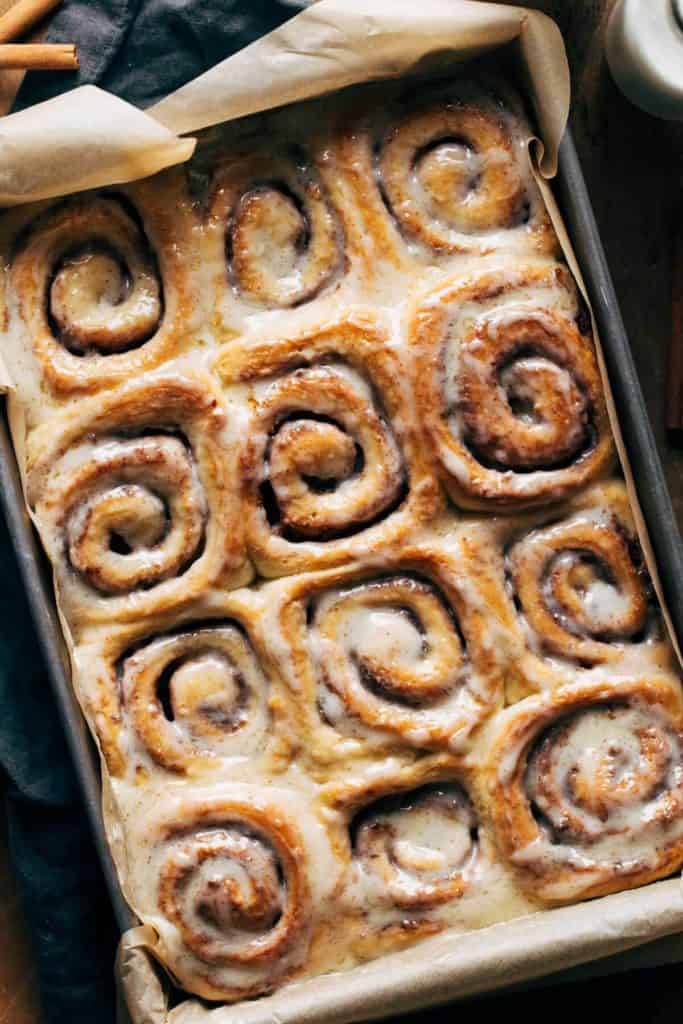
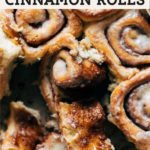
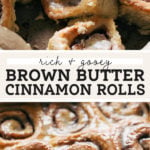
Brown Butter Cinnamon Rolls
If you’re looking to try a cinnamon roll recipe that’s a bit different than the classic, these brown butter cinnamon rolls are for you! They’re baked with brown butter in the dough, in the filling, and are then topped with a brown butter cream cheese icing. Thanks to all that brown butter, the flavor is a bit richer and more mature than regular cinnamon rolls, but the texture is still soft and fluffy just like all rolls should be.
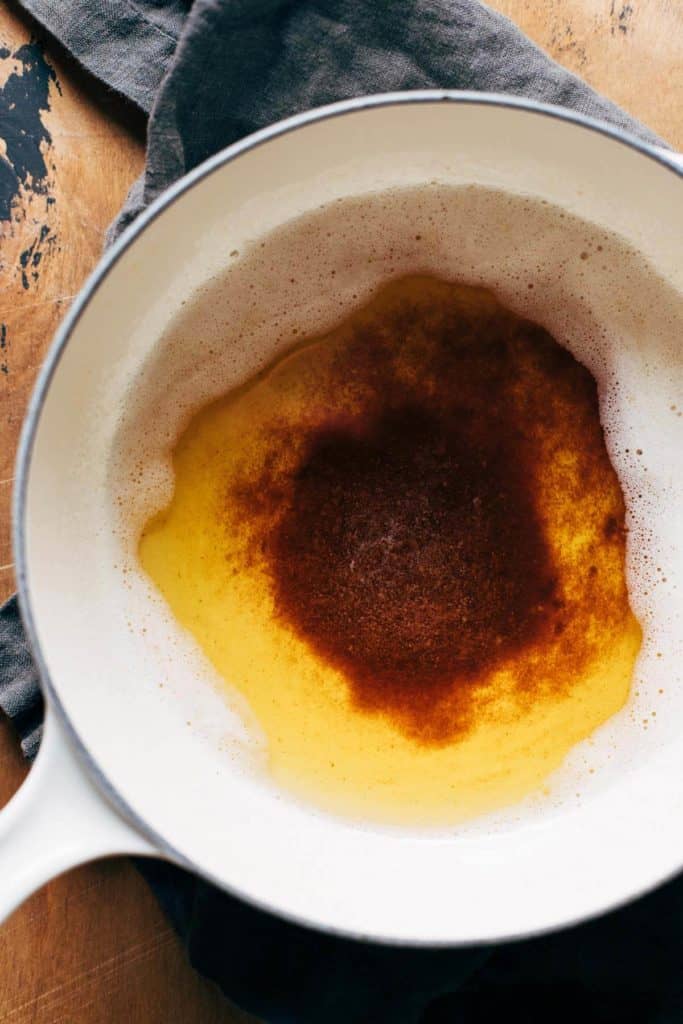
What is brown butter?
It’s magical. Seriously, add brown butter to any recipe and it makes it 10x better!
Brown butter is melted butter that has been cooked down to release its milk solids. Once those have toasted at the bottom of the pan, you’ll see the butter transform into an amber color and release a delicious nutty aroma. It basically smells like heaven.
It’s along the same lines as roasting nuts in the oven, to release a deeper flavor.
It adds so much depth of flavor to any dish, either sweet or savory. The brown butter in this recipe pairs perfectly with the warm cinnamon and brown sugar. It elevates this delicious cinnamon roll recipe into a really special treat.
How to make brown butter
Making brown butter is very easy to do, but is also very easy to burn. I walk you through how to brown butter more in depth in a separate post, but here are a few tips to follow:
- Use a heavy bottomed saucepan. This prevents the butter from browning too quickly.
- Melt the butter over medium heat. Stir occasionally at first.
- As the butter melts, you’ll see phases of bubbles. First, there will be a few clear bubbles. As the butter cooks, more and more bubbles will appear.
- After about 5 minutes, the bubbles will start to turn into a foam. This is when you want to switch to stirring constantly.
- Once the foam forms, the browning process will happen fast. Keep stirring to not only keep the milk solids from burning on the bottom of the pan, but to also push away the foam so you can see the butter.
- When the butter turns an amber color and you start to see little brown flecks mixing into the foam, the butter is ready.
- Remove from heat and pour into a heat safe container.
- Scrape down the bottom of the pan because that’s where all the brown bits like to stick. Don’t leave those behind! They hold all the flavor.
Tips for making brown butter cinnamon roll dough
This is a foolproof recipe and the rolls turn out perfect every single time (trust me, I’ve made these MANY times). But if you’re brand new to working with yeast, or it’s your first time making cinnamon rolls from scratch, here are a few times to follow:
- The Yeast – For the best cinnamon rolls, use a quality yeast with fast activation. It helps these rolls rise quickly and is the secret to that fluffy, soft, and moist texture.
- Wet Ingredients – The milk, water and butter must be warm before adding to the dry ingredients. This is to help activate the yeast, so it’s important that the mixture isn’t too hot. If it’s too hot, it will kill the yeast. If it’s too cool, the yeast won’t activate. Microwave in 15 second intervals until the mixture is just warm to the touch.
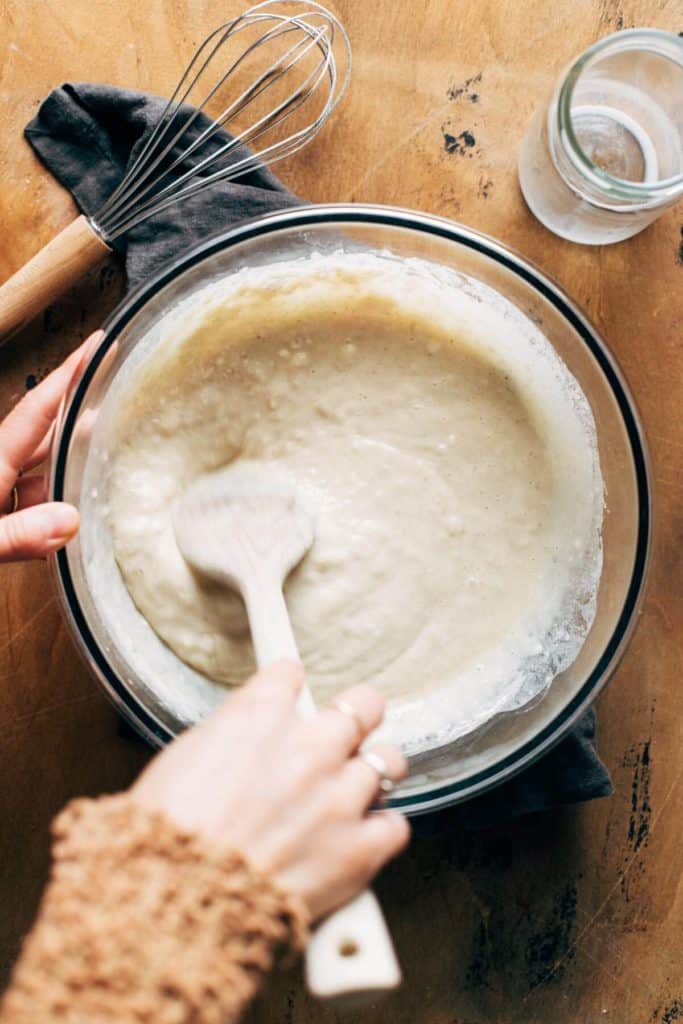
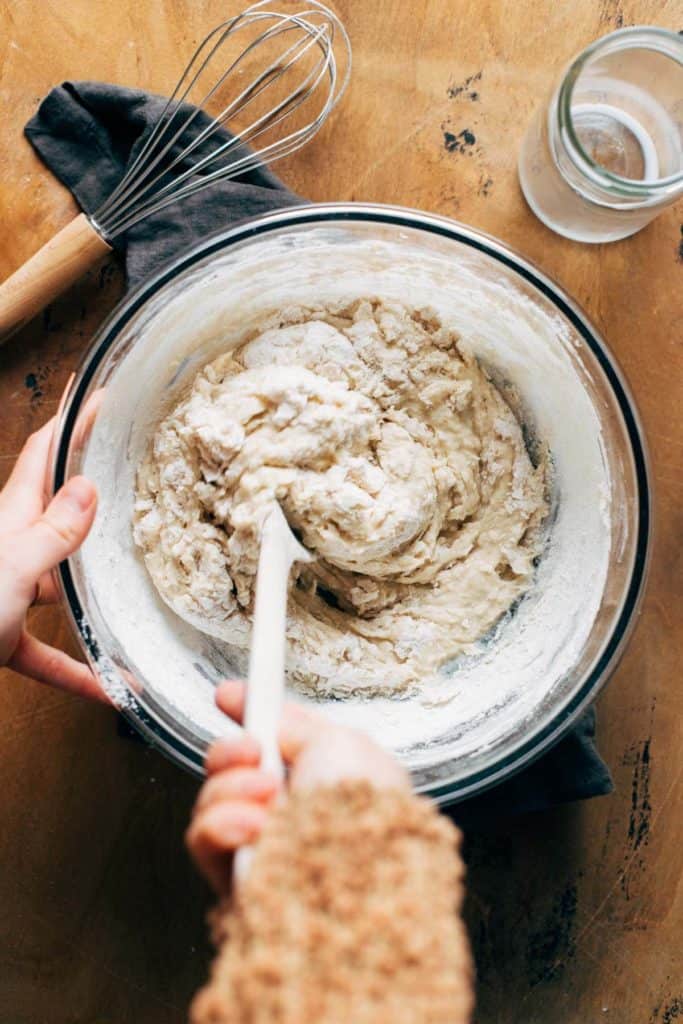
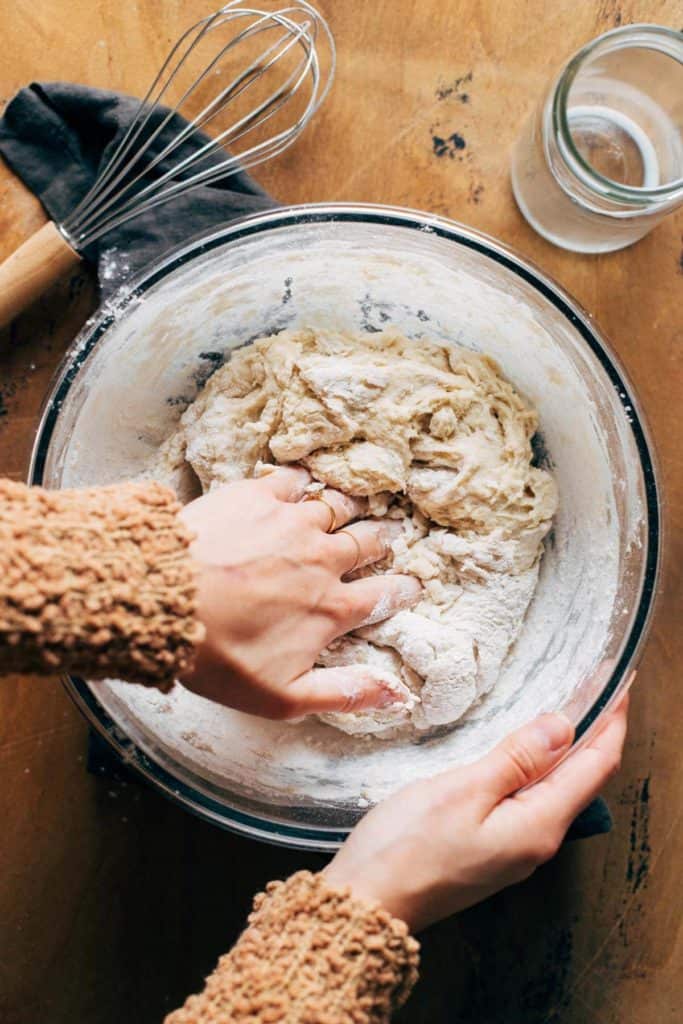
- Mixing and Kneading – To make this a mixer-free recipe, we gradually add the flour in order to hydrate the dough without overwhelming it. It goes in 3 phases. In the beginning it’s a very thin and wet batter. Then after adding bit more flour, it’s a thick but very sticky dough. In the end it will turn into a shaggy dough that’s still sticky but more manageable. At this point, it’s time to knead the dough until it’s smooth.
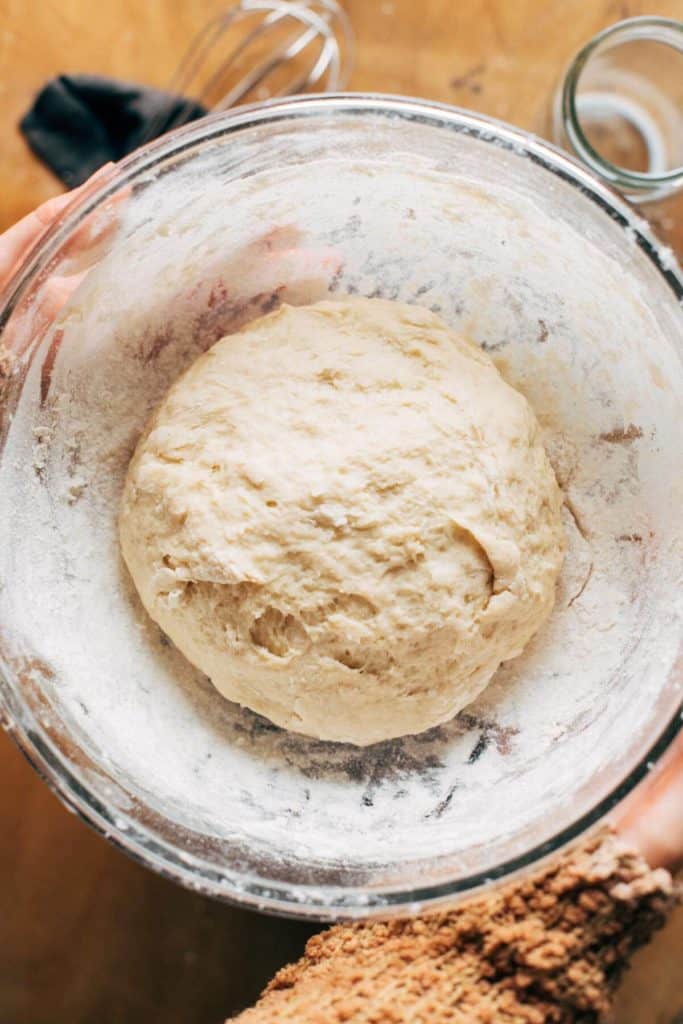
- The Stick Test – After kneading, the dough should still feel sticky because your fingers will be covered in the dough. Give them a rinse and then with a dry finger, press it into the surface of the dough. If it sticks, keep kneading. If it bounces back with a clean finger, then it’s ready.
Once the dough is finished, let it rest for 10 minutes before filling, rolling, and cutting. This allows the dough to rise, gives the dry ingredients a chance to fully absorb, and lets the gluten strands to relax. After 10 minutes, the dough will nearly double in size and become much easier to roll out.
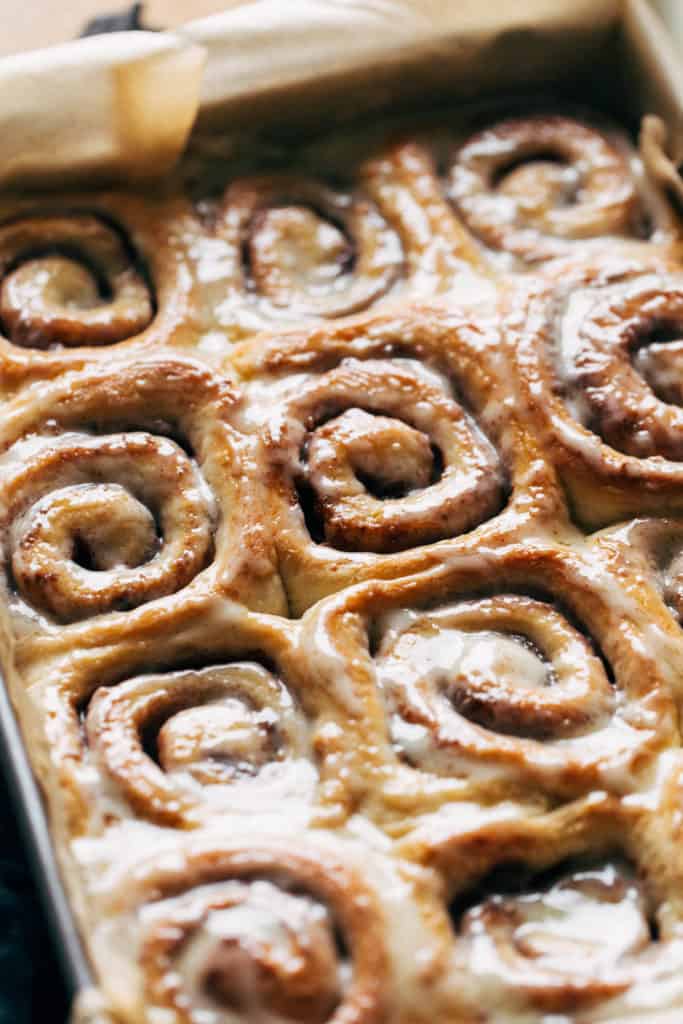
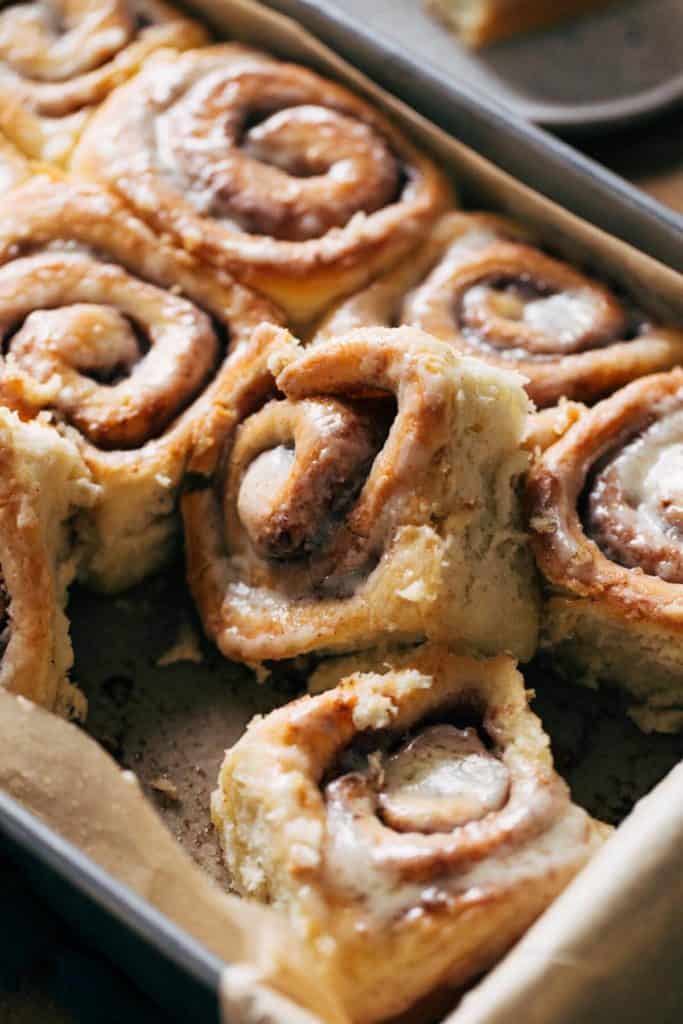
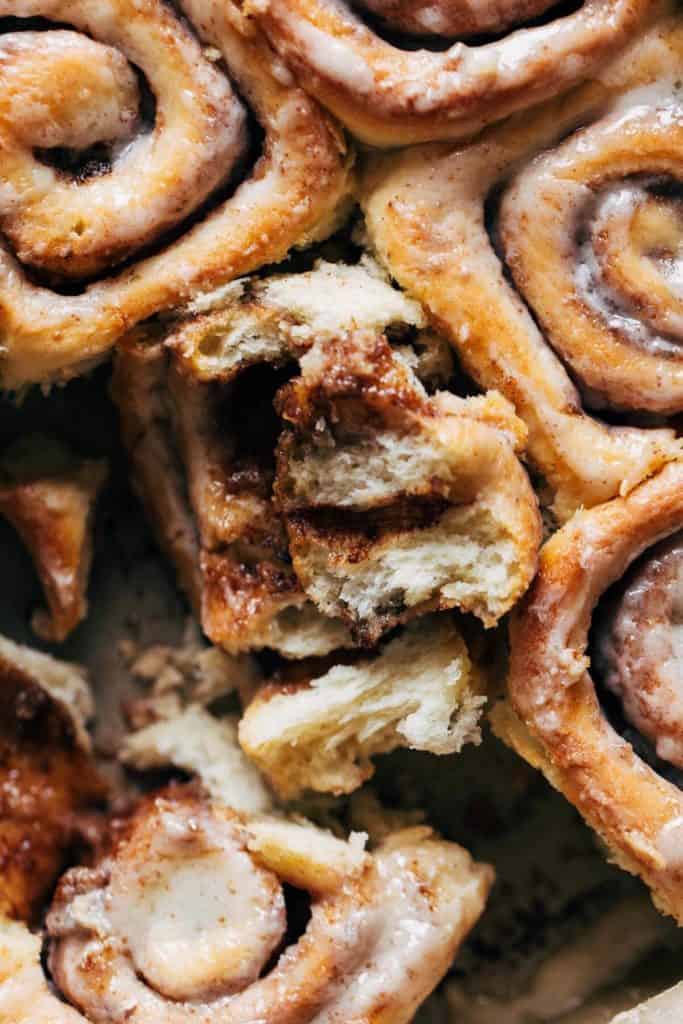
The secret to extra fluffy cinnamon rolls
I need my cinnamon rolls to be soft, fluffy, and squishy, but NOT dry. These rolls are all that and more! The texture is like a pillow, but each bite just melts in your mouth and is bursting with flavor.
The trick to getting really fluffy cinnamon rolls is to use double the amount of yeast. This gives the rolls so much lift, with tiny little air pockets all throughout the dough.
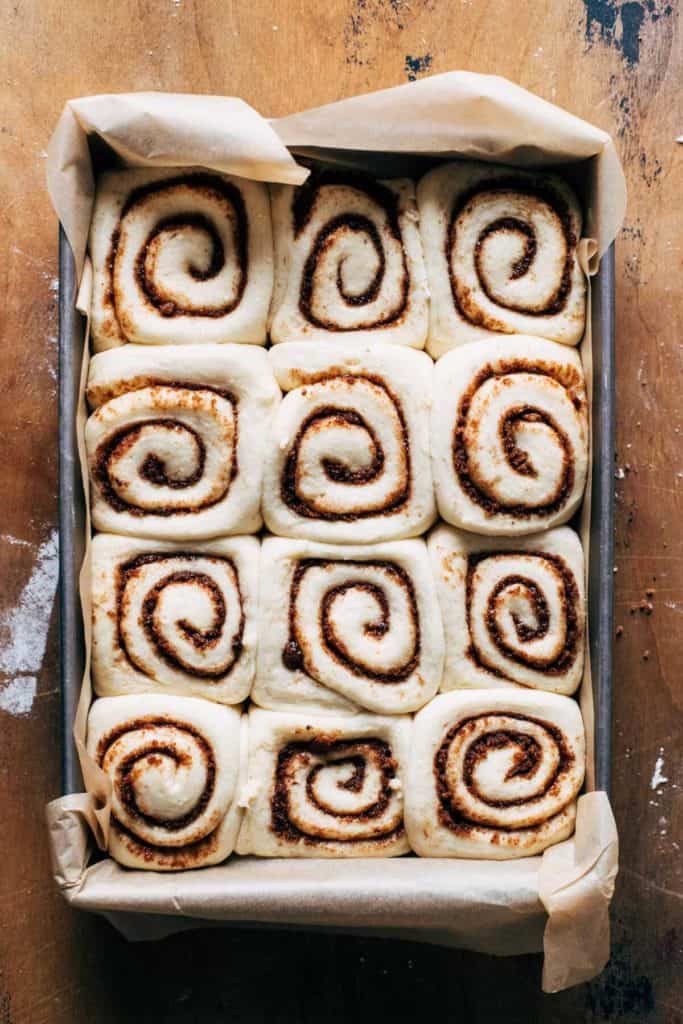
Once the dough has been rolled and cut, allow the cinnamon rolls to proof for about 45 minutes. This is when you’ll see the magic of the double yeast, as the rolls will puff up and fill the entire baking dish.
The best way to cut cinnamon rolls
Since this dough is soft and squishy, cutting the rolls with a knife can lead to misshapen rolls. The weight of the knife can smash the rolls down or push out the filling.
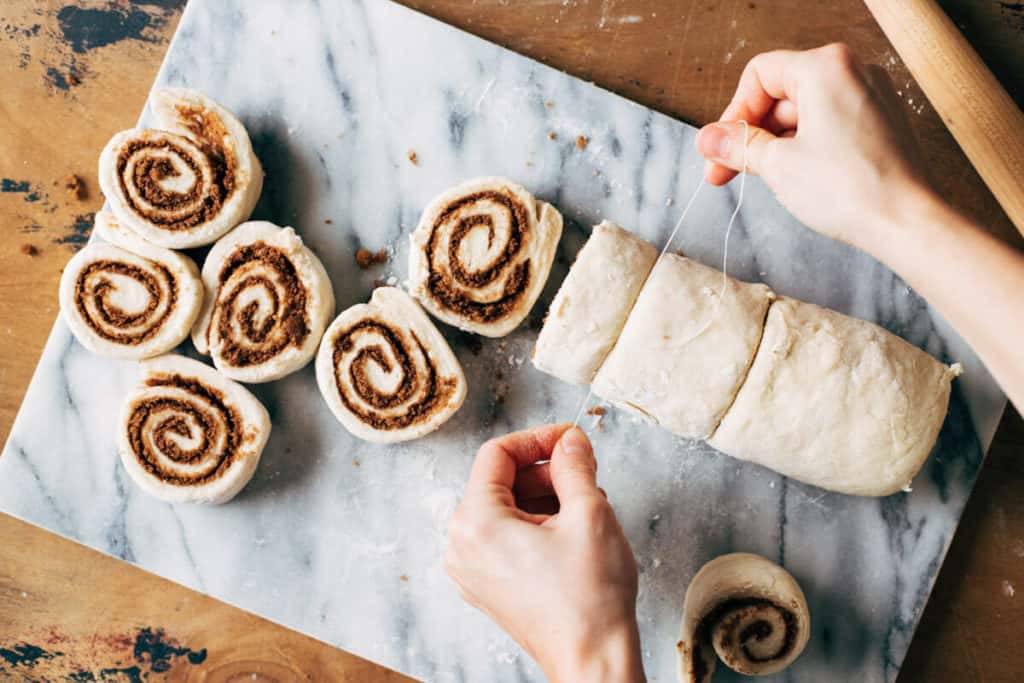
To prevent this from happening, I always use unflavored floss to cut my cinnamon roll dough. Once the dough has been rolled up into a log, run a string of floss underneath the log. Then pull up the two ends of the string and cross them over each other. Pull through to slice right into the roll.
This works really well because it applies even pressure from the outside in, giving you a perfectly shaped cinnamon roll.
My favorite proofing method
The best time of year to make these cinnamon rolls is in the fall and winter. It’s such a warm and cozy dish and are best served when they’re fresh from the oven.
But because of that, my kitchen is often very cold when I’m making these rolls. If it’s too cold, the rolls will have a hard time puffing up. So instead of allowing them to proof at room temp, I instead proof them in the oven.
First, preheat your oven to the lowest possible heat setting. Once it’s preheated, turn the oven off and place the rolls inside with the door closed. This creates a warm environment for the yeast to thrive, allowing the rolls to puff up and double in size.
Why didn’t my cinnamon rolls double in size?
If your rolls didn’t puff up and fill the baking dish, it could be a few reasons:
- Your water, milk, and butter mixture may have been too hot or too cold when you added it to the batter. If it’s too hot, it will kill the yeast. If it’s too cold, the yeast will not activate. You can try to carry on and bake the rolls anyway. I’ve had luck with rolls puffing up from the heat of the oven. But if they fall flat, this is likely the reason.
- You added too much flour to the dough. When working with the dough, it should feel light, warm, and slightly tacky. If it’s tough and dry, it could be that you added too much flour. This will create a more dense and dry roll which is likely not to puff up as it should. In this case, you may need to start over.
Tips for making brown butter icing
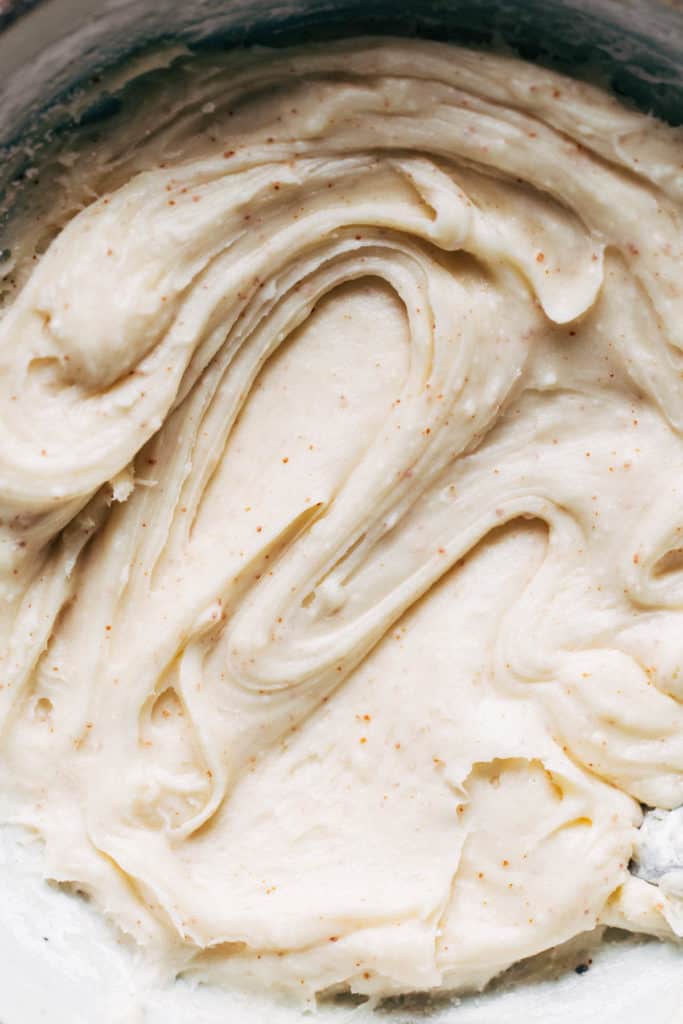
This brown butter icing is so rich and so delicious. It’s almost like a cross between a glaze and an icing. It’s not too sweet and it just melts into these rolls, but it also isn’t super thin and runny like a glaze would be. It’s just the perfect topping to these rolls because they sink right into all of the swirls, making these cinnamon rolls extra soft and gooey.
But before you make it, it’s very important that both the cream cheese and butter are at room temperature. The very first step in this recipe is to make the brown butter, so by the time you’re ready to make the icing the brown butter should be solidified but soft. You don’t want to use liquified butter in this icing because it could turn clumpy.
Same goes for the cream cheese. If it’s too cold, the icing won’t have that rich and smooth consistency. But if the two are at the right temperature, this icing can be made by hand. First mash the butter and cream cheese together with a fork, then mix in the powdered sugar, vanilla, and milk.
But the time you’ve mixed in the milk, you should be able to switch to a whisk to fully smooth out the icing. Then it’s ready to spread on the rolls!
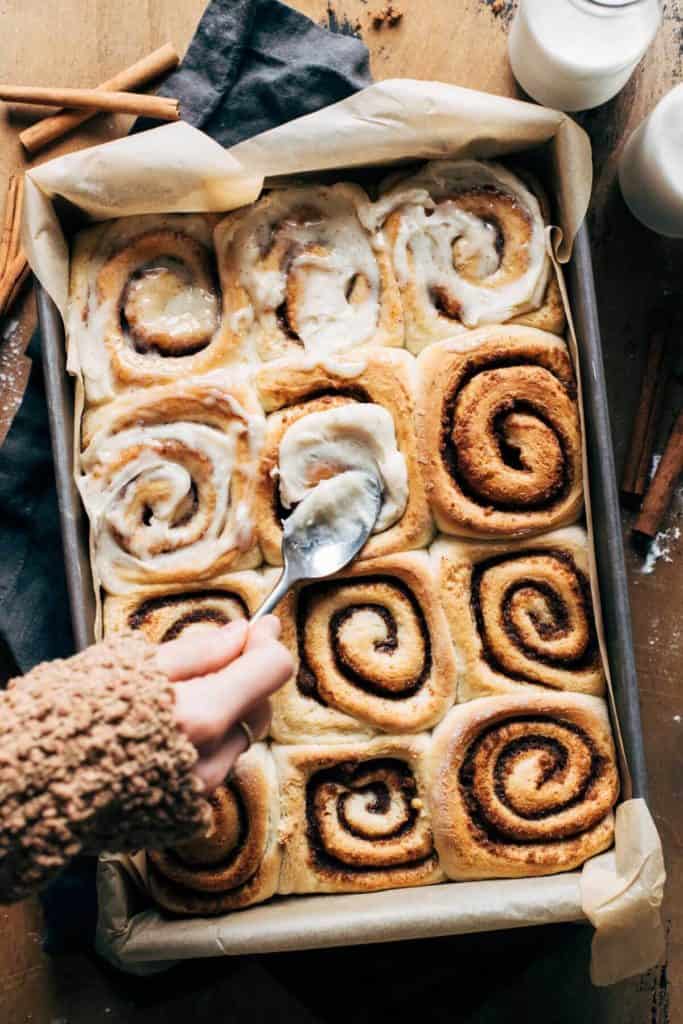
When is the best time to add icing to cinnamon rolls
Right when they’re fresh from the oven. This icing is mostly butter, so when that solid brown butter hits these warm rolls, it slowly begins to melt right into the swirls and cracks.
Spreading it on when the rolls are warm gives the icing to soak in, creating an extra gooey and soft texture.
How to serve brown butter cinnamon rolls
Definitely serve when they’re warm! This is when they’re at their prime, as the texture is super soft, tender, melty, and just all around perfect.
Can I make these cinnamon rolls overnight?
Yes. Once you’ve formed the rolls and placed them in the baking dish, cover the dish in plastic wrap and store in the refrigerator overnight. When you’re ready to bake, allow the rolls to rest at room temperature before placing in the oven.
How to store leftover cinnamon rolls
Cover the rolls tightly in plastic wrap. They can be stored at room temperature for 2 days or in the refrigerator for up to 6 days.
How to reheat brown butter cinnamon rolls
Since these are best served warm, any leftovers should be reheated before eating. Simply place the roll on a heat-safe dish and microwave for about 10 seconds. It doesn’t take much!
For more cinnamon roll recipes, check out my:
Make sure to tag me @butternutbakery on Instagram if you make these Brown Butter Cinnamon Rolls. I love seeing my recipes come to life in YOUR kitchen! To pin this recipe and save it for later, you can use the button on the recipe card, the buttons above or below this post, or on any of the photos above. Happy baking!
Print
Brown Butter Cinnamon Rolls
- Total Time: 1 hour 10 minutes + 1 hour proofing
- Yield: 12 rolls
Description
These warm and cozy brown butter cinnamon rolls are baked with brown butter in the dough, in the filling, and in the cream cheese icing. They’re the perfect rich, soft, and fluffy rolls that are so easy to make!
Ingredients
Butter
- 1 cup + 2 tbsp unsalted butter
Cinnamon Roll Dough
- 5 – 5 1/2 cups all purpose flour
- 1/2 cup (100g) granulated sugar
- 1 tsp salt
- 2 packets instant (also known as quick-rise) yeast (4 1/2 tsp)
- 1 large egg
- 1 tsp vanilla bean paste (or 2 tsp vanilla extract)
- 1 cup (250ml) milk
- 1/2 cup (120ml) water
- 1/3 cup browned butter
Filling
- 1/3 cup browned butter
- 1 cup (200g) light brown sugar, packed
- 3 tbsp cinnamon
Brown Butter Cream Cheese Icing
- 1/3 cup browned butter, solidified and softened
- 2 oz cream cheese, room temp
- 1 cup (120g) powdered sugar
- 1/2 tsp vanilla bean paste (or 1 tsp vanilla extract)
- 1 tbsp milk
- Pinch of salt
Instructions
Butter
- First, brown the butter. All of this butter will be dispersed throughout the entire recipe.
- Add the butter to a saucepan over medium heat. Melt it down and continue to stir as it goes from melted, to bubbling, to foaming. The foaming stage is when the butter begins to brown rapidly, so keep a very close eye on it. It’s ready when the butter has turned a rich amber color. (See this post all about how to brown butter for more tips).
- Pour the butter into a measuring glass and scrape in the brown bits at the bottom of the pot. They hold all the flavor.
Cinnamon Roll Dough
- In a large mixing bowl, whisk together 2 cups of flour, sugar, salt, and yeast.
- In a heat-safe glass, add the milk, water, and 1/3 cup of the browned butter (give the brown butter a stir before pouring out your 1/3 cup in order to capture some of the brown bits at the bottom of the glass).
- Microwave the mixture for 30-45 seconds or until it’s warm to the touch, but not hot.
- Pour the milk mixture into the bowl of dry ingredients along with the egg and vanilla. Mix to combine.
- Mix in 2 more cups of flour using a wooden spoon. It should still be pretty wet and sticky, so mix in another 1 to 1 1/2 cups of flour until the dough is shaggy and tacky.
- Use your hand to knead the dough into a smooth ball. It may stick to your fingers but that’s OK. But if it’s way too sticky to manage, mix in 1/4 cup of flour at a time until it’s a bit less sticky.
- Cover the dough and let it rest for 10 minutes.
- While it rests, make the filling. Combine all 3 ingredients in a bowl (remembering to stir the brown butter before pouring out your 1/3 cup). It should be the consistency of wet sand. Place the last bit of brown butter in the refrigerator to solidify. This will be used in the icing.
- After 10 minutes, the dough shouldn’t look that different so don’t be concerned if it hasn’t puffed up. Place the dough on a lightly floured surface. Roll it into a 12×16 inch rectangle.
- Cover the surface with the filling, leaving a 1/2 inch gap all around the edge of the dough.
- Roll the dough up from the long end, forming one large log. Gently press the two ends in towards each other to restore the dough to its original length as it tends to stretch while rolling.
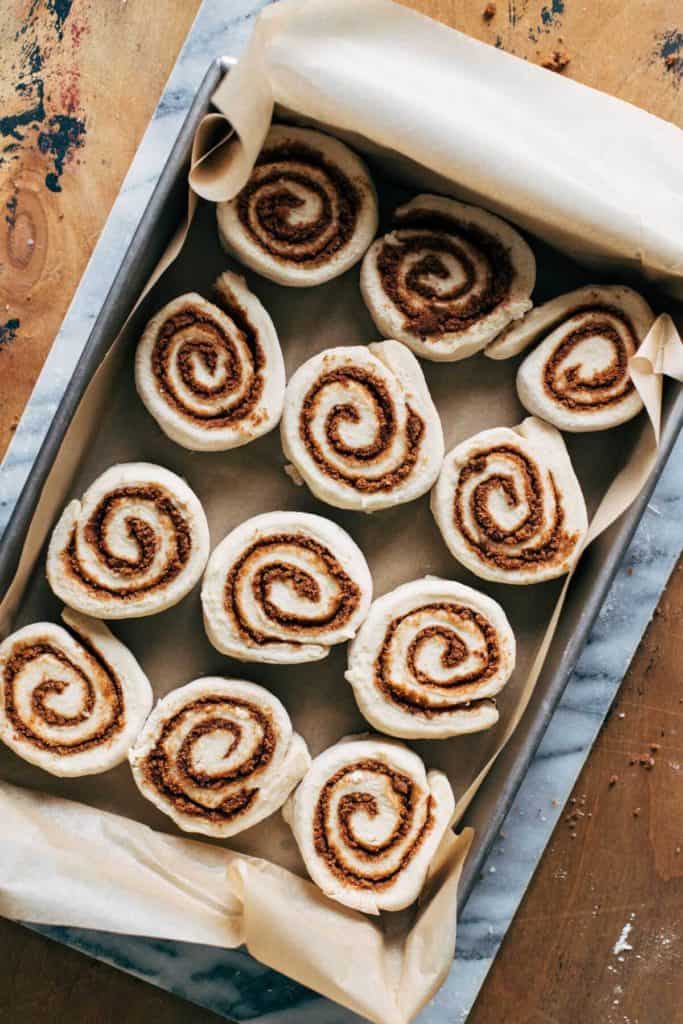
- Using a piece of unflavored floss, cut off the two ends. Do so by running the floss under the log. Pull the two ends of the string up and over the log, crossing over each other. Then pull those ends through to cut through the log. Then cut the log into 12 equal pieces.
- Place the pieces into a 9×13 baking dish that has been lined with parchment paper.
- If you’re in a warm climate, cover the rolls and let them proof at room temperature for 45 minutes. They should double in size. If it’s cold in your kitchen, preheat the oven to the lowest temperature possible. Once preheated, turn the oven off and place the rolls inside uncovered and close the door. After 30-45 minutes, the rolls should have doubled in size.
- Take the rolls out of the oven and preheat it to 350F. Bake uncovered for 25-30 minutes or until the tops are a light golden brown.
- When the rolls are fresh from the oven, make the icing.
Brown Butter Cream Cheese Icing
- Check on the refrigerated brown butter. It should be solidified but still soft. If it’s too hard, fill a bowl with warm water and place the glass of brown butter inside for a few minutes. If it’s still liquid, continue to chill it for another 20 minutes.
- There should also be 1/3 cup of butter left. If it’s just a smidge too much or too little, that’s ok. But if it’s well over 1/3 cup, take away some of the butter.
- In a bowl, mix together the brown butter and cream cheese. You can do so using a fork or an electric mixer.
- Mix in the powdered sugar, 1/2 cup at a time. Mix in the vanilla and milk in between each half. Then mix in the salt.
- Spread the icing over the warm rolls and allow it to melt in. Now serve and enjoy!
Notes
OVERNIGHT ROLLS – You can make these a day ahead and allow the rolls to chill overnight to bake the next morning. Once the rolls have been placed in the baking pan, cover and chill overnight. Then let the rolls rest at room temperature for 30 minutes before baking. They may not double in size before baking but that’s OK. They should puff up in the oven.
- Prep Time: 45 minutes
- Cook Time: 25 minutes
Join Our Community


Meet Jenna
I’m the creator, baker, and photographer behind Butternut Bakery. Here I share desserts for every diet because I believe everyone should have a chance to indulge!
Made these for Christmas morning! Cinnamon rolls were fully and the brown butter was so delicious.
I think my buns were somehow too big! They were very squished in the pan and then did not bake through in the oven. I used the same size pan but it seemed like i had 2-4 too many buns. My dough did proof very seriously, and they got very big….
This recipe was amazing! It seems like a lot of steps but it was very straightforward, easier than I expected and so, SO delicious. One question though: I did the overnight option in a 9 x 13in pan, and after 30 minutes took the rolls out of the oven. The rolls in the very center of the pan were very underdone, but the exterior rolls were almost overdone. Should I have covered the pan with foil and kept them in longer? Thanks!
These look delicious! Can any of this get prepped the night before to save on work?
I attempted to make these last night and unfortunately failed! I’m not sure where I went wrong, the dough was tough (like dried up play dough) I couldn’t roll it out and just tossed it. Any idea where I went wrong?
Hi jenna
This looks so awesome! I can’t wait to try them! Do you have the measurements in gram?
I don’t have a stand mixer and typical fold cinnamon rolls by hand, how long do you suggest for hand kneading?
These look amazing! Question , recipe states to grease a pan but pic shows what looks like parchment paper? Is that better?
THESE ARE AMAZING! And soft on the inside. I accidentally put the heavy cream in with the cinnamon rolls and then realized later it’s supposed to go on top before baking. I did that step as well and they turned out just fine! These are the BEST!
When reading the directions I’m not seeing when to put the heavy cream in. Is it along with the other cinnamon roll ingredients (milk/yeast/etc)?