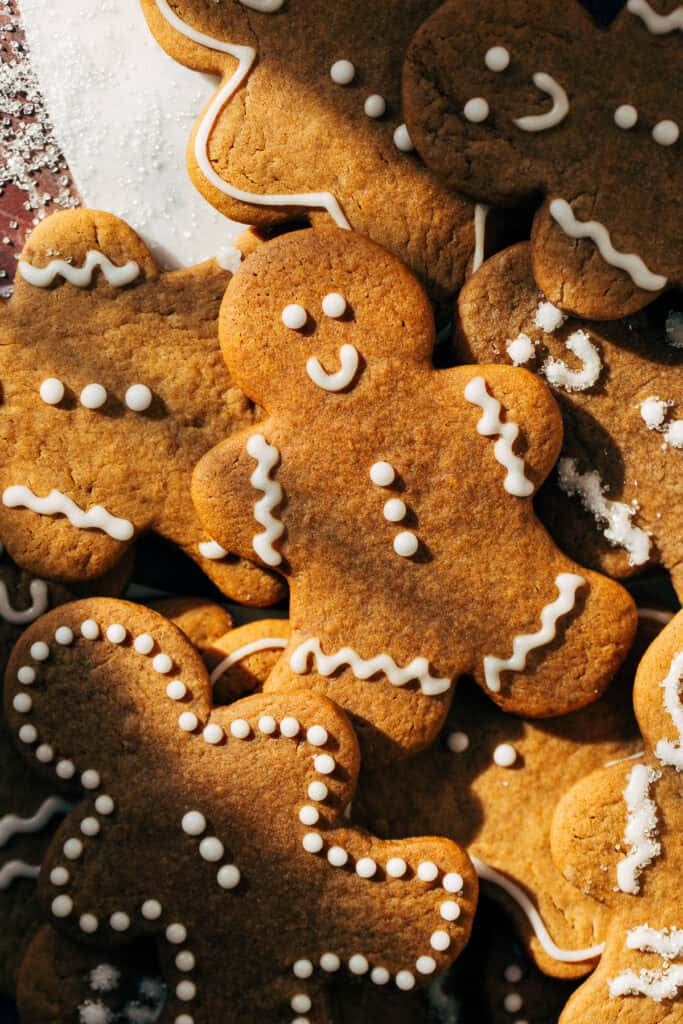
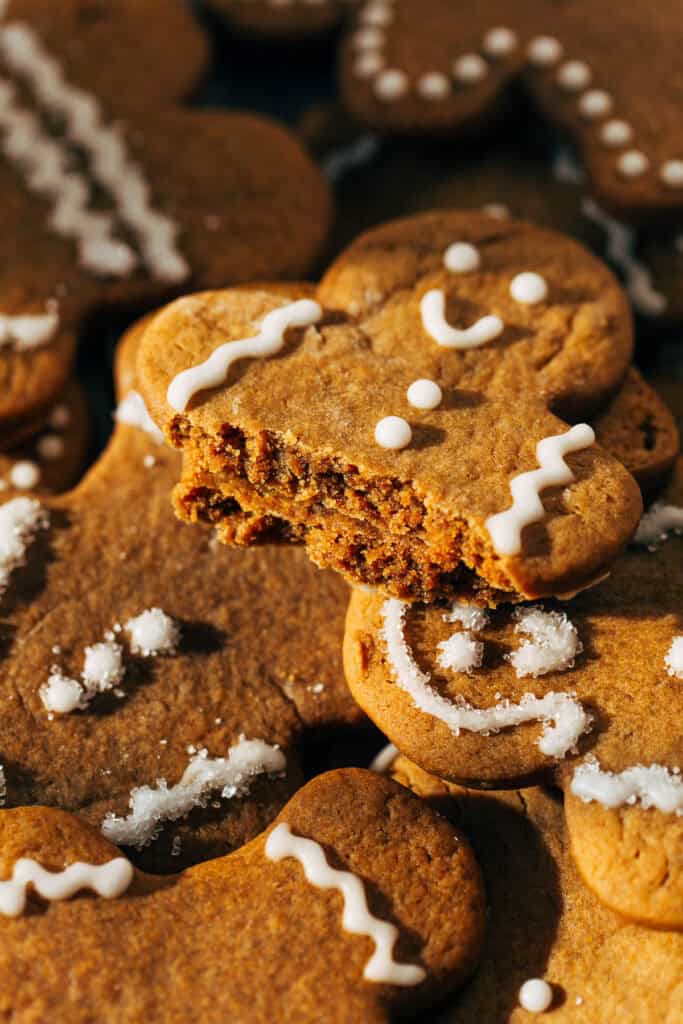
BEST Gingerbread Cookies
These are definitely the BEST gingerbread cookies and it’s bound to be your new go-to recipe! They’re thick, soft, and chewy but hold their shape so well when baked. This recipe also uses lots of molasses and spices, so they’re incredibly rich and flavorful. You’ll never make another gingerbread cookie again after trying this recipe!
What makes these the best gingerbread cookies?
I know, “BEST” is a bold word to put in front of any recipe and I don’t take it lightly. But gingerbread cookies are the entire reason why I started baking in the first place, so I made it my mission to create a recipe that’s not only delicious but also consistent.
Growing up, my mom, sister, and I would bake homemade gingerbread cookies every year for Christmas and every year they turned out different! Some were perfectly chewy, while others were a bit tough and dry. So for this recipe, I made it pretty much impossible to have any variation. These cookies bake perfectly thick and chewy every time.
The secret is in the molasses. This recipe uses tons of molasses to not only capture the rich flavor, but add tons of chew. Too often, we tried gingerbread cookies that were too tough or too cakey. These are neither! They turn out rich and chewy and stay that way for days.
This recipe is also uses tons of spices! We’re adding an entire tablespoon of both vanilla and ginger to this dough, along with a touch of cinnamon and cloves. The end result is an incredibly flavorful gingerbread cookie that will leave you wanting more.
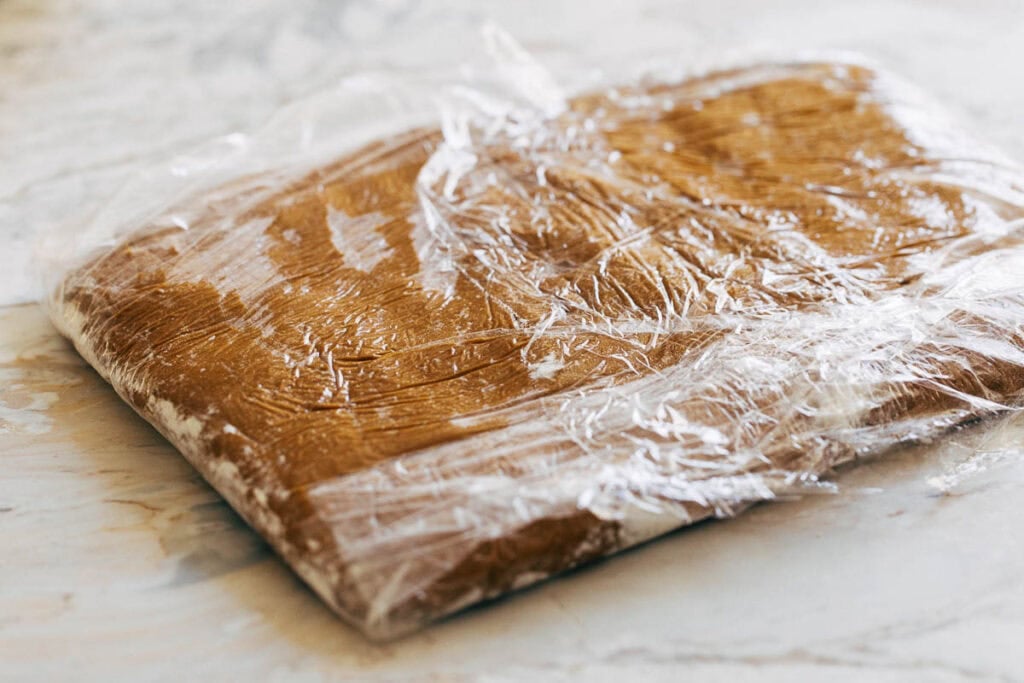
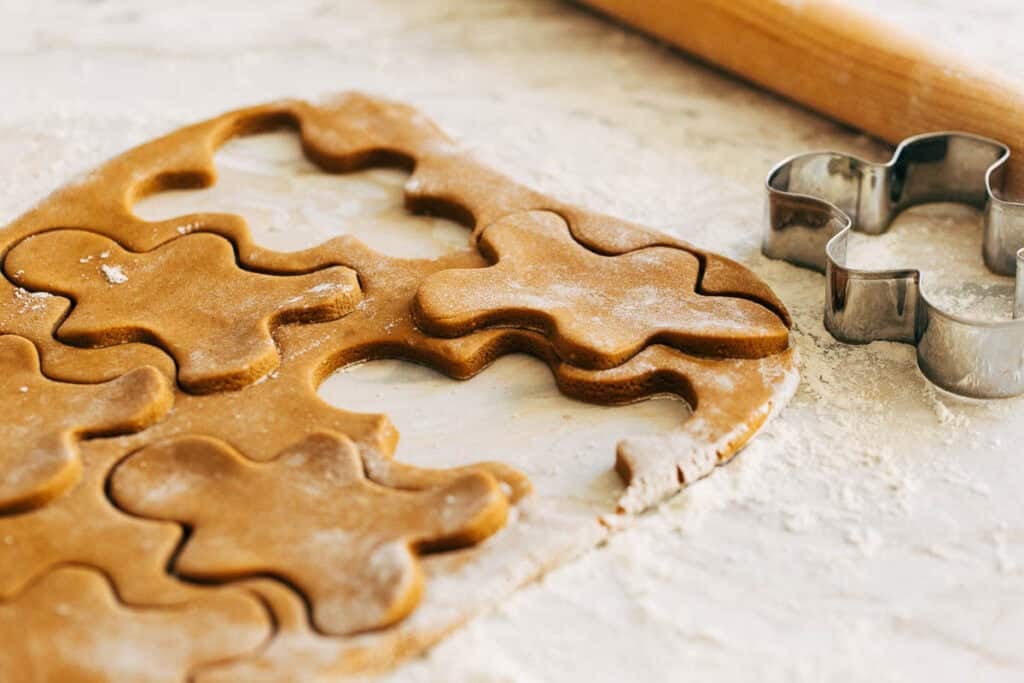
Lastly, the dough is VERY sticky (never trust a gingerbread dough that’s easy to work with). Because of this, the dough has to chill for a minimum of one hour. It’s patted into a one inch thick rectangle and wrapped. By doing this, it’s so easily to roll it out once chilled. We’re also rolling the dough to 1/4″ thick, so we get a nice and chewy bite!
Making gingerbread cookies – what to look for
The one and only trick to perfecting this recipe is in the final stage of making the dough. Luckily it’s very easy to tell when the dough is ready, so here is what you need to know:
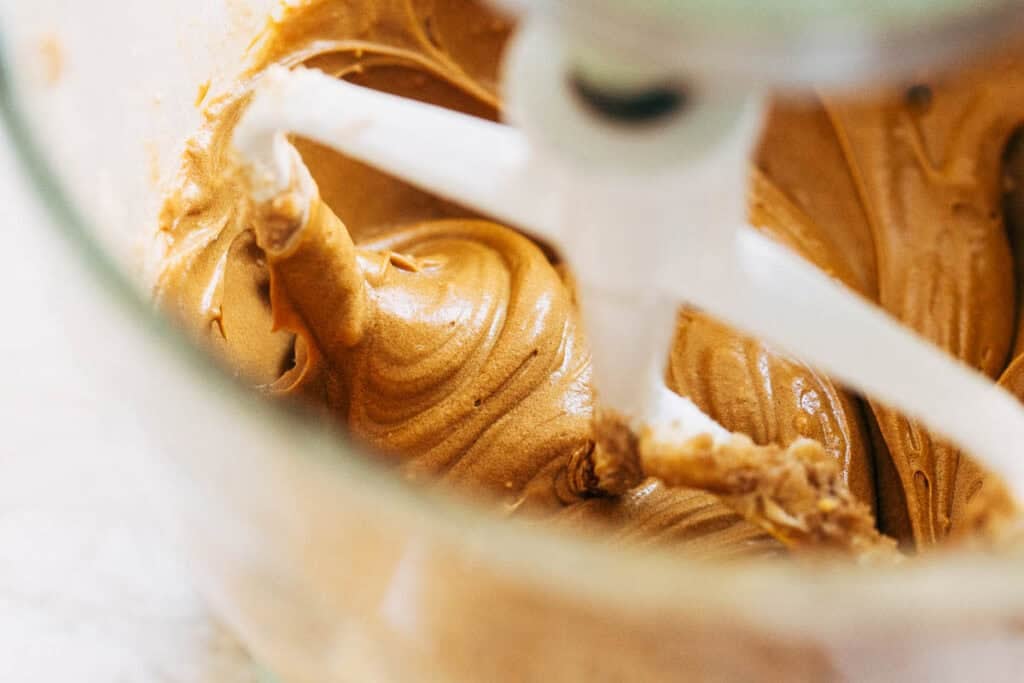
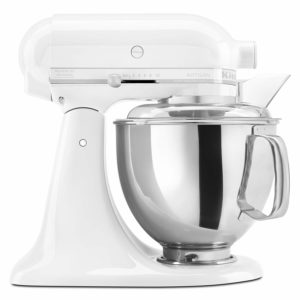
- Butter & Sugar – First, the butter and sugars are mixed together. Make sure to fully cream the two together in to a light and fluffy consistency. This takes about 1-2 minutes on medium-high speed. This process whips tiny air holes into the butter, allowing the heat from the oven to freely move through the dough as the gingerbread cookies bake.
- Molasses – No need to get fancy with this recipe. Just basic unsulphured molasses (not blackstrap) that you can find at just about any grocery store. I always use Grandma’s brand.
- Scraping – Scrape the bowl as often as possible throughout the process. Doing so will ensure the dough is evenly combined, leaving less work for you at the end!
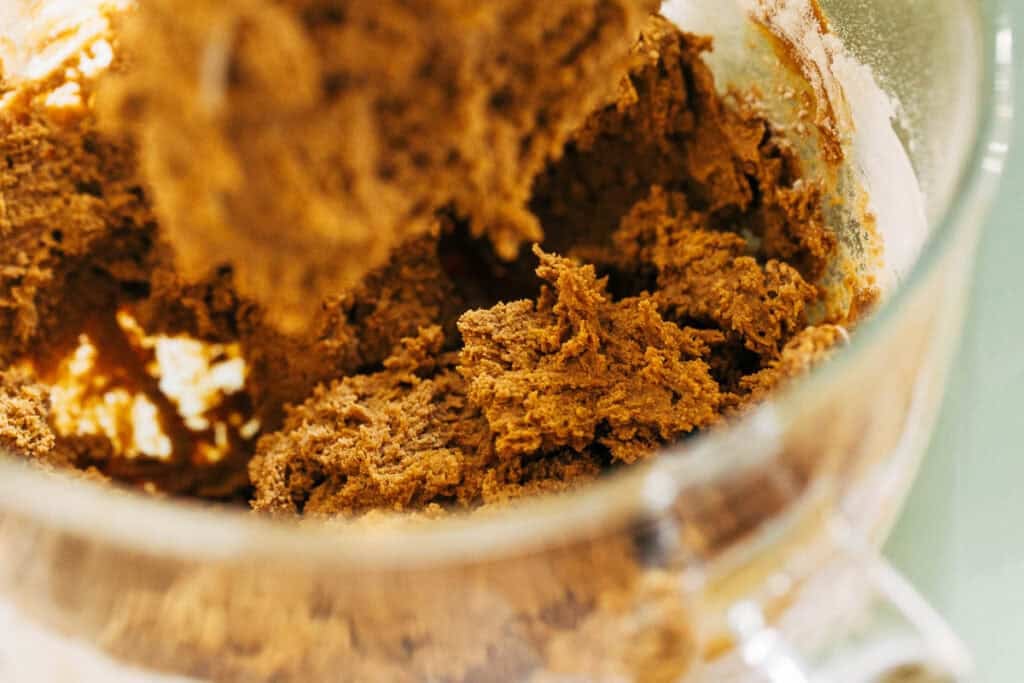
- Dry Ingredients – Once the flour is added, the dough will get VERY thick and sticky. Mix as long as your mixer can handle it, then remove from the bowl and use a strong spatula to fold it all together and ensure it’s evenly combined. This part requires a little bit of elbow grease, hence why I suggest tip 3 above.
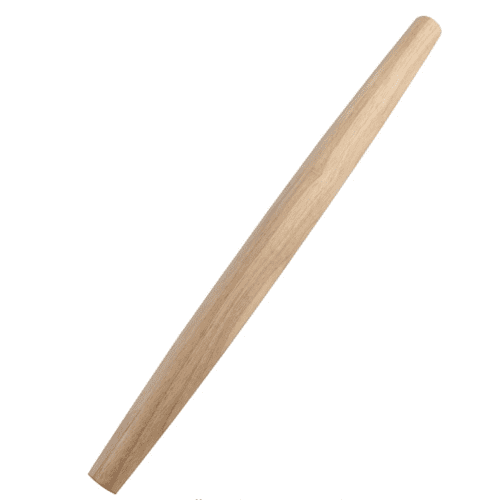
- Rolling – Once the dough has chilled for an hour, it will still be pretty soft and easy to roll. Work fast, because as the dough softens it becomes difficult to work with. For this reason, use a gingerbread cookie cutter that’s simple and plump. Anything intricate will be hard to manage with this dough.
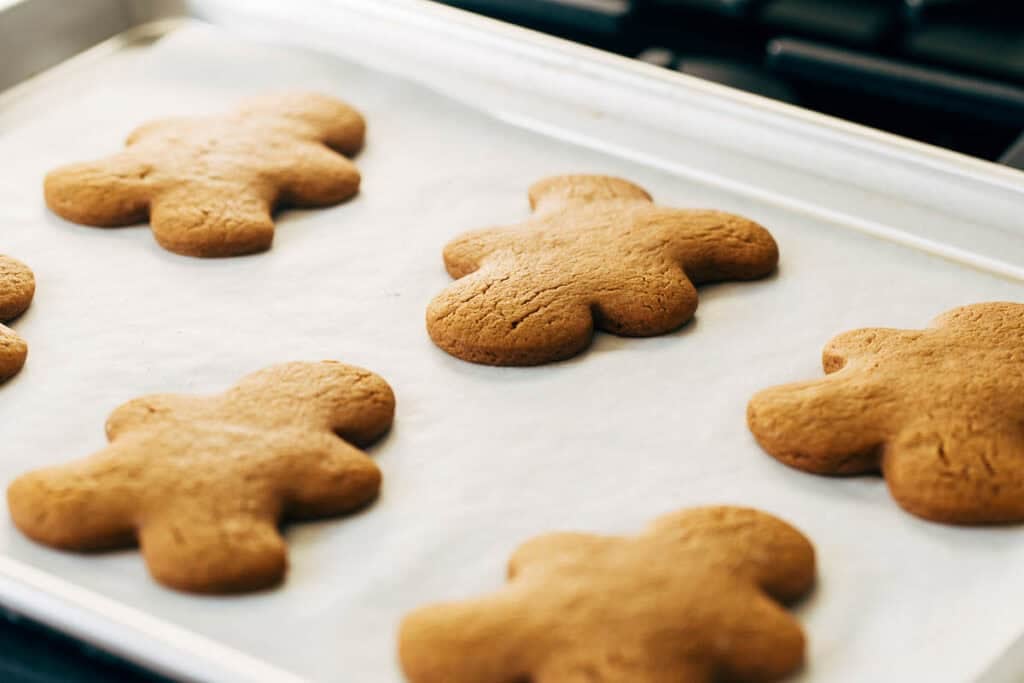
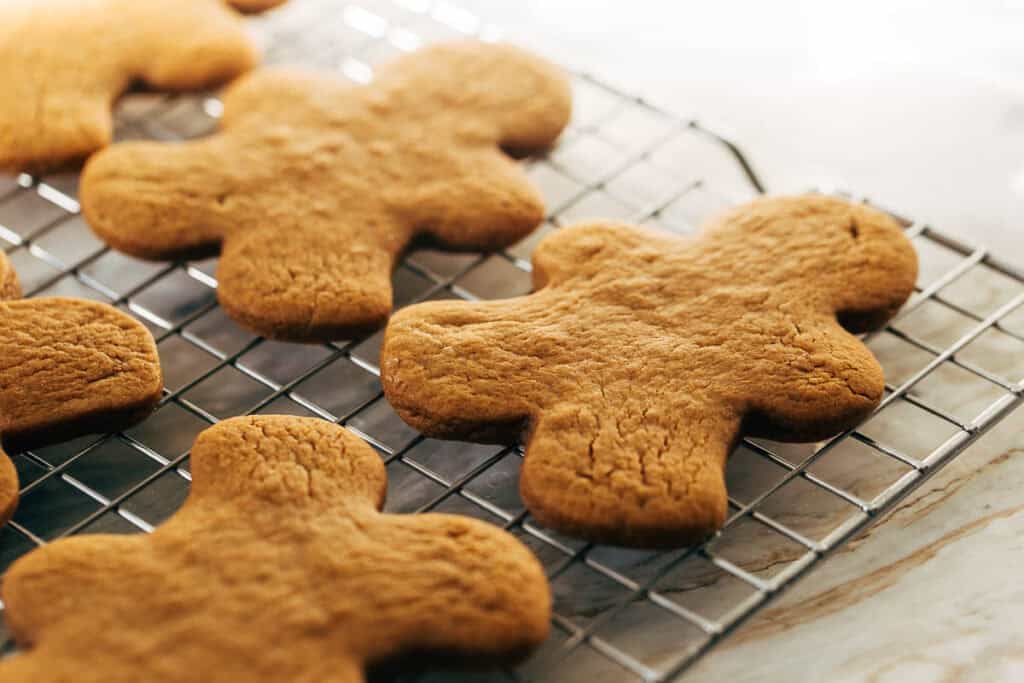
- Baking – The cookies are done when they’re well puffed and cracked on the surface, but will still appear slightly underdone in the center. The cookies will flatten out as they cool, leaving you with that dense and chewy texture.
Chilling gingerbread cookie dough
The dough is patted into a rectangle that’s one inch thick and wrapped in plastic wrap before chilling. This shape makes it much easier to roll out later, and speeds up the chilling process.
After the hour, the dough will still be soft but cold enough to handle if you work fast. I find that the hour chill leads you with the best texture, but is the hardest to work with.
However, you can chill the dough overnight and it’s much easier to work with. The trade off is that the cookies aren’t as chewy. Still chewy, but not AS chewy. You can help combat this by reducing the bake time by one minute.
Rolling gingerbread cookie dough
Once chilled, split the dough in half and work with one half at a time. Since the dough softens pretty quick, it’s easier to manage half the dough at once.
First, flour your work surface and then rub flour on both sides of the pad of dough. Start rolling it out and about halfway through, lift the dough and flour underneath. Then continue rolling to 1/4″ thick.
Cut out your cookies and transfer to your baking sheet. For the cookies that don’t fit, transfer them to a plate and immediately store in the refrigerator until the oven is free.
When transferring the cookies to the baking pan, use delicate hands and reshape as needed. Some of mine turned out a little bit wonky, but I like to think that just adds personality to these little guys!
Decorating chewy gingerbread cookies
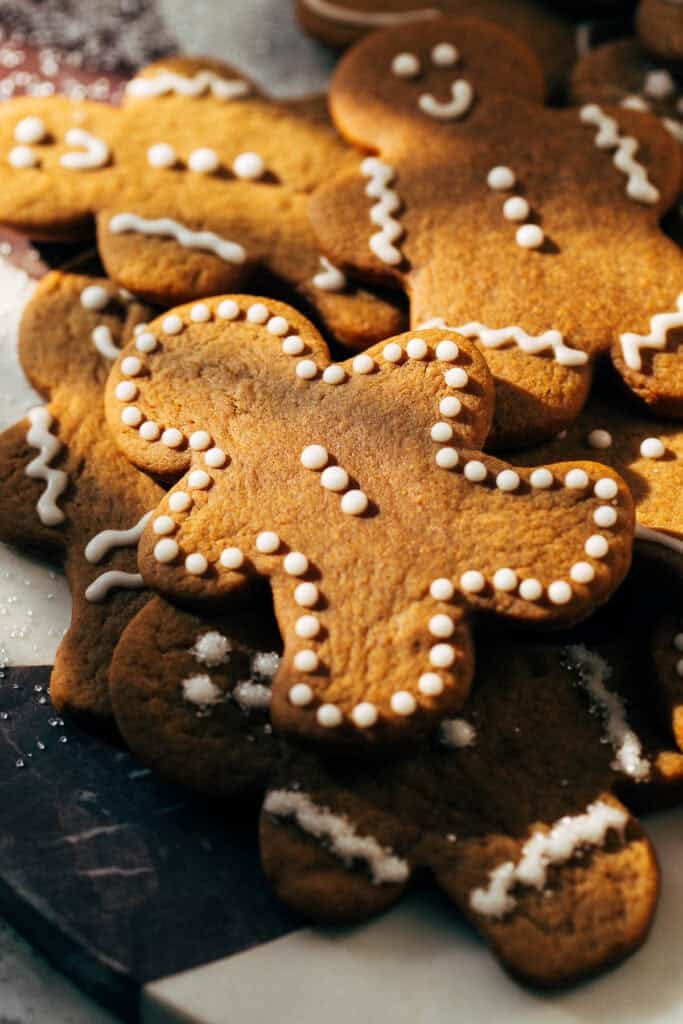
When the cookies are completely cooled, it’s time to decorate. The icing recipe for these cookies is VERY easy to make and also dries firm.
The ingredients are simply powdered sugar, water, and corn syrup. Corn syrup is what will provide a skin on the icing, basically turning it into a much easier royal icing.
The right consistency should look like Elmer’s glue, but a bit thicker. When all of the ingredients are mixed together, assess the icing. If it’s too thin, add a tablespoon of powdered sugar. Too thick, add a teaspoon of water. Adding bit by bit allows full control over the icing consistency.
To decorate, small round piping tips work best. For these cookies, I use a No. 2 Wilton piping tip fitted on a piping bag.
These cookies are also moist enough to where icing isn’t all that necessary and is purely decorative, so another option is to dust the cookies in powdered sugar before baking. Just that hint of sweetness pairs perfectly with the rich molasses flavor.
Gingerbread Cookies FAQs
In my experience, cut out cookie dough doesn’t work great with a gluten-free flour swap! However, since this dough is so soft and sticky, it could work here. I haven’t tested it, but you can try swapping the flour with a cup for cup gluten-free baking flour. I like Bob’s Red Mill, the blue bag, or King Arthur measure for measure.
I suggest only a day in advance. I find the cookies become too dry if the dough chills for too long.
For more Christmas cookie recipes, check out my:
- Soft Molasses Cookies
- Cut Out Sugar Cookies
- Soft and Chewy Sugar Cookies
- Slice and Bake Cookies
- Pistachio and Raspberry Thumbprint Cookies
- Turtle Cookies
- Cream Cheese Sugar Cookies
Make sure to tag me @butternutbakery on Instagram and comment below if you make these gingerbread cookies. To pin this recipe and save it for later, you can use the button on the recipe card or on any of the photos above. Happy baking!
Watch how to make the BEST gingerbread cookies!
Print
BEST Gingerbread Cookies
- Total Time: 1 hour 38 minutes
- Yield: 20 cookies
Description
These are the BEST gingerbread cookies because they’re thick, soft and chewy and last that way for days. The flavor is also incredibly rich, using tons of molasses and spices to bring in that cozy holiday feel. It will definitely be your new go-to recipe!
Ingredients
Gingerbread Cookies
- 1/2 cup (112g) unsalted butter, room temp
- 6 tbsp vegetable shortening
- 3/4 cup (150g) dark brown sugar, packed
- 1 tbsp vanilla extract
- 1 large egg
- 3/4 cup (250g) unsulphured molasses (I use Grandma’s)
- 1 tbsp ground ginger (yes, one tablespoon!)
- 2 tsp ground cinnamon
- 1/2 tsp kosher salt
- 1/2 tsp baking soda
- 1/2 tsp cream of tartar
- 1/4 tsp ground clove
- 3 1/2 cups (450g) all-purpose flour, spooned and leveled
Icing
- 1 1/2 cups (165g) powdered sugar
- 6–8 tsp water
- 1 tsp corn syrup
- Gel food coloring (optional)
Instructions
Gingerbread Cookies
- In a large bowl using a hand or stand mixer with the paddle attachment, mix the butter, shortening, and dark brown sugar on medium-high speed until light and creamy (about 1 minute).
- Scrape down the bowl and mix in the vanilla and egg. Once smooth, scrape down the bowl again and mix in the molasses until smooth, rich, and glossy (it will look so lush at this point!).
- Now mix in the spices, salt, baking soda, and cream of tartar until combined.
- Scrape down the bowl and mix in the flour. Mix as long as your mixer can handle it because it will produce a very thick and sticky dough. Then remove the bowl and use a strong silicone spatula to fold the dough and ensure it’s evenly combined. This will take some elbow grease!
- Dump the dough out onto a sheet of plastic wrap dusted in flour. Coat your hands in flour and pat the dough into a rectangle that’s 1/2″ thick. Wrap it up and chill for at least 1 hour or overnight. I find the cookies are the best after a one or two hour chill, but the dough is still pretty soft and takes some patience to work with. However if it chills overnight, the dough is easy to work with but the cookies aren’t as chewy – still chewy but not AS chewy. You can help combat this by reducing the bake time by a minute.
- When ready, remove the dough from the refrigerator once the oven has preheated to 350F.
- Cut the dough in half and return one half to the refrigerator. To the other half, coat both sides in flour and roll onto a well-floured surface. Roll to 1/4″ thick and cut out your cookies.
- Carefully transfer the cookies to a large cookie sheet lined with parchment paper, spaced a couple inches apart. You should be able to fit about 6 to 8 cookies depending on the size. While this first batch bakes reroll the scraps as much as you can and store the cut outs in the refrigerator until they’re ready to bake.
- Bake for 8-10 minutes (start with 8 and then assess). They’re done when they’re evenly puffed with a cracked surface, but still appear a little underdone in the center.
- Allow to rest on the pan for a minute or two, then transfer to a cooling rack. The cookies will de-puff as they cool.
- Continue baking the rest of the batch then repeat the process with the other half of dough until all the cookies are baked.
Icing
- Make the icing once all the cookies have cooled.
- Whisk together all of the ingredients, starting with 6 tsp of water. The consistency should be slightly thicker than glue.
- If it’s too thick and pasty, mix in 1 tsp of water at a time until you reach a thick glue consistency.
- Mix in a drop or two of gel food coloring at this point if you like. Pipe designs onto the cooled gingerbread cookies and enjoy!

Notes
SIZE – The gingerbread man cookie cutter I used was about 4×2.5″ and 8 minutes was the perfect bake time. Keep in mind that if your cookies are smaller, they may only need 6-8 minutes, if quite larger, they will need closer to 10 minutes.
STORAGE – Store the cookies in an air tight container at room temperature where they’ll keep for about 5 days (they will continue to get softer as the days go on). To keep for a few extra days, store in the fridge.
- Prep Time: 1 hour 30 minutes
- Cook Time: 8 minutes
- Category: Dessert
- Method: Baking
- Cuisine: American
Join Our Community


Meet Jenna
I’m the creator, baker, and photographer behind Butternut Bakery. Here I share desserts for every diet because I believe everyone should have a chance to indulge!


This is best recipe for any baked goods that I have ever found! Wow, are these cookies delicious! I had never made gingerbread cookies before, and was a little doubtful I would like them, but now, every other cookie pales in comparison to this. Doubling the batch and making them again right now. Thank you for sharing this!
Excellent
Just wanted to say these are the best gingerbread cookies I’ve ever made & I am so glad I came across your recipe.
The dough was so easy to roll and cut, unlike a lot of other recipes.
I cannot stop eating them, and they are even better the next day!
Followed the recipe exactly (aside from dairy free butter). These are delicious. We use this icing for our sugar cookies so we know it is good, and it was great for gluing our gingerbread house. My kids were adamant we make real gingerbread houses this year, and this recipe was perfect. Even being soft and chewy they built really well. And we enjoyed eating them too. Thank you!