Snickerdoodle Puff Pastry S’mores Pop Tarts
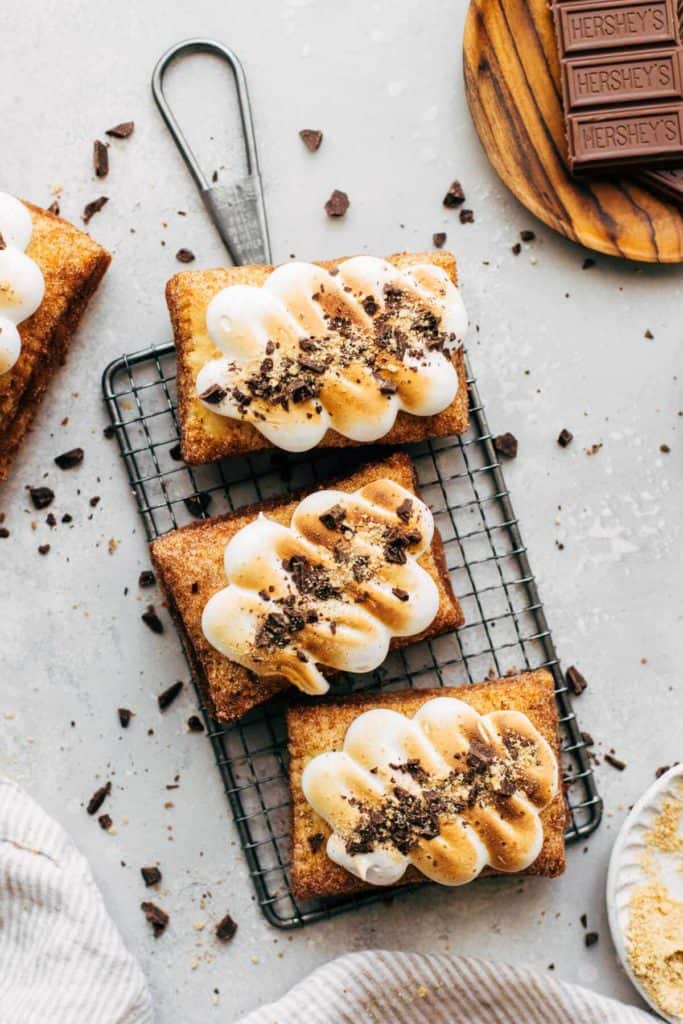
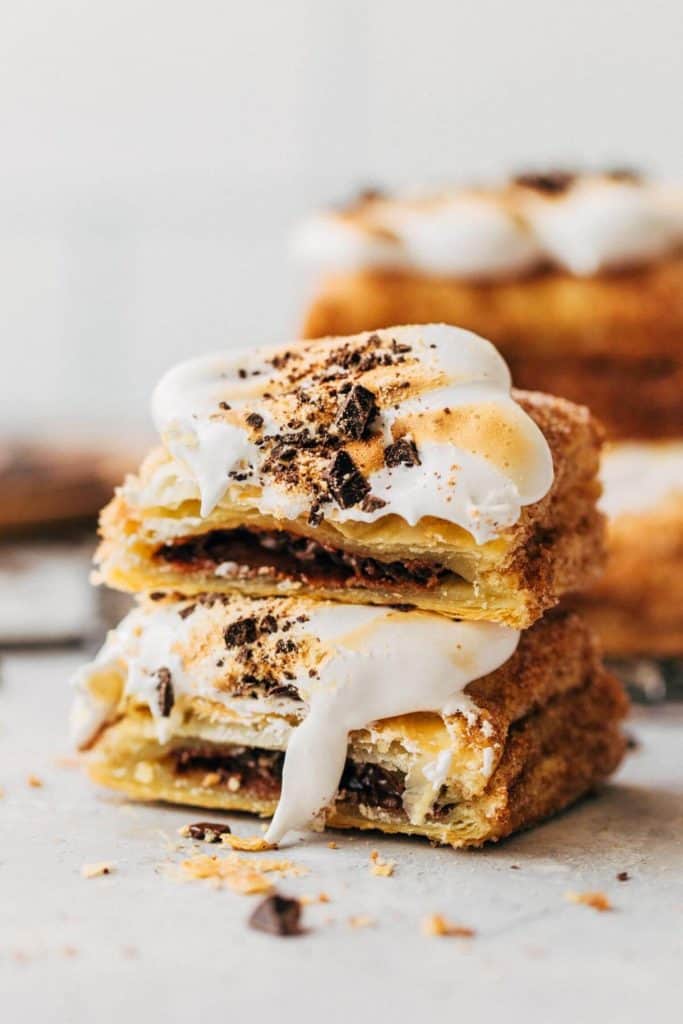
I’m taking s’mores to the NEXT LEVEL with these insane snickerdoodle s’mores pop tarts. Baked with puff pastry, these tarts are flaky, buttery, and coated in graham cracker cinnamon sugar. The center is filled with a classic Hershey’s milk chocolate bar and it’s all topped off with a creamy and toasted marshmallow meringue. I’m telling you, these pop tarts will put all other s’mores recipes to shame!
What makes these s’mores pop tarts so good?
I swear my first bite of these puff pastry pop tarts sent me to a whole other world. It’s flaky, buttery, gooey, sweet, and creamy, all while tasting like a delicious classic s’more.
These pastries taste SO GOOD for 3 main reasons:
- Puff Pastry – Rather than using a more dense pie dough, these pop tarts are baked with puff pastry for a light and flaky exterior. It pairs perfectly with the dense chocolate filling and the creamy marshmallow meringue on top.
- The Coating – Once baked, the pastries are brushed with butter and coated in a graham cracker cinnamon sugar mixture. You get the buttery puff pastry, the rich chocolate, and the sweet exterior. It’s similar to using cinnamon sugar graham crackers rather than honey graham crackers.
- The Chocolate – I will never be too good for Hershey’s chocolate in my s’mores. I may not be a fan of it otherwise, but it is the ONLY chocolate to use in this case. For me, it’s what gives it that classic “s’more” nostalgia you have of toasting marshmallows on a stick and trying your best to assemble a s’more that doesn’t get all over your face and hands…even though it still does. The chocolate also melts perfectly inside the pastry. It’s not too thin and not too firm, and borderlines the texture of fudge.
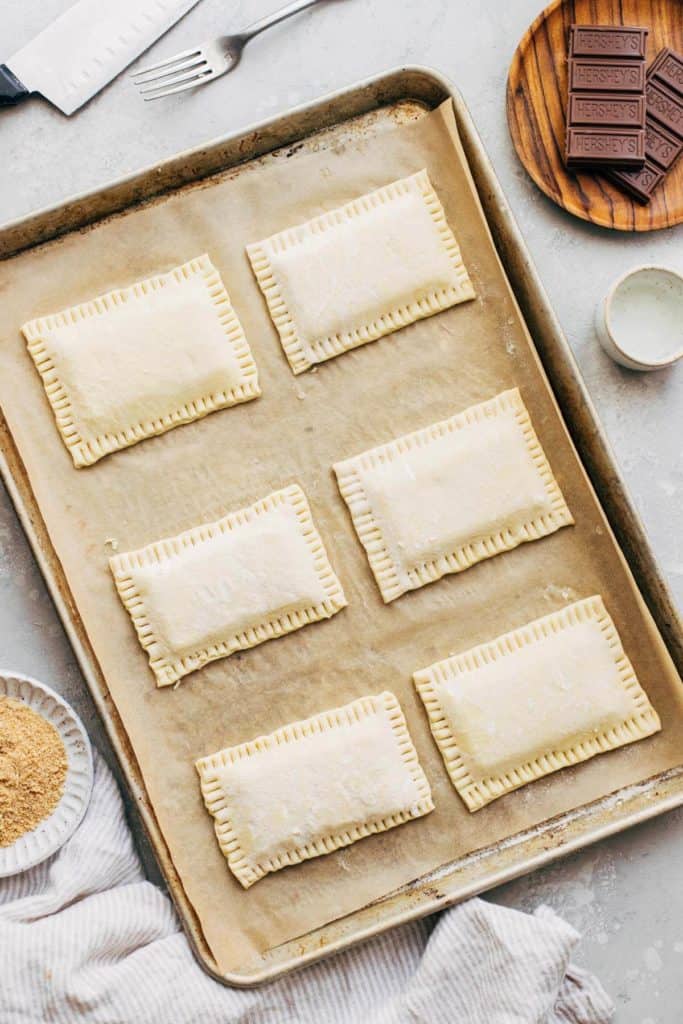
Tips for assembling puff pastry pop tarts
Using pre-made puff pastry means these pop tarts come together in no time. It also makes assembly really quick and simple. Here are a few tips to ensure they turn out just right:
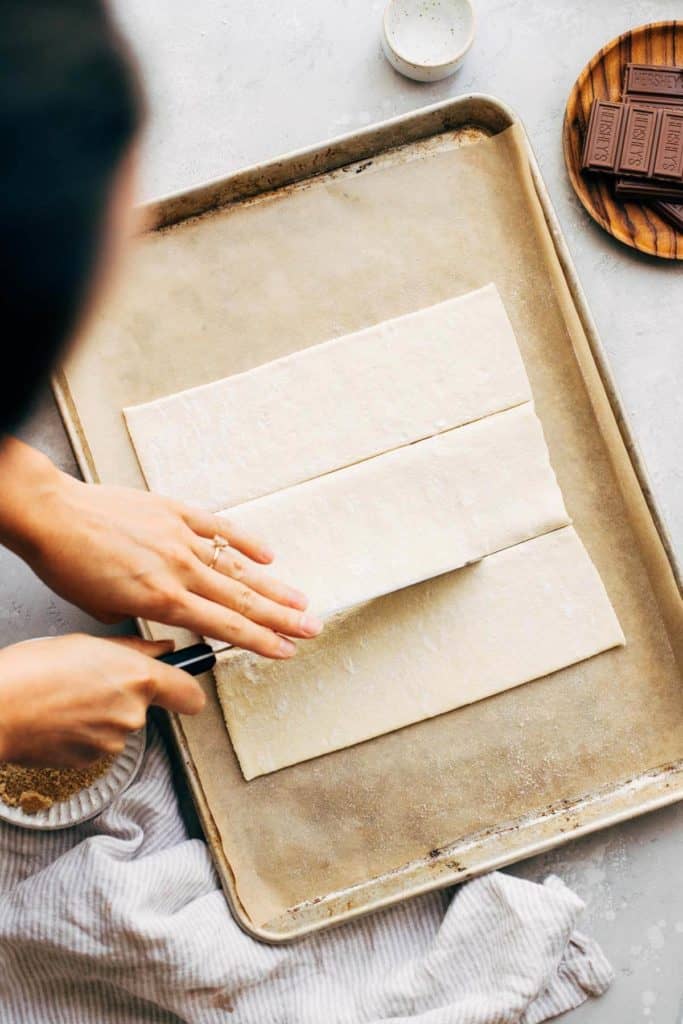
- The Puff Pastry – Allow the pastry to thaw before us. Let it sit out at room temperature for about 30 minutes to soften. Then, unfold and brush off any excess flour. This makes it easier for the two halves to stick together later. Use a pizza cutter to cut each sheet into 6 equal rectangles for a total of 12. Half will be the bottom of the pop tarts and the other half will be the top.
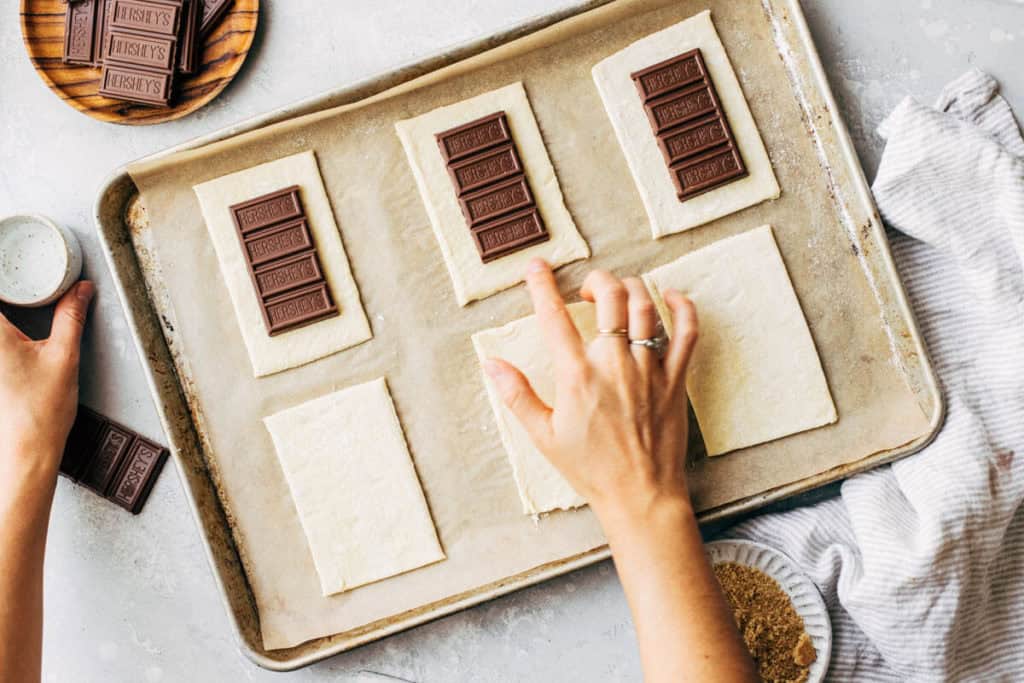
- The Chocolate – I found that XL Hershey’s chocolate bars fit PERFECTLY in these little pastry pop tarts. Simply break it up into equal rectangles containing 4 chocolate pieces (see pictures above) and place in the center of each puff pastry. If you don’t have access to these bars, scroll down to see more options.
- Sealing – Once the chocolate is placed onto all of the bottom sheets, brush the edges with a bit of water. This will help the top sheet to adhere. Place the top sheets onto the bottoms and crimp the edges with a fork.
- Presentation – This is optional, but you can cut off any wonky edges with a knife or pizza cutter for perfectly shaped pop tarts. I found this to be very satisfying, but you can definitely leave the edges as is.
Graham Cracker Cinnamon Sugar Coating
The real magic of this recipe is all in the coating. Each pastry is tossed in a graham cracker cinnamon sugar mixture which takes these pop tarts over the top in the best way possible.
What is it?
It’s simply a mixture of crushed graham crackers, sugar, and cinnamon. For the best consistency, finely ground the graham crackers to mimic the texture of the sugar. That way you don’t have any clunky bits and pieces stuck around the edges of the pop tarts.
How to apply
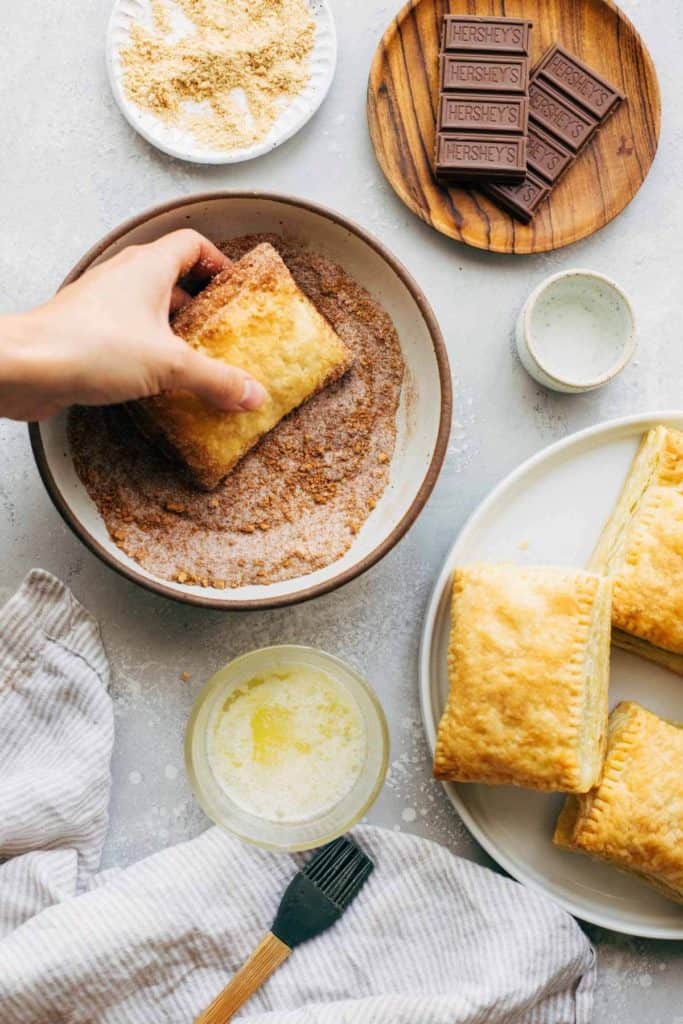
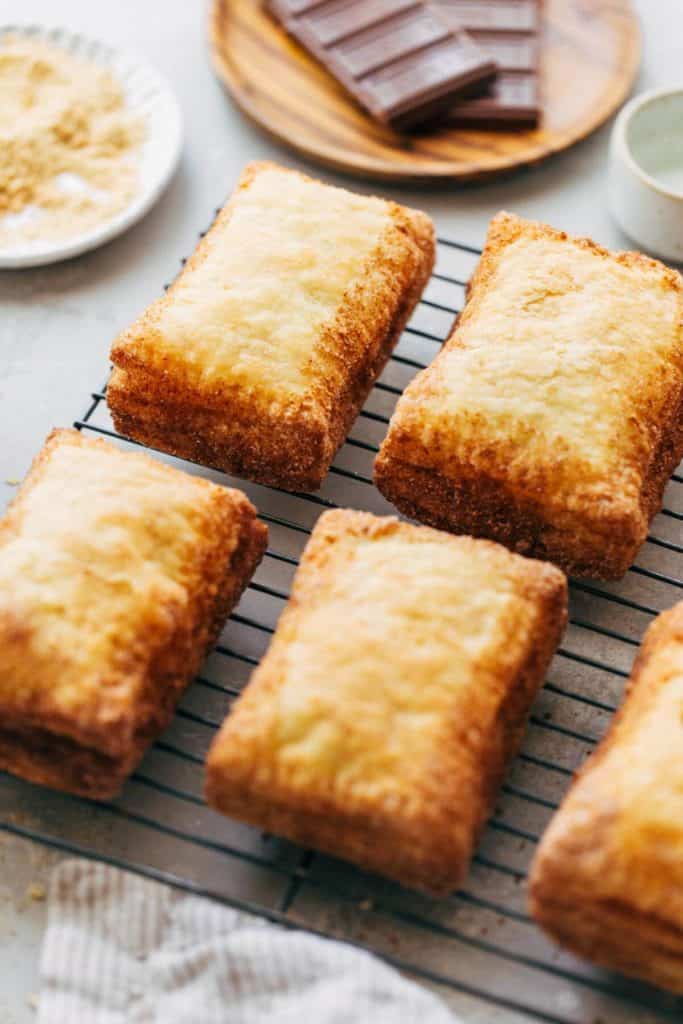
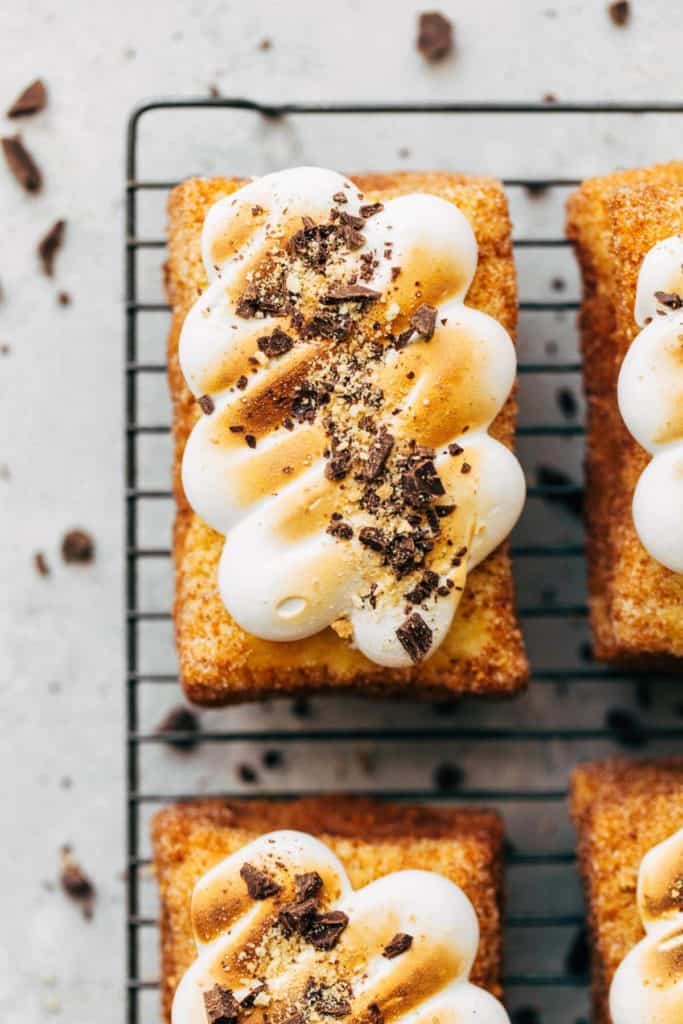
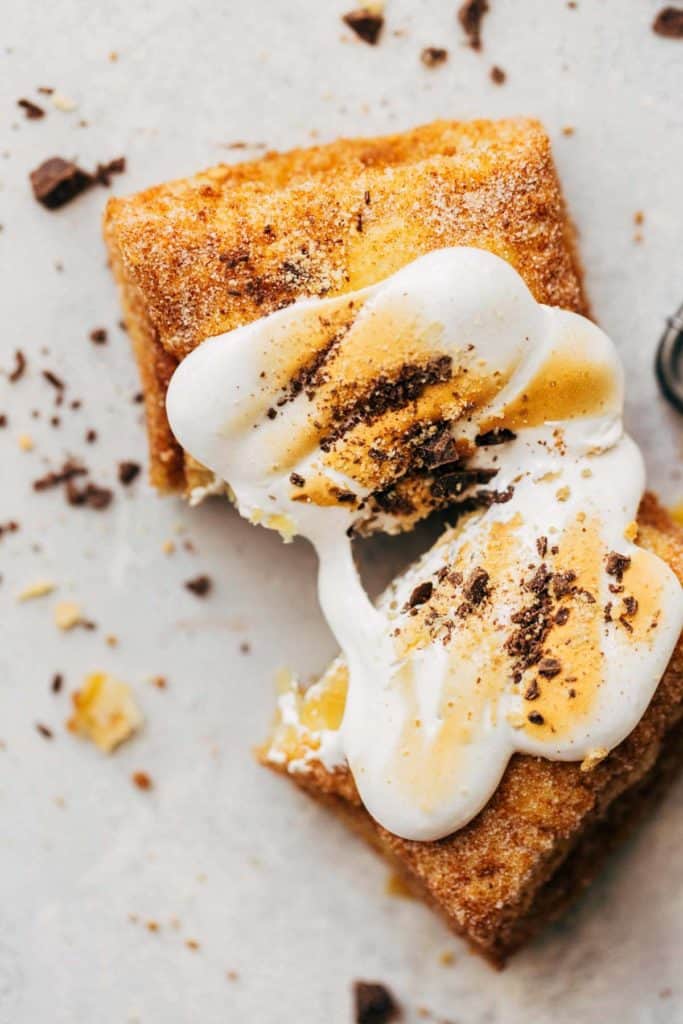
When the pastries are baked and still a bit warm, brush the outside in melted butter. But not the ENTIRE outside. Only brush the bottom, sides, and a very small border around the top. You want to leave a blank surface so the meringue can stick. Otherwise, if it’s entirely coated, the meringue won’t have anything to grip to and it will just slide right off.
Once you have a pastry coated in butter, toss in the bowl of the cinnamon sugar mixture. Work with one pastry at a time. So brush, toss, and move on to the next. In the end your pastries should look like the picture above.
Easy marshmallow meringue
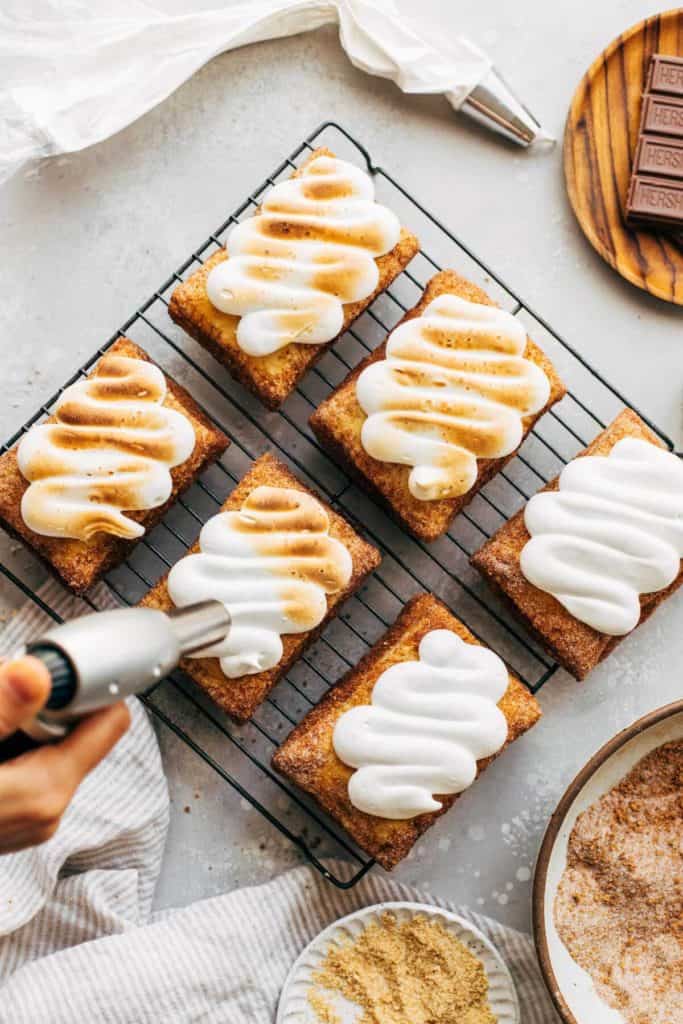
With the filling all chocolate, the marshmallow has to go somewhere. That’s why I topped these pastries with a creamy homemade marshmallow meringue.
I found that baking any type of marshmallow product inside the pastry, whether they were mini marshmallows, large, or marshmallow fluff, it would just dissolve or toughen up once baked. Leaving the marshmallow for AFTER they’re done baking was the best option. It gives you that gooey messy marshmallow experience that every classic s’more should have.
To make the meringue, heat egg whites and sugar over a bain marie. Fill a pot about halfway full with water, bring to a simmer on the stove top, and place a heat-safe mixing bowl on top. Just make sure the bowl doesn’t touch the water otherwise the egg whites will get too hot and scramble.
Mix until the sugar is completely dissolved. To test, rub a bit of the mixture between your fingers. If it’s smooth, it’s done. If it’s grainy, keep cooking. It should take about 10 minutes.
Transfer the bowl to a mixer and add cream of tartar and vanilla. The cream of tartar helps stabilize the meringue. Mix on high speed until thick, fluffy, opaque, and can hold a stiff peak.
Pipe it onto the coated pastries and dig in!
Can I use a different kind of chocolate?
I recommend Hershey’s milk chocolate. If you can’t find the XL bars, you can use 2 mini Hershey’s for each pastry for 1 1/2 segments of a regular Hershey’s bar.
If you don’t like Hershey’s, Cadbury milk chocolate is also a great option. Ghirardelli also works too. I’d try to stay away from Lindt as it tends to melt a bit more than others and definitely don’t use any off or store brand milk chocolate is it doesn’t provide the best flavor.
Can I prep these a day ahead?
Yes, once the pastries are crimped, place them in the freezer. Once firm, transfer the frozen pastries to a freezer ziplock bag. Freeze for up to 5 days before baking. Allow them to sit at room temperature for about 30 minutes before baking.
When to serve and how to store
These pastries are best eaten fresh. If you have leftovers, store in an air tight container at room temperature for up to 3 days. If you don’t want any leftovers, you can cut this recipe in half and just make 3 pop tart pastries. Half of 1/4 cup is 2 tbsp.
For more s’more recipes, check out my:
Make sure to tag me @butternutbakery on Instagram and comment below if you make these Snickerdoodle S’mores Pop Tarts. To pin this recipe and save it for later, you can use the button on the recipe card or on any of the photos above. Happy baking!
Print
Snickerdoodle Puff Pastry S’mores Pop Tarts
- Total Time: 1 hour
- Yield: 6 pop tarts
Description
Puff pastry pop tarts filled with chocolate, coated in graham cracker cinnamon sugar, and topped with marshmallow meringue.
Ingredients
Pastry
- 2 sheets puff pastry, thawed
- 3 tbsp unsalted butter, melted
- 1/2 cup (100g) granulated sugar
- 1/4 cup (30g) finely ground graham cracker crumbs
- 2 tbsp cinnamon
Chocolate Filling
- 1 1/2 XL Hershey’s Milk Chocolate Bars (or any milk chocolate bar you prefer)
Marshmallow Meringue
- 2 large egg whites
- 1/2 cup (100g) granulated sugar
- 1/4 tsp cream of tartar
- 1/2 tsp vanilla extract
Instructions
- Preheat the oven to 375F and line a large baking sheet with parchment paper.
- Unfold the puff pastry sheets and brush off any excess flour. Slice each sheet into 6 rectangles for a total of 12.
- Transfer 6 of the rectangles onto the baking sheet, evenly spaced out. Place a block of chocolate into the center of each pastry.
- Using your finger, brush the edges of each pastry with water and place the remaining 6 pastry rectangles on top. Crimp the edges with a fork to seal.
- Bake for 25-30 minutes or until puffed and golden brown.
- While the pastries bake, make the meringue. Place a metal mixing bowl over a pot of simmering water on the stove top. If using a stand mixer, use that bowl. Whisk in the egg whites and sugar and continue to whisk every so often. Heat until the sugar is dissolved. To test, rub a bit of the mixture between your fingers. If it’s smooth, it’s done. If it’s still grainy, continue to heat. It should take about 10 minutes.
- Once dissolved, transfer the bowl to your stand mixer (or use a hand mixer) and add in the cream of tartar and vanilla. Whisk on high speed until thick, white, and fluffy. Stop when you reach stiff peaks.
- Transfer the meringue to a piping bag fitted with a large round tip (or a large ziplock bag with a corner tip snipped off).
- Once baked, allow the pastries to cool for about 10 minutes. While they cool, mix together the sugar, cinnamon, and graham cracker crumbs in a bowl.
- Brush the pastries with melted butter, coating the edges, bottom, and a thin border around the top. Leave the top center blank so that the marshmallow meringue can stick. (see picture in post for reference)
- Work with one pastry at a time, so brush with butter, toss in the cinnamon sugar mixture, then move on to the next one.
- Once all the pastries are coated, pipe on the marshmallow meringue and toast with a kitchen torch (optional). Sprinkle on some extra chopped chocolate and leftover cinnamon sugar. Dig in!
- Prep Time: 30 minutes
- Cook Time: 30 minutes
Join Our Community

Meet Jenna
I’m the creator, baker, and photographer behind Butternut Bakery. Here I share desserts for every diet because I believe everyone should have a chance to indulge!

This was amazing!!!