Fruity Cheese Danish
This Fruity Cheese Danish recipe is SO easy to make using frozen puff pastry and a simple sweet cream cheese and tart red fruit filling. They’re like the grown up version of a toaster strudel – buttery and flaky but with even MORE flavor than the packaged version. These cheese Danish puffed pastries also come together in under an hour, and the same amount of time it takes for them to disappear!
This post is sponsored by Bonne Maman but all thoughts and opinions are my own. Thank you for supporting the brands that make Butternut Bakery possible!

The trick to these easy Danish pastries
The trick to making this recipe for Fruity Cheese Danish SO simple is using frozen puff pastry. I’m not too big on making shortcuts in my recipes, but puff pastry is one I’ll gladly take. It’s just as good as homemade, if not better, and saves SO MUCH time.
It’s also a great ingredient just to keep on hand. Since it comes frozen, you can store it for months and quickly thaw out a sheet whenever you need it… like now for these cheese Danish puffed pastries!
Before use, remove a single sheet (left folded up) from the packaging and leave it out at room temperature for 30 minutes to an hour. When working with it, it should be thawed enough to fold open and roll, but not too soft. The key to delicious puff pastry is the chilled butter between each layer. That’s why you want to keep the puff pastry as cold as possible, while still giving it enough warmth to work with.

Quick and easy cheese danish fillings
Not only is the pastry a snap, but the rest of the recipe comes together in minutes. These Danish pastries are comprised of two delicious fillings:
Cream Cheese Filling
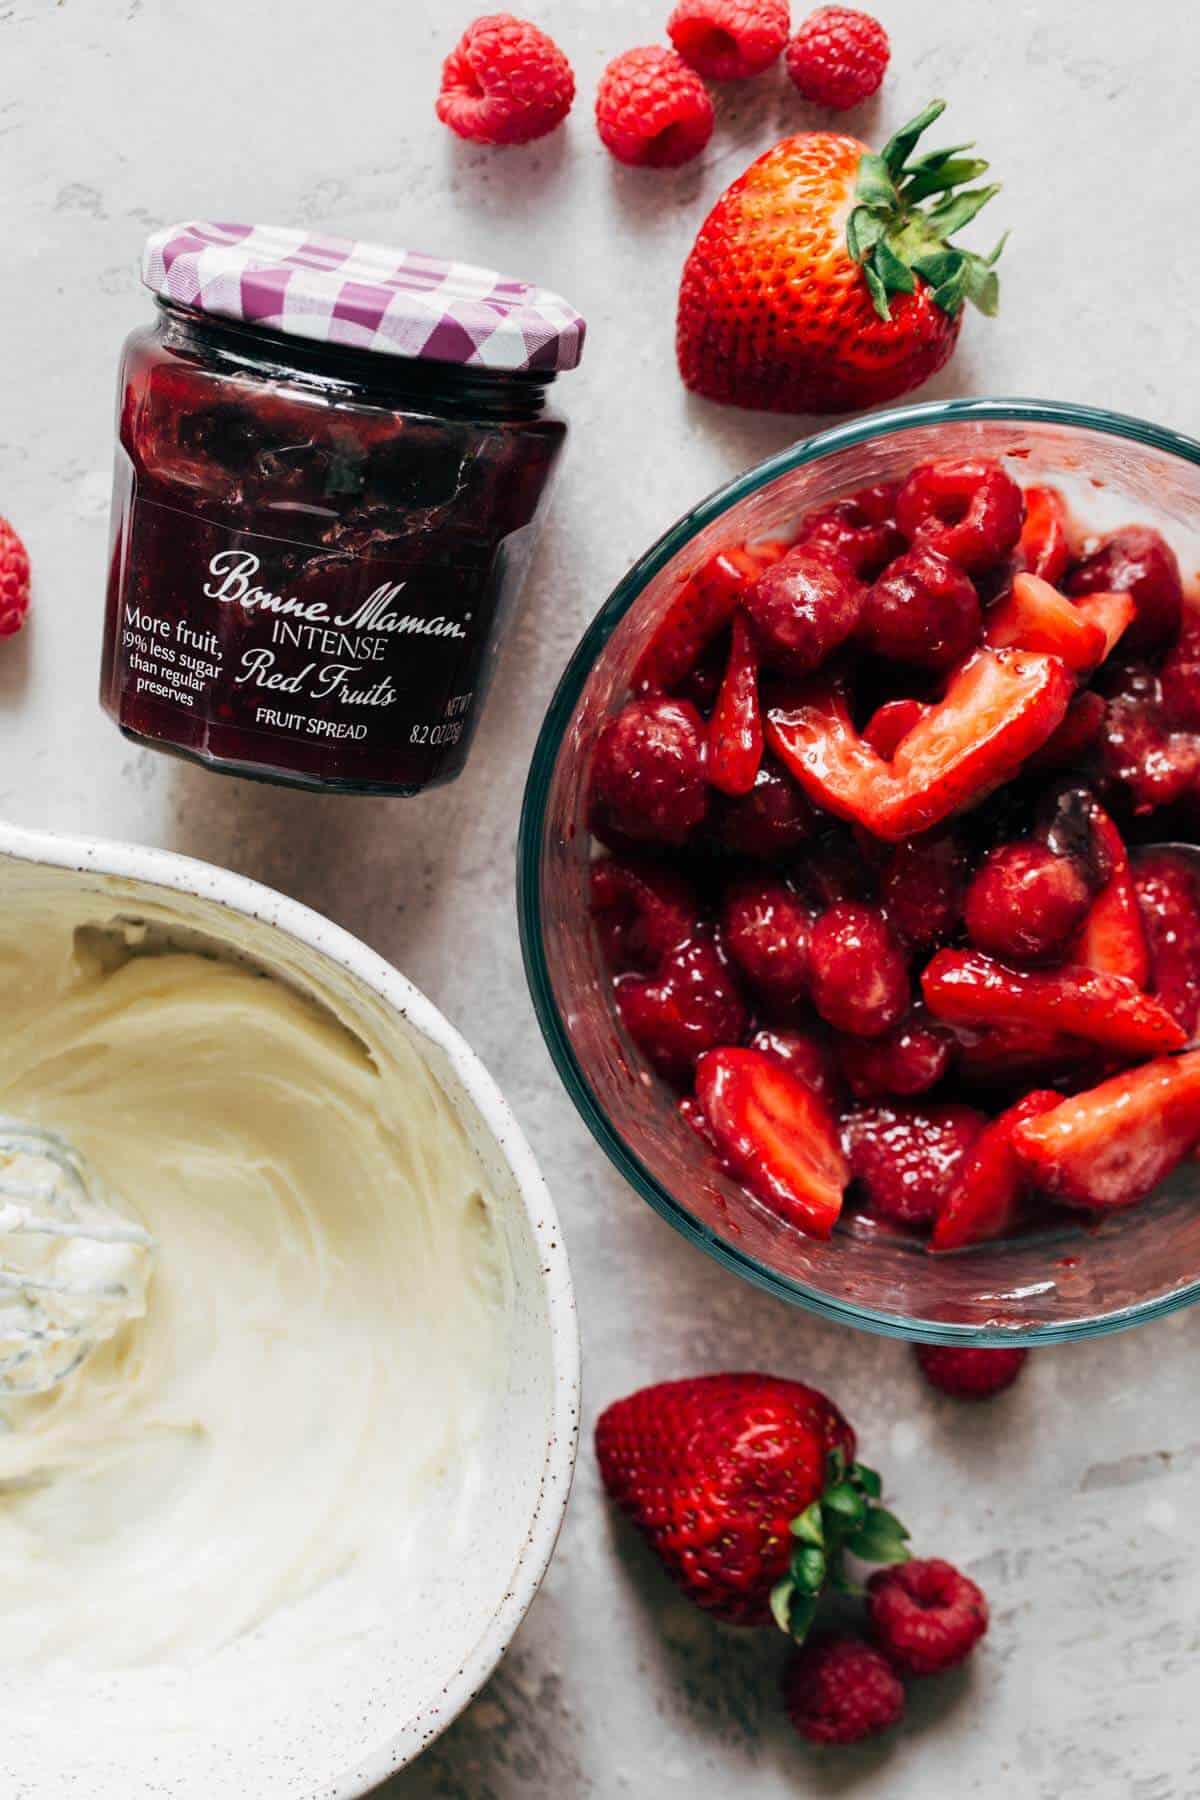
This is the first layer and is made up of just 5 ingredients (or 4 with one optional ingredient). Cream cheese, sugar, vanilla extract, almond extract (optional), and lemon juice are all mixed together to create a super smooth cream cheese spread that’s not too sweet.
Before mixing, make sure the cream cheese is softened at room temperature. If not, your filling will turn out chunky and lumpy. With softened cream cheese, it’s very easy to mix up the filling by hand so no mixers are required!
Red Fruity Filling
Layered on top of the cream cheese is a sweet but tart red fruit filling. Using a combination of fresh fruit and Bonne Maman INTENSE Red Fruits Fruit Spread, it creates a really fruit-forward flavor that pairs perfectly with the sweet cream cheese and flaky puff pastry.
Using the Bonne Maman INTENSE Red Fruits Fruit Spread also takes all the work out of making the fruity top layer. It’s made with more fruit and 39% less sugar than their regular preserves, so it adds so much flavor to the fruit topping without making the Danish too sweet.
Paired with fresh fruit, the Bonne Maman INTENSE Red Fruits Fruit Spread creates a really tender fruit topping packed full of flavor and even more bits of fruit. It’s made up of strawberries, cherries, raspberries, redcurrants, and blackcurrants so you’re getting so much more than the fresh strawberries and raspberries used in the filling. Feel free to use any combination of fresh fruits used in the spread to accompany these Danish pastries. I chose strawberries and raspberries, but cherries would also be a great choice!
The fruit filling mixture also includes cornstarch to help hold everything together while it bakes. I tried a couple versions without it, but it either left a puddle of fruit juices in the center of the Danish, or it would slide off the top. Tapioca flour is another great option if you prefer not to use cornstarch.

How to bake your cream cheese danish
With the fillings made, it’s time to prep the puff pastry and bake! To start, line a large baking sheet with parchment paper or a silicone baking mat and preheat the oven to 400F. The high heat allows the pastry to bake all the way through to create super flaky layers.
With the puff pastry thawed, unfold it flat onto a floured surface or a sheet of parchment paper. Roll it out just enough to blend in the seams, rolling a couple times on both the length and width of the sheet.
Cut the pastry in half lengthwise using a pizza cutter. Then cut each half into three rectangles to make a total of 6 Danish.
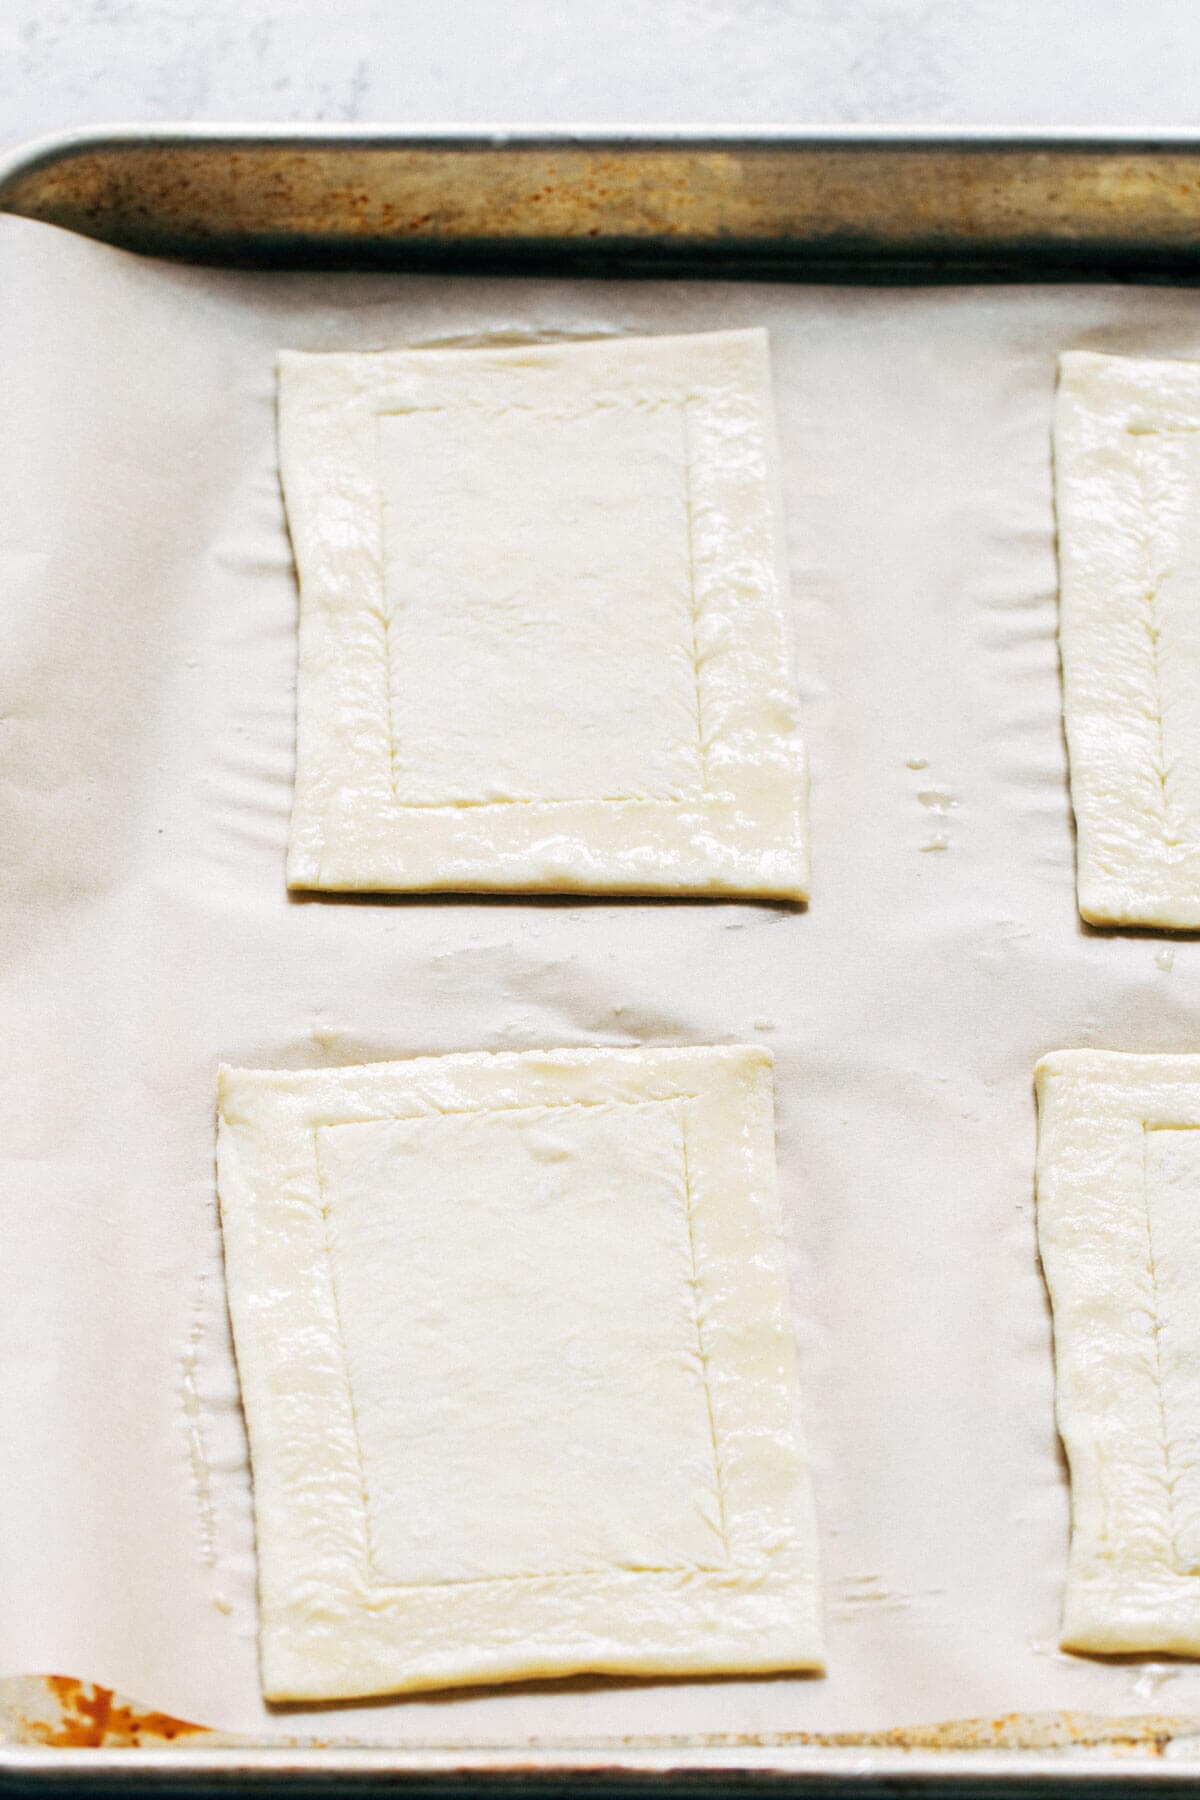
Transfer the individual sheets on to the baking tray, evenly spaced apart. Use a knife to score a 1/4 inch border around the edges of each Danish. Don’t cut all the way through, but just enough to leave a distinct border. This helps the edges rise to contain the filling.
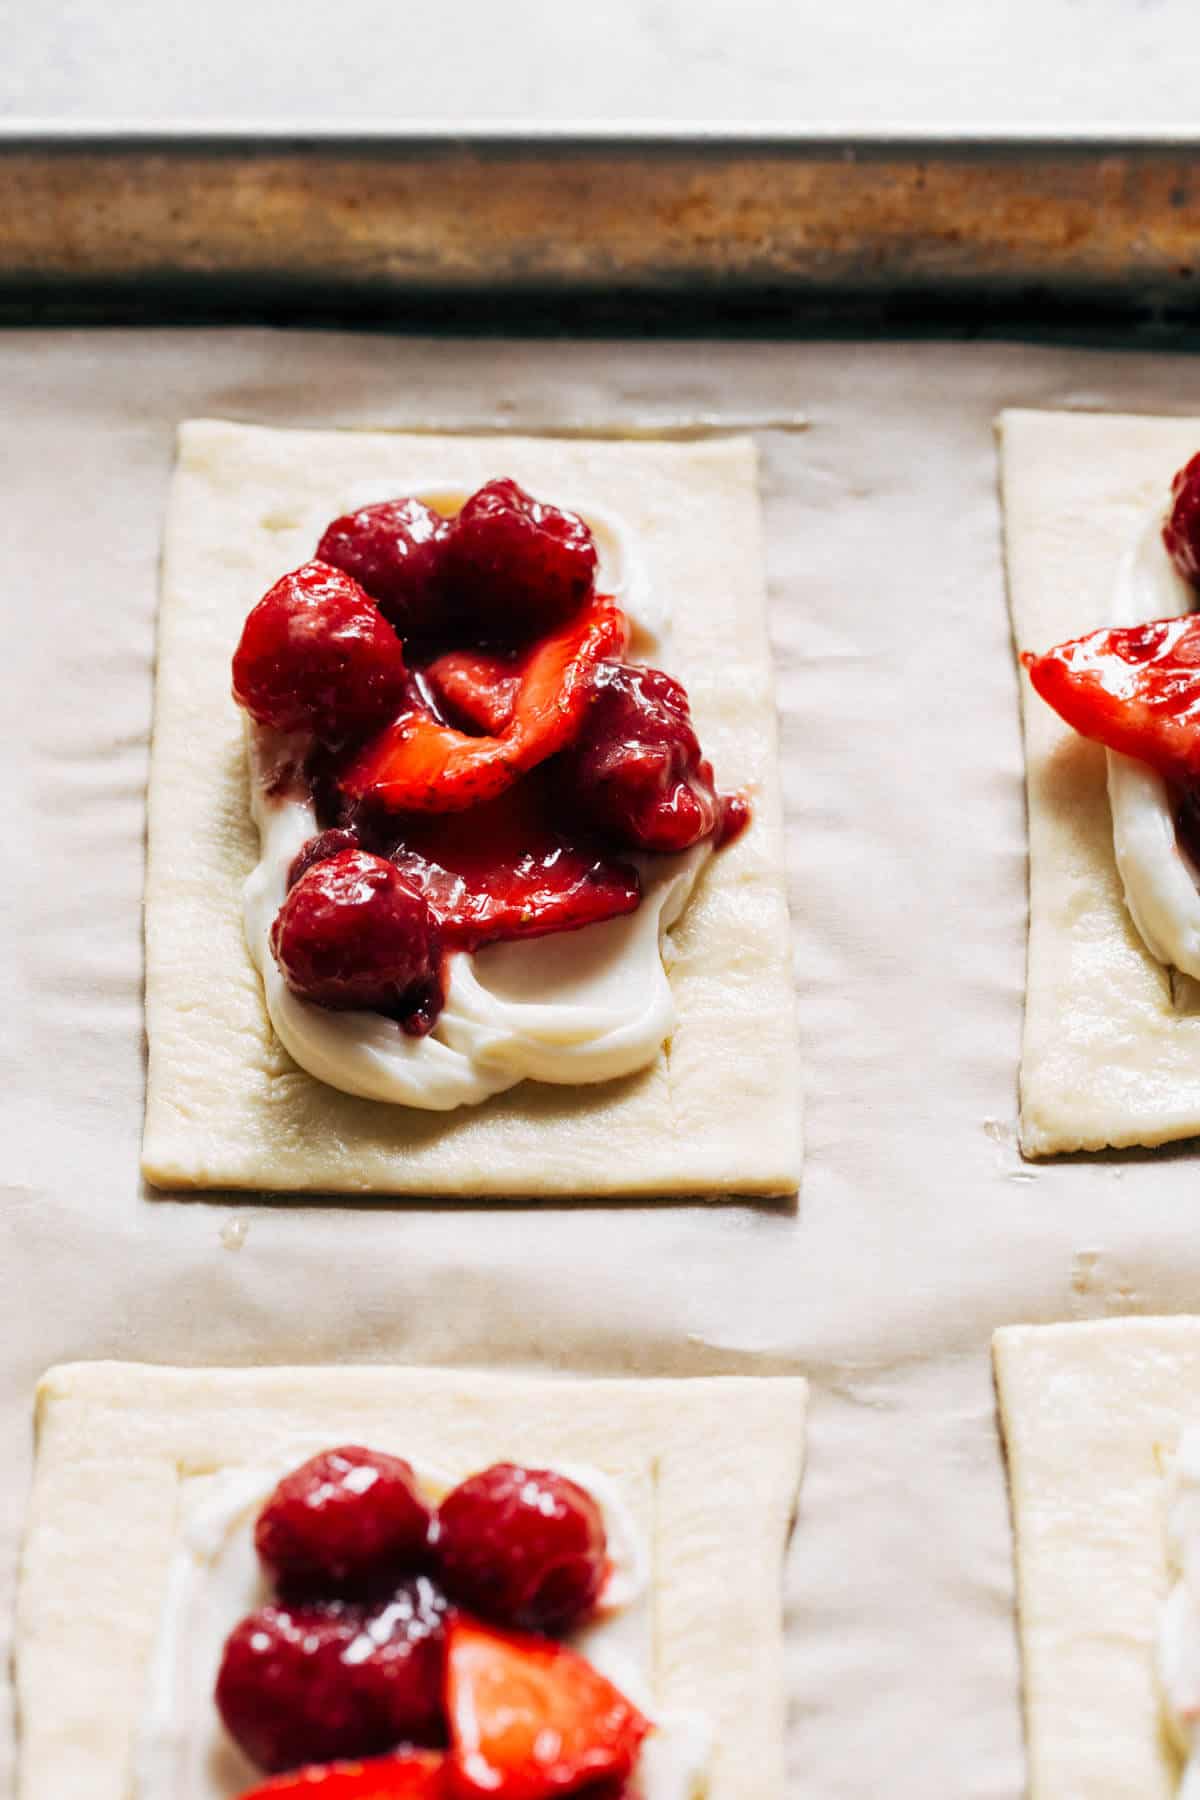
Brush the edges with an egg wash (1 whole egg whisked with 2 tsp water or milk). Then, add a tablespoon sized dollop of the cream cheese filling into the center of each danish. The filling makes exactly 6 Danish so use it all up. Spread an even layer within the border using the back of a spoon.
Gently spoon the red fruity filling on top, keeping it as close to the center as you can. Careful not to over fill each Danish (see picture above for reference), otherwise the fruits will slide off or prevent the bottom of the Danish from baking through.
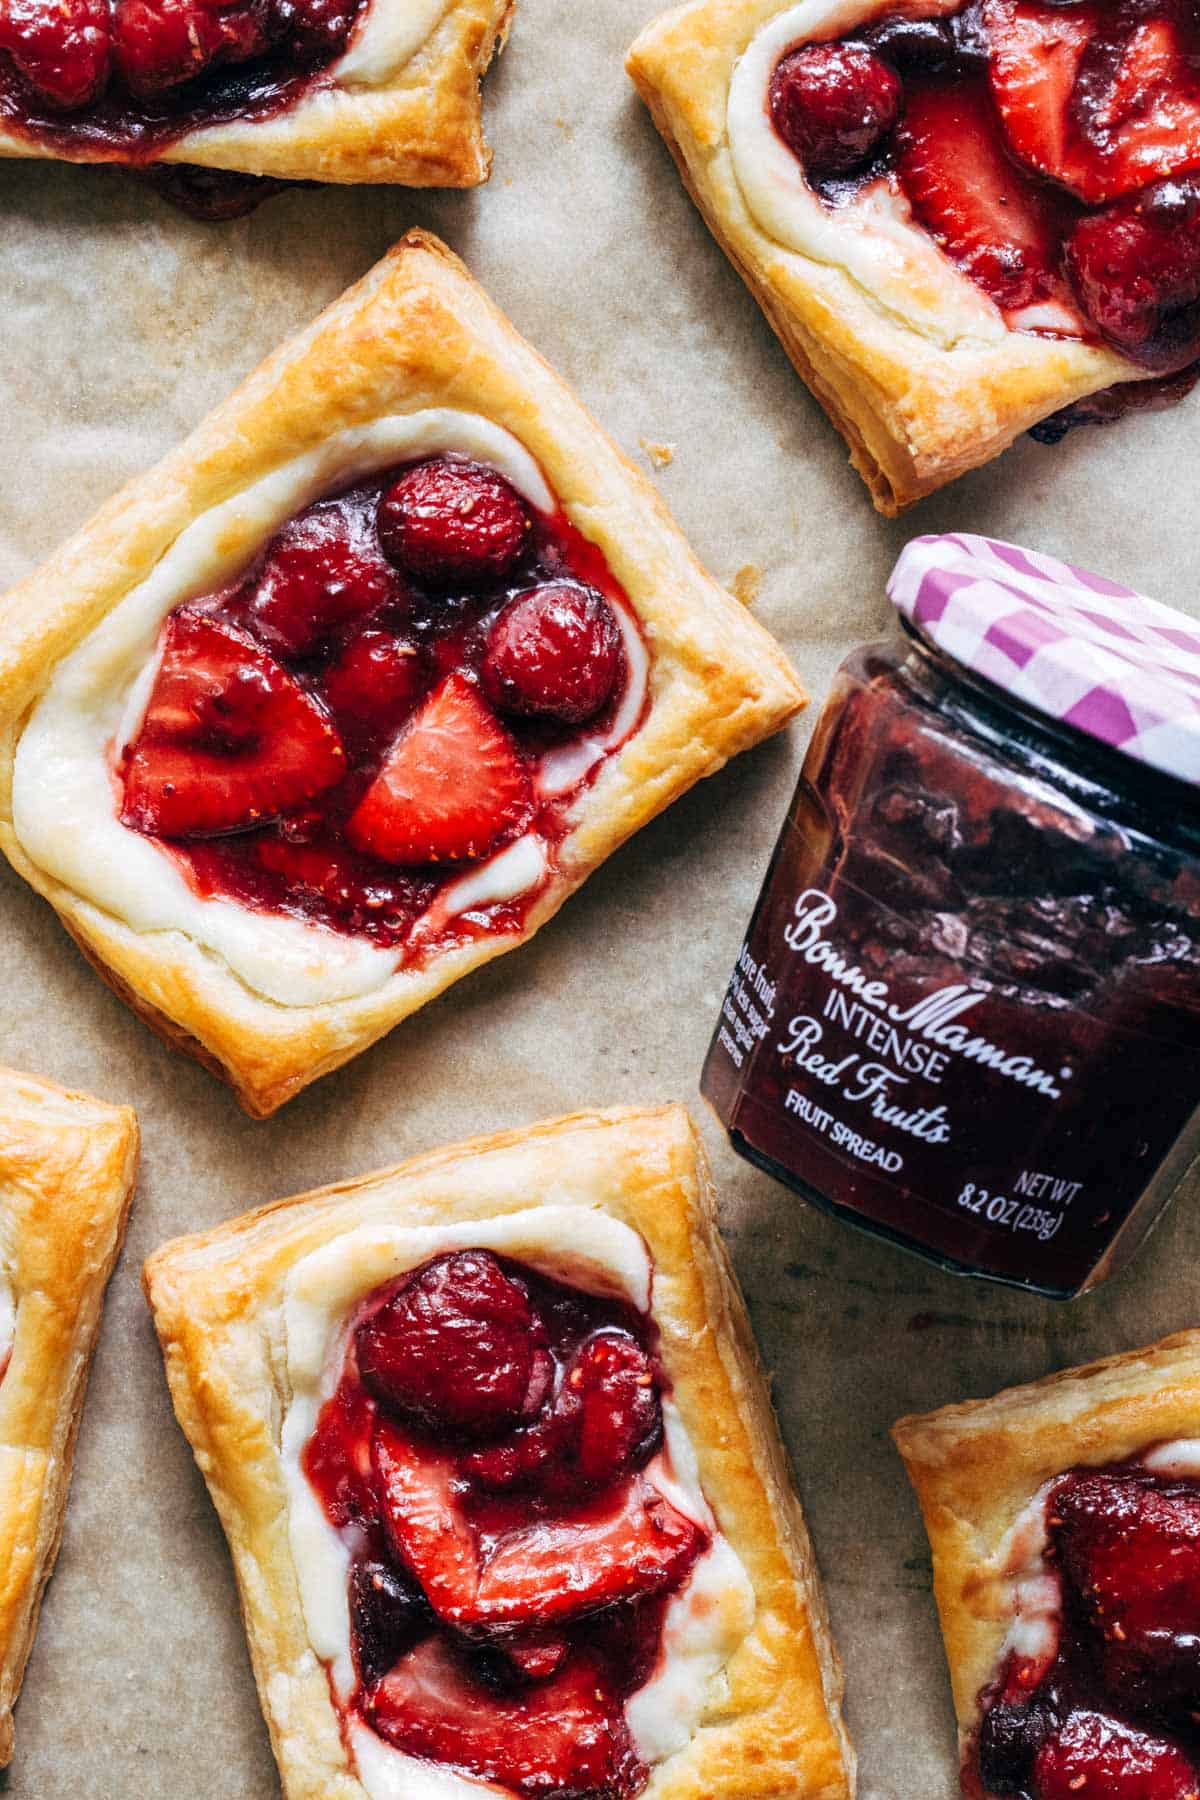
Now they’re ready to bake! Bake for 20-25 minutes or until evenly puffed and golden brown around the edges.

Finishing your Danish
Since cornstarch was used to hold the filling of these Fruity Cheese Danish together, you’ll notice a dull sheen on the topping after they’ve baked. To bring these back to life, brush a little extra of the Bonne Maman INTENSE Red Fruits Fruit Spread on top! It not only adds shine, but enhances that fruity flavor even more.
To take it a step further, I chose to top mine with a really simple icing drizzle. All you need is a little bit of powdered sugar and some water, lemon juice, or milk. Whisk the two together until you reach a thin glue-like consistency and drizzle on top of the cooled Danish.
Another option is to dust the tops with powdered sugar. Keep in mind that the sugar will dissolve into the berry portion, so you’ll be left with a light dusting around the edges which looks so pretty.
Or just leave them as is! They’re so delicious with or without the extra icing or sugar. Just make sure to not skip the extra fruit spread on top.

How to store cheese Danish
These Danish pastries are to be served fresh because that’s when the pastry is extra flaky and crispy. It’s also a small batch recipe, so you’re left with 6 Danish… and trust me you won’t want to have just one!
But if you do end up with extras, store the Danish at room temperature in an airtight container for up to 2 days. I found that when they’re stored in the fridge, the puff pastry loses a lot of the crispness.
If you have a toaster oven, warm these back up to revive some of the flakiness. You could also bake on a sheet tray for a few minutes in a 300F oven.

How to make ahead
Another option would be to prep the Danish pastries the night before so you can just pop them in the oven in time for breakfast or brunch! Simply assemble the Danish, wrap the tray in plastic wrap, and store in the fridge overnight. Follow all of the same baking instructions.


For even more fruity recipes, check out my:
- Easy Fresh Strawberry Dessert Pizza Recipe
- SunButter Pie with Fresh Raspberries
- Easiest Apple Fritter Cake
- Sticky Toffee Banana Dessert Cake
- Easy Fresh Peach Cobbler (Gluten Free Option)
Make sure to tag me @butternutbakery on Instagram and leave a review below if you make these Fruity Cheese Danish. To pin this recipe and save it for later, you can use the button on the recipe card, the buttons above or below this post, or on any of the photos above. Happy baking!
Print
Fruity Cheese Danish
- Total Time: 50 minutes
- Yield: 6 Danish
Description
Your brunch needs these cheese Danish! They’re flaky, creamy, sweet, tart, and bursting with flavor. Using frozen puff pastry, a quick cream cheese filling, and jammy berry topping, these are so quick to make but are a definite crowd pleaser.
Ingredients
Danish
- 1 sheet frozen puff pastry, thawed
- 4 oz cream cheese, softened
- 2 tbsp granulated sugar
- 1/2 tsp vanilla
- 1/8 tsp almond extract (optional)
- 2 tsp fresh lemon juice
- 1/4 cup (85g) Bonne Maman INTENSE Red Fruits Fruit Spread + more for brushing on top
- 1/2 cup fresh sliced strawberries*
- 1/2 cup fresh raspberries*
- 2 tsp cornstarch or tapioca flour
- 1 large egg + 2 tsp water or milk (for egg wash)
Icing (optional)
- 1/4 cup powdered sugar
- 1/2 tsp water, milk, or lemon juice
Instructions
- Preheat the oven to 400F and line a large baking sheet with parchment paper.
- To make the cream cheese filling, mix together the softened cream cheese, sugar, extracts, and lemon juice until smooth. Start off with a fork to loosen up the mixture then switch to a whisk to remove any lumps. Set aside.
- In a separate bowl, mix together the Bonne Maman INTENSE Red Fruits Fruit Spread, berries, and cornstarch. Set aside.
- Unfold the thawed puff pastry and lay it flat onto a floured surface or sheet of parchment paper. Roll it out just until the seams are blended, rolling a couple times both length and width-wise.
- Slice the puff pastry in half right down the middle lengthwise using a pizza cutter. Slice each half into 3 rectangles width-wise, along the blended seams, to make 6 Danish.
- Transfer the sheets onto a baking tray and make sure they’re evenly spaced apart. Use a knife to score a 1/4 inch border around the outside. This allows the edges to rise in order to contain the filling. Don’t cut all the way through, but just enough to leave behind a clear border.
- Lightly brush the edges with an egg wash. Whisk together the egg with 2 teaspoons of milk or water and use a pastry brush to apply. This helps the edges turn golden brown and glossy once baked.
- Scoop 1 tablespoon of the cream cheese filling into the center of each Danish. The filling makes the exact amount for 6 Danish, so use it all up. Spread the filling within the border using the back of a spoon.
- Dollop the fruit filling into the center of the cream cheese. Don’t overcrowd the cream cheese layer, as you should be able to see the cream cheese peeking out from under the fruit (see post for reference photo).
- Bake the Danish on the middle rack of the oven for 20-25 minutes, until evenly puffed with golden brown edges.
- When they’re still warm on the baking sheet, brush the tops with a little extra fruit spread. This adds a glossy shine and extra fruity flavor.
- Transfer the Danish to a cooling rack. They’re best served fresh and warm. See notes in the blog post about prepping the Danish ahead so they’re ready to bake in the morning.
- As an optional topping, whisk together the powdered sugar and liquid of choice until it reaches a thin glue-like consistency. If it’s too thick, add a touch more liquid. Too thin, add a bit more sugar. Drizzle on top of the warm Danish and enjoy!
Notes
*Feel free to use any red fruits you like! I chose a combination of strawberries and raspberries, but you can use all strawberries, all raspberries, or add in some cherries. As long as it all equals 1 cup.
- Prep Time: 30 minutes
- Cook Time: 20 minutes
Join Our Community

Meet Jenna
I’m the creator, baker, and photographer behind Butternut Bakery. Here I share desserts for every diet because I believe everyone should have a chance to indulge!


These are the perfect summer morning treat! Mine came out a little underbaked in the center and didn’t have many layers. Do you have any tips for having a flaky center crust?
I really like how to write your cooking instructions. Easy to follow and makes lots of sense. Thank you for sharing the recipe.
I loved this recipe! Very easy to make and they look beautiful when they come out of the oven. I appreciate they are not overly sweet. Next time will make them a little smaller – maybe 8 or 9 out of a batch.
I’ll be checking out the other recipes on this blog. ☺
These were super easy to make and absolutely delicious! I have made them twice now and cut back slightly on the sugar in the cream cheese the second time to keep a little bit more of the tang.
These danishes were a great addition to our ladies brunch party for my sisters birthday. So beautiful and delicious!! Definitely a recipe I would make again.