Baked Chocolate Cheesecake
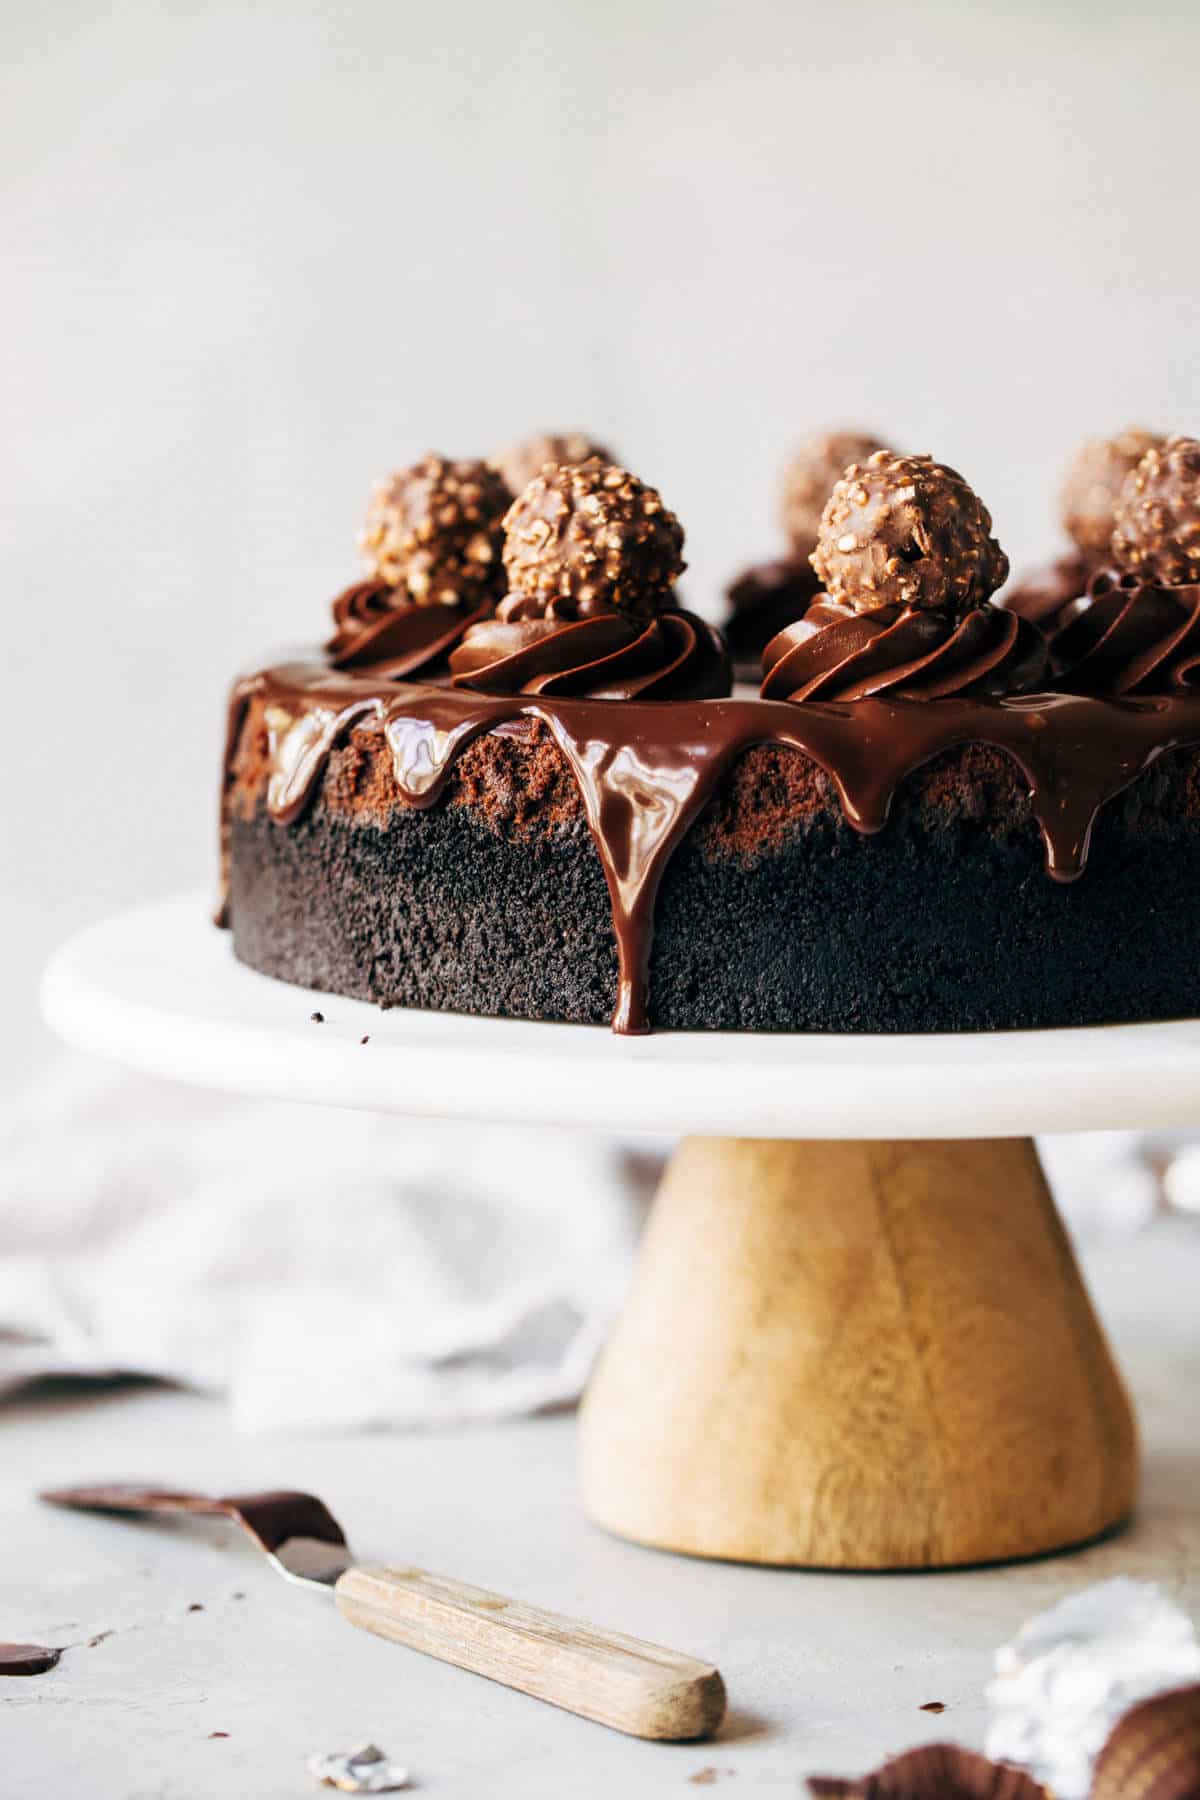
This is the most PERFECT Baked Chocolate Cheesecake. It’s filled with chocolate from top to bottom, from the Oreo crust to the chocolate ganache coating. I’ve also included a bunch of tips to help you master cheesecake baking for the perfect dessert every time!
Why I love this recipe
Seriously, once you’ve made this Baked Chocolate Cheesecake recipe you won’t go back.
I know the recipe itself is very detailed. Cheesecake can be so tricky and it was once one of my baking fears. Between the cracking, the over mixing, the under mixing… the whole process can feel overwhelming.
That’s why I’m carefully walking you through each step, so you can bake this cheesecake with confidence!
Once it’s baked, you’re left with an insanely delicious cheesecake. The Oreo crust is dense and melty, the filling is smooth and rich, and the ganache on top is creamy and luscious. Each bite is like chocolate heaven.
Tips for baking cheesecake
A lot can go wrong with baking a cheesecake, so here are some tips to ensure it turns out perfect every time:
- DON’T use off brand cream cheese. If you can, always use Philadelphia full fat cream cheese – the 8oz bricks. It’s much creamier and richer, as opposed to others that turn somewhat yellow and lumpy when mixing.
- All refrigerated items should be brought up to room temperature before starting. This includes the cream cheese, eggs, and heavy cream. Using room temperature cream cheese ensures a smooth batter. But if your other ingredients are still cold, it could cause the cream cheese to curdle.
- Use a stand mixer when possible. Start with the whisk attachment to get the cream cheese REALLY smooth, then switch to the paddle attachment for the rest of the steps. The whisk eliminates any lumps while the paddle prevents air bubbles.
- Knock out any air from the cream cheese by disrupting the mixture with a rubber spatula. Once your cream cheese is well whisked and smooth, take the bowl off of the mixer and really try to knock out that air. Do so by mixing and spreading the cream cheese around with your spatula.
- Low and slow is the key to a good cheesecake. After the cream cheese, mix everything else on low speed and low speed only.
- Bake the cheesecake in a water bath. Start a pot of boiling water and just before you’re ready to bake the cheesecake, pour the boiling water into a roast pan on the bottom rack of your oven. Work fast, because as soon as you pour in the water, place the cheesecake on the rack above and shut the door. You want to trap in all of that steam to prevent any cracks.
- Allow the cheesecake to slowly come back up to room temperature. Once baked, shut off the oven and leave the door cracked open with the cheesecake still inside. After 30 minutes, remove the cheesecake and allow it to sit at room temperature for another hour before transferring to the fridge. At this point your cheesecake should be flat in the center with zero cracks.
I’ll be covering even more tips in this post, but these are the essentials that apply to ANY cheesecake. It’s important to not cut any corners during this process!
Making the Oreo crust
I can’t bake a Chocolate Cheesecake and NOT have an Oreo crust. This recipe is the perfect amount for a 9-inch springform pan. It creates a not-too-thick, not-too-thin layer on the bottom and reaches up along the sides.
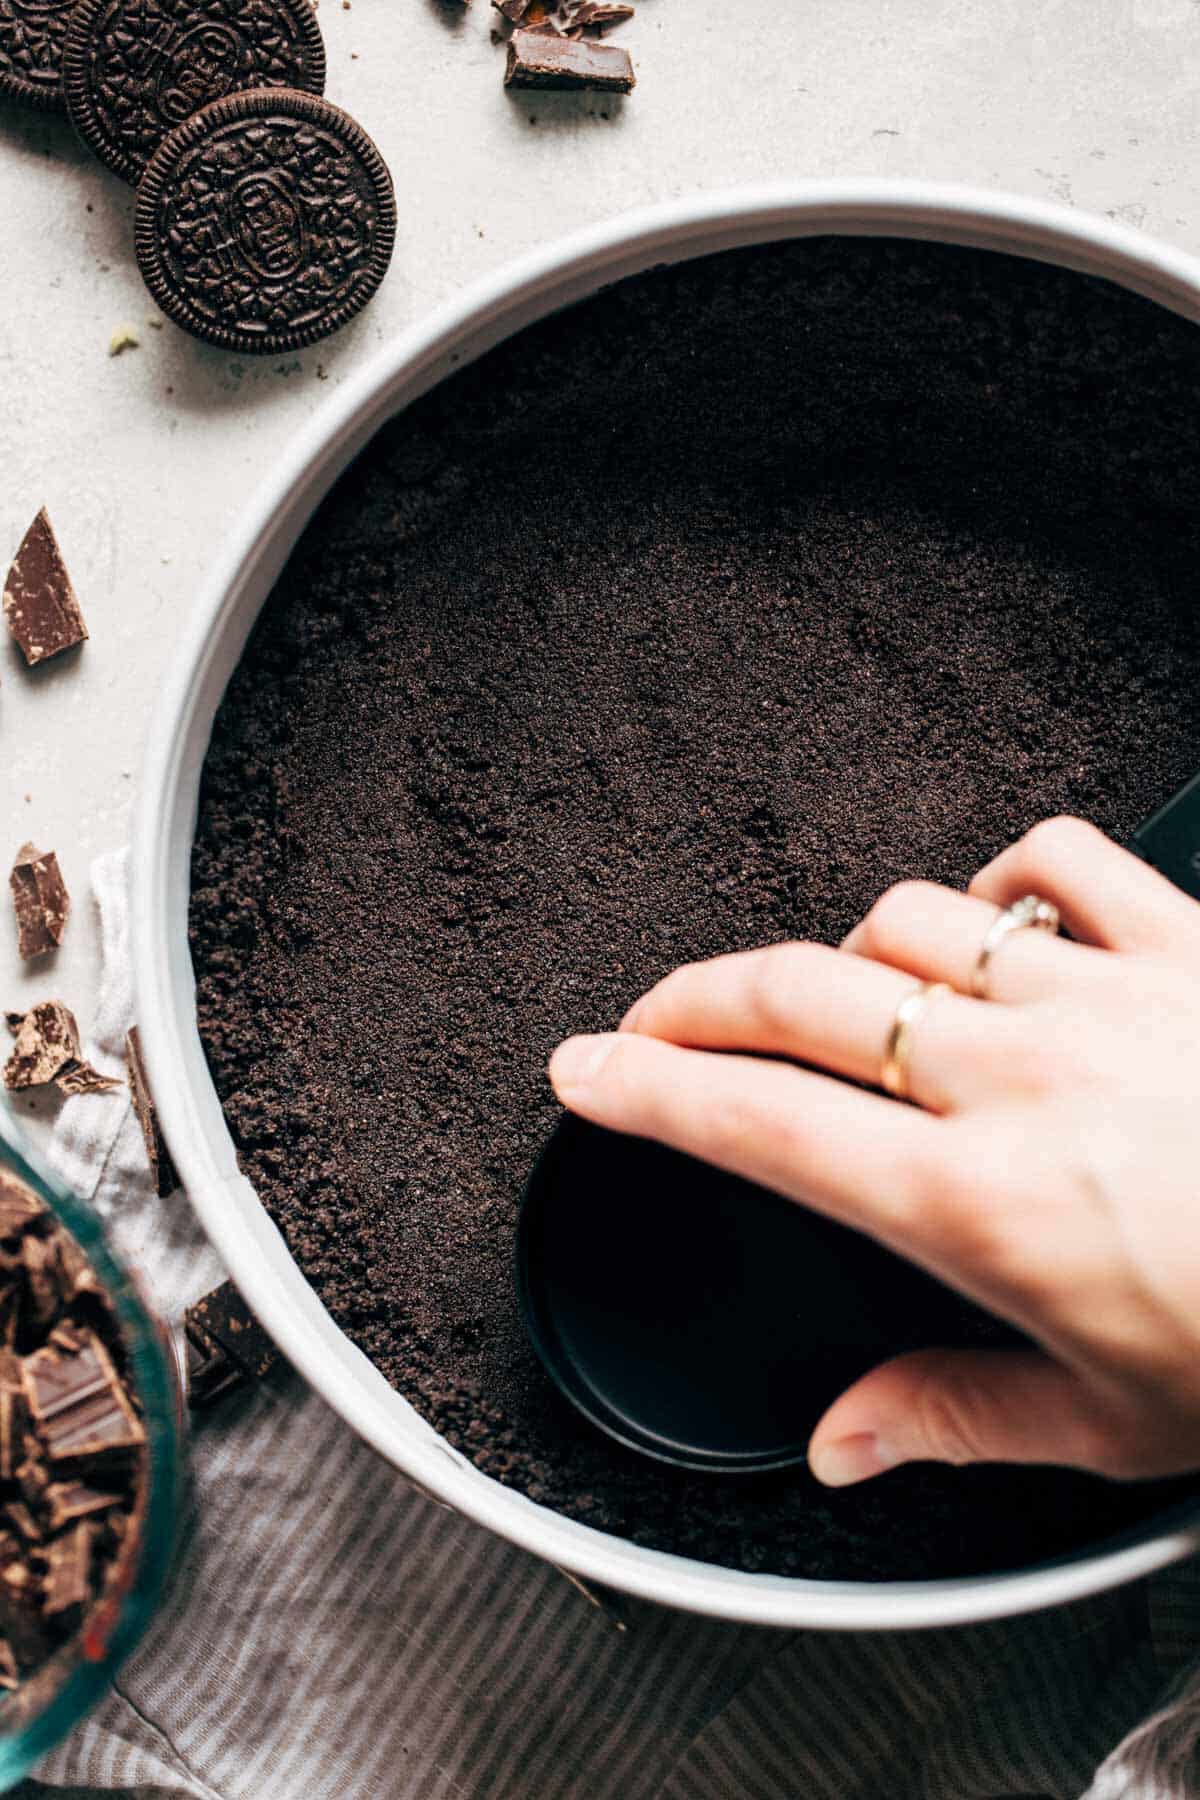
To make a cheesecake Oreo crust, all you need is a package of Oreos and some butter. Toss 24 cookies into a food processor and grind them up as fine as you can.
Mix the crushed Oreos with some melted butter and press it into your pan using the back of a measuring cup. Now all that’s left to do is pre-bake it while you start on the cheesecake filling.
What is the best chocolate to use?
Since chocolate is the star of the show here, it’s important to focus on the quality of your ingredients.
I’m not talking anything too fancy, but use the nicest brand you can find at your grocery store. My personal favorite is Ghirardelli. Their bittersweet chocolate baking squares and chocolate chips are PERFECT for this cheesecake and they melt beautifully.
Also try to use dutch processed cocoa powder. It’s much darker and richer but it’s a little bit harder to find. I like to use either Rodelle or Guittard. If you can’t find either, Hershey’s dark baking cocoa is a good option and it can be found in most grocery stores.
How to tell when your cheesecake is done baking
No one wants an over or under baked cheesecake. It can either be too thin and soupy or dry and crumbly. This simple trick will ensure your cheesecake is juuust right.
For this recipe, the cheesecake should puff up quite a bit. The edges will crack (not to worry, they’ll settle and disappear) and then it will dip down in the middle. This is where you want to check it.
After an hour, test to see if your cheesecake is done. Give the pan a slight nudge and if the center wobbles too much, let it bake for another 5-10 minutes. It’s ready when the center jiggles like jello, and not like you just nudged a bowl of water. This cheesecake shouldn’t take any longer than 1 hour 15 minutes.
How to prevent your cheesecake from cracking
Everyones cheesecake nightmare! Your cheesecake looks beautiful in the oven but once it cools, a big crack surfaces right down the middle.
To prevent this from happening, there are 2 things that need to happen:
- Bake the cheesecake in a water bath. I like to do it the lazy way by placing the water bath and cheesecake on two separate shelves. Right before you’re about to finish up the batter, start a pot of boiling water and place a roast pan on the bottom shelf of your oven. When it’s time to bake the cheesecake, carefully pour the boiling water into the roast pan (lots of sizzling and steam will happen). Immediately place the cheesecake on the middle shelf, above the roast pan, and shut the door. This traps the steam inside, preventing the cheesecake from drying out and cracking. The steam also helps to circulate the heat around the cheesecake, so it bakes more even.
- Once baked, allow the cheesecake to slowly return to room temperature. Shut the oven off and crack open the door with the cheesecake still inside. Leave it there for 30 minutes then move it to your counter top. Allow the cheesecake to sit out at room temperature for 1 hour. Then, run a knife around the edge of the cheesecake and remove the springform ring. Place the cheesecake in the fridge uncovered for at least 6 hours or overnight.
The importance of chilling cheesecake
Do not skip this step! It’s really important to allow the cheesecake to chill in the refrigerator for at least 6 hours or overnight.
Skipping this step will give you a cheesecake that’s TOO soft, and each slice will just slump over on your plate. Chilling your cheesecake helps all of that cream cheese and chocolate firm up and settle.
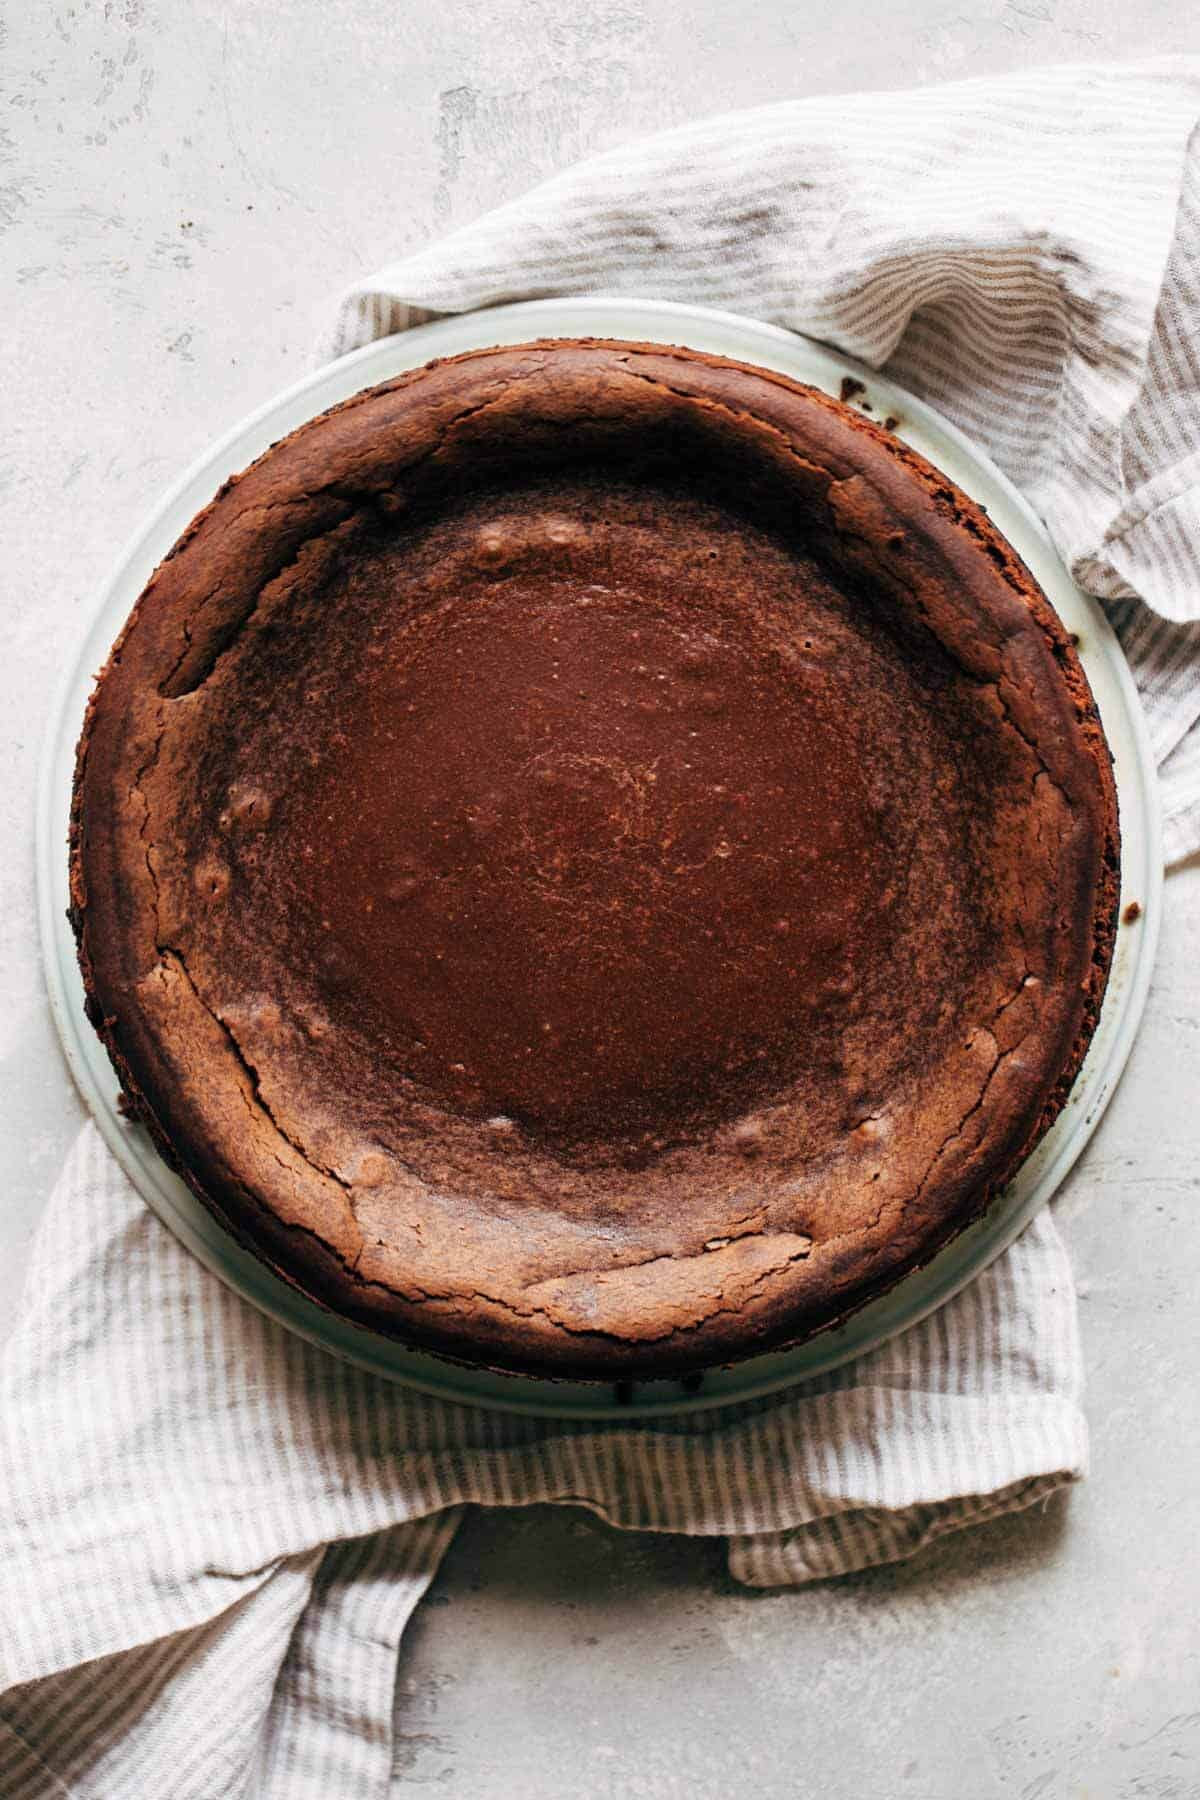
You’ll notice that when you place the cheesecake in the fridge, a dark circle will have formed in the center. When it’s ready to take out of the fridge, that circle will have taken up the entire center of the cheesecake (see picture above).
This is because the cheesecake is slowly deflating to become more and more dense and creamy, AKA the best cheesecake texture.
Make sure to remove the springform ring before placing it in the fridge, otherwise it will be more difficult to remove it later. Leave the cheesecake in the fridge completely uncovered to prevent condensation.
How to make chocolate ganache
Let’s be honest, the Chocolate Cheesecake itself is not very pretty. It has that dark center, crackly ring around the edge, and some unsightly bubbles on top. So how do we fix this? With more chocolate!
Not only does it make the cheesecake look stunning, but the extra bit of chocolate on top really brings this cheesecake together. Each bite is met with the silky ganache, creamy cheesecake, and crumbly Oreo crust.
To make ganache, place 8oz of chopped chocolate or chocolate chips into a bowl. In a measuring glass, microwave 8oz of heavy whipping cream for 1 to 2 minutes, or until it begins to bubble.
Pour the piping hot cream over the chocolate and let it sit for about 30 seconds. Whisk the two ingredients together until you’re left with a super silky ganache.
Depending on the chocolate used, you may need to thin out the ganache a bit more. Do so by adding 1-2 tsp oil in order to reach the perfect dripping consistency.
How to thicken ganache
If you’d like to add some ganache swirls on top, repeat the same processes, minus the oil and with half the amount of ingredients.
Allow the ganache to chill in the fridge for about 45 minutes. It should thicken and become a rich frosting consistency. Transfer to a pipping bag and decorate!
See my post on gluten free chocolate cupcakes which includes pictures of what ganache frosting should look like.
Decorating your chocolate cheesecake
With the cheesecake cooled and the ganache ready, it’s time to decorate.
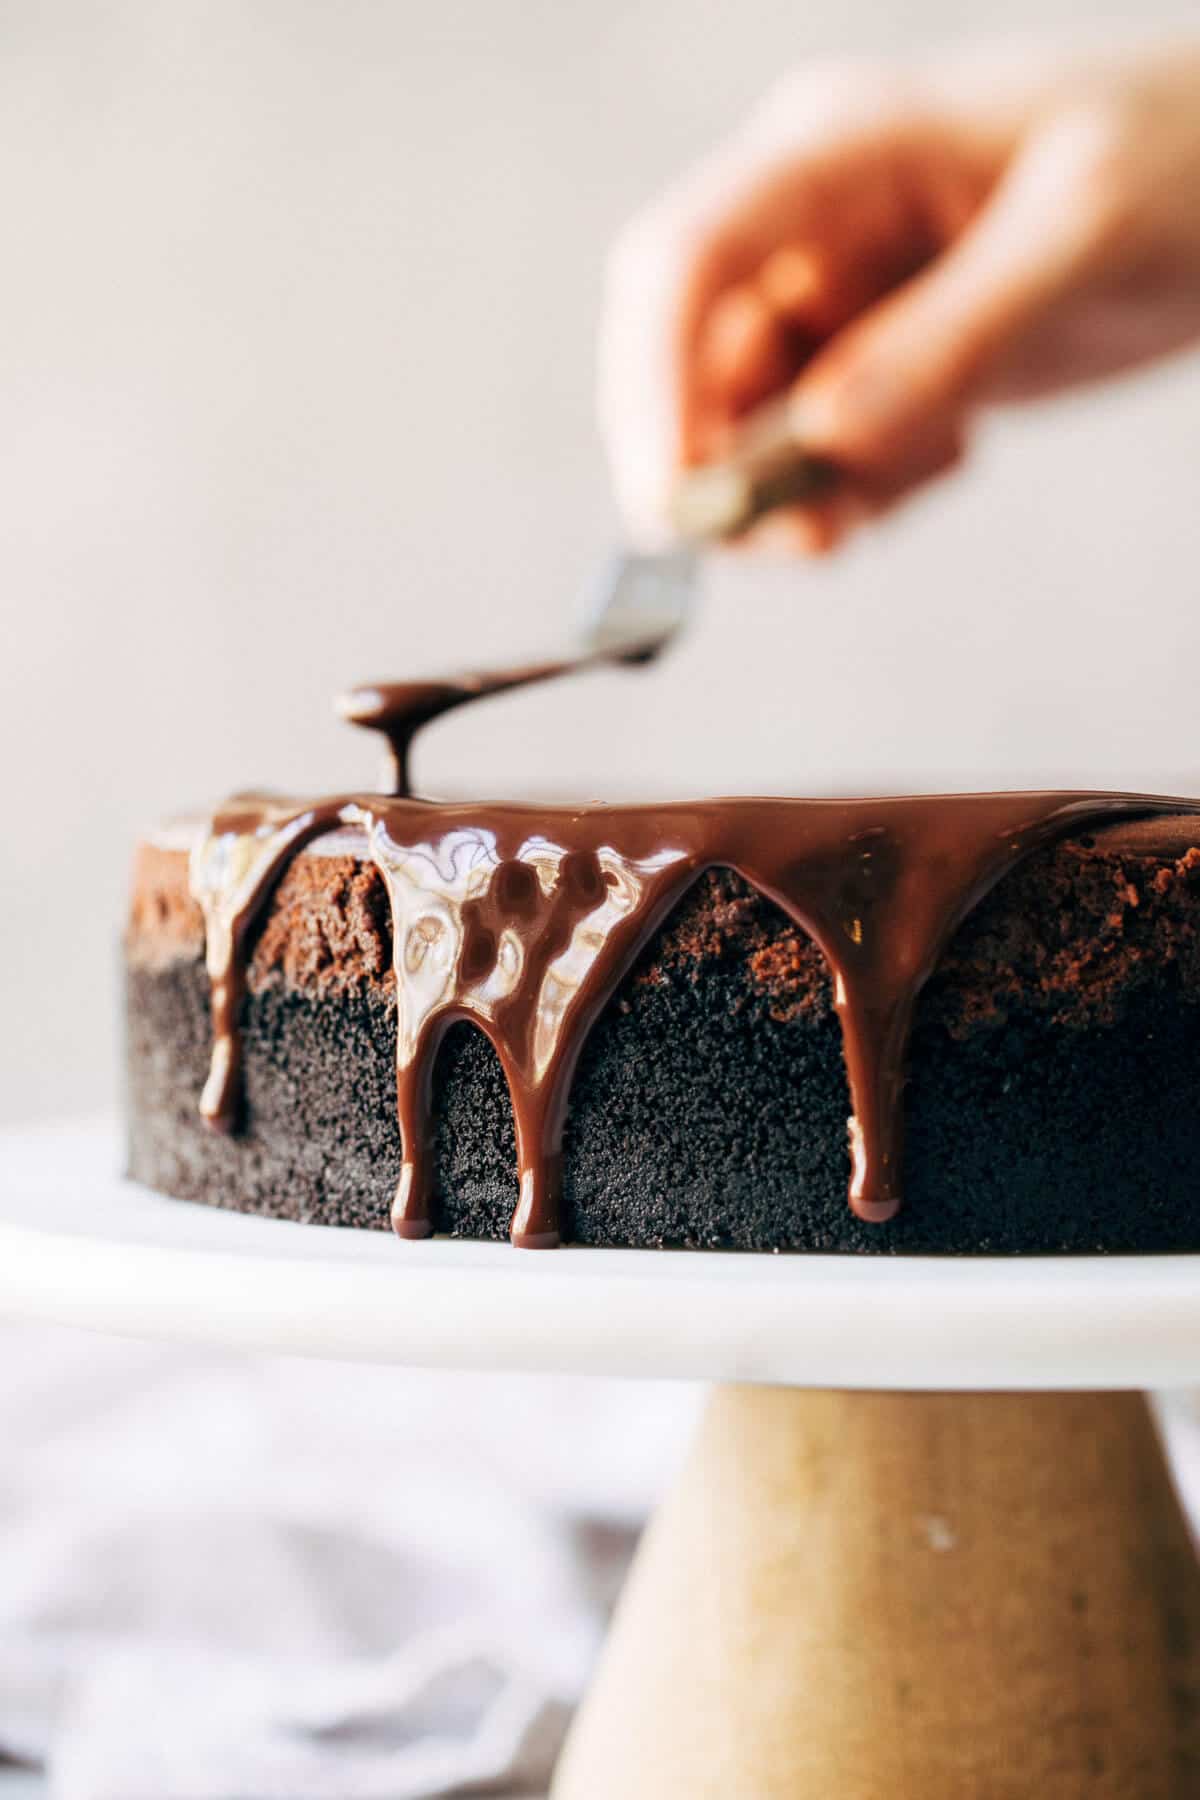
Pour all of the warm ganache into the center of the cheesecake. With a small offset spatula, nudge it to the edges and off the sides. It should slowly drip down but not pool at the bottom.
If you’d like to take it a step further, use a large star tip and pipe in your chilled and thickened ganache. To do so, allow the first layer of ganache to chill for about 20 minutes, then pipe on the extra ganache on top.
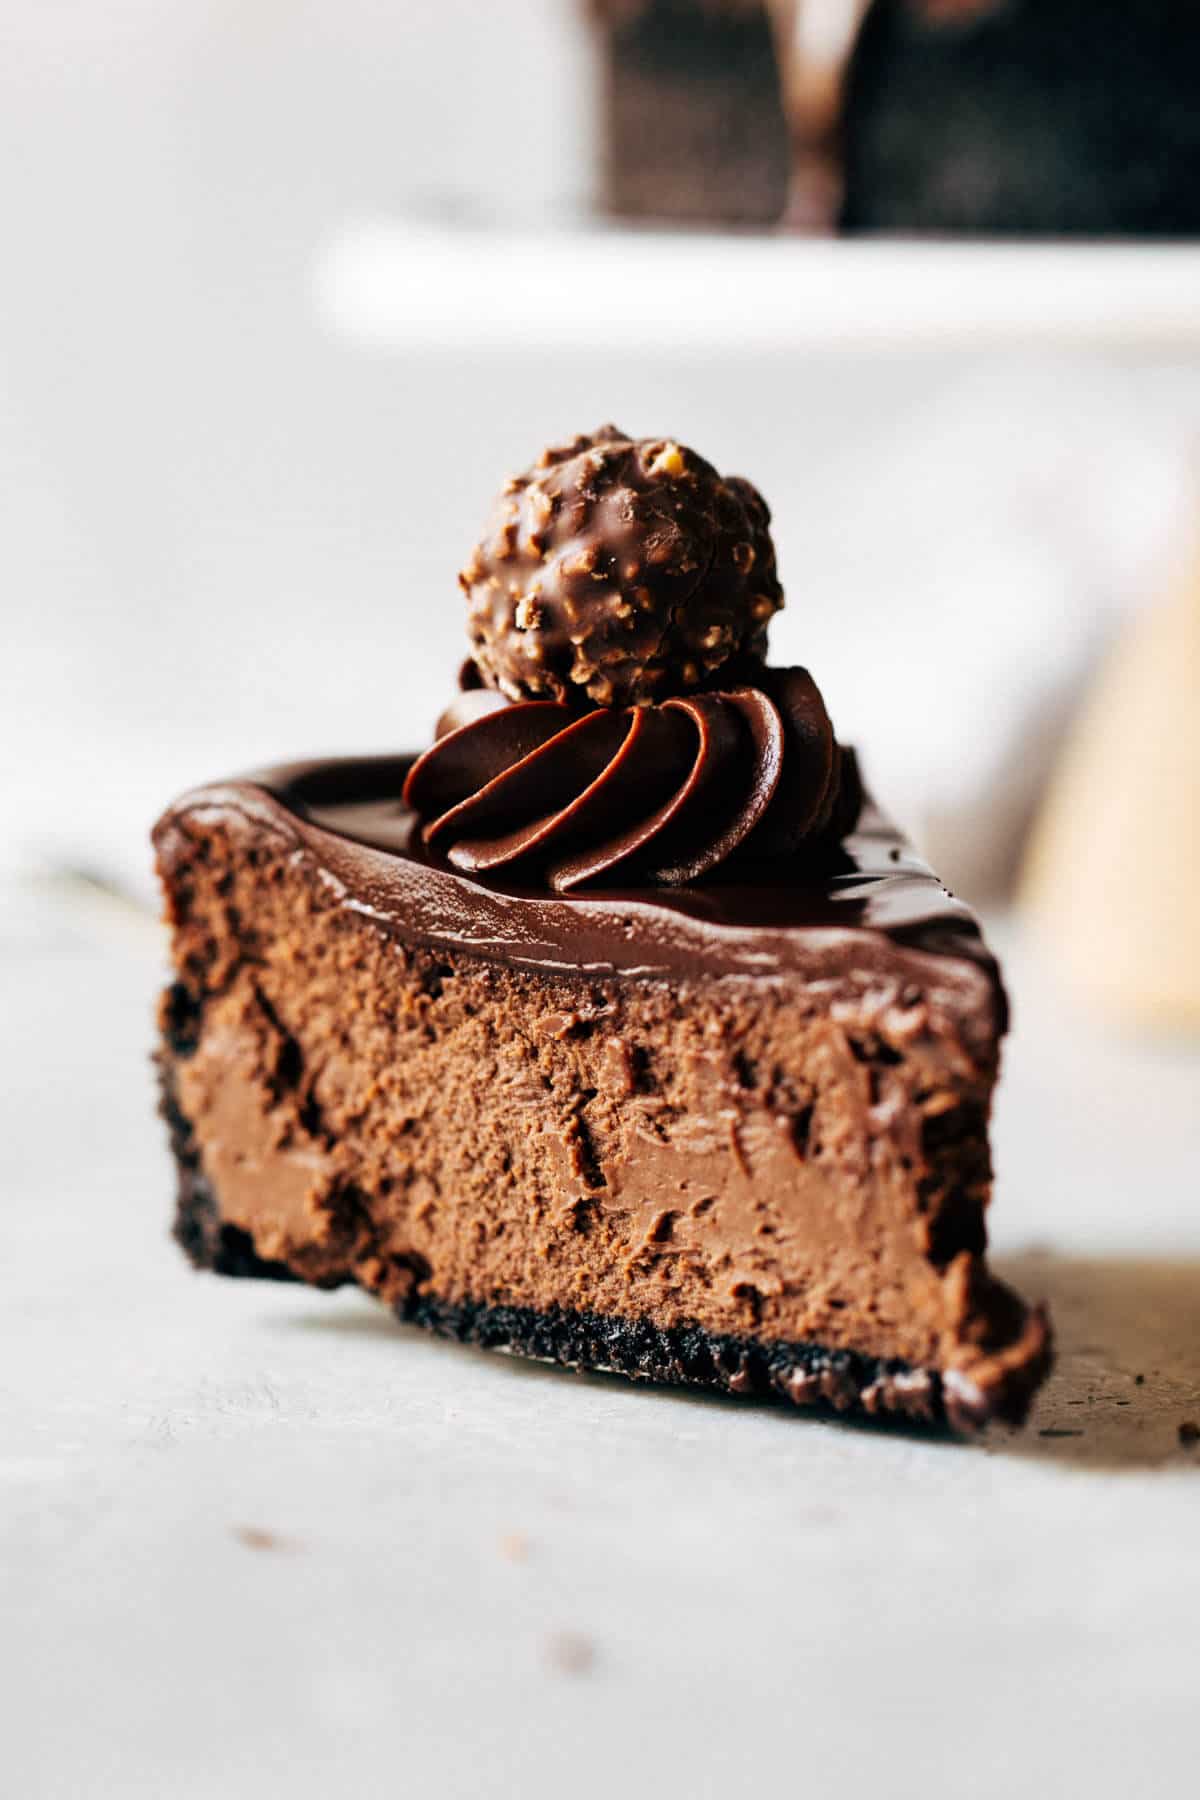
Top it off with your favorite chocolates. I chose Ferrero Rocher, but you could use Lindt truffles, sprinkle on some chocolate curls or chips, or leave it the way it is.
How to get the perfect slice
Since you’ve worked so hard on the presentation, don’t let the slicing ruin this beautiful cheesecake!
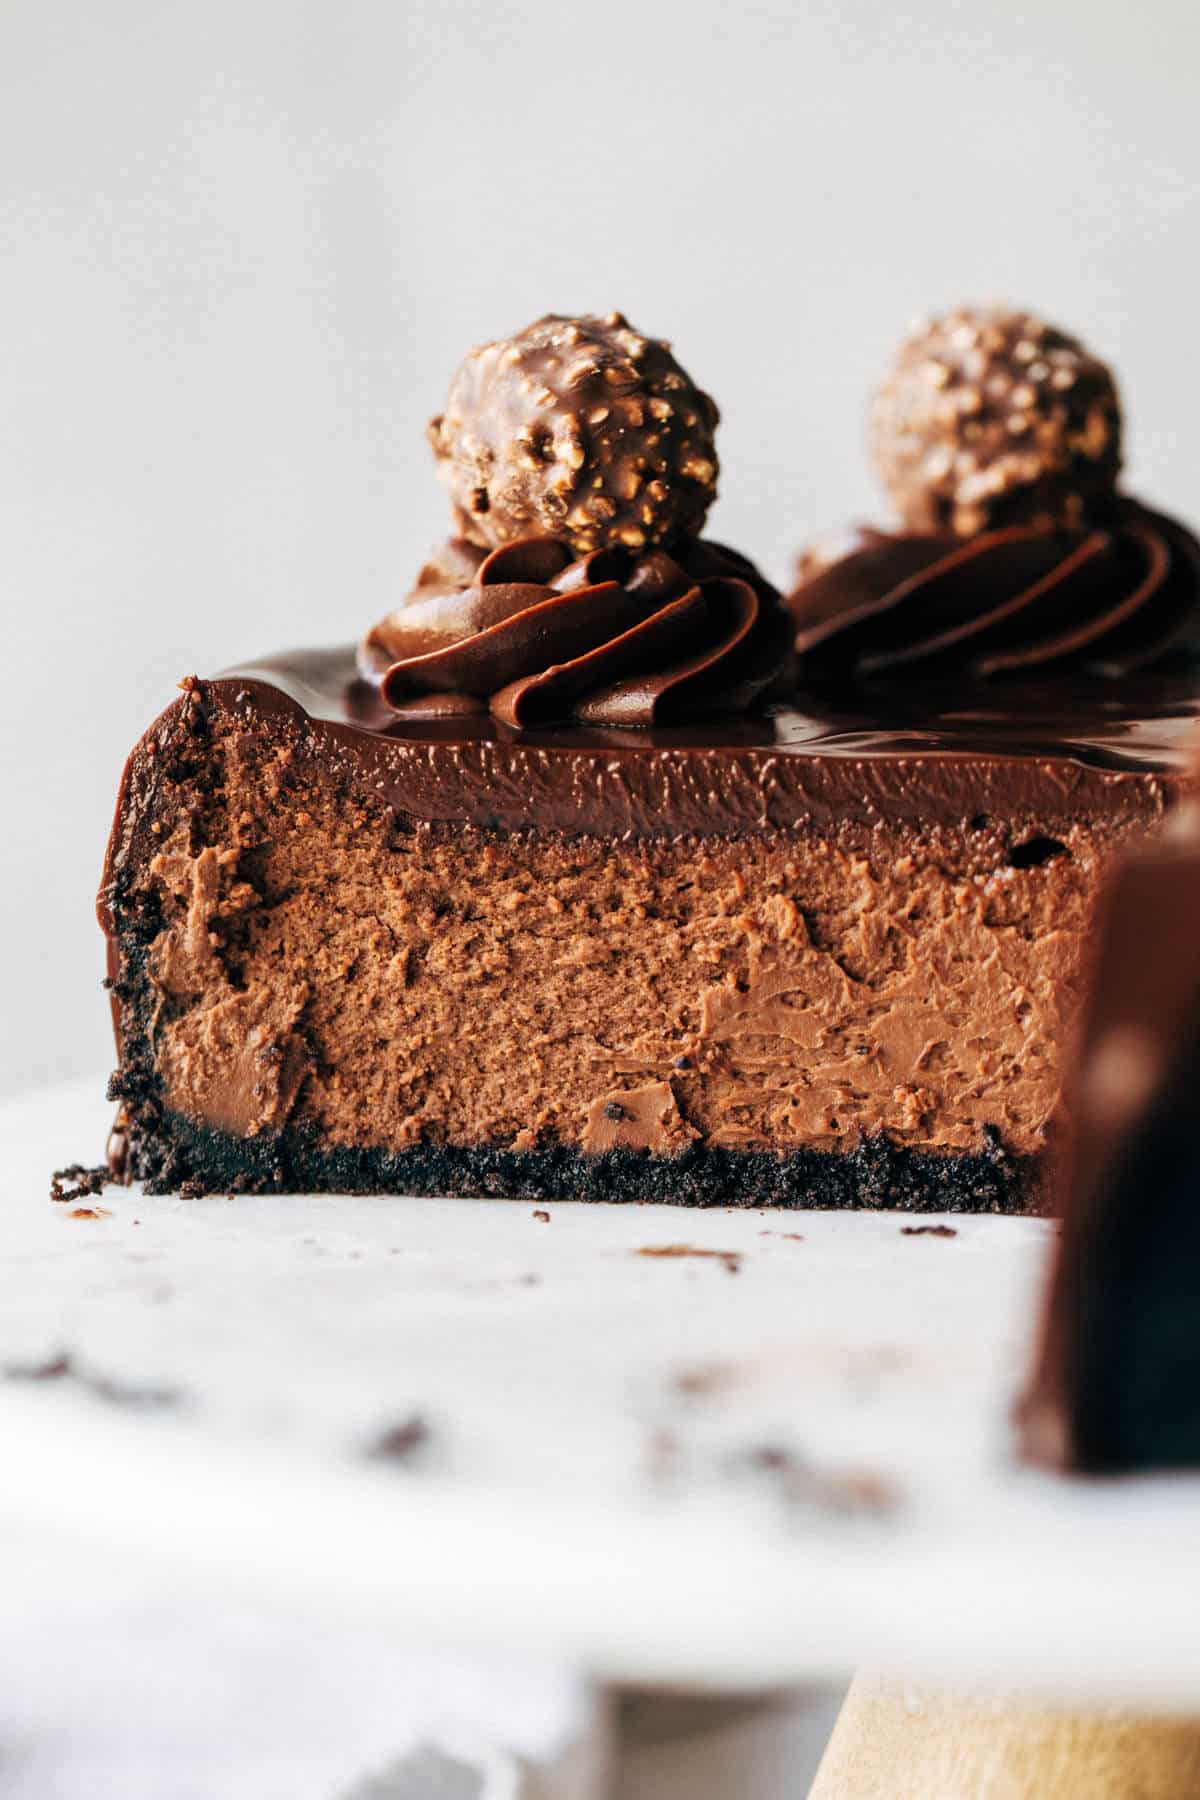
The trick to getting that perfect slice is to use a warm knife. Dip it in a glass of warm water and wipe it off. Make your slice, whip the knife off, and repeat the process.
The warm knife will glide right through the cheesecake, and whiping the knife between each slice will create perfectly clean cuts.
Why this is the perfect make ahead dessert
What I love about this recipe is that it’s perfect to make ahead for events or birthdays.
Since the cheesecake has to chill overnight, you can bake the cheesecake the day before and decorate it the day of. OR bake it two days before, decorate it the day before, and have it ready on the day of.
To make this a few days ahead, allow the cheesecake to chill uncovered for one night. After that, cover the cheesecake in plastic wrap and let it chill for another night. This will prevent it from drying out.
Decorate the cheesecake and place it back in the fridge in a cake container. Take it out of the fridge the day of and let it come up to room temp. Now it is ready to serve!
Can you freeze cheesecake?
Yep! After the cheesecake has chilled for the first 6 hours in the fridge, take it out and wrap it in a layer of plastic wrap and then a layer of foil. Place it in the freezer for up to 30 days.
For more delicious cheesecake recipes, check out my:
- Baked Banana Pudding Cheesecake
- Classic New York Style Cheesecake with Philadelphia
- Baked Salted Caramel Cheesecake
- Burnt Basque Cheesecake Recipe
- Funfetti Cheesecake (with a cake bottom!)
Make sure to tag me @butternutbakery on Instagram and leave a review below if you make this Baked Chocolate Cheesecake. To pin this recipe and save it for later, you can use the button on the recipe card, the buttons above or below this post, or on any of the photos above. Happy baking!
Print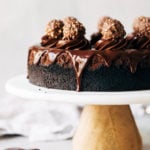
Chocolate Cheesecake
- Total Time: 1 hour 30 minutes + 6 hours refrigerated
- Yield: 9in cheesecake
Description
This is the PERFECT chocolate cheesecake recipe. It’s rich, creamy, and loaded with chocolate from top to bottom.
Ingredients
Oreo Crust
- 24 chocolate sandwich cookies, finely crusted (regular or gluten free)
- 1/4 cup (55g) unsalted butter, melted
Chocolate Cheesecake Filling
- 10oz bittersweet chocolate, chopped
- 3 x 8oz blocks Philadelphia full fat cream cheese (680g, 24oz), room temp
- 1 1/2 cups (300g) granulated sugar
- 1/4 cup (30g) dutch processed cocoa powder, sifted
- 2 tsp espresso powder (optional but highly recommended)
- 4 large eggs + 1 egg yolk, room temp
- 2 tsp vanilla extract
- 1 cup (8oz) heavy cream, room temp
Chocolate Ganache Drip
- 8oz bittersweet chocolate, chopped
- 1 cup (8oz) heavy cream
- 1–2 tsp oil
- 6–8 truffles (optional)
Instructions
Oreo Crust
- Preheat the oven to 350F and take out a 9-inch springform pan.
- Mix together the crushed Oreos and melted butter. Press it into the pan using the bottom of a measuring cup, along the bottom and halfway up the sides.
- Bake for 7 minutes then allow it to cool while you start on the batter.
Chocolate Cheesecake Batter
- Place a heat-proof bowl over a pot of water. Make sure the bottom of the bowl does not touch the water.
- Place on the stove top over medium heat, bringing the water to a simmer.
- Add the 10oz chopped chocolate to the bowl and mix to melt. Once melted, remove from heat, keeping the bowl over the pot.
- In the bowl of a stand mixer fitted with the whisk attachment, mix the cream cheese until smooth. This requires medium-high speed for about a minute.
- Once smooth, scrape down the bowl and add in the sugar, cocoa powder, and espresso powder. Whisk until combined.
- Take the bowl off of the stand and grab a rubber spatula. Mix and spread the cream cheese mixture around the inside of the bowl to knock out any air. Work at this for about 1-2 minutes.
- Return to the stand and replace the whisk attachment with the paddle attachment. ONLY work on low speed from here on out.
- Shift gears at this point and place a roast pan on the bottom rack of your oven (which should still be at 350F). Start a pot of boiling water and return back to the cheesecake batter.
- Mix in the eggs one at a time, scraping down the bowl after every 2. Mix in the vanilla.
- Once smooth, keep the mixer running on low and pour in the chocolate that you melted earlier. Make sure to get every last drop.
- Once that’s combined and with the mixer still on low, slowly pour in the heavy cream.
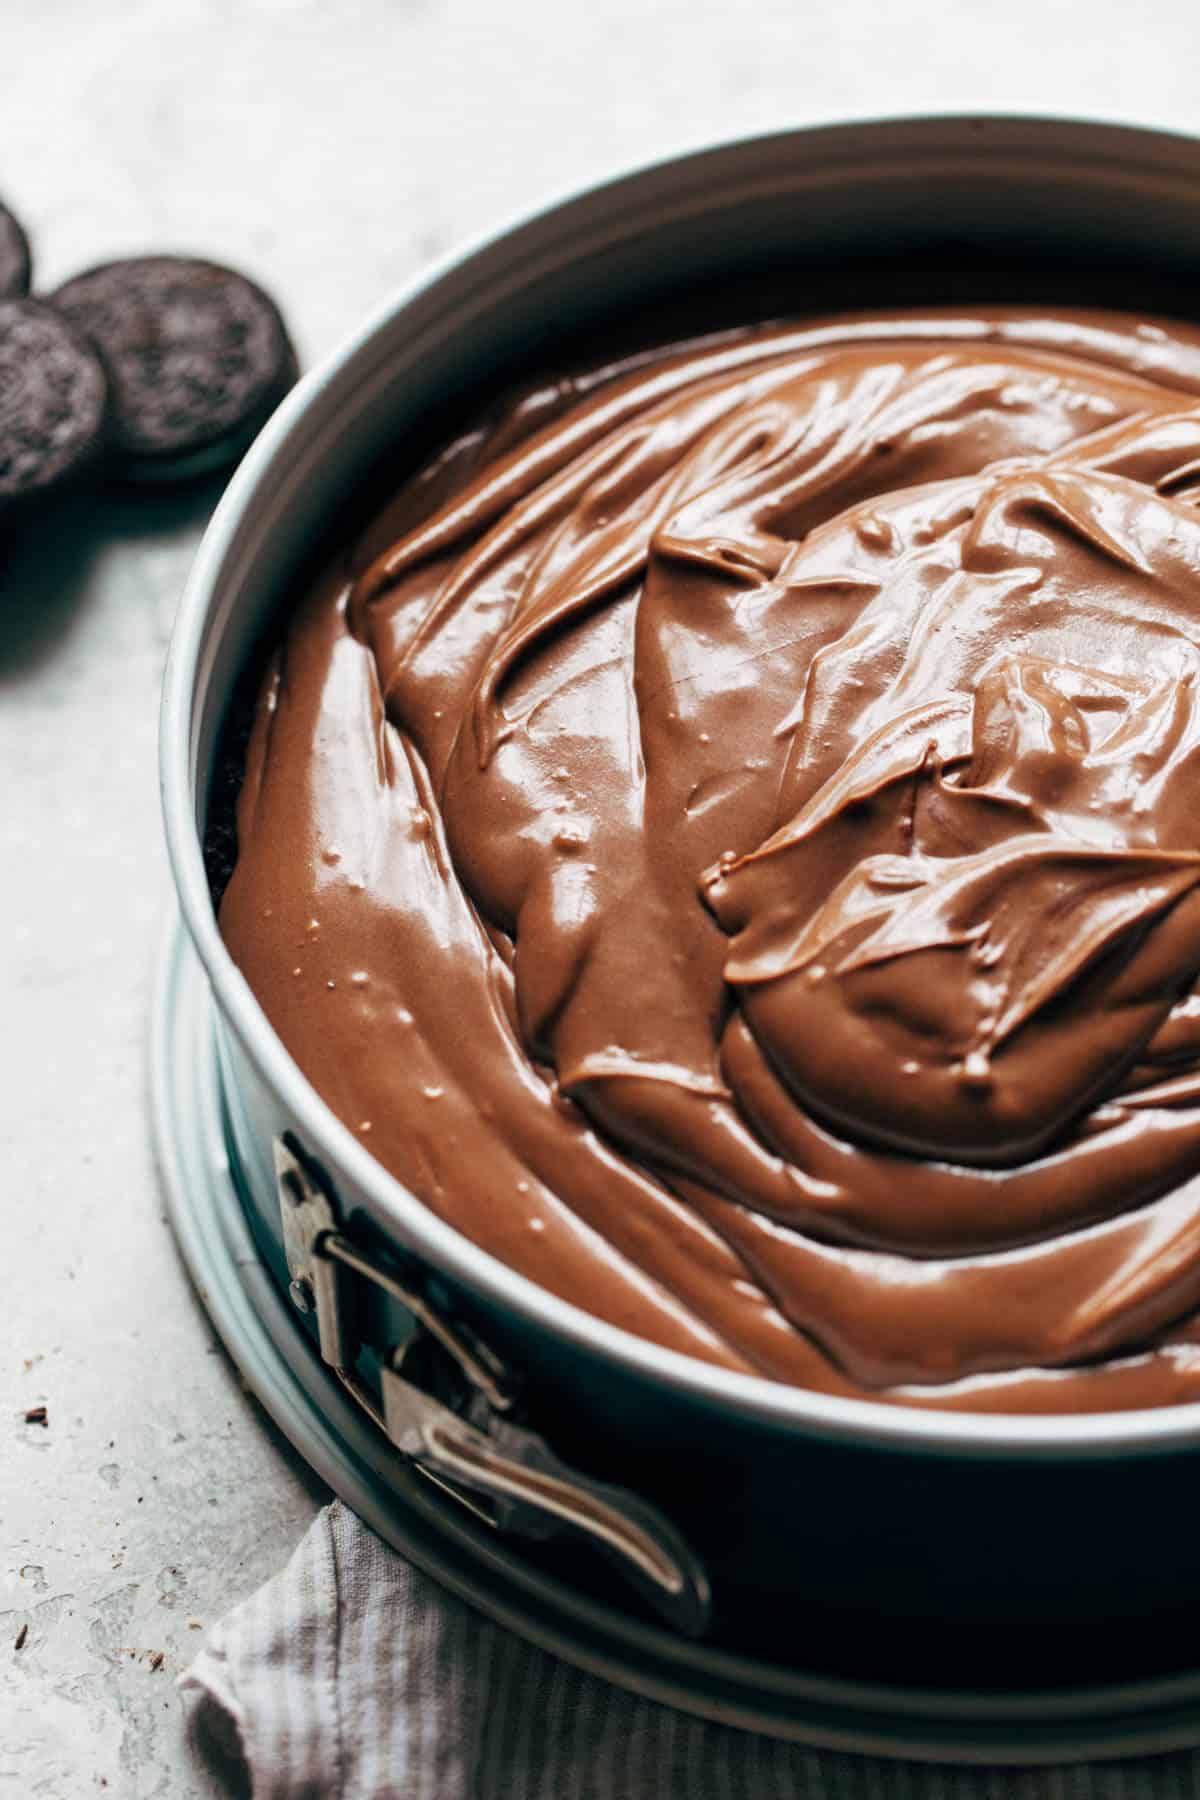
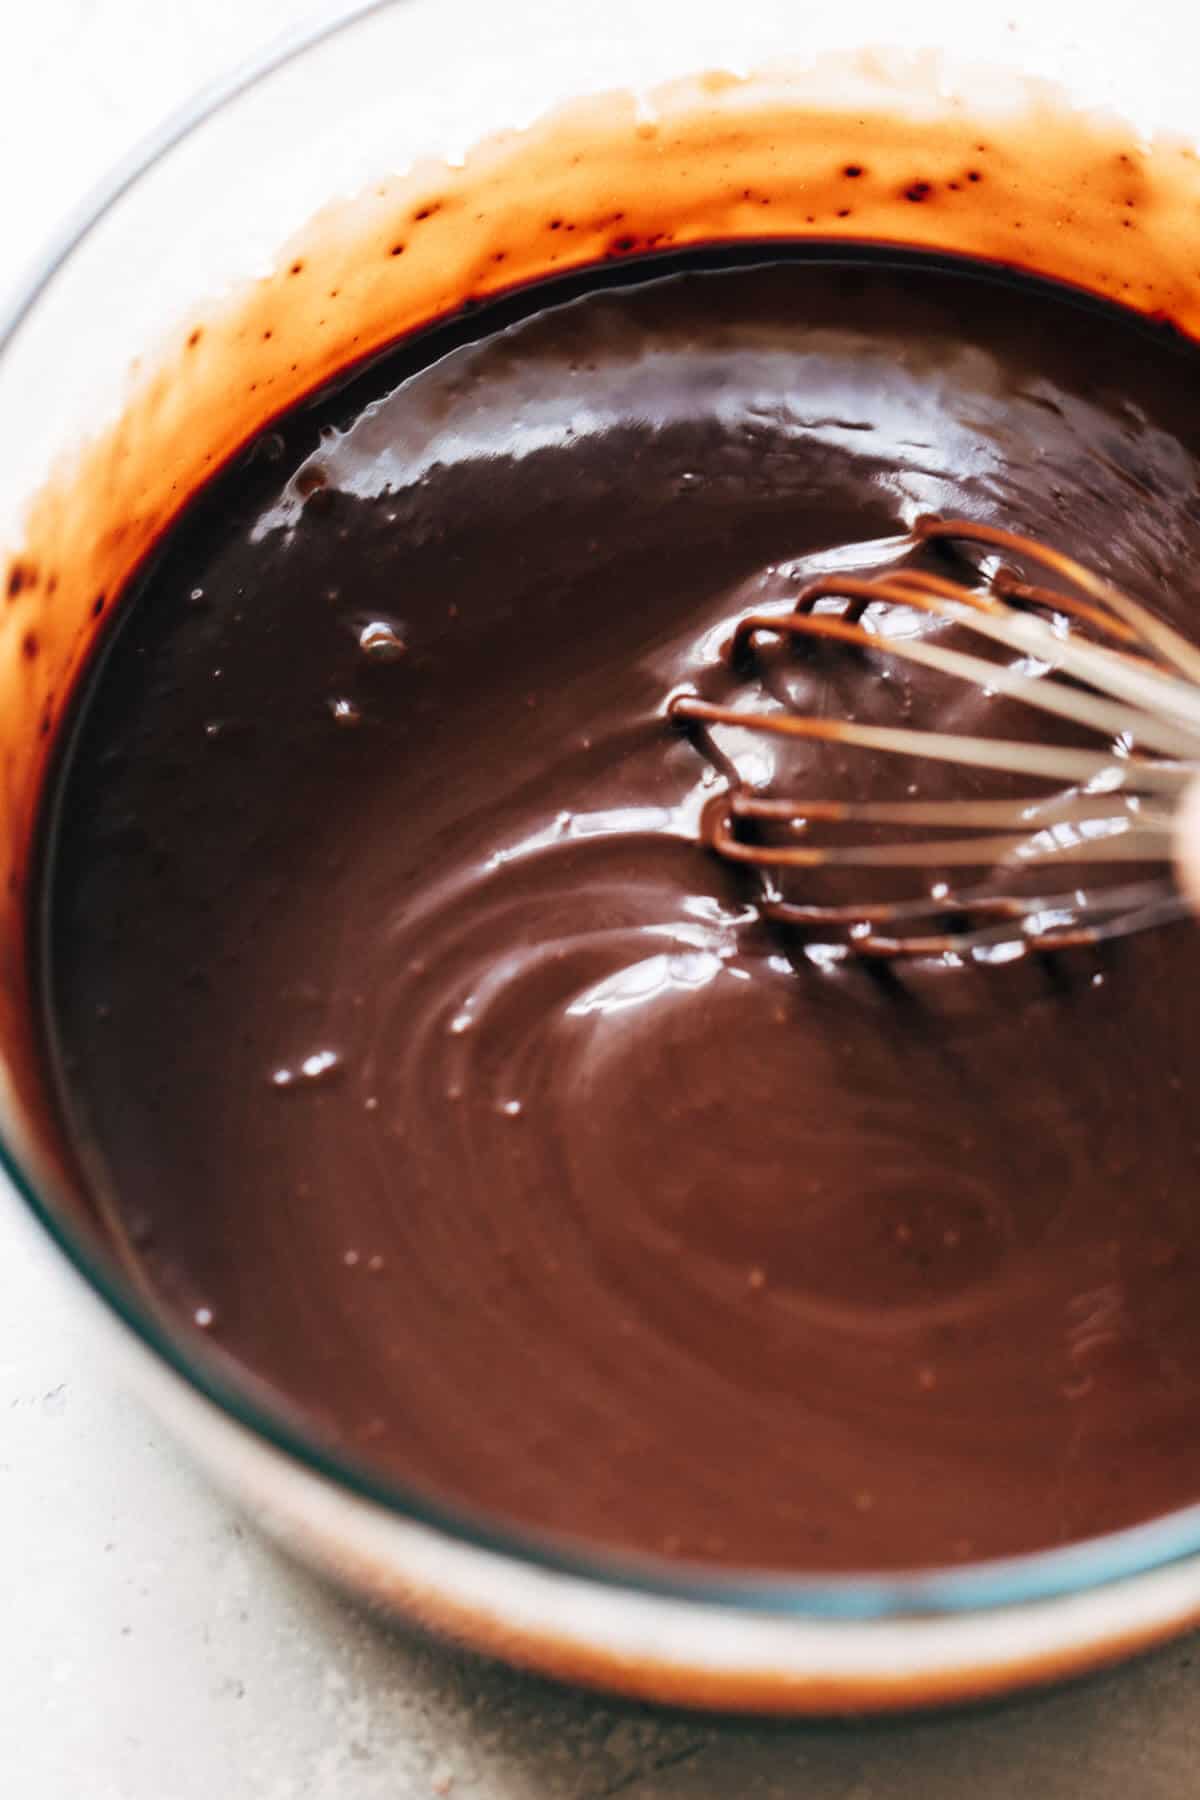
- Remove the bowl from the stand and use a rubber spatula to really get to the bottom of the bowl and make sure the batter is as smooth as possible. It should look like chocolate pudding at this point (see picture in post).
- Pour the batter into the springform pan and gently shake the pan to even it out. Some air bubbles may surface, so pop those with a toothpick.
- At this point you should have boiling water. Open the oven door and pull out the rack with the roast pan, just enough to where you can safely pour in the boiling water. Please be careful during this step!
- Slide the rack back in and quickly place the cheesecake on the middle rack just above it. Close the door to stop the steam from escaping.
- Bake for 1 hour to 1 hour 10 minutes. When it’s done, the edges should be puffed up and cracked (not to worry), and the center will dip down. Give the pan a slight nudge. If the center jiggles like jello, it’s ready. If the center is still a little too wobbly, bake for another 10 minutes.
- Once it’s done, turn the oven off and crack open the door with the cheesecake still inside. Leave it in there for 30 minutes.
- Then, remove the cheesecake and let it rest at room temperature for another hour.
- After the hour, run a knife along the edge of the cheesecake and remove the springform ring. Place the cheesecake in the fridge uncovered for at least 6 hours but preferably overnight. Don’t skip this step!
Chocolate Ganache
- If you’d like to create those chocolate swirls on top, prep half of the batch of ganache about an hour before you’re ready to decorate.
- Do so by adding 4oz chopped chocolate to a bowl. In a glass measuring cup, heat 1/2 cup heavy cream in the microwave for 1-2 minutes or until it starts to bubble.
- Pour the hot cream over the chocolate and let it sit for 30 seconds. Then, whisk the two ingredients together until you reach a smooth ganache.
- Transfer the bowl to the fridge and chill for 45 minutes to an hour to thicken. If it’s too thick by the time you need it, microwave it for about 10 seconds or until you reach the perfect frosting consistency.
- To get the chocolate ganache drip, repeat this process just before you’re ready to decorate the cheesecake, using the full recipe (8oz chocolate, 1 cup cream) but add 1-2 tsp of oil after it’s all mixed together. Depending on the chocolate used, this will help thin it out to get that perfect dripping consistency.
- Pour the ganache into the center of the cheesecake and use a small offset spatula to nudge it off the sides.
- Place the cheesecake in the fridge for about 15 minutes, then add the ganache swirls on top. By now, that ganache should be thick enough for piping.
- Add some truffles on top and it’s ready to serve. Enjoy!
Notes
To freeze this cheesecake, after it has chilled for the first 6 hours in the fridge, take it out and wrap it in a layer of plastic wrap and then a layer of foil. Place it in the freezer for up to 30 days.
- Prep Time: 30 minutes
- Cook Time: 1 hour
- Category: Dessert
- Cuisine: American
Join Our Community

Meet Jenna
I’m the creator, baker, and photographer behind Butternut Bakery. Here I share desserts for every diet because I believe everyone should have a chance to indulge!


I’ve made this for Thanksgiving 3 years in a row now. Because it is simply THE BEST. Easy to follow instructions and it turns out perfectly everytime. My favorite thing to make(and eat) come Thanksgiving
I don’t think I’ve ever left a comment or a review on anything in my life but I just had to for this cheesecake. May be the most delicious thing I’ve ever put in my mouth. I’ve made it twice now, the 2nd time in place of my birthday cake. Came out perfect both times. Would give it 10 stars if I could!
Our 12 yr old made this for one of his coaches and it was DELICIOUS! Straightforward to make. The best cheesecake!!! Everyone who’s tried it absolutely loved it. Thank you!