BEST Chocolate Chip Muffins
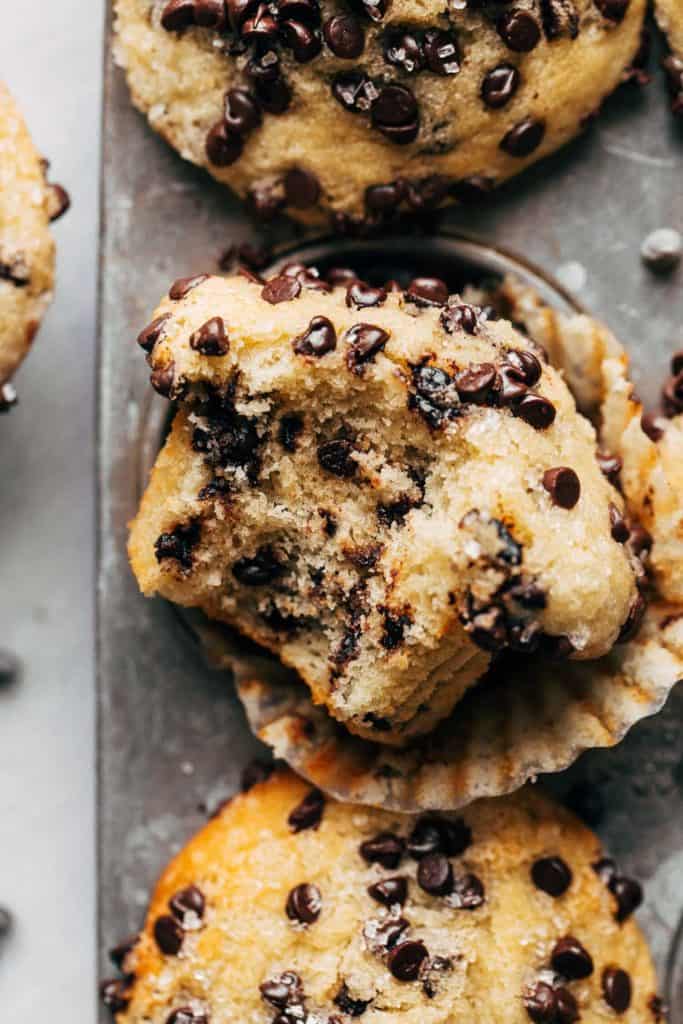
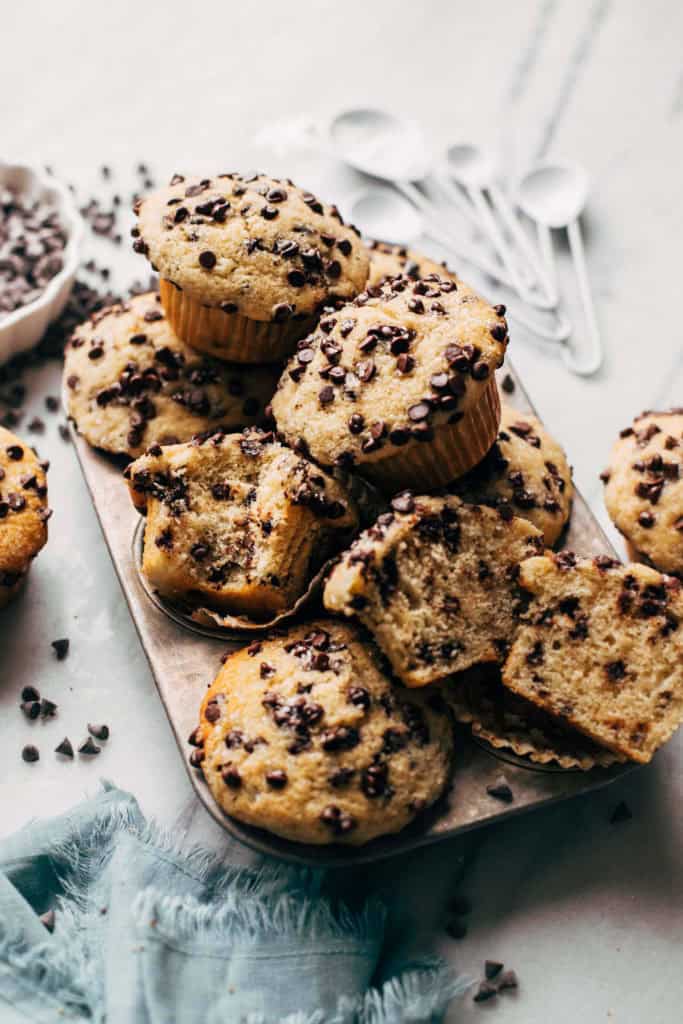
These are BEST chocolate chip muffins! Not only are they loaded with chocolate chips, but each muffin is baked with a tall muffin top and fluffy and moist in the texture. Those domed tops are studded with extra chocolate and sugar to give them a delicious crunchy crust that sets these muffins over the edge.
This post is sponsored by Danish Creamery but all thoughts and opinions are my own. Thank you for supporting the brands that make Butternut Bakery possible!
What makes these the BEST chocolate chip muffins?
I don’t throw around the term “best” very lightly because it can set a high expectation. But with these muffins, I don’t think there’s any room for a let down. They’re tall, moist, and not too sweet. I could go on and on, but here are the top reasons why these chocolate chip muffins are SO good:
- Danish Creamery European Style Butter – I love using Danish Creamery butter in my baking for so many reasons. It’s much more flavorful than traditional butter as it’s slow churned and made with quality ingredients. Their European style butter is what takes these muffins from basic to gourmet. It adds an extra depth of flavor and helps to keep these muffins moist for days. Trust me, once you bake with Danish Creamery butter you’ll never go back!
- The Method – It’s tough to get a muffin that’s both tall and moist, and these muffins check both boxes. By using a couple muffin baking secrets, these muffins bring you the best of both worlds. I discuss more in detail what these tricks entail, so read on to see how to make the perfect chocolate chip muffins.
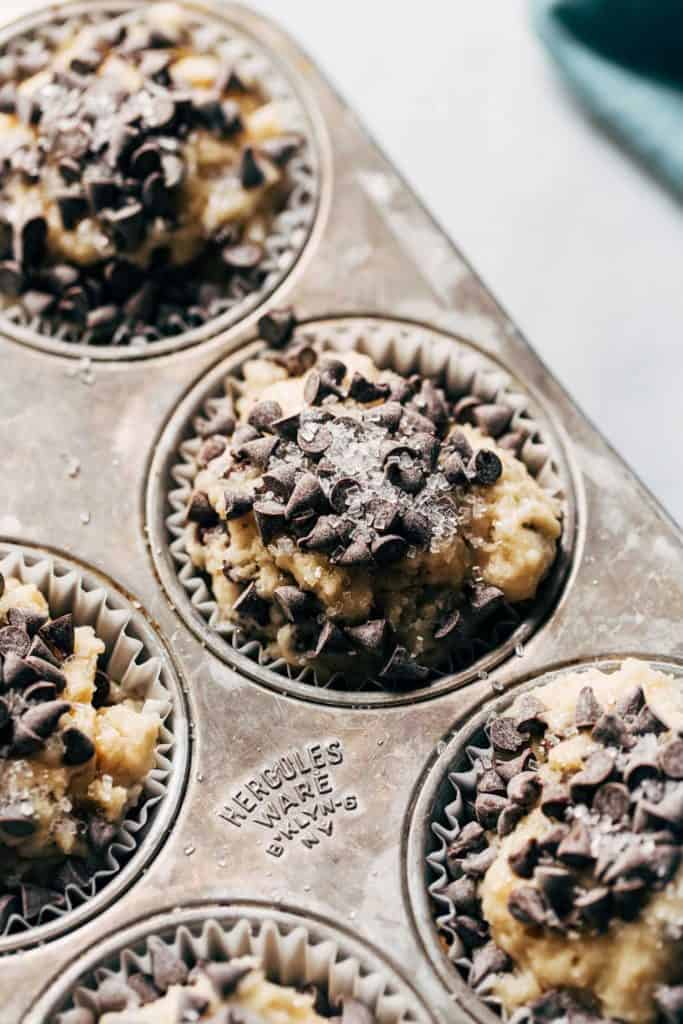
- The Crust – Before the muffins are baked, each one is topped with a layer of sugar and more chocolate chips. While this makes the muffins look delicious, it also adds a crunchy crust to the top of the muffins. Combined with the fluffy and moist inside, it’s a match made in heaven.
How to make chocolate chip muffins
What I love about muffins is just how easy they are to make. Unlike cupcakes that depend on the creaming method for height (combining butter and sugar until fluffy), muffins are made in fewer steps because they’re a quick bread. This means that they rely heavily on baking soda and baking powder in order to grow nice and tall. Because of this, it takes the load off of the baker as the leaveners do most of the work.
So what is the process of making muffins using this quick bread method? It’s essentially three simple steps:
- Dry Ingredients – Combine ALL of the dry ingredients in one bowl, including the sugar and chocolate chips.
- Wet Ingredients – Combine all of the wet ingredients in a separate bowl, which includes the eggs, milk, butter, and any additional liquid flavorings or fats.
- Mix Together – Pour the wet ingredients into the dry ingredients and mix to combine. That’s it!
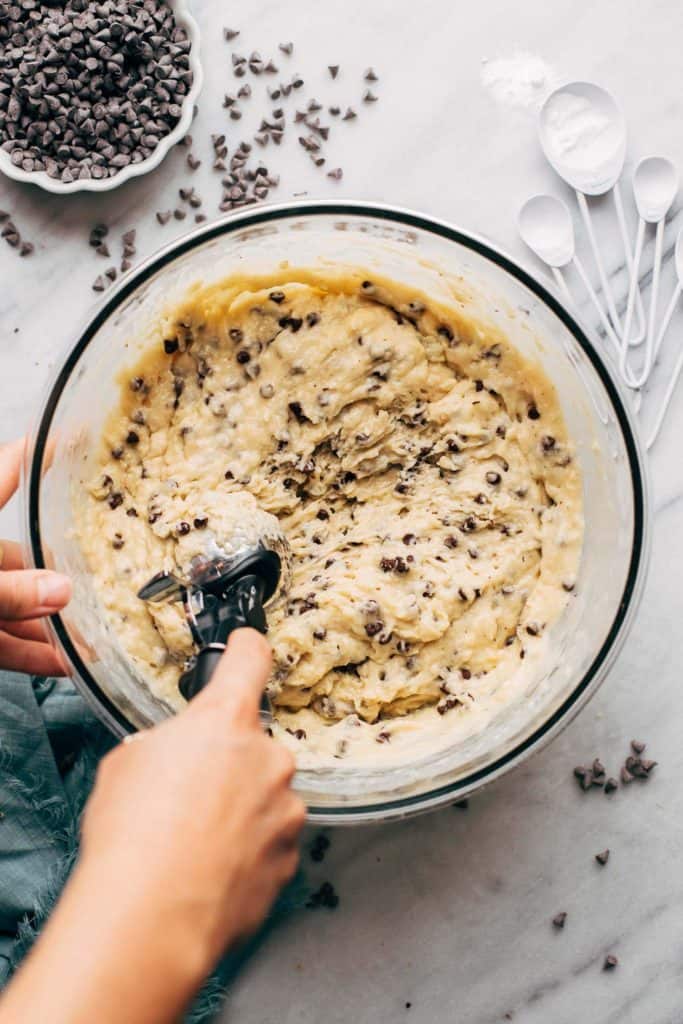
Because of the large amount of leaveners in the dry ingredients, the batter will start to froth as the wet ingredients are mixed in. This is due to the fact that baking powder activates with liquid, and baking soda activates with liquid and acid (such as buttermilk). So be very careful not to disrupt this reaction as you stir the two together. Mix JUST until it’s combined, otherwise, you could deflate the batter.
The secret to tall muffin tops
My biggest dilemma with muffins is that they should most definitely have a tall muffin top, but to get there the muffin usually turns out a bit heavy and dry…or at least too dry for my liking.
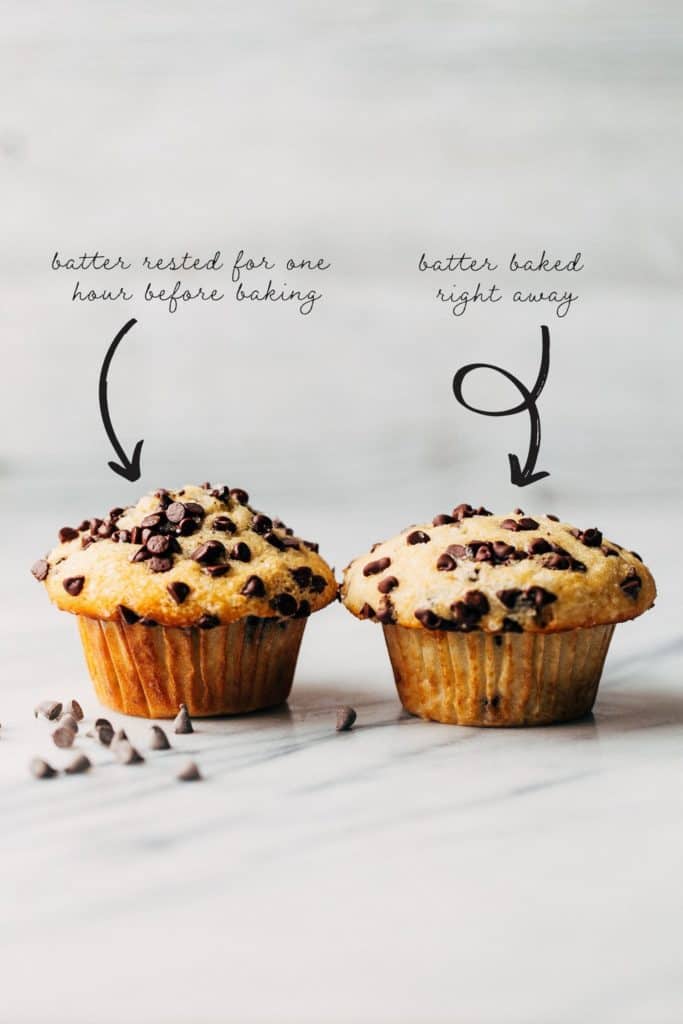
I spent two entire days testing this recipe, coming up with a delicious and moist version that just wasn’t as tall as I had liked. But then I remembered this muffin baking secret I heard a while back, and decided this was the recipe to test it out on. To my surprise, it WORKED! And it worked SO well!
So what’s this secret?? Right after the batter is mixed, it rests for 1 hour at room temperature before it’s baked. During this hour, magic happens. Remember what I said about the leaveners activating in liquid? By resting the batter, we’re prolonging this process and allowing the leaveners to fully do their thing. It’s like giving them a head start, allowing the batter to lift before it lifts once more in the heat of the oven.
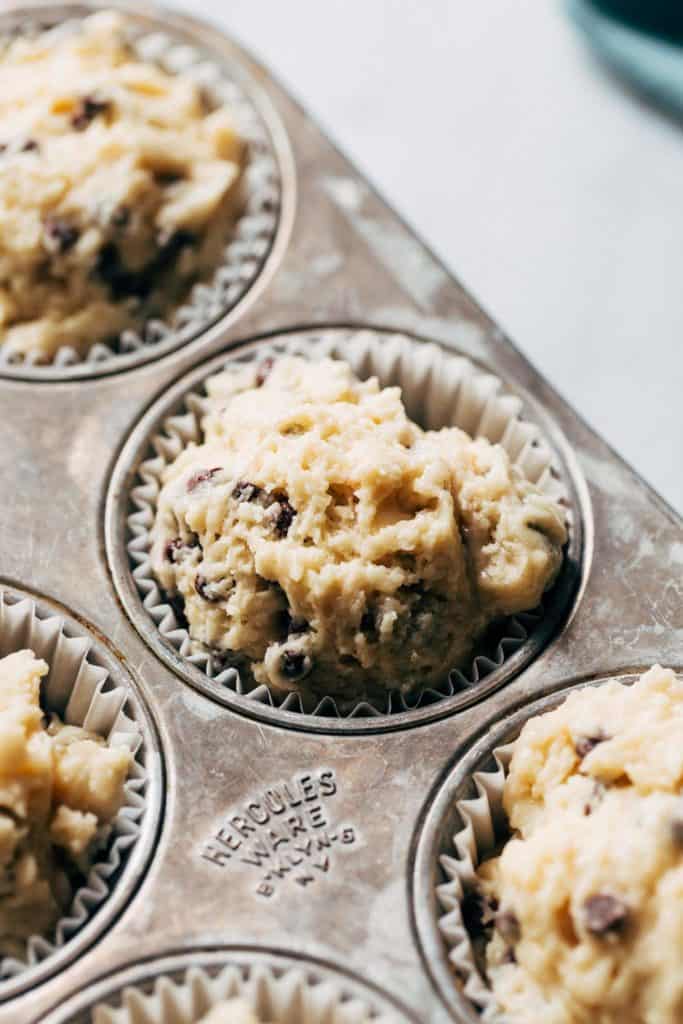
After the hour, another important step awaits. In order to get the batter into the muffin liners, you must be very gentle as you scoop. We don’t want to disrupt all the hard work the leaveners did while resting. So as you scoop, just make one smooth motion through the batter in order to fill the scooper. Then plop it into the liner and move on to the next. Don’t mix around the batter, don’t make a double pass, just scoop and plop.
This will become instinctual after you notice just how fluffy the batter has become. You can SEE how light it is, so it’s easy to not want to deflate it. As you can see in the image above, the difference between the two muffins (one baked right away, one baked after an hour) just blows my mind. It’s an hour well worth it!
Chocolate Chip Muffins: Frequently Asked Questions
I have not tested it, but I would recommend swapping the flour with a good quality all purpose gluten free baking flour. My assumption is that the muffins might not rise as much due to how heavy gluten free flour can be, but it’s worth a try!
Unfortunately you need the acidity in buttermilk in order to activate the baking soda in these muffins. If you don’t have buttermilk, you can make your own from whole milk and vinegar. Measure out 1 cup of milk and then remove 1 tablespoon. Then stir in one tablespoon of vinegar or lemon juice. Let it sit for 10 minutes to curdle before use.
No, please do not. Danish Creamery European style butter has a very specific purpose in this muffin recipe as it provides a unique flavor and texture. Replacing it with oil could weigh down the muffins or give off a strong oil flavor.
I do not recommend this, as chocolate chips are a dry ingredient and blueberries are a wet ingredient. The moisture from the berries could completely throw off these muffins. Instead, try swapping some of the chocolate with nuts or any dried fruit.
You can, but mini chocolate chips provide the best texture and spread of chocolate throughout the muffins. Alternatively, you could give your regular-sized chocolate chips a rough chop before mixing into the batter.
For more of my BEST dessert recipes, check out my:
- BEST Chocolate Chip Cookies
- BEST Homemade Cinnamon Rolls
- Funfetti Cake
- Perfect Carrot Cake
- Better than Boxed Chocolate Fudge Brownies
- Perfect Vanilla Cupcakes
- BEST Blueberry Muffins
- BEST Vanilla Cake
Make sure to tag me @butternutbakery on Instagram if you make these chocolate chip muffins. I love seeing my recipes come to life in YOUR kitchen! To pin this recipe and save it for later, you can use the button on the recipe card, the buttons above or below this post, or on any of the photos above. Happy baking!
Watch how to make the best chocolate chip muffins!
Print
BEST Chocolate Chip Muffins
- Total Time: 1 hour 36 minutes
- Yield: 12 muffins
Description
These are easily the BEST chocolate chip muffins – baked with a tall muffin top, moist texture, and crunchy crust.
Ingredients
- 2 1/2 cups (320g) all purpose flour*
- 1 cup (200g) granulated sugar
- 2 1/2 tsp baking powder
- 1/2 tsp baking soda
- 1/2 tsp salt
- 1 1/2 cups mini semi sweet chocolate chips, divided
- 2 large eggs, room temp
- 1/4 cup (65g) sour cream*, room temp
- 2 tsp vanilla extract
- 2 tbsp pure maple syrup
- 2 tbsp vegetable oil
- 1/2 cup (110g) unsalted Danish Creamery European Style Butter, melted
- 1 cup (255ml) buttermilk*, room temp
- 2–3 tbsp coarse or raw sugar, for sprinkling
Instructions
- In a large mixing bowl, whisk together the flour, sugar, baking powder, baking soda, salt, and 1 cup of mini chocolate chips.
- In a separate bowl, whisk together the eggs and sour cream until completely smooth.
- Then mix in the vanilla, maple syrup, and oil followed by the butter and then buttermilk.
- Pour the wet ingredients into the bowl of dry ingredients and gently whisk to combine. Stop right when the batter is fully combined – careful not to over mix.
- Cover the bowl with plastic wrap and let it rest at room temperature for 1 hour. This will give the leaveners a head start, so each muffin bakes with a tall muffin top in the oven. If you’re in a rush, you can bake the batter right away. They just won’t be as domed on top.
- After 1 hour, preheat the oven to 425F and line a muffin (or cupcake) tin with 12 paper liners.
- Using an ice cream scoop, gently run the scoop through the bowl of batter. You’ll notice the batter is very fluffy, so be careful not to disrupt this as you scoop. Just run the scoop through the bowl and pull out the batter. Don’t mix it around or bother it too much.
- Over fill each liner just a smidge (see pictures in post for reference). You may have about 1 scoop of batter leftover which is to be expected.
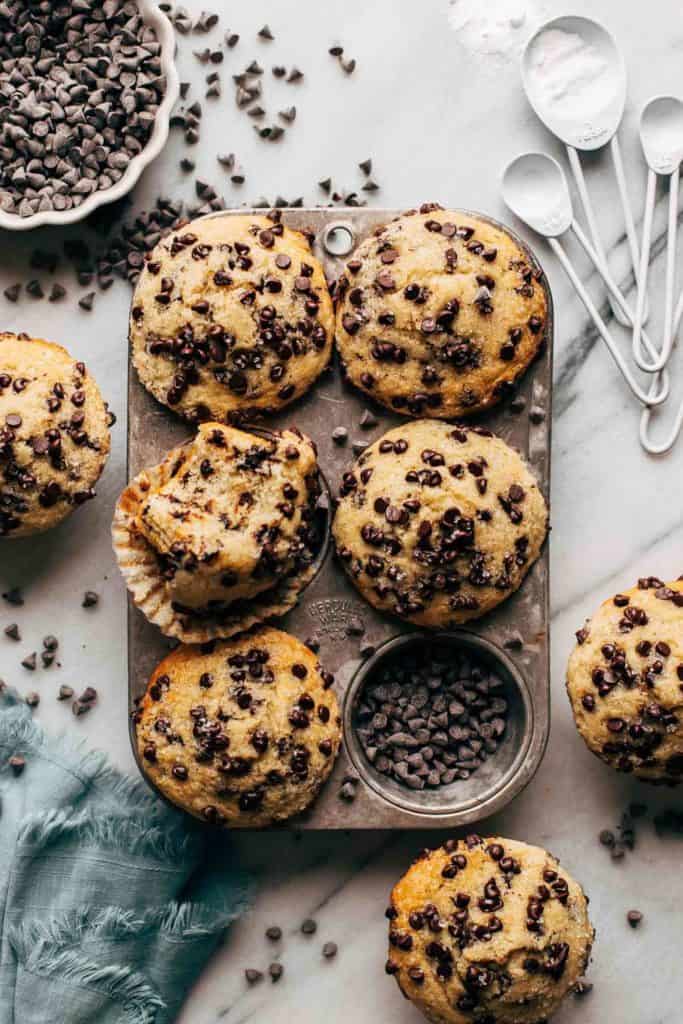
- Top each muffin with a sprinkle of coarse sugar and a pile of mini chocolate chips. Really lay on those chocolate chips as they’ll disperse and spread as the muffins grow (see picture in post for reference).
- Bake at 425F for 8 minutes. Then, with the oven door still closed, reduce the oven temperature to 350F and bake for another 8-10 minutes. You do not need to wait for the temperature to reach 350F to continue baking, simply just adjust the temperature down to 350F and set a timer for 8-10 minutes.
- Quickly test a muffin with a toothpick to see if they’re ready, but try not to keep the oven door open for too long as you do not want the hot air to escape.
- Remove the muffins and let them cool for 10 minutes. Then, carefully transfer each muffin to a cooling rack. The muffins may stick to the pan around the bottom edges, so just use a knife to pop them loose if needed.
- Let the muffins cool for another 10-15 minutes. They’re best served warm so enjoy!
Notes
FLOUR – For accuracy, I recommend weighing the flour if you can. Otherwise, spoon and level the flour when measuring. Do so by lightly spooning the flour into the measuring cup and leveling it off with a knife. Do not shake it or pack it down into the cup, otherwise you’ll end up with dry and dense muffins.
BUTTERMILK – You can also make your own buttermilk from whole milk and vinegar or lemon juice. Measure out 1 cup of milk, then omit one tablespoon. Then stir in 1 tablespoon of vinegar or lemon juice. Let it sit for 10 minutes to curdle before use.
SOUR CREAM – You can also use full fat Greek yogurt
STORAGE – After the muffins have cooled completely, keep in an air tight container at room temperature for about 2 days. To keep for longer, store in the refrigerator where they will keep for up to 5 days.
- Prep Time: 1 hour 20 minutes
- Cook Time: 16 minutes
- Category: Dessert
- Method: Baking
- Cuisine: American
Join Our Community

Meet Jenna
I’m the creator, baker, and photographer behind Butternut Bakery. Here I share desserts for every diet because I believe everyone should have a chance to indulge!


This is the best recipe ever! I love the little suger taste! #Lola Lux
LOL slay queen they are so moist.
Hi again. Any idea what size scoop we should use? It would be helpful so they are all uniform in size.
I just used a cookie scoop, as long as you fill to the top of your muffin tins you should be good. I also used coconut oil not vegetable oil, and turned out fantastic.
Oh thanks. I might try to the coconut oil next time. I like to get as uniform size as possible. I have so many different sized scoops, so if I can know the exact size scoop, rather then trying to get the same amount of batter in each pan with “not the right size scoop”.. that’s my goal. :0
These were absolutely moist and delicious muffins. Amazing recipe!
These are flippin’ DELICIOUS! Amazing crumb! I would add a touch more salt next time. Otherwise perfection. YUMMMMMY!
This muffin recipe – from the texture to the flavor – is consistently perfect. Upon making them multiple times, I do substitute the butter with unrefined coconut oil and it works great. Thank you so much for developing these and sharing!
Unbelievable texture and taste. Fantastic recipe!
So i tried making them in a muffin tin and they kept coming out under cooked 🙁 , but when i made them in a cupcake tin they came out perfect. I with i could’ve made them muffin sized though cause that would’ve been amazing.
The recipe name does not lie, these are by far THE BEST muffin recipe I have ever tried!! Someone else made them and sent me a picture, and I couldn’t resist so asked for the recipe and made them that very night!!
I was in a rush so didn’t prove them, but they still turned out wonderfully and rose well! Fairly quick to make and super easy!
Nice light and airy texture. Will definitely be making them again.
I find all of her recipes really good! Easy to follow and taste great!