Full Moon Brownie Cupcakes
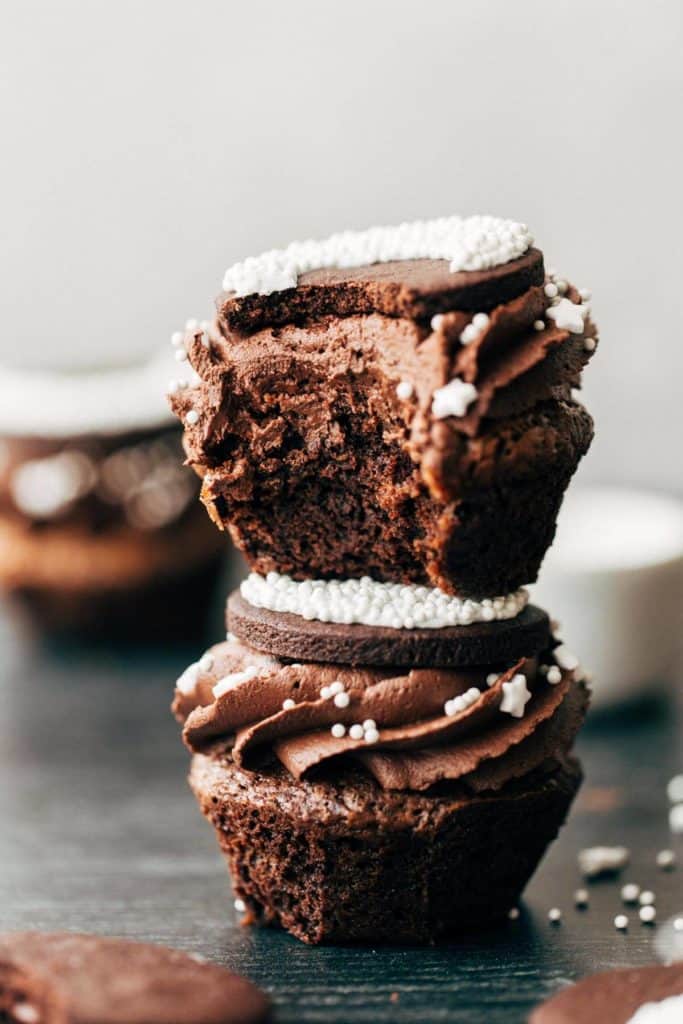
These brownie cupcakes are moist, rich, chocolatey, and can be dressed up or down for any occasion! Each cupcake is topped with dark chocolate buttercream and homemade chocolate shortbread cookies, decorated for each phase of the moon cycle. They’re the perfect treat for Halloween and are so easy to decorate.
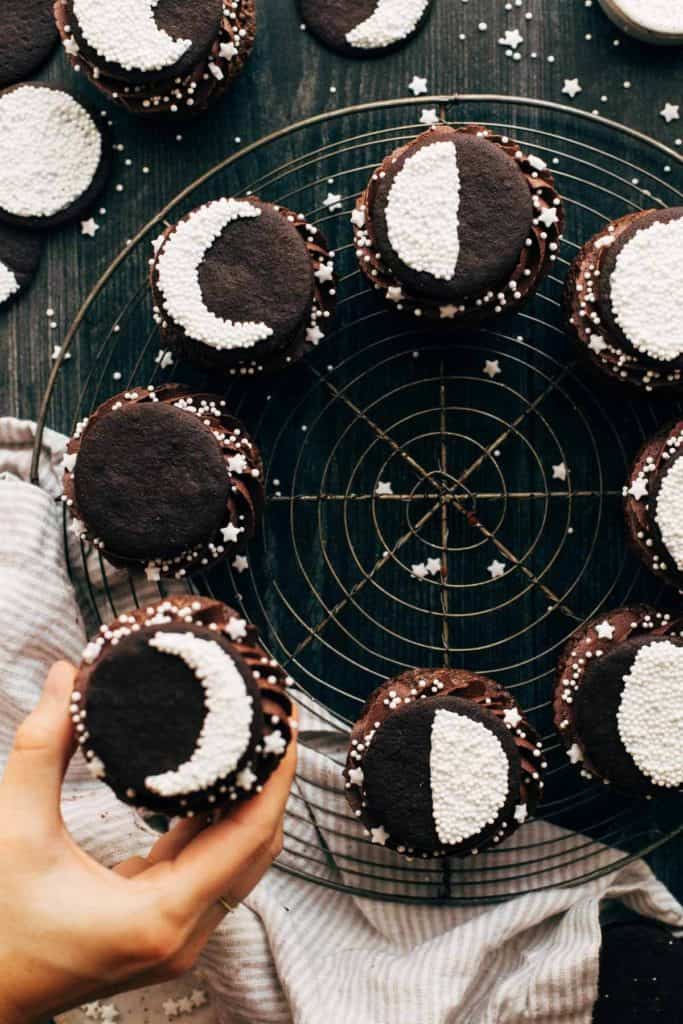
How to make homemade chocolate shortbread cookies
The very first step in this recipe is to make the shortbread cookie dough. It’s very simple and requires minimal ingredients, but tastes just like an Oreo cookie!
You start by combine the butter, sugar, and salt until it’s light and fluffy. It’s best to use an electric mixer here. Then, mix in one egg.
The tricky part is when it comes to the dry ingredients. You don’t want to use too much or too little, otherwise the cookies will melt in the oven or turn out tough and dry.
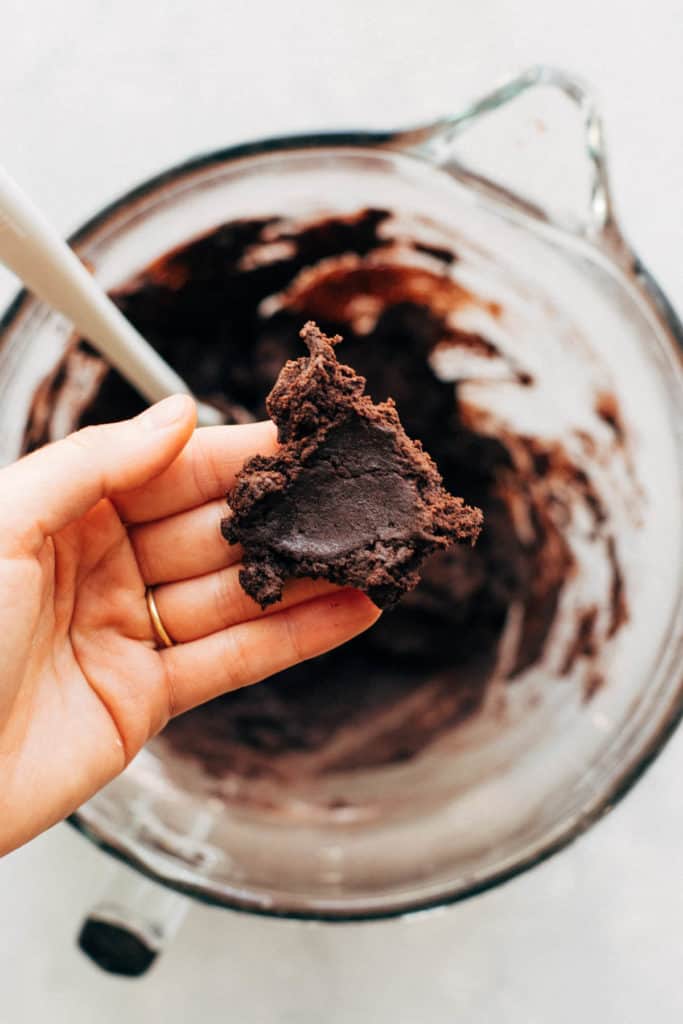
The key is to know exactly what to look for. After adding in the flour and cocoa powder, mix until the dough comes together. It will seem like it’s way too much flour, as the dough will look somewhat dry. But just keep mixing and it should come together.
To know if it’s ready, take a chunk and press it between your fingers. If it holds together and doesn’t stick to you, then it’s ready. To ensure this goes as planned, follow this one rule:
- Measuring – When measuring both the flour and cocoa powder, never scoop directly into the bag or container. Always spoon it into your measuring cup and then level it off. Measuring these two ingredients any other way can compact it down into your measuring cup, leaving you with way too much. This is the difference between soft and moldable dough and dry and crumbly dough.
The dough is then pressed into a disk, wrapped, and chilled for about 30 minutes. Chilling makes it easier to roll the dough out later.
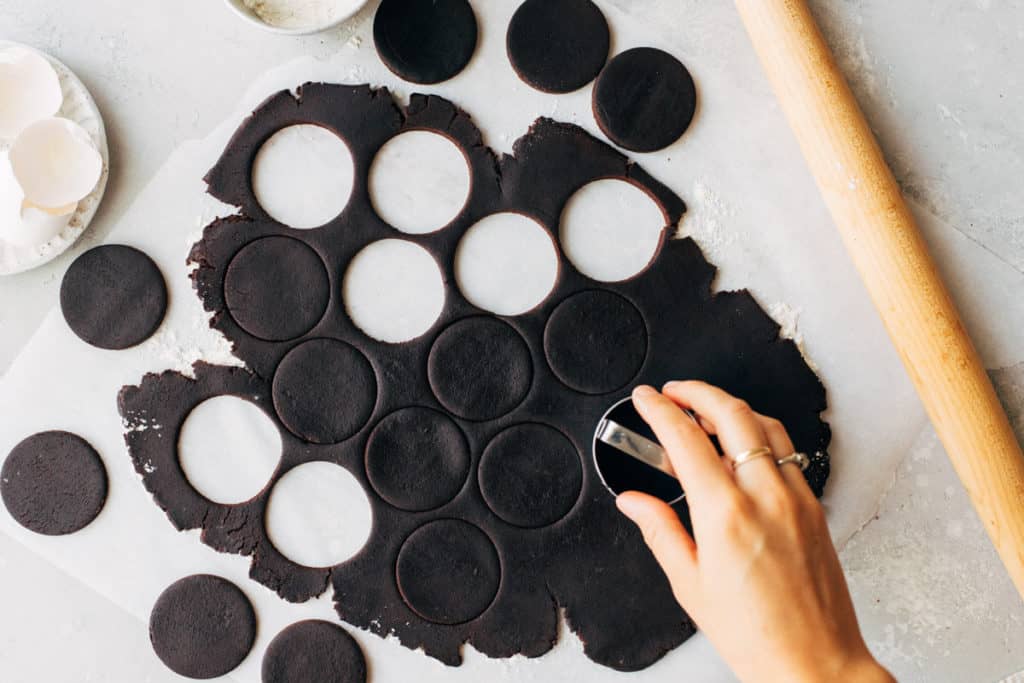
Once chilled, roll the dough out onto a lightly floured surface. If the dough is sticking to your rolling pin, use a veeerrrry tiny amount of flour and lightly dust it on top of the dough. If you use too much, the flour will show up on the cookies as they bake.
Roll to about 1/8 of an inch thick and use a 2 inch round cookie cutter to stamp out your cookies. Discard the excess, as it’s now too saturated in flour, and place the cookies onto a large cookie sheet lined with parchment paper. If they’re sticking, use a small offset spatula to wiggle them loose.
These then chill in the refrigerator while you prep the cupcake batter.
What’s the difference between chocolate cupcakes and brownie cupcakes?
The best way to explain the difference is that a chocolate cupcake is light and fluffy while a brownie cupcake hits right between a dense and fudgy brownie and a moist and fluffy chocolate cake. You get the best of both textures in one delicious cupcake.
The batter is also made very similarly to a regular brownie batter with a few exceptions.
- Brownie cupcake batter is baked with leaveners like baking powder or baking soda in order to mimic a more cake-like texture. Brownies are typically made without in order to achieve a really dense texture.
- A bit more flour is added to brownie cupcake batter vs regular brownie batter. This goes back to that dense and fudgy consistency brownies have, as they have more wet ingredients than dry ingredients. For brownie cupcakes, they’re a bit lighter than brownies, so more flour is needed to absorb the wet ingredients.
Do I have to use dark cocoa powder?
Dark cocoa powder is used in this recipe to achieve a really deep color and flavor. I specifically used Hershey’s Special Dark Cocoa Powder which can be found at just about any conventional grocery store. If you can’t find it, you can also use regular cocoa powder or dutch processed cocoa powder.
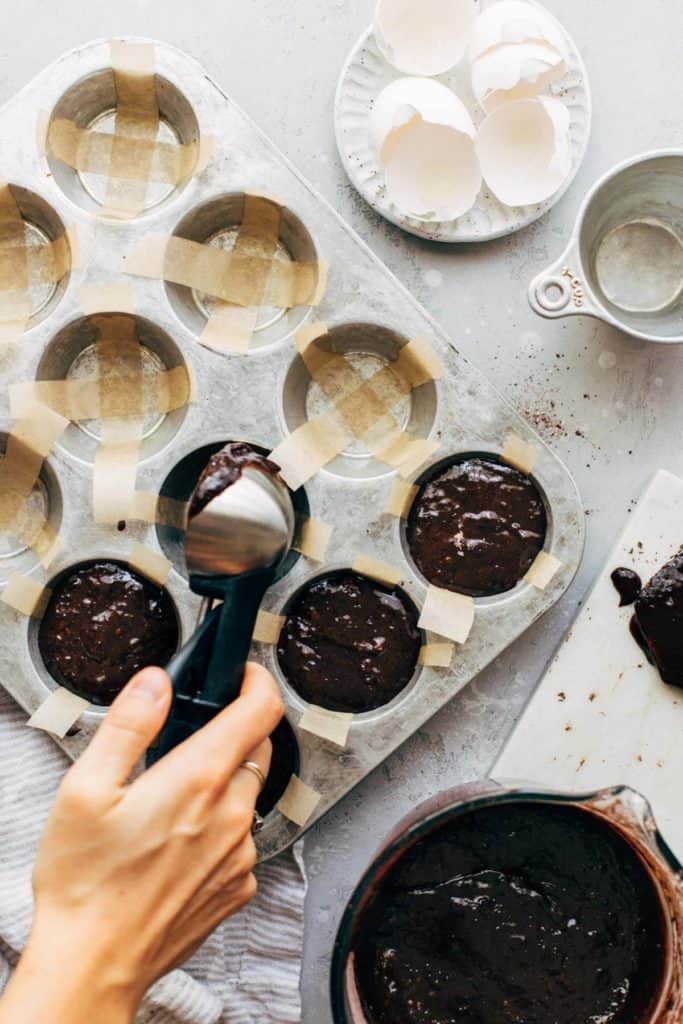
How to prevent the brownies from sticking to the pan
For best results, use a nonstick cupcake tin. But nonstick or not, still follow all of these instructions to ensure the brownies pop right out:
- Coat the pan with nonstick spray, make sure to get it into every single cup.
- Place tiny strips of parchment paper in a criss cross formation in each cup. Allowing the strips to hang over the edges makes it much easier to lift the brownies out once they’ve baked.
- Resist the urge to use cupcake liners. I found that the brownies stuck terribly to cupcake liners. The only ones that could be safe to use are fully parchment paper liners.
- If you pop out the first one and it looks like it’s sticking a bit, run a small knife around the edges of each brownie before releasing the rest.
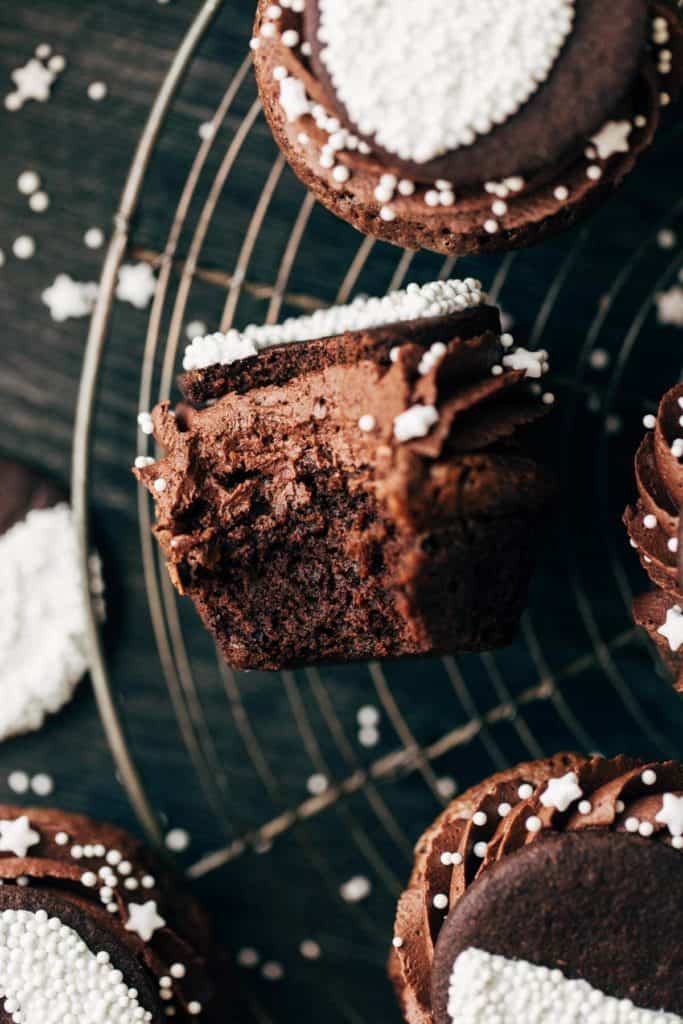
Tips for decorating
If you choose to do the phases of the moon as shown here, here are a few things to keep in mind:
- The icing must be the right consistency, otherwise things can get very messy very fast. To know what to look for, the icing should be a smidge thicker than glue but thinner than paste. It should be easy to pipe but not run all over the place.
- Work with one cookie at a time, as you want the icing to be wet when you dunk it in sprinkles. Otherwise, the sprinkles won’t stick.
- When you lift the cookie out of the sprinkles, use a knife to gently nudge in some of the sprinkles around the edges to get a cleaner outline of the moon shape.
- Work somewhat fast, as in don’t let the icing sit out for an hour before decorating. The icing will start to firm up the longer it sits, so just keep that in mind as you decorate.
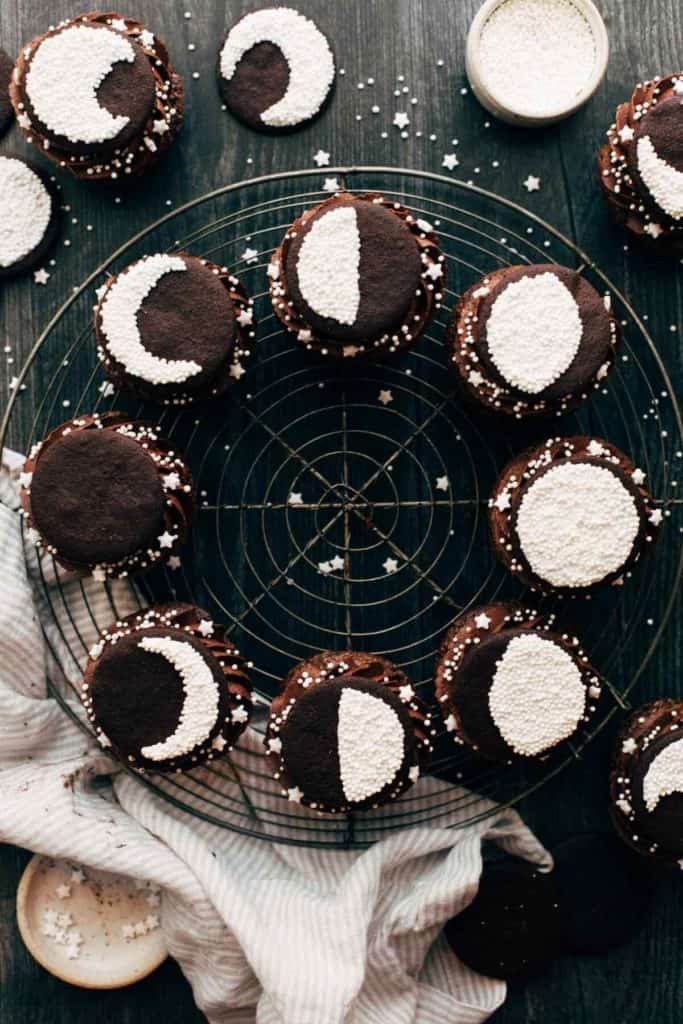
How to store the cupcakes
Place the cupcakes in an air tight container to store in the refrigerator, then bring up to room temperature when you’re ready to eat. Otherwise, the cupcakes will last in the refrigerator for up to 5 days.
Can I make these gluten free?
I haven’t tested it, but if you need to have a gluten free option, replace the flour with Bob’s Red Mill 1-to-1 gluten free baking flour and use gluten free chocolate sandwich cookies for the topping. Simply split them apart, scrape off the filling, and use the flat underside to decorate.
For more halloween dessert ideas, check out my:
Make sure to tag me @butternutbakery on Instagram and comment below if you make these Brownie Cupcakes. To pin this recipe and save it for later, you can use the button on the recipe card or on any of the photos above. Happy baking!
Print
Full Moon Brownie Cupcakes
- Total Time: 1 hour 25 minutes
- Yield: 12 cupcakes
Description
Moist and fudgy brownie cupcakes topped with chocolate buttercream and homemade chocolate shortbread cookies
Ingredients
Chocolate Cookies**
- 1/2 cup (110g) unsalted butter, room temp
- 3/4 cup (150g) granulated sugar
- 1/2 tsp salt
- 1 large egg
- 1/2 cup (50g) dark cocoa powder**
- 1 1/2 – 1 3/4 cups (190g – 220g) all purpose flour
Brownie Cupcakes
- 4 oz bittersweet chocolate, chopped
- 1/2 cup (110g) unsalted butter
- 1 cup (200g) granulated sugar
- 1 tsp vanilla extract
- 3 large eggs
- 1/2 cup (65g) all purpose flour
- 1/4 cup (20g) dark cocoa powder
- 1/2 tsp baking powder
- 1/4 tsp salt
Chocolate Buttercream
- 1 cup (220g) unsalted butter, room temp
- 4 cups (480g) powdered sugar
- 1/2 cup (50g) dark cocoa powder
- 3–4 tbsp milk
Decoration
- 2 cups (240g) powdered sugar
- 2 tbsp milk
- White nonpareil sprinkles
- White star sprinkles (optiona)**
Instructions
Chocolate Cookies
- Cream together the butter, sugar, and salt using a hand or stand mixer with the paddle attachment. The mix in the egg.
- Once smooth, add in the cocoa powder and 1 1/2 cups of flour. Mix until it forms a dough that’s moldable but not sticky, and it will look like the dough is too dry and won’t come together but just keep mixing until all the flour is absorbed. Take a chunk and press it between your fingers. If it holds together and doesn’t stick, it’s ready. If it’s still too wet, add in another 1/4 cup of flour.
- Lay out a sheet of plastic wrap and add the dough to the center. Press it into a disk about 1 inch thick and wrap it up tightly. Chill for about 30 minutes.
- After 30 minutes, roll the dough out onto a lightly floured surface to roughly 1/8 of an inch thick. Using a 2 inch round cookie cutter, stamp out the cookies and lay them on a large baking sheet lined with parchment paper. You should get about 18 cookies. Chill the cookies in the refrigerator while you make the cupcake batter.
Brownie Cupcakes
- Preheat the oven to 350F and coat a cupcake tin with nonstick spray. Then cut tiny strips of parchment paper and press them into each cup in a criss cross formation (see picture in post for reference). This will prevent the brownies from sticking and make it much easier to release them from the pan later on.
- In a large heat-safe bowl, combine the chocolate and butter. Heat in the microwave in 30 second intervals until smooth and melted (it shouldn’t take more than 60 seconds total).
- Allow the mixture to cool as you whisk together the flour, cocoa powder, baking powder, and salt in a separate bowl off to the side.
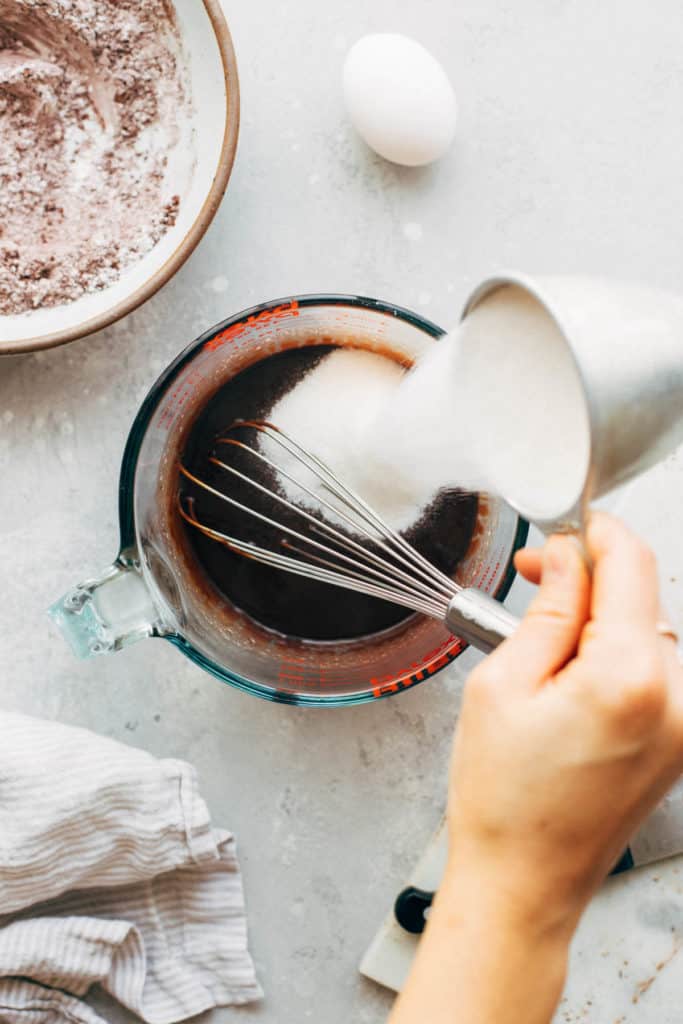
- Returning to the butter and chocolate, whisk in the sugar, vanilla, and eggs one at a time.
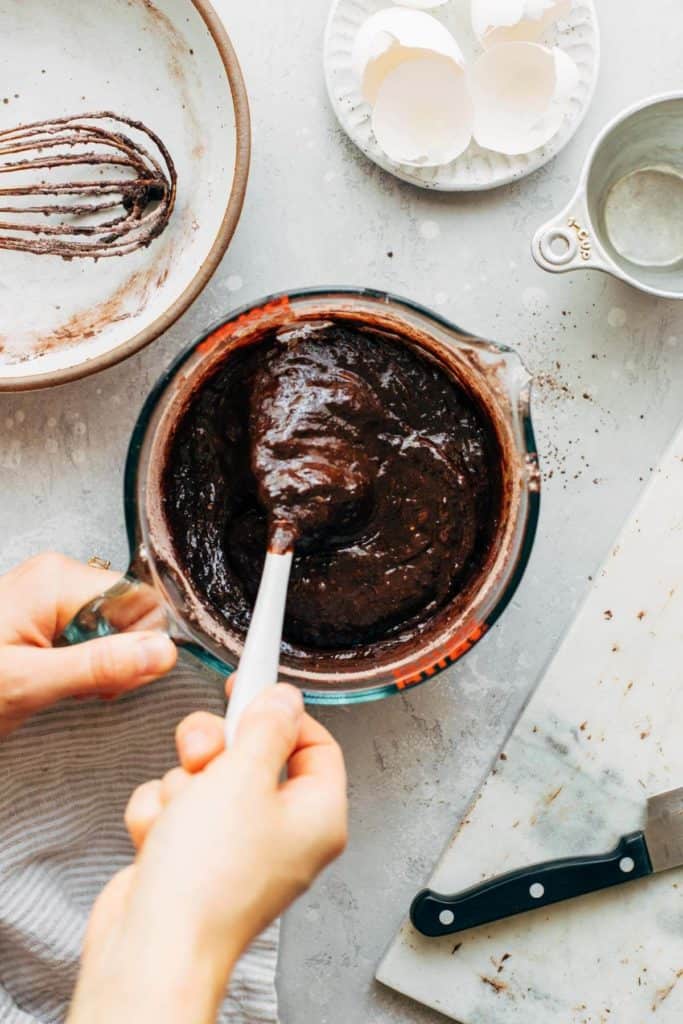
- Once smooth, fold in the dry ingredients using a rubber spatula. Don’t over mix.
- Scoop the batter into the cupcake tin, filling each about half full (using up all the batter). I like to use a large cookie scoop to make this process easier.
- Take the cookies out of the fridge and bake both the cupcakes and cookies at the same time (if your oven isn’t large enough, you can bake the two separately starting with the cupcakes). The cupcakes will bake for 20-25 minutes, and the cookies for about 15 minutes. So pull the cookies, then continue to bake the cupcakes.
- The cookies should be dull on the surface and the cupcakes will be puffed in the center. Allow the two to cool completely before assembling.
Chocolate Buttercream
- In a large mixing both using a hand or stand mixer with the whisk attachment, mix the butter on medium-high speed until light and fluffy. Then mix in the powdered sugar one cup at a time, followed by the cocoa powder.
- Mix in the milk one tablespoon at a time to loosen up the buttercream, then transfer to a piping bag fitted with a large star tip and set aside.
Decoration
- Whisk together the powdered sugar and milk until it forms a glue-like consistency. It should be slightly thicker than glue, but not as thick as a paste. Add a spoonful of powdered sugar if it’s too thin or 1/2 tbsp of milk if it’s too thick. Keep adding bit by bit until you reach the right consistency.
- Transfer the icing to a piping bag fitted with a small round tip, or a ziplock bag with a very tiny corner snipped off. Then fill a small but shallow dish with the nonpareil sprinkles.
- Pipe the icing into the cooled shortbread cookies in each phase of the moon. First pipe the outline of the shape, then partially fill it in. Use a spoon or small knife to spread it into an even layer.
- Place the cookie face down into the bowl of sprinkles to completely cover the icing. Apply pressure if needed. Make sure to work on one cookie at a time, so pipe, dunk, and move on to the next. It’s important the icing is still wet so the sprinkles can stick.
Assemble
- Once the brownies are cooled, remove from the pan (if they stick at all, run a knife around the edges before releasing) and pipe on the buttercream. Press the moon cookie on top, right in the center. Then, add your nonpareil and star sprinkles around the edges. Enjoy!
Notes
CHOCOLATE COOKIES – You can make these from scratch or just use Oreos. Split the cookies apart, scrape off the cream filling, and using the flat underside of the cookie to decorate.
DARK COCOA POWDER – I use Hershey’s Special Dark Cocoa Powder. If you can’t find this, you can also use regular cocoa powder or even dutch processed cocoa powder. Just expect the brownies to not be as dark as shown in the photos here.
STAR SPRINKLES – It’s tedious, but my favorite star sprinkles are by Wilton but they only come in rainbow colors. So I pick all of the white stars out of the bottle of rainbow star sprinkles and use those.
- Prep Time: 1 hour
- Cook Time: 25 minutes
Join Our Community

Meet Jenna
I’m the creator, baker, and photographer behind Butternut Bakery. Here I share desserts for every diet because I believe everyone should have a chance to indulge!

I love these so much!. What a great idea 🙂
OMG! these are the cutest! I’m definitely going to make these for Halloween 🙂