Caramelized White Chocolate Brownie Cookies
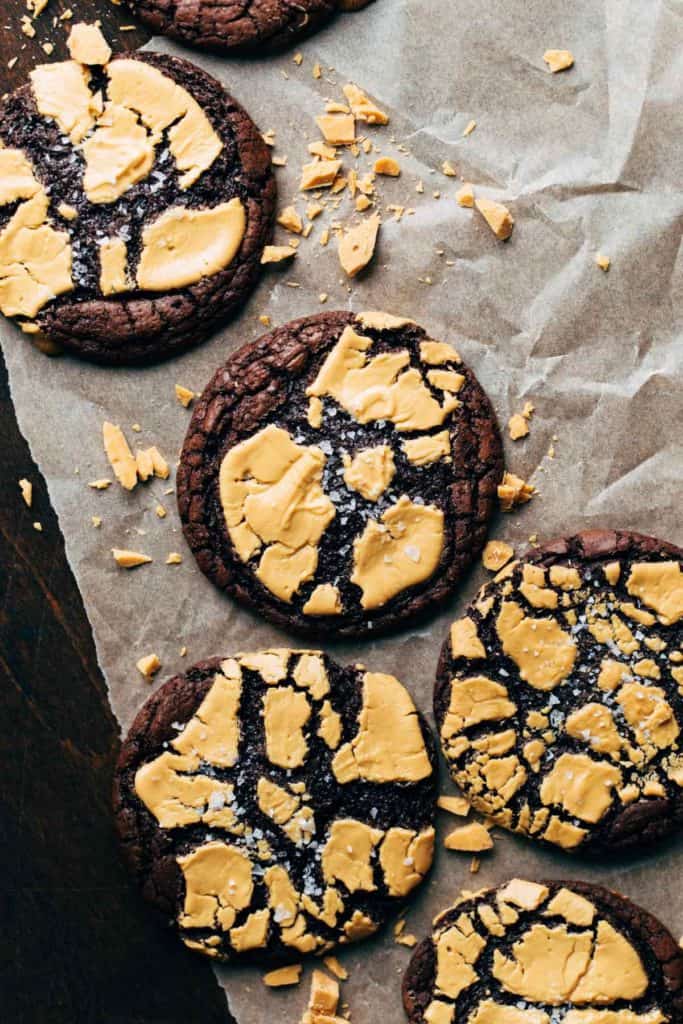
Why have regular brownie cookies when you can have brownie cookies with caramelized white chocolate? The more chocolate, the better! The cookie has a crackled top and fudgy inside, all baked with a puddle of caramelized white chocolate right on top. The nutty and creamy caramelized white chocolate pairs beautifully with these rich dark chocolate cookies, making them a totally unique chocolate cookie with a flavor you won’t forget.
What is caramelized white chocolate?
The best way I can describe caramelized white chocolate is to compare it to brown butter. You take a solid product and carefully caramelize or “toast” it into a liquid form. But instead of toasting the milk solids in butter, you’re roasting the cocoa butter in the white chocolate. This is done through a process of baking white chocolate at a low temperature. It’s baked in 10 minute intervals and smoothed out in between.
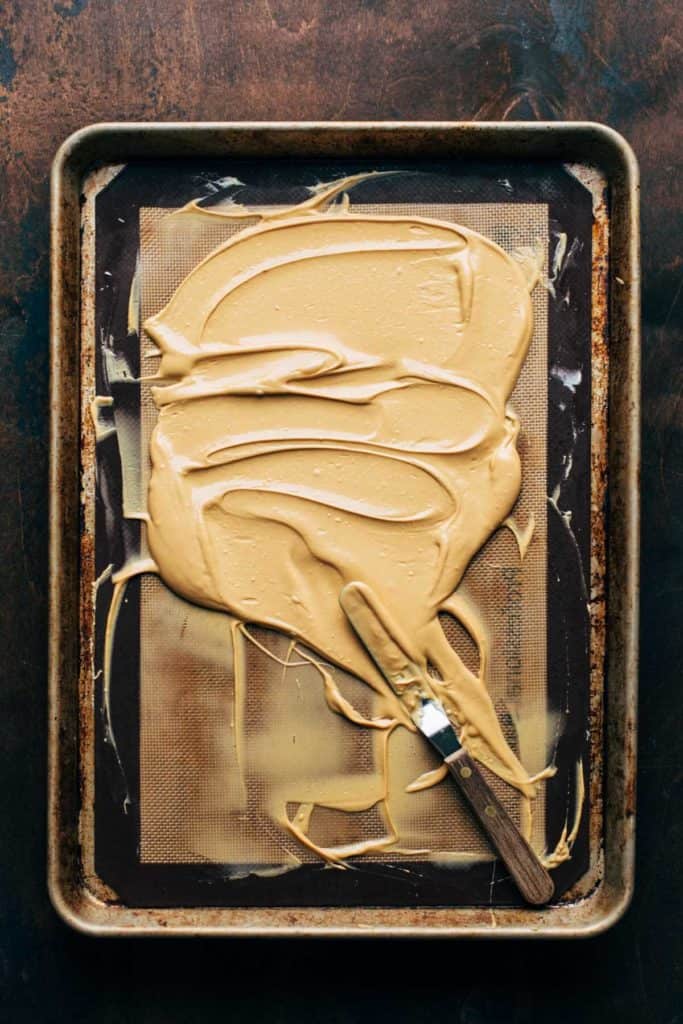
After every 10 minutes, you’ll notice the chocolate start to darken and caramelize. When it’s done, you’ll understand why caramelized white chocolate is often called “liquid gold”. It’s silky, creamy, and has a rich golden color. This is also why it’s important to use good quality white chocolate as it yields a smooth and creamy consistency, unlike basic white chocolate that doesn’t contain enough cocoa butter. The cocoa butter is what will give you a silky caramelized white chocolate.
As far as flavor, caramelizing brings out a nutty flavor that is very different from your typical white chocolate. As strange as it sounds, it almost tastes like a graham cracker! It has a much deeper flavor that’s nearly indistinguishable from the white chocolate it started out as.
How to make caramelized white chocolate
The process of making caramelized white chocolate is a bit time consuming, but so satisfying and worth it. The reason why it’s tedious is because the white chocolate is roasted low and slow, needing constant attention throughout the entire process. Doing so prevents the white chocolate from burning.
Start by using good quality white chocolate. You can get as fancy as you like, using Valrhona or Callebaut chocolate on the higher end or Ghirardelli on the more accessible side. I find that Ghirardelli white chocolate baking squares work so well and they can be found at most grocery stores. I do not recommend using chocolate chips as those are often coated help hold their shape. Chocolate bars will give you a much creamier consistency and will not take as long to caramelize as chocolate chips.
To caramelize the chocolate, you will need a large baking sheet, a silicone baking mat, and an offset spatula. I highly recommend the silicone baking mat because it stays in place while you’re scraping the white chocolate off. You can use parchment paper but it might be a little tough to spread around the chocolate.
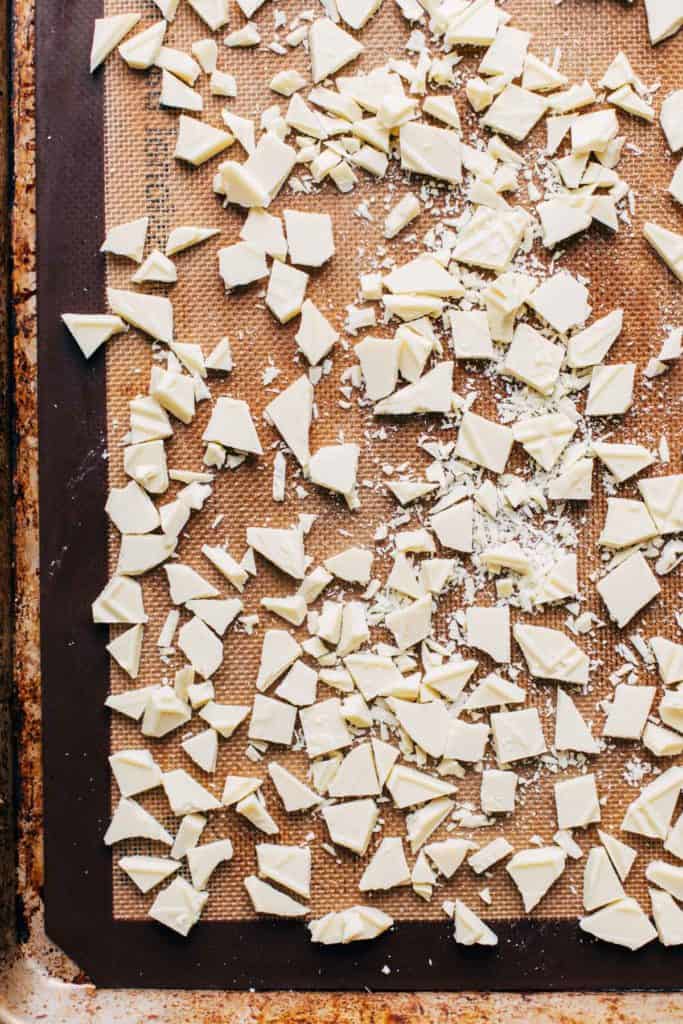
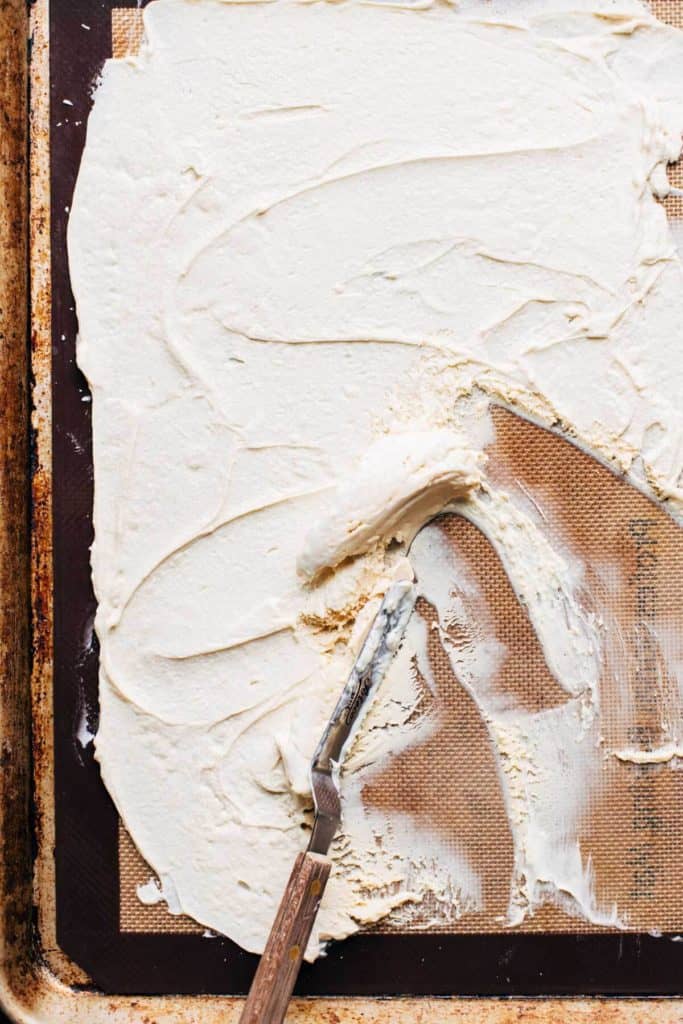
Start by evenly distributing the chocolate on your mat, ensuring it’s been chopped into even pieces. All you have to do is bake the chocolate at a low oven temperature in 10 minute intervals. Every 10 minutes, you take out the chocolate, scrape it into a pile in the center of your mate, and spread it out again. Keep doing this 5-7 times until you get a caramel color and smooth consistency. It’s that easy!
Can the caramelized white chocolate be made ahead of time?
Yes, you can go through the entire process and then allow the chocolate to solidify in the refrigerator. Then when you’re ready to use it on these cookies, warm it back up on the stove top. Place a heat proof bowl over top a pot of shallow simmering water. Stir to melt down the chocolate.
Fudgy Brownie Cookies
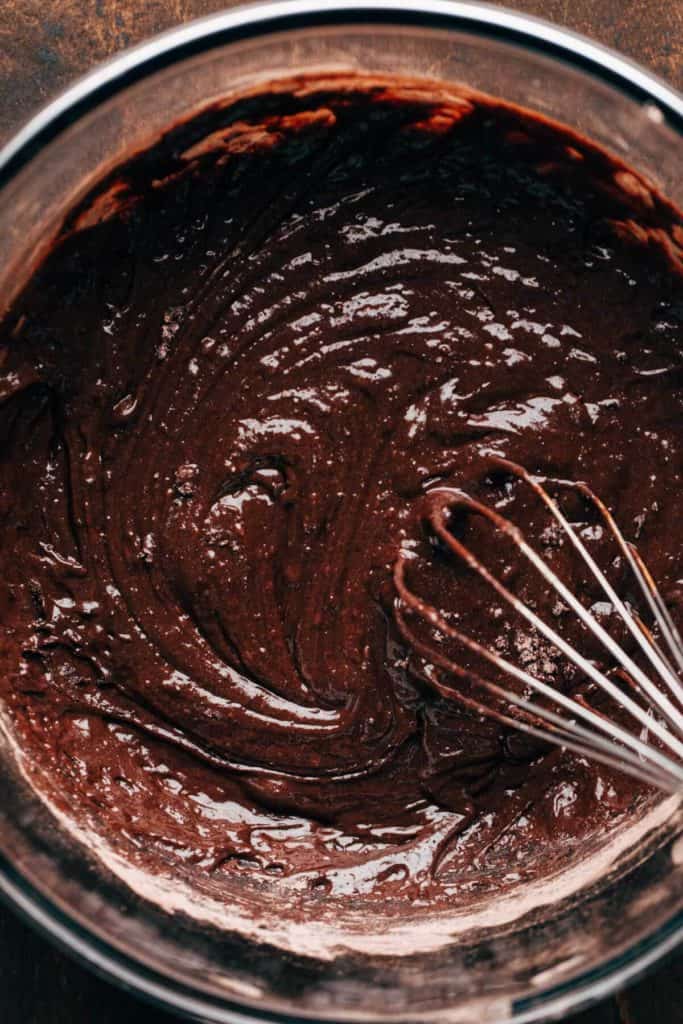
The caramelized white chocolate may the best star of the show, but it’s nothing without a soft and fudgy brownie base. These brownie cookies have all the qualities of a delicious brownie – fudgy inside, crackled and glossy outside, and a tender chew. Here’s what you need to know to ensure yours turn out perfect:
- Properly measure the flour – I say this in every post, and for good reason. It’s the number one reason why most recipes fail, especially for cookies. If there’s too much flour, the cookies will not spread properly. If you can, measure the flour with a food scale. Otherwise, to ensure you use the exact amount needed, gently spoon the flour into your measuring cup and level if off with a flat edge. If you scoop directly into the flour container, it packs it down into the cup which could leave you with 1/4 cup or more of added flour.
- Chocolate – Just like the white chocolate, go for good quality chocolate INSIDE the cookie as well. Again, I recommend Ghirardelli baking squares as it’s the best quality you can find at your local grocery store. Good chocolate will lend a much more flavorful and rich cookie.
- Cocoa Powder – This recipe calls for dutch processed cocoa powder for two reasons. A – it gives these cookies a rich color and flavor and B – it’s alkalized compared to regular cocoa powder. This plays with the acidity in the chemical leaveners used in these cookies, which can make or break these cookies. Using dutch processed cocoa powder is key to getting the right spread and crackle in your brownie cookies.
- Chill the Dough – This step is ESSENTIAL so don’t skip it! Once combined, the dough is chilled for 1 hour. This allows the chocolate to thicken the dough, making it easier to scoop and slower to spread in the oven.
How to bake brownie cookies with caramelized white chocolate
What makes this recipe so unique is how the caramelized white chocolate is incorporated into these cookies. I originally shared this recipe YEARS ago where I allowed the caramelized white chocolate to solidify so I could them chop it up and use it as chocolate chips. I wasn’t crazy about the texture of the white chocolate once it hardened, so I wanted to adjust this recipe to make it even better. That’s when I saw Cupcake Jemma share a recipe where she baked the melted caramelized white chocolate right on top of her cookies so I had to try it for myself!
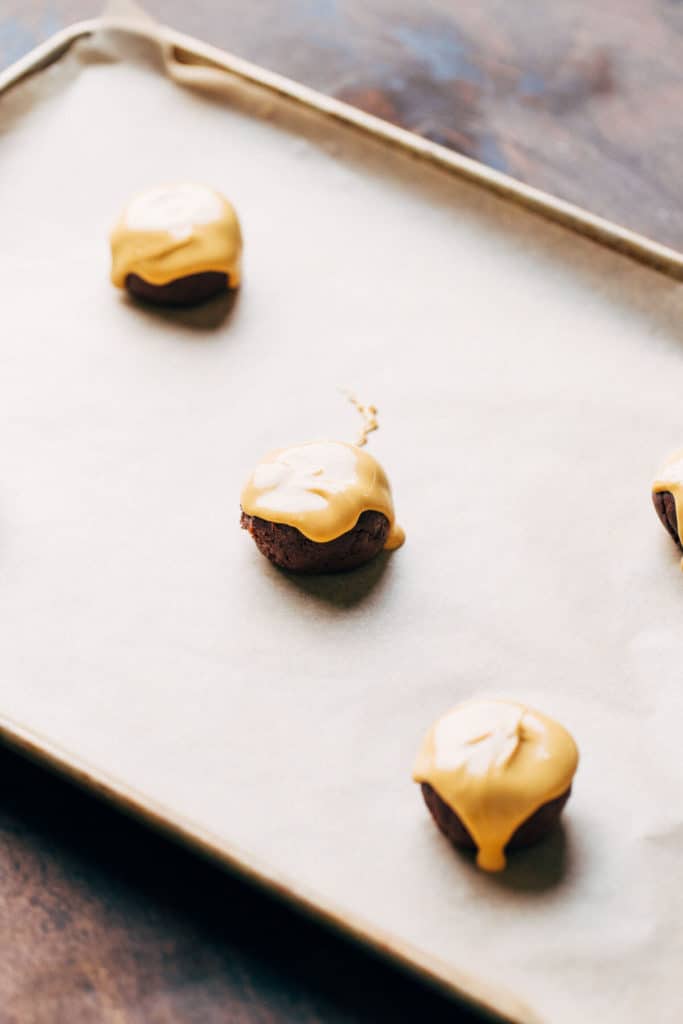
Once the dough is chilled, scoop it out into balls using a large cookie scoop (about 3 tablespoons worth). Then, roll into a ball and slightly flatten the top. This supplies a ledge for the white chocolate to rest. Taking the melty caramelized white chocolate, spoon it on top of each cookie and allow it to drip down the sides, nearly coating the entire surface of the dough ball.
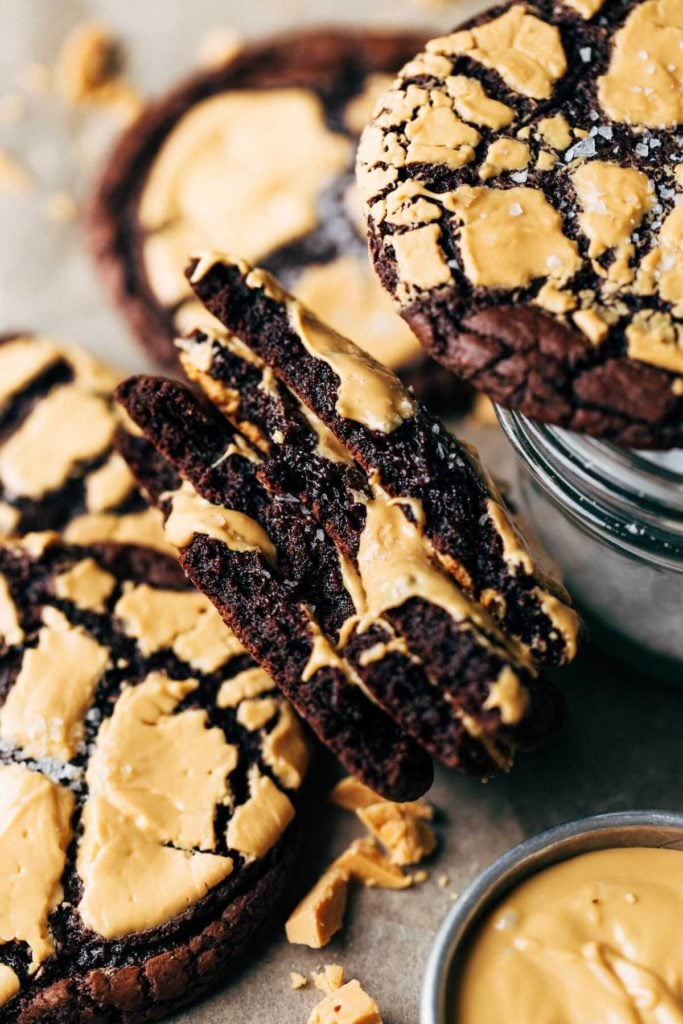
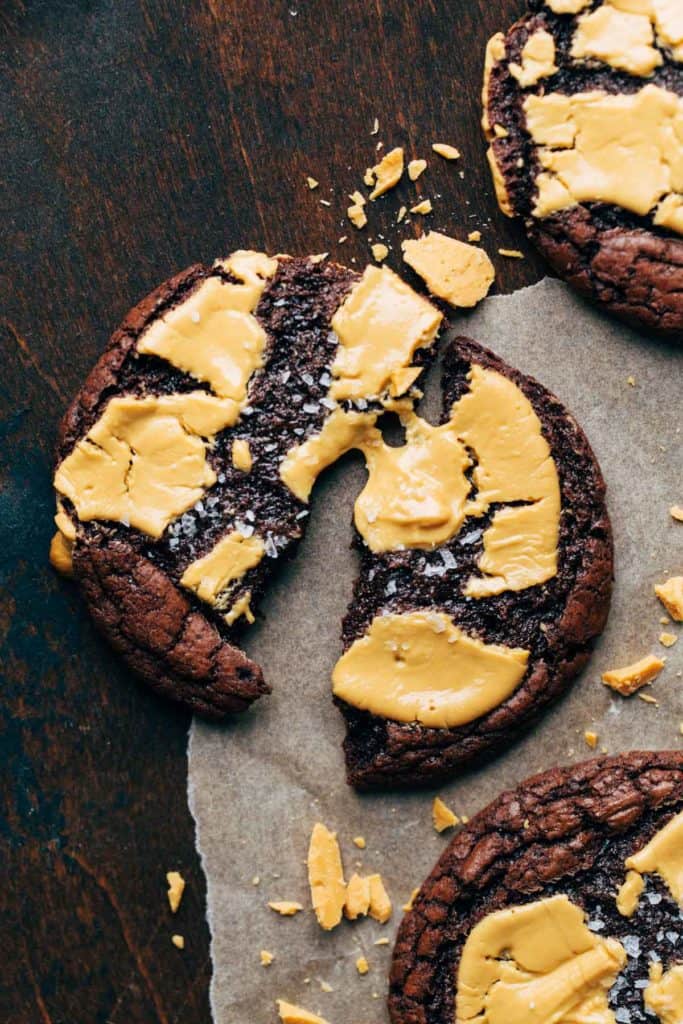
When baking, the brownie cookies will spread and flatten, taking the caramelized white chocolate with it. As this happens, the white chocolate will crack with the surface of the cookie, giving each brownie cookie an abstract white chocolate design on top.
To help balance out the sweetness of the white chocolate, sprinkle a bit of sea salt on top of the warm cookies. This will allow the chocolate of the cookie and the chocolate of the topping to shine through without overpowering your taste buds!
Can you freeze the dough?
These cookies are best made fresh. I tested to see if the dough could rest overnight or if you could freeze the dough and bake later, but I found the brownie cookies didn’t crackle on the top like they would when only chilled for an hour. Your best option is to make all of the cookies and freeze the baked cookies. Then just thaw and heat one back up when you have a craving!
For more cookie recipes, check out my:
- BEST EVER Chocolate Chip Cookies
- Lemon Bar Butter Cookies
- Butter Pecan Chocolate Chip Cookies
- Brown Butter Oatmeal Cookies
- Pan-Banging Peanut Butter Cookies
Make sure to tag me @butternutbakery on Instagram and leave a review below if you make these these Caramelized White Chocolate Brownie Cookies. To pin this recipe and save it for later, you can use the button on the recipe card, the buttons above or below this post, or on any of the photos above. Happy baking!
Print
Caramelized White Chocolate Brownie Cookies
- Total Time: 2 hours
- Yield: 15 cookies
Description
These brownie cookies are baked with a layer of caramelized white chocolate. They have that ooey gooey brownie center with the nutty caramelized white chocolate flavor.
Ingredients
- 6 tbsp unsalted butter
- 4 oz semisweet chocolate, chopped
- 4 oz bittersweet chocolate, chopped
- 2 large eggs, room temp
- 1/2 cup (100g) granulated sugar
- 1/4 cup (50g) light brown sugar, packed
- 2 tsp vanilla extract
- 2/3 cup (85g) all purpose flour
- 3 tbsp dutch processed cocoa powder
- 1 tsp baking powder
- 1/4 tsp baking soda
- 1/2 tsp salt
- 8 oz good quality white chocolate baking squares, chopped*
- Flaky sea salt for sprinkling on top
Instructions
- Start by making the brownie cookie dough. In a heat safe bowl, add the butter and chocolate. Heat in the microwave in 30 second intervals until fully melted. Allow it to cool down a bit before use.
- In a medium bowl, whisk together the flour, cocoa powder, baking powder, baking soda, and salt. Set aside.
- In a large bowl, whisk together the sugars and eggs. Vigorously whisk for 2 minutes until you reach a pale and frothy consistency. Then mix in the vanilla.
- Slowly pour in the melted chocolate as you whisk to combine.
- Once smooth, add in the dry ingredients and whisk to combine. If it gets too thick, switch to a rubber spatula. It should be the consistency of thick pudding.
- Cover the bowl and let it chill in the refrigerator for 1 hour.
- While it chills, make the caramelized white chocolate.
- Preheat the oven to 250F and place a silicone baking mat on a large baking sheet. Evenly distribute the chopped white chocolate on the mat and bake for 10 minutes.
- Once the 10 minutes is up, take the pan out and spread the chocolate evenly with an offset spatula.
- Bake again for 10 minutes then scrape up the entirety of the pan to spread it out again. After the second or third time, the chocolate will begin to clump and look like it’s totally ruined but don’t worry, just work through it!
- Continue this process 5 more times until you get that rich butterscotch color. It will also get easier and easier to smooth out. If you have any lingering clumps, just apply more pressure to smooth them out.
- When both the white chocolate and the dough are ready (white chocolate is warm and melty, dough is firm and chilled), preheat the oven to 350F and cover a large baking pan in parchment paper.
- Using a large cookie scoop (about 3 tablespoons worth of dough), scoop out 5-6 cookies and place them on the baking pan. Roll into a ball and slightly flatten the tops.
- Coat the tops of each cookie dough ball with a dollop of the melty caramelized white chocolate. Allow it to gently drip down the sides, covering about 70% of the dough’s surface (see picture in post for reference).
- Bake for 10-11 minutes, or until the cookies have completely spread and the white chocolate has cracked on top. Allow the cookies to rest on the baking sheet for about 3 minutes, then transfer to a cooling rack and sprinkle with flaky sea salt.
- Enjoy when they’re slightly warm or at room temperature to get that delicious fudgy texture in the center.
Notes
WHITE CHOCOLATE – This will only work if you use really good quality white chocolate. Also stay away from chocolate chips or candy melts. Go for baking chocolate such as Ghirardelli baking squares as this can be found in most grocery stores.
**BAKING TECHNIQUE INSPIRED BY A CUPCAKE JEMMA RECIPE
- Prep Time: 1 hour 30 minutes
- Cook Time: 30 minutes
Join Our Community

Meet Jenna
I’m the creator, baker, and photographer behind Butternut Bakery. Here I share desserts for every diet because I believe everyone should have a chance to indulge!


This is my second time making these and yet again I am not happy with how the white chocolate melts. It does caramelize but mine doesn’t look as creamy as yours in the photo. I am spreading it as thin as I can in between each 10 minutes and mine just clumps. I wish I could send you a photo but there’s no way to attach one in the comments. While the color contrast is beautiful, and the flavor is wonderful, I don’t know that I’m going to make these again without some type of tip on how to make minus creamy looking as yours. And I did use Ghirardelli white chocolate both times
It sounds like you just need to keep heating and spreading it! It will look clumpy throughout the process, but will turn creamy near the end. Just keep going until you reach that consistency.
Will these cookies taste just as good if I make it without the white chocolate?
Great recipe for a first timer trying caramelized white chocolate, it definitely didn’t look like it was going well when the chocolate was toasting, but it came out amazing and the cookies looked just like the picture!
The best cookies I’ve ever made. A wonderful combination of cookie and almost brownie. I brought them to a cookie party and my friends all asked for the recipe!!