This post may include affiliate links, please see our privacy policy for details.
Can we just take a minute to appreciate the FUDGE factor on these brownies? And another moment to note that they are made with BROWN BUTTER? These incredibly fudgy brown butter brownies are so flavorful, so rich, and they bake with a perfectly thin crinkly top. It’s absolute chocolate heaven.

What is brown butter?
Brown butter is liquid GOLD in baking. It’s the most simple but impactful thing you can make because it only requires one ingredient…butter! Transforming basic butter into brown butter is a very quick process but releases so much flavor.
Brown butter is essentially toasted butter. Butter is melted over a burner to release the milk solids. These then sink to the bottom and toast or “brown” to create a nutty aroma and rich flavor.
To learn more about how to brown butter with step-by-step photos, I have an entire post dedicated to the topic here.
How to make brown butter brownies
In order to ensure the brown butter flavor comes through amongst the loads of semisweet and dark chocolate, I used a really simple trick to create EXTRA brown butter.
When the butter starts to melt and bubble, milk powder is added to the mix. Dry milk powder is the same as the milk solids that are released and toasted from the butter. By adding dry milk powder to the browning process, we are essentially doubling down on those toasty brown butter bits.
Once the milk powder is added, it toasts alongside the milk solids that are released from the butter. Together, the two create a SEA of toasty brown butter bits which duplicates that brown butter flavor.


Tips for baking browned butter brownies
Brown Butter – During the browning process, the milk powder is added when the butter starts to foam. It’s important to keep whisking at this point, otherwise the milk solids can burn at the bottom of the pan. As you whisk, the butter will transform from creamy yellow to amber brown.
Cocoa Powder – Right when the butter browns, quickly whisk in the cocoa powder as this will prevent the brown butter from burning. Then allow the mixture to bubble for 30 seconds. This process activates the cocoa to release even more chocolate flavor.
Sugars – Stick with the sugars used in this recipe. They both play a specific role in these brownies. The brown sugar adds a rich molasses flavor while the powdered sugar helps with the crinkly crust on top.
Measuring – For the powdered sugar and flour, gently spoon the ingredient into a measuring cup and level it it off. They both require light and fluffy cups, otherwise these brownies can turn out too sweet or not as fudgy.
Mixing – Whisk all of the ingredients up until the flour is added. At this point, switch to a rubber spatula to gently mix. This will ensure a super tender brownie, as over mixing and lead to a tough texture.
Cooling – Once the brownies have baked, allow them to cool completely. This can be done at room temperature, or sped up in the refrigerator. Either way, the brownies must set before slicing. Otherwise, they will be a fudgy soupy mess.

How to bake crinkle top brownies
The secret to achieving a glossy and paper thin crust on top of brownies is simple – dissolve the sugar!
When sugar is dissolved in the batter, in creates an invisible dry barrier on top of the brownies when baked. That barrier traps air inside the brownies, but is then released through fine little cracks all on the surface.
In the end, that sugar crust on the surface bakes into a glossy paper thin top.
For this recipe, brown sugar is vigorously whisked with the eggs in order to dissolve the large sugar granules. Once fully dissolved, powdered sugar is whisked in.
Since powdered sugar is much more fine than granulated sugar, it dissolves almost instantly. When the two sugars are prepared in this exact way, it will create a glossy paper thin crust on top of these brown butter brownies.

Brown Butter Brownies FAQs
For the best flavor, use 70% cocoa dark chocolate. I prefer Lindt baking chocolate which can be found in the candy aisle of most grocery stores. Otherwise, use bittersweet baking chocolate.
Unfortunately not. Not only does it lead to a much more flavorful brown butter brownie, but leaving it out can alter the texture of these brownies.
For the CLEANEST slices, spritz a large knife with nonstick spray between each slice. Wipe the knife off between each cut as well. This is very extra, but very effective.
These brownies are best kept at room temperature. I found that if they are chilled, the brownies firm up a little too much more my liking. But if they are stored at room temp in an air tight container, they will keep for about 5 days.

For more brownie recipes, check out my:
- Salted Dark Chocolate Brownies
- Homemade Cosmic Brownies
- Better Than Box Mix Brownies
- Salted Caramel Brownies
- Fudgy Gluten Free Brownies
Make sure to tag me @butternutbakery on Instagram and leave a review below if you make these brown butter brownies. To pin this recipe and save it for later, you can use the button on the recipe card, the buttons above or below this post, or on any of the photos above. Happy baking!
Watch how to make these fudgy brown butter brownies!
Get my Top 10 Recipes ebook, free!
Join the newsletter and I’ll send it straight to your inbox.
Fudgy Brown Butter Brownies
These brown butter brownies are the FUDGIEST and the most FLAVORFUL brownies you will ever have! They’re made with loads of brown butter, dark and semisweet chocolate, and bake with a glossy paper thin crinkle top.
- Prep Time 20 minutes
- Cook Time 30 minutes
- Total Time 1 hour 50 minutes
- Yield 16 brownies
Ingredients
Brown Butter Brownies
- 1 cup (220g) unsalted butter, sliced (use basic American butter here, avoid European-style)
- 1/4 cup (38g) nonfat dry milk powder
- 1/2 cup (50g) dutch process cocoa powder
- 6 oz 70% cocoa dark chocolate, chopped
- 2 tbsp oil (vegetable or olive oil)
- 3 large eggs, room temp
- 1/2 cup (100g) packed light brown sugar
- 1 3/4 cups (193g) powdered sugar, spooned and leveled
- 1 tsp vanilla extract
- 1/2 cup (66g) all purpose flour, spooned and leveled
- 1/4 tsp kosher salt
- 1 cup (180g) semisweet chocolate chips
Instructions
Brown Butter Brownies
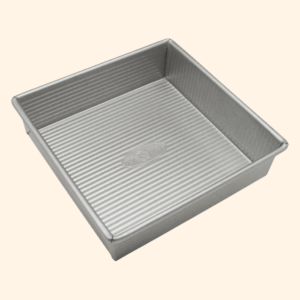
- Preheat the oven to 350F. Grease an 8×8 baking dish (aluminum is best) and line the bottom and two sides with a sheet of parchment paper with some overhang for easy removal.
- Add the butter to a medium saucepan and place over medium heat. Allow it to melt and then continue to whisk as it starts to bubble. Once it starts to foam up, add in the milk powder and quickly whisk. After about 30-60 seconds, it should start to darken into an amber color and give off a nutty aroma. Quickly whisk in the cocoa powder to combine. Bubble for 30 seconds, then remove from heat and mix in the chopped chocolate (to melt) and oil. Set aside to cool.
- In a large bowl, vigorously whisk together the eggs and brown sugar until the sugar is fully dissolved (about 90 seconds of fast whisking). Rub the mixture between two fingers. It’s ready when you can no longer feel the sugar granules. Whisk in the powdered sugar until completely smooth (If you don’t have a scale, measure it by spooning it into your measuring cup and leveling off with a flat edge). Then mix in the vanilla.
- When the butter chocolate mixture is no longer hot (it’s ok if it’s slightly warm), pour into the eggs and sugar and whisk to combine. Switch to a spatula and fold in the flour and salt. If the batter is still warm, allow it to rest for a few minutes before mixing in the chocolate chips so they don’t melt. Then fold in the chocolate chip sand spread the batter in the pan.
- Bake for 28 to 32 minutes or until the edges are puffed with a slightly lower center and the middle doesn’t jiggle when the pan is nudged. Right when they’re pulled from the oven, immediately slam the pan against a hard surface to create a fudgier texture.
- Allow the brownies to cool for about an hour in the refrigerator. You can tell if they’re ready to slice by lifting them out of the pan by the parchment paper overhang. If they bend in the middle, they’re not ready. If they hold firm while lifting, you’re good to go. Slice into 16 bars, wiping off the knife between each cut, and enjoy!
Equipment
 Buy Now
 Buy Now
- Cooling Time: 1 hour
- Category: Dessert
- Method: Baking
- Cuisine: American


Rate & Review