Crunchy Chocolate Babka

To be honest with you, I hadn’t heard of babka until about a week before making this. I did a bunch of research and fell down a babka rabbit hole where I found that it’s EVERYWHERE. How had I never seen one before?? Let alone try one. Then I realized it was a challenge on The Great British Baking Show and felt pretty ashamed of myself. ANYWAY…it’s amazing. It’s bread…it’s sweet…and there’s chocolate. ‘Nuff said. I was pretty intimidated by it too. It looks complex and messy but it’s actually pretty straight forward and easy to make. I’m also not the best when it comes to working with yeast and I rarely ever use my dough hook. So if I can do it, you can too!
As I was researching, Smitten Kitchen’s recipe kept coming up so I decided to go for it. It was definitely the right choice because A. it’s fool proof and B. it’s delicious. But, I wanted to mix it up and try a different filling so I found another babka recipe by Tasty and saw that they used turbinado sugar. I loved the idea of a crunch and I also have a big jug of that sugar laying around from Alison Roman’s chocolate chip cookies (and I’m sure you do too!). As for the flavor, I’m not a big fan of orange and chocolate but it just works here. It’s like a whisper of orange and an marching band of chocolate.
In a nutshell; it’s delicious, it’s easier than it looks, and you’ll feel so accomplished when it comes out perfect (and it will!). Whether you’re new to babka or you’ve already heard of or made one, I hope you try this one out!

Crunchy Chocolate Babka
- Total Time: Overnight
- Yield: 1 loaf
Description
Sweet and soft chocolate babka with a surprise crunch.
Ingredients
Dough
- 2 cups + 2 tablespoons all-purpose flour (plus extra for dusting)
- 1/4 cup granulated sugar
- 1 teaspoon active dry yeast
- Grated zest 1/4 of an orange
- 2 large eggs
- 1/4 cup water (1 tablespoon extra if needed)
- 1/2 teaspoon salt
- 1/3 cup unsalted butter (room temp)
Chocolate
- 4 oz bittersweet chocolate
- 4 tablespoons unsalted butter
- 2 tablespoons + 2 teaspoons granulated sugar
- 1 1/2 tablespoons cocoa powder
- 1 teaspoon cinnamon
- 2 teaspoons espresso powder
- 3 tablespoons turbinado sugar
Syrup
- 3 tablespoons water
- 3 tablespoons granulated sugar
Instructions
- For the dough, combine the flour, sugar, yeast, and zest in the bottom of the bowl of a stand mixer. With the dough hook attachment, mix in eggs and 1/4 cup water until it comes together (2-3 minutes). If it isn’t coming together just add in a tablespoon of water until it forms a mass. With the mixer on low, add the salt then the butter, one tablespoon at a time, until it’s fully incorporated into the dough. Then, run the mixer on medium speed for about 10 minutes until the dough is completely smooth. Stop and scrape down the bowl a couple times during this process. You want the dough to pull away from the sides of the bowl. When I made this, I had to add a couple tablespoons of flour to get it to that point.
- Coat a large bowl with oil, place the dough inside, cover it in plastic wrap, and refrigerate. I left mine overnight (made it the night before and assembled in the morning). The dough won’t double in size so don’t worry if it looks like yours hasn’t grown much.
- When your dough is ready, make the chocolate spread. In a microwave safe bowl, add in the chocolate, butter, sugar, cocoa powder, cinnamon, espresso powder, and turbinado sugar (this is the crunch). Microwave for 1-2 minutes and then stir to combine.
- Coat at 9×4 bread pan with oil and line the bottom and short sides with one long strip of parchment paper. This makes it easier to take out of the pan. Take the dough out of the fridge and roll it out onto a well-floured surface. It should be 10-inches wide (the side closest to you) and 12-inches long (away from you). I rolled mine about 1/2 inch bigger than this so that I could cut off the sides to create a perfect rectangle with distinct corners.
- Spread the chocolate in an even layer over the dough, leaving 1/2 inch all around the outside. Brush the end farthest away from you with water. Roll the dough up into a log (like making cinnamon rolls). You want to make sure the roll it tight enough so that there are no gaps between the layers but also not too tight to where the chocolate spills out.
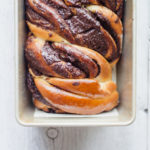
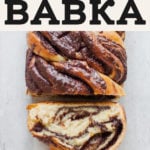
- Gently cut the log lengthwise and lay one piece on the top of the other to form an X (not a +, but an X). Make sure the cut sides are facing up. Working on one side of the X, twist the two pieces together twice, still making sure the cut sides are facing up. Do the same to the other side of the X. You should be left with a fat twisted log with the chocolate layers facing up.
- Place the log into the bread pan and cover it with a damp tea towel. Leave it to rise for 1 1/2 hours at room temperature.
- To bake, preheat the oven to 375F. Remove the tea towel and bake on the middle rack for 30 minutes or until a toothpick in the center comes out clean. If you insert the toothpick and there’s a bit of a give or stretch, that means it isn’t done. When it’s done, you’ll feel almost no resistance. If it browns too quickly, you can cover it with foil.
- While the babka is baking, make the simple syrup. Bring the sugar and water to a simmer until the sugar dissolves (about 4 minutes). Remove from heat and let it cool for a couple minutes. When the babka is fresh from the oven, brush the simple syrup all over. Don’t skimp on this, make sure to use up every last drop. Let it cool half in the pan, and half on a cooling rack before eating.
Join Our Community

Meet Jenna
I’m the creator, baker, and photographer behind Butternut Bakery. Here I share desserts for every diet because I believe everyone should have a chance to indulge!


Turned out amazing!