Classic Cut Out Sugar Cookies
This will definitely be your new go-to cut out sugar cookie recipe! Why? Because they’re soft and tender, have a smooth texture that’s not gritty like other sugar cookies, and they still hold their shape when baked. Plus they’re super easy to make and so fun to decorate. I’ve also included recipe for both classic icing or spreadable buttercream so you can decorate however you like!

What makes these sugar cookies so good?
Have you ever bit into a sugar cookie and wished it wasn’t so tough or gritty? I know I’ve had my fair share of sugar cookies that LOOK pretty, but just don’t stack up to my taste standards. That’s why I made it my mission to create a sugar cookie that ticked both boxes – one that had that soft and smooth texture but still held its shape when baked.
These cookies DEFINITELY hit the mark. They’re sweet, but not overwhelming, and have a unique flavor that makes them simply irresistible. These cookies are made with both vanilla and almond extract. While vanilla is typical, the hint of sweet almond adds a unique flavor that works so well in these sugar cookies. It’s subtle, but you can definitely tell a difference when it’s not there.
The other secret to these cookies is the use of cream of tartar. Combined with baking soda, theses two react to bring you a sugar cookie that’s soft and tender. Cream of tartar is commonly used in snickerdoodle cookies for that exact reason. I mean have you ever had a snickerdoodle that wasn’t perfectly soft?
But in order to get that soft texture, the trade off is a very slight change in size when baked. The cookies will definitely still hold its intended shape and look completely recognizable, but they will grow just a touch. This is to make room for the tiny little air pockets inside that helps make these cookies so soft and delicious.
Tips for making sugar cookie dough
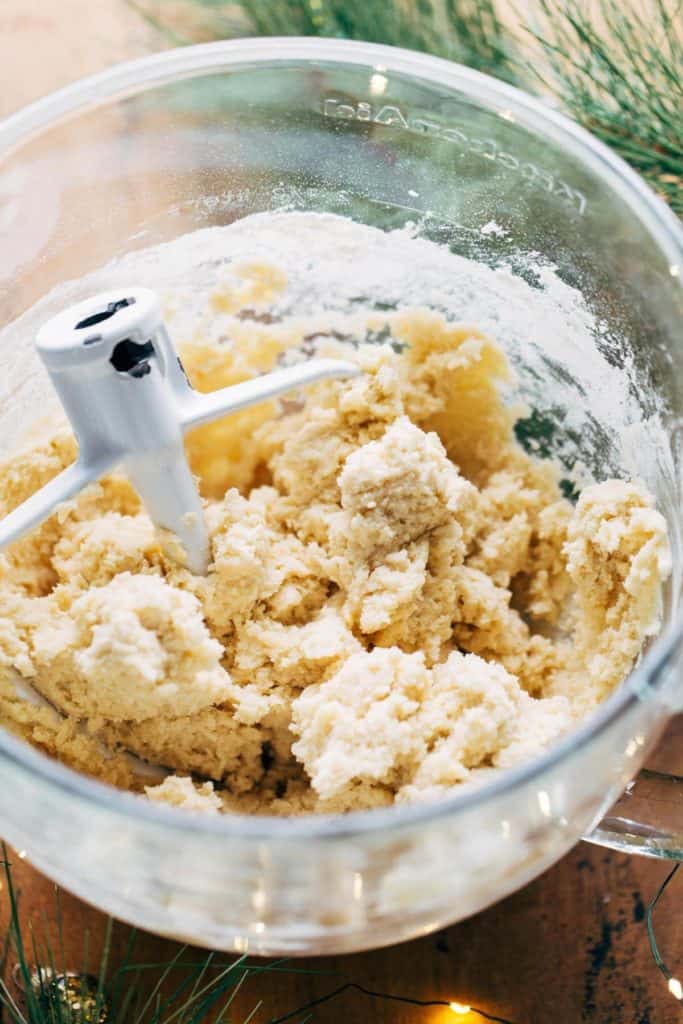
Sugar cookie dough is one of the easiest cookie doughs to make. It requires really basic ingredients and only a few steps. But there are also a couple things that can go wrong during the process. Follow these tips and your cookies will turn out perfect:
- Room temperature butter – It’s very important that the butter is at the right temperature. If it’s too cold, the dough will be too crumbly. If it’s too soft, the dough will be too sticky. To prevent this from happening, allow the butter to sit out at room temperature for about an hour before starting. But if you’re in a rush, you can also place the butter in the stand mixer and mix the butter on medium-high speed until it softens and smooths out. It may take about 10 minutes.
- Properly measure the flour – I say this in every post, and for good reason. It’s the number one reason why most recipes fail, especially for cookies. If there’s too much flour, the cookies will turn out dry and they will not spread. If you can, measure the flour with a food scale. Otherwise, to ensure you use the exact amount needed, gently spoon the flour into your measuring cup and level if off with a flat edge. If you scoop directly into the flour container, it packs it down into the cup which could leave you with 1/4 cup or more of added flour.
- Don’t get discouraged – If the final dough looks too crumbly straight from the mixer, don’t be alarmed! Use a rubber spatula to combine any bits of dry ingredients that may rest at the bottom of the bowl, and this step should bring the dough together.

The best way to prepare and cut out sugar cookie dough
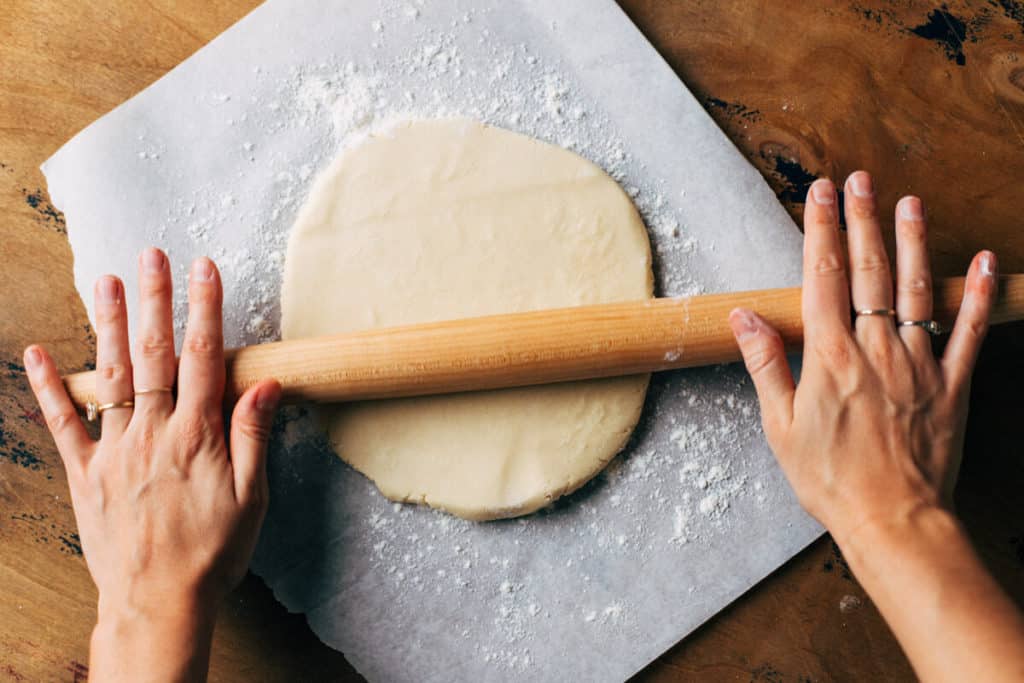
Once the cookie dough is prepared, it is then separated into two halves. Each half is then rolled out on to two separate sheets of parchment paper. But make sure to keep this in mind:
LIGHTLY dust your surface – Each sheet should be lightly dusted with flour before rolling. Do not completely coat the entire sheet with flour as this will absorb into the dough. Only give it a light and even dust. And if the rolling pin starts to stick, very lightly dust the surface with flour. If you add too much, this flour will absorb into the cookie and possibly make them too dry and crumbly.
This is a unique step in this recipe because typically, the dough is chilled whole and then rolled out. But when the dough is fresh and soft, it is much easier to roll it out. It doesn’t crack around the edges which gives you more surface area to cut cookies from. It also cuts down on the chilling time. Since the dough is rolled out thin, it takes about half the amount of time to chill compared to fully formed dough.
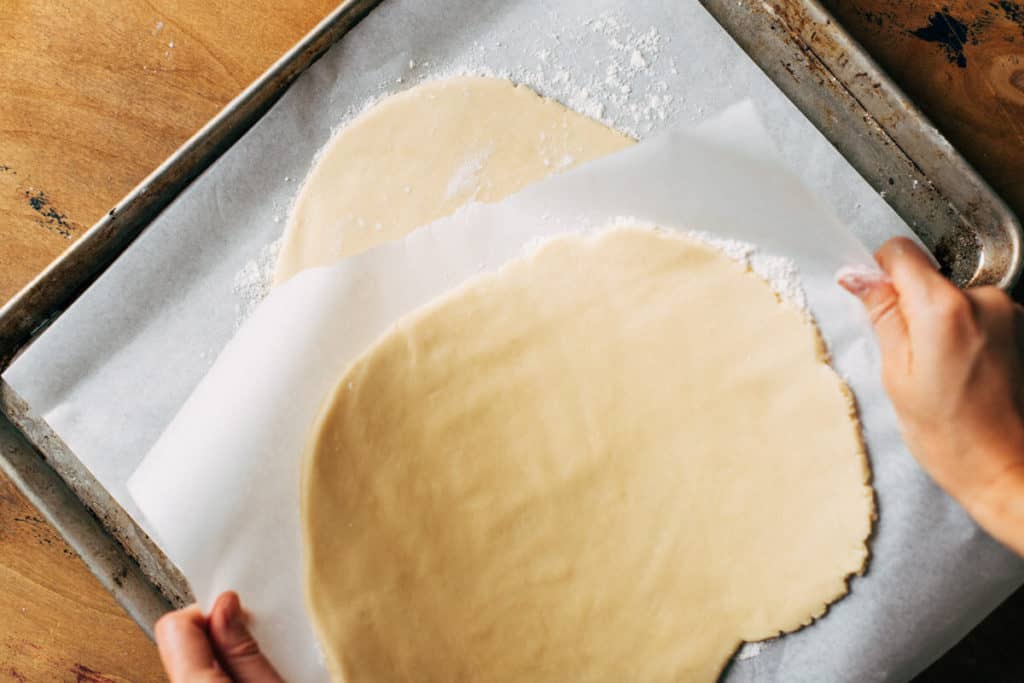
The two sheets of cookie dough are also stacked on top of each other to help you save room in the refrigerator. But once chilled the dough should be stiff and firm, making it very easy to cut out your cookies.
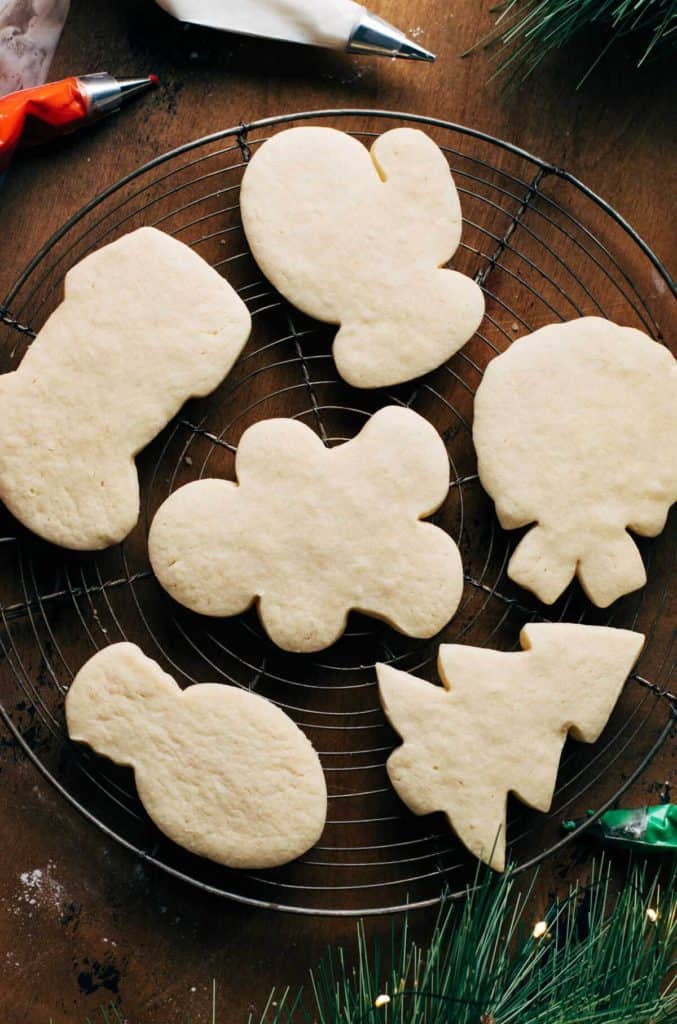
When cutting out the cookies, I first like to run a large knife between the cookie dough and the sheet of parchment paper. This just ensures your cookies don’t stick when you try to lift them up off the paper. Once all the cookies are cut out, they are then placed on a small cookie tray. This is where they will complete their last and final chill in the refrigerator.
During the cutting process, the dough will start to warm up and soften. If the dough is too warm before baked, the cookies will spread too much. Chilling the cut cookies right before baking ensures they’re chilled firm, preventing them from spreading.
Can I chill the dough overnight?
Yes, once the dough is rolled out and wrapped, the dough can chill overnight. It can also chill for 2 days.
Can I chill the cut cookie dough overnight?
Yes, once you’ve cut out all the cookies, you can wrap your tray full of cut cookie dough and chill overnight.
Can I freeze the cookie dough?
If you choose to freeze it, I recommend cutting out the individual cookies and freezing those. They should then be tightly wrapped with plastic wrap or placed in a freezer safe bag. They can keep in the freezer for up to 1 month.


Tips for decorating sugar cookies
What I love most about this recipe is that you are given two decorating options: the classic and pipeable royal icing method or easy to spread buttercream. Each give you a delicious and gorgeous cookie, it all just depends on how much patience you have when decorating!
Royal icing requires some technique practice and bit of extra patience. It’s tedious, but the end result is a very professional looking cookie. With buttercream, you simply just spread it on and top with sprinkles. The only downside is that buttercream doesn’t set firm like royal icing, so they cannot be stacked when stored.
So whichever you choose, here are a few tips to help you create gorgeous sugar cookies:
- Look for the right consistency. The royal icing should be a tad bit thinner than the consistency of Elmer’s glue. But not too runny to where it will slide off the edges of the cookie. For the buttercream, it should be soft and spreadable but not too firm.
- When piping the royal icing, start with a border all around the shape of the cookie. When doing so, do not pipe right up against the edge. Since the icing is a bit thin, it will slowly push its way out towards the edges as the center is filled in. So as a rule of thumb, pipe the border about 1/8 of an inch in from the very edge.
- Once you’ve placed the border, fill in the center with random squiggly lines. Then use a toothpick to spread and push around the icing to completely fill in the center. Doing it this way prevents you from using too much icing. If you pipe in a thick layer, it will not dry firm.
- Always add the sprinkles right after you’ve decorated with the icing or buttercream. Otherwise, both will form a skin on the surface which will prevent the sprinkles from sticking.
- To get a full coating of sprinkles, add the sprinkles to a shallow does. Then, place the cookie face side down into the sprinkles and shake off the excess. This will completely fill your surface with sprinkles, giving it an effortlessly polished look.

What is the best food coloring to use?
If you choose to color your icing or buttercream, I highly recommend gel food coloring. One, it gives you the biggest color pay off and two, it will not disrupt the consistency of your icing or buttercream.
I use this small kit from Americolor and it has everything you need! The unsung hero of this bunch is the brown food coloring. If you want to tone down the vibrancy of your colors, dip a toothpick into the brown food coloring and add just a tiny bit to any of your colors. This will help neutralize any bright color.
What are the best sprinkles to use for sugar cookies?
There is no wrong answer here, but I recommend a variety of colors, shapes, and sizes. If you’re completley starting form scratch, here is a list of sprinkles to use that work very well together:
- Crystal sugar sprinkles – I recommend grabbing white/clear, red, green, silver, or gold.
- Nonpareils – White nonpareils are my absolute favorite sprinkle because they make any cookie look simple but beautiful. I also like a variety mix of different holiday or rainbow colors.
- Pre-mixed – These often come in small packets but contain a variety of sprinkles in all shapes and sizes. Each are coordinated to create a beautiful mix that make your cookies look fancy and gourmet.
All of the sprinkles I use come from Wilton Cakes. They offer a wide variety and are easy to access online, or in grocery or craft stores. But the beauty of decorating cookies is that it’s totally up to you and your creativity!

For more Holiday cookie recipes, check out my:
- Butter Pecan Chocolate Chip Cookies
- Soft Molasses Cookies
- Brown Butter & Maple Pumpkin Cookies
- Soft & Chewy Sugar Cookies
Make sure to tag me @butternutbakery on Instagram and comment below if you make these Sugar Cookies. To pin this recipe and save it for later, you can use the button on the recipe card or on any of the photos above. Happy baking!
Watch how to make these sugar cookies:

Classic Cut Out Sugar Cookies
- Total Time: 1 hour + 2 hours cooling
- Yield: 20 cookies
Description
This is going to be your new go-to sugar cookie recipe. These cut out cookies hold their shape when baked, but still remain soft and tender.
Ingredients
Sugar Cookies
- 2 3/4 cups (350g) all purpose flour, spooned and leveled*
- 1/4 tsp baking soda
- 1/2 tsp cream of tartar
- 1/2 tsp salt
- 1 cup (220g) unsalted butter, room temperature
- 1 cup (200g) granulated sugar
- 1 large egg
- 2 tsp vanilla extract
- 1/2 tsp almond extract
Royal Icing (pipeable)
- 4 cups powdered sugar
- 3 tbsp meringue powder
- 5–6 tbsp water
- Gel food coloring
- Sprinkles
Buttercream (spreadable)
- 1 cup (220g) unsalted butter, room temp
- 4 cups powdered sugar
- 3–4 tbsp milk
- 1 tsp vanilla extract
- Pinch of salt
- Gel food coloring
- Sprinkles
Cream Cheese Frosting (half recipe)
Instructions
Sugar Cookies
- In a bowl separate from your mixing bowl, whisk together the flour, baking soda, cream of tartar, and salt. Set aside.
- In your mixing bowl using a hand or stand mixer with the paddle attachment, mix together the butter and sugar on medium-high speed until pale and fluffy (2-3 minutes).
- Scrape down the bowl and mix in the egg, followed by the vanilla and almond extract.
- Scrape down the bowl once again and give it another mix to fully smooth out the batter.
- Mix in half of the dry ingredients until combined. Then mix in the rest. Some dry ingredients may linger at the bottom of the bowl. Remove the bowl from the mixer and use a rubber spatula to fully incorporate the last bits of flour.
- Roughly shape the dough into one large mass inside the bowl. Cut it in half down the middle and roll out each half on two separate sheets of parchment paper that have been lightly dusted with flour (see process photos or video in post for reference). Roll to about 1/4 of an inch thick, lightly dusting the surface as you roll to prevent the dough from sticking to your rolling pin.
- Transfer one rolled cookie sheet to a large baking tray. Very lightly dust the surface with flour and stack the second sheet on top (see process photos or video in post for reference). Wrap the tray with plastic wrap and chill for at least 2 hours or overnight.
- Once chilled, remove the top sheet of cookie dough from the refrigerator. Careful as it may stick just a bit, so gently run your hand under the sheet to separate it from the cookie dough underneath. Keeping the cookie dough on its original sheet of parchment paper, cut out your cookies and place them on a small tray lined with parchment paper. It’s ok to stack them on top of each other as they should be cold enough to not stick to one another. Combine the scraps, careful not to take too much flour with them, and set aside.
- Remove the second sheet of cookie dough from the refrigerator and repeat the process. Once all cookies have been placed on your small tray, place the tray in the refrigerator to chill for 20-30 minutes while you preheat the oven to 350F.
- While you wait, combine the dough scraps from the two sheets of cookie dough and roll it out to 1/4 inch thick on a lightly floured sheet of parchment paper. If it’s too soft to cut out, chill the rolled dough for 20-30 minutes to firm up. Then, cut out your cookies and allow them to chill while the first batch bakes.
- To bake, place the cookies on a large baking sheet lined with parchment paper. Space them about 1 1/2 inches apart and keep all other cookies in the refrigerator while each batch bakes. Bake for 10-12 minutes, careful not to let the edges brown.
- Transfer to a cooling rack and continue to bake the rest of the cookies.
- Allow the cookies to cool completely before decorating.
Royal Icing (option 1)
- In a large mixing bowl, whisk together the powdered sugar and meringue powder.
- Mix in the water, one tablespoon at a time, until you reach a consistency that’s just a tad thinner than glue.
- Separate the icing to individual bowls and add different colors of food coloring to each. Tip: if your food coloring is a bit too vibrant, dip a toothpick into brown food coloring and add it to the icing. If you don’t have brown food coloring, you could also add roughly 1/8-1/4 tsp cocoa powder.
- Add the icing to piping bags fitted with small round tips, or a ziplock bag with a very tiny corner snipped off. Pipe a border around the cookie, then roughly fill in the center. Use a toothpick to spread and guide the icing to completely cover the surface (see video for reference).
- Add sprinkles when the icing is still wet and allow the icing to harden (about 1 hour).
Buttercream (option 2)
- Using a hand or stand mixer with the whisk attachment, mix the butter and 1 cup of powdered sugar until smooth and combined.
- Mix in 1 cup of powdered sugar at a time, alternating with one tablespoon of milk at a time, until the buttercream is smooth but spreadable. End with the vanilla extract and a pinch of salt.
- Separate the buttercream into separate bowls and add food coloring to each. If the food coloring makes the buttercream too thin, mix in about 1 tablespoon of powdered sugar to thicken back up.
- Spread onto your cooled cookies and decorate with sprinkles when the buttercream is still fresh.
- This buttercream will not harden, so these cookies cannot be stacked on top of each other when stored.
Notes
FLOUR – If you have a food scale, measure the flour. If not, spoon the flour into your measuring cup and level it off with a flat edge. If you scoop directly into the flour bag or container, it will pack it down into your cup and you’ll add way too much flour to the dough. This will cause the dough to be dry and crumbly and the cookies to also be tough and dry.
STORING CUT COOKIE DOUGH – Once you’ve cut out the cookies, you can store the cut cookie dough in the refrigerator overnight. Just make sure to wrap the tray with plastic wrap to prevent the cookie dough from drying out.
- Prep Time: 50 minutes
- Cook Time: 10 minutes
Join Our Community

Meet Jenna
I’m the creator, baker, and photographer behind Butternut Bakery. Here I share desserts for every diet because I believe everyone should have a chance to indulge!


wow. one hundred stars. one million stars. i’m drooling just thinking about my next cookie. in fact I’m having to force myself to finish this review before getting up to get another cookie.
this recipe is so simple and the cookies turn out PERFECT. I made the buttercream frosting to go with them but honestly I’ve eaten so many plain because I don’t want to take away from how good they are on their own. You weren’t lyin’- this WILL be my go to sugar cookie recipe from now on.
Could this recipe be made with gluten-free flour?
Hi Jenna, I came across your sugar cookie recipe. I had used the Same recipe for years but I lost it this last Christmas. So, Christmas time I got on Pinterest looked for sugar cookie recipes came across a couple made two different batches one had almond extract in it the other one didn’t. Is your recipe a strong taste of almond extract? Because I wasn’t a fan of the other recipe I made that had that in it.
Also, I’m interested in maybe doing some royal icing with some flooding technique do you have a good recipe for that? Valentines is coming up and I thought maybe I would try it and give it to my Adult kids, grandchildren and friends.
Thank you for your time can’t wait to hear back from you with your comments.
Kelly
These are so good!! I hate making sugar cookies around the holidays because they’re never “just right.” I’ve tried many different recipes and stopped making them because the time never paid off. I’ve loved every cookie recipe that I’ve tried of Jennas so I took a shot at these and WOW! They were super delicious and my husband (who doesn’t really like sugar cookies) kept stealing some- even before they were frosted. 100% my go-to recipe now!
I’ve never made successful sugar cookies until this recipe! I think I’ll be using the recipe every Christmas! I used her cream cheese frosting recipe instead of the ones on here because I didn’t have meringue powder and it turned out great!
How long can I store the uncut cookie dough in the freezer or refrigerator? I’m hoping to prep the dough ahead of time and then cut them out in the next week with our kids.
Can the frosted cookies be froze?
Should the flour be sifted?
These are the perfect sugar cookies. I love the idea of rolling them out warm and placing them in the fridge. That is the reason I don’t make roll cookies, only the first ones are actually good.. I used wax paper on the bottom an plastic wrap on top. I didn’t need any flour and my re-rolls were just as good as the first. Thank you so much for sharing a great recipe, and rolling technique I’ll be using from now on!
Great recipe! Made this with my girlfriends and we had an awesome time decorating them! Love the almond extract in them, really give them something extra.